
Navigation Drawer using Jetpack Compose
source link: https://proandroiddev.com/navigation-drawer-using-jetpack-compose-27ea7db74903
Go to the source link to view the article. You can view the picture content, updated content and better typesetting reading experience. If the link is broken, please click the button below to view the snapshot at that time.
Navigation Drawer using Jetpack Compose

Jetpack Compose is the newest coolest Android toolkit from Google to develop native Android UI. If you haven’t tried it yet, now is the best time to get started with it as the library is still in beta (as of April 2021), but will very soon see a stable release. Here’s an official code lab to get started with Compose Basics.
In this article we’ll take a look at a way to create a navigation drawer and navigate between different screens using navigation component from Compose.
To start with, we’ll first create a UI which will be used as a drawer.
Drawer
Here we have created a list of three screens that we will navigate through the drawer. The drawer composable is a simple column containing these three screens and an image at the top. The preview of the drawer would look like this:

Lets create a TopBar for the app:
Our TopBar uses a Compose provided component for creating TopBar called TopAppBar. We are passing in the title and the navigation icon. On click of navigation icon will trigger the onButtonClicked callback where we will handle the opening of drawer or going back to previous screen. We will use this in all of our screens. You can customize the TopAppBar as per your need. Check the documentation of TopAppBar for the customization available.
Now lets create UI for our three screens that we have added in our drawer.
Screens
These three screens are quite same except for the Help screen. The Help screen uses a back button instead of menu button in the TopBar. We are passing NavController to Help screen to go back to previous screen on click of the back button. For Home and Account screen we pass a callback “openDrawer”, that will open the drawer, which will be called when the menu button is clicked.
Navigation host
We need a Navigation host which will host and navigate between these screens. From the official document on Navigation in Compose:
Creating the
NavHostrequires theNavControllerpreviously created viarememberNavController()and the route of the starting destination of your graph.NavHostcreation uses the lambda syntax from the Navigation Kotlin DSL to construct your navigation graph. You can add to your navigation structure by using thecomposable()method. This method requires that you provide a route and the composable that should be linked to the destination:

We will create the NavController in the next step, but first lets define the route for our screens which we will use in our NavHost.
Let’s update our DrawerScreens sealed class with route information.
Our NavHost will look like this:
This NavHost is created with the starting destination as “Home”. We have added all the three screens to the navigation graph.
Before we put everything together we need to do one last thing. We need to update our drawer composable to handle navigation to the required screens when the respective item is clicked. Here’s our updated drawer composable:
We have added a callback onDestinationClicked which accepts a parameter for route. Whenever any item in the drawer is clicked, this callback will be invoked and the corresponding route string will be passed.
And this is how we put everything together:
In this composable we have created a NavController which will be used to create navigation host and to navigate between different composable screens. To add a navigation drawer, we are using ModalDrawer composable component from Compose. This composable is a handy way to create a drawer. The parameters used here for ModalDrawer are:
drawerState: Controls the open/close state of the drawer.
gestureEnabled: Used to enable gesture to open/close the drawer. We are enabling the gesture when the drawer is open so that it can be swiped closed.
drawerContent: This takes a composable which is used to show the UI of the drawer when it opens. We are passing here the Drawer composable we created at the beginning.
The last one is the content passed as a lambda. This is the composable which is shown as the rest of the screen. We pass our NavHost here which will show all our screens that we want.
In the callback OnDestinationClicked of Drawer, we are closing the drawer and navigating to the required screen. We also pop the backstack till the home destination (not popping home) so that on press of back it comes to home screen. Our new screen is launched as singleTop so that there is only one instance of it even if an item is selected multiple times in the drawer.
We will use the AppMainScreen composable in our activity.
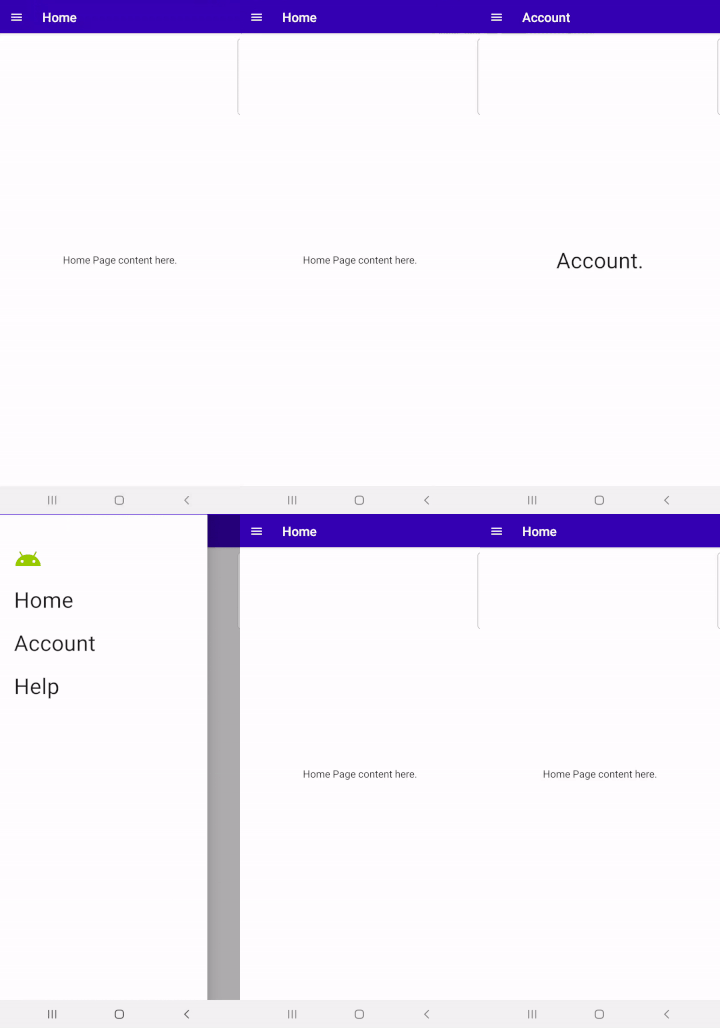
And this is how it works.

In this post we used ModalDrawer composable to create a navigation drawer. We can do much more than just a navigation drawer using a Scaffold from Compose. In the next post I’ll show navigation using Navigation drawer and Bottom navigation created with the help of a Scaffold.
While Jetpack Compose is in beta, navigation in Compose is in alpha. But both will see a stable release soon. So jump right at it and checkout this wonderful library.
Thanks for reading.
Check out the complete code in GitHub:
ComposeNavigationUsingModalDrawer
References:
https://developer.android.com/jetpack/compose/navigation
Recommend
About Joyk
Aggregate valuable and interesting links.
Joyk means Joy of geeK