

Replicate 12 UIKit's contentMode options in SwiftUI
source link: https://sarunw.com/posts/uikits-contentmode-in-swiftui/
Go to the source link to view the article. You can view the picture content, updated content and better typesetting reading experience. If the link is broken, please click the button below to view the snapshot at that time.

Replicate 12 UIKit's contentMode options in SwiftUI
Table of Contents
There are twelve way[1] to transform image in UIImageView with content mode, but we got only two content mode in SwiftUI. But, we can replicate most of them with a combination of two modifier aspectRatio(_:contentMode:) and frame(width:height:alignment:).
This is the list of UIKit's contentMode. You can visit my previous post to see what these property are.
Throughout this post, I will use two images, a big image with a size of 240x300[2] and a smaller image with a size of 80x100. You will see how each image reacts to the same content mode.
 large image (240x300)
 small image (80x100)
I will put them side-by-side in image views of size 200x200. I also add a pink border for you to visualize the behavior easily. Here is our testing code.
struct ContentView: View {
    var body: some View {
        HStack(spacing: 200) {
            Image("contentmode-large")
                .resizable()
                .frame(width: 200, height: 200)
                .border(Color.pink)
            Image("contentmode-small")
                .resizable()
                .frame(width: 200, height: 200)
                .border(Color.pink)
        }
    }
}
In the examples below, I will only code for the large image for brevity.
Scaling
scaleToFill
scaleToFill scales the content to fill the view's bounds without maintaining the aspect ratio. We can do this in SwiftUI with .resizable() modifier.
Image("contentmode-large")
.resizable()
.frame(width: 200, height: 200)
.border(Color.pink)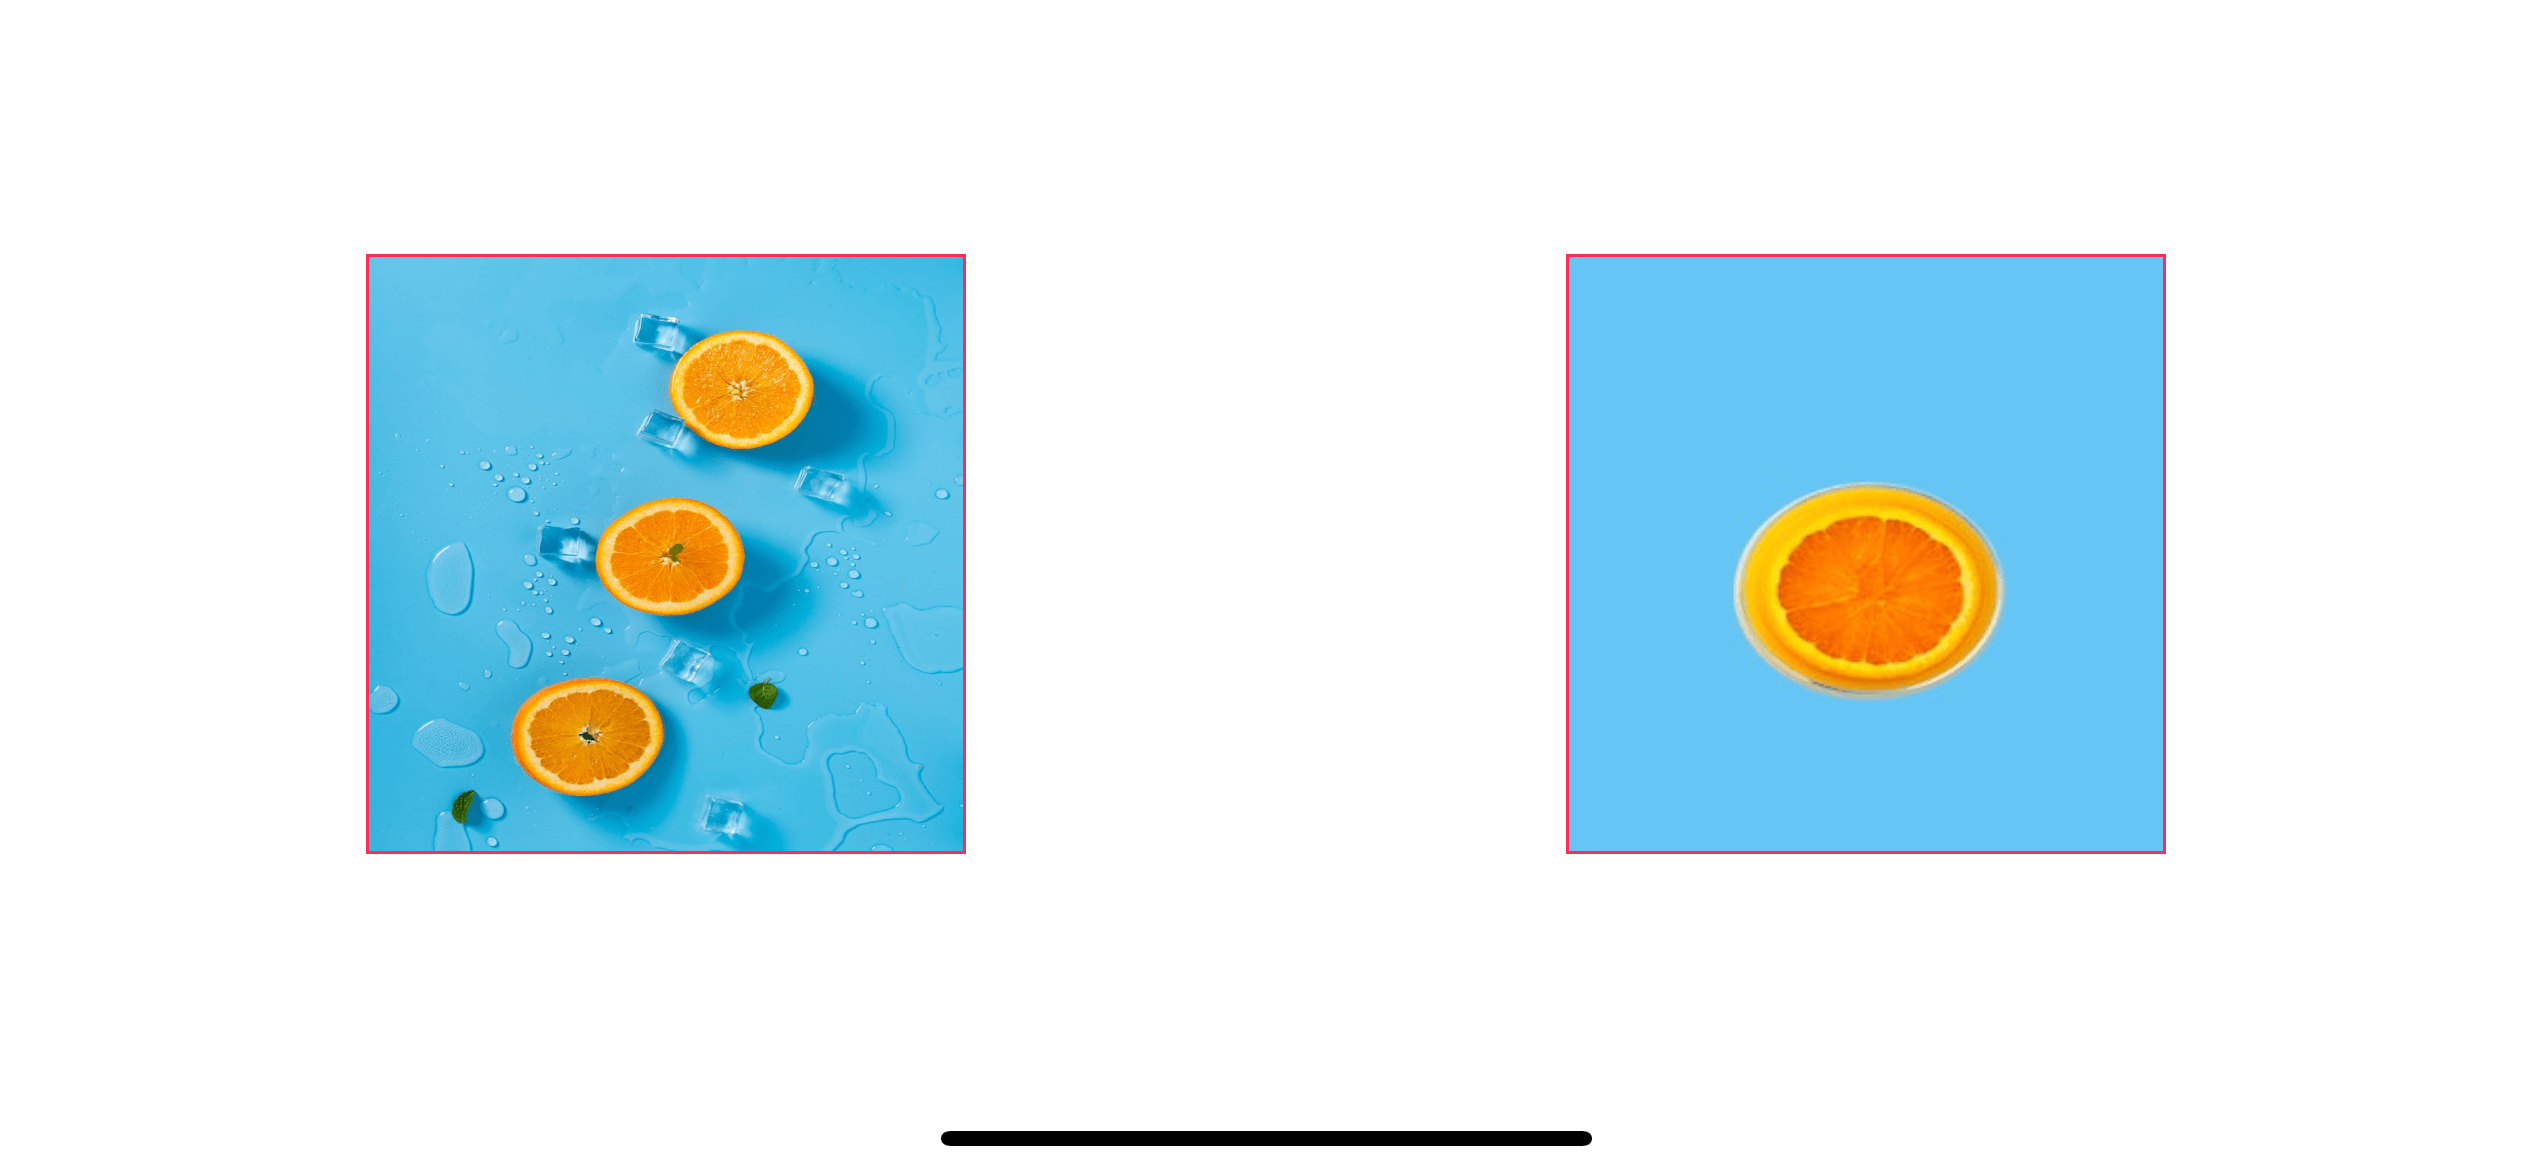 scaleToFill
scaleAspectFit
scaleAspectFit scales the content to fit within the view's bounds and maintaining the aspect ratio. This might leave an empty space on one axis. We do this in SwiftUI with resizable() and .aspectRatio(contentMode: .fit) (or .scaledToFit()).
Image("contentmode-large")
    .resizable()
    .aspectRatio(contentMode: .fit) // 1
    .frame(width: 200, height: 200)
    .border(Color.pink)
Image("contentmode-small")
    .resizable()
    .scaledToFit() // 2
    .frame(width: 200, height: 200)
    .border(Color.pink)
You can use .aspectRatio(contentMode: .fit) <1> or shorthand version, .scaledToFit() <2>.
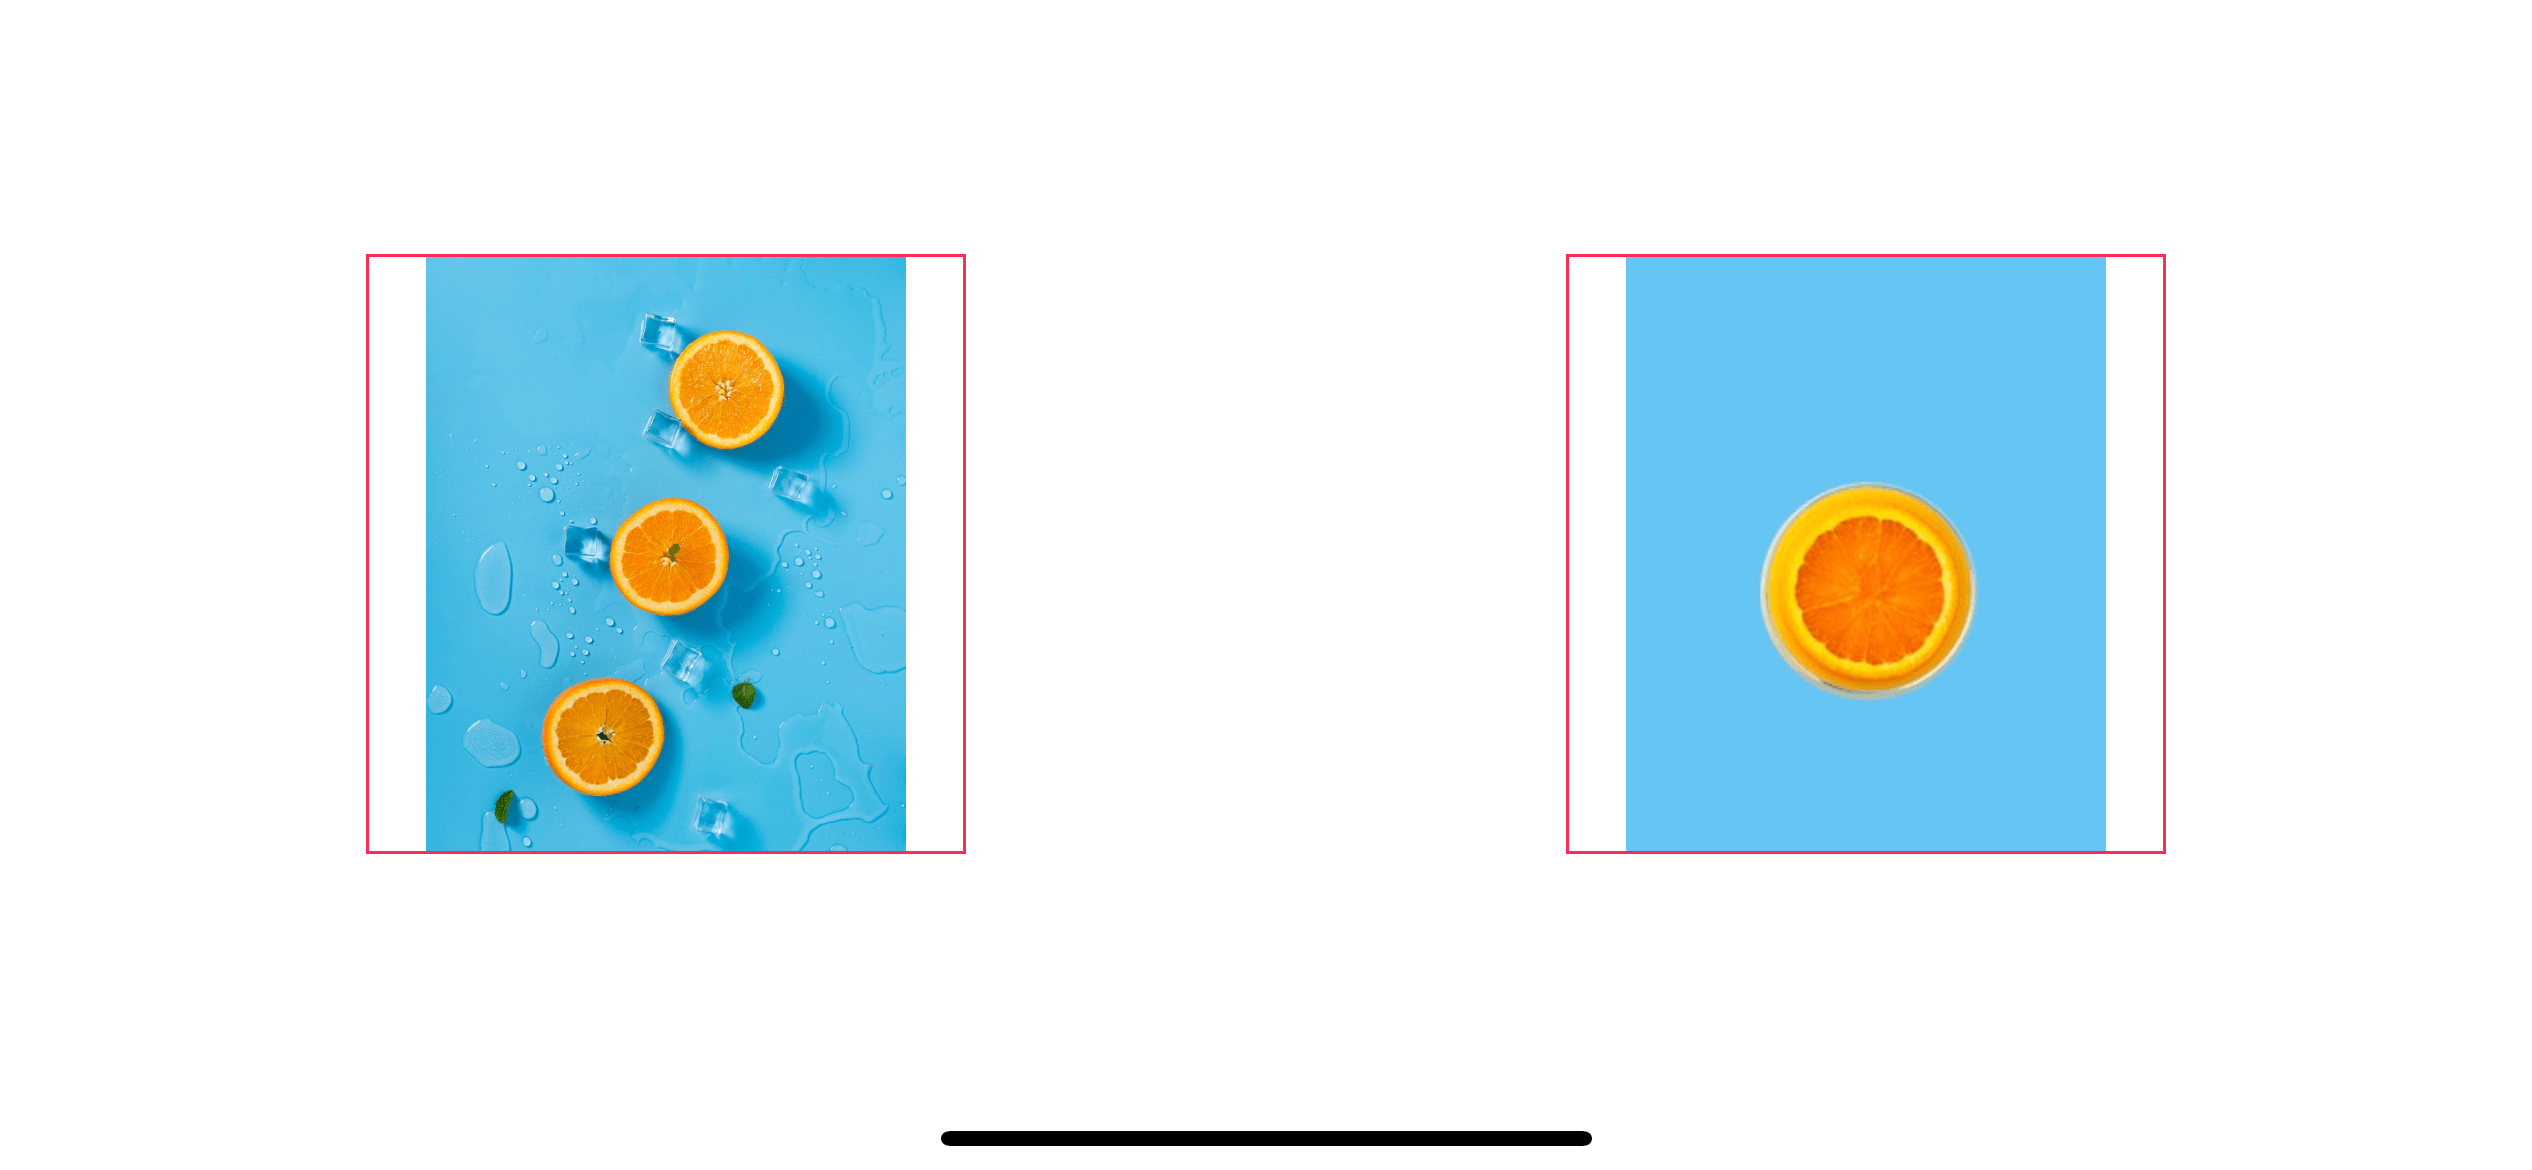 scaleAspectFit
scaleAspectFill
scaleAspectFill scales the content to fill the view's bounds and maintaining the aspect ratio. This might cause some portion of the image to extend beyond the view's bounds. We do this in SwiftUI with resizable() and .aspectRatio(contentMode: .fill) (or .scaledToFill()).
Image("contentmode-large")
.resizable()
.aspectRatio(contentMode: .fill)
.frame(width: 200, height: 200)
.border(Color.pink)
Image("contentmode-small")
.resizable()
.scaledToFill()
.frame(width: 200, height: 200)
.border(Color.pink)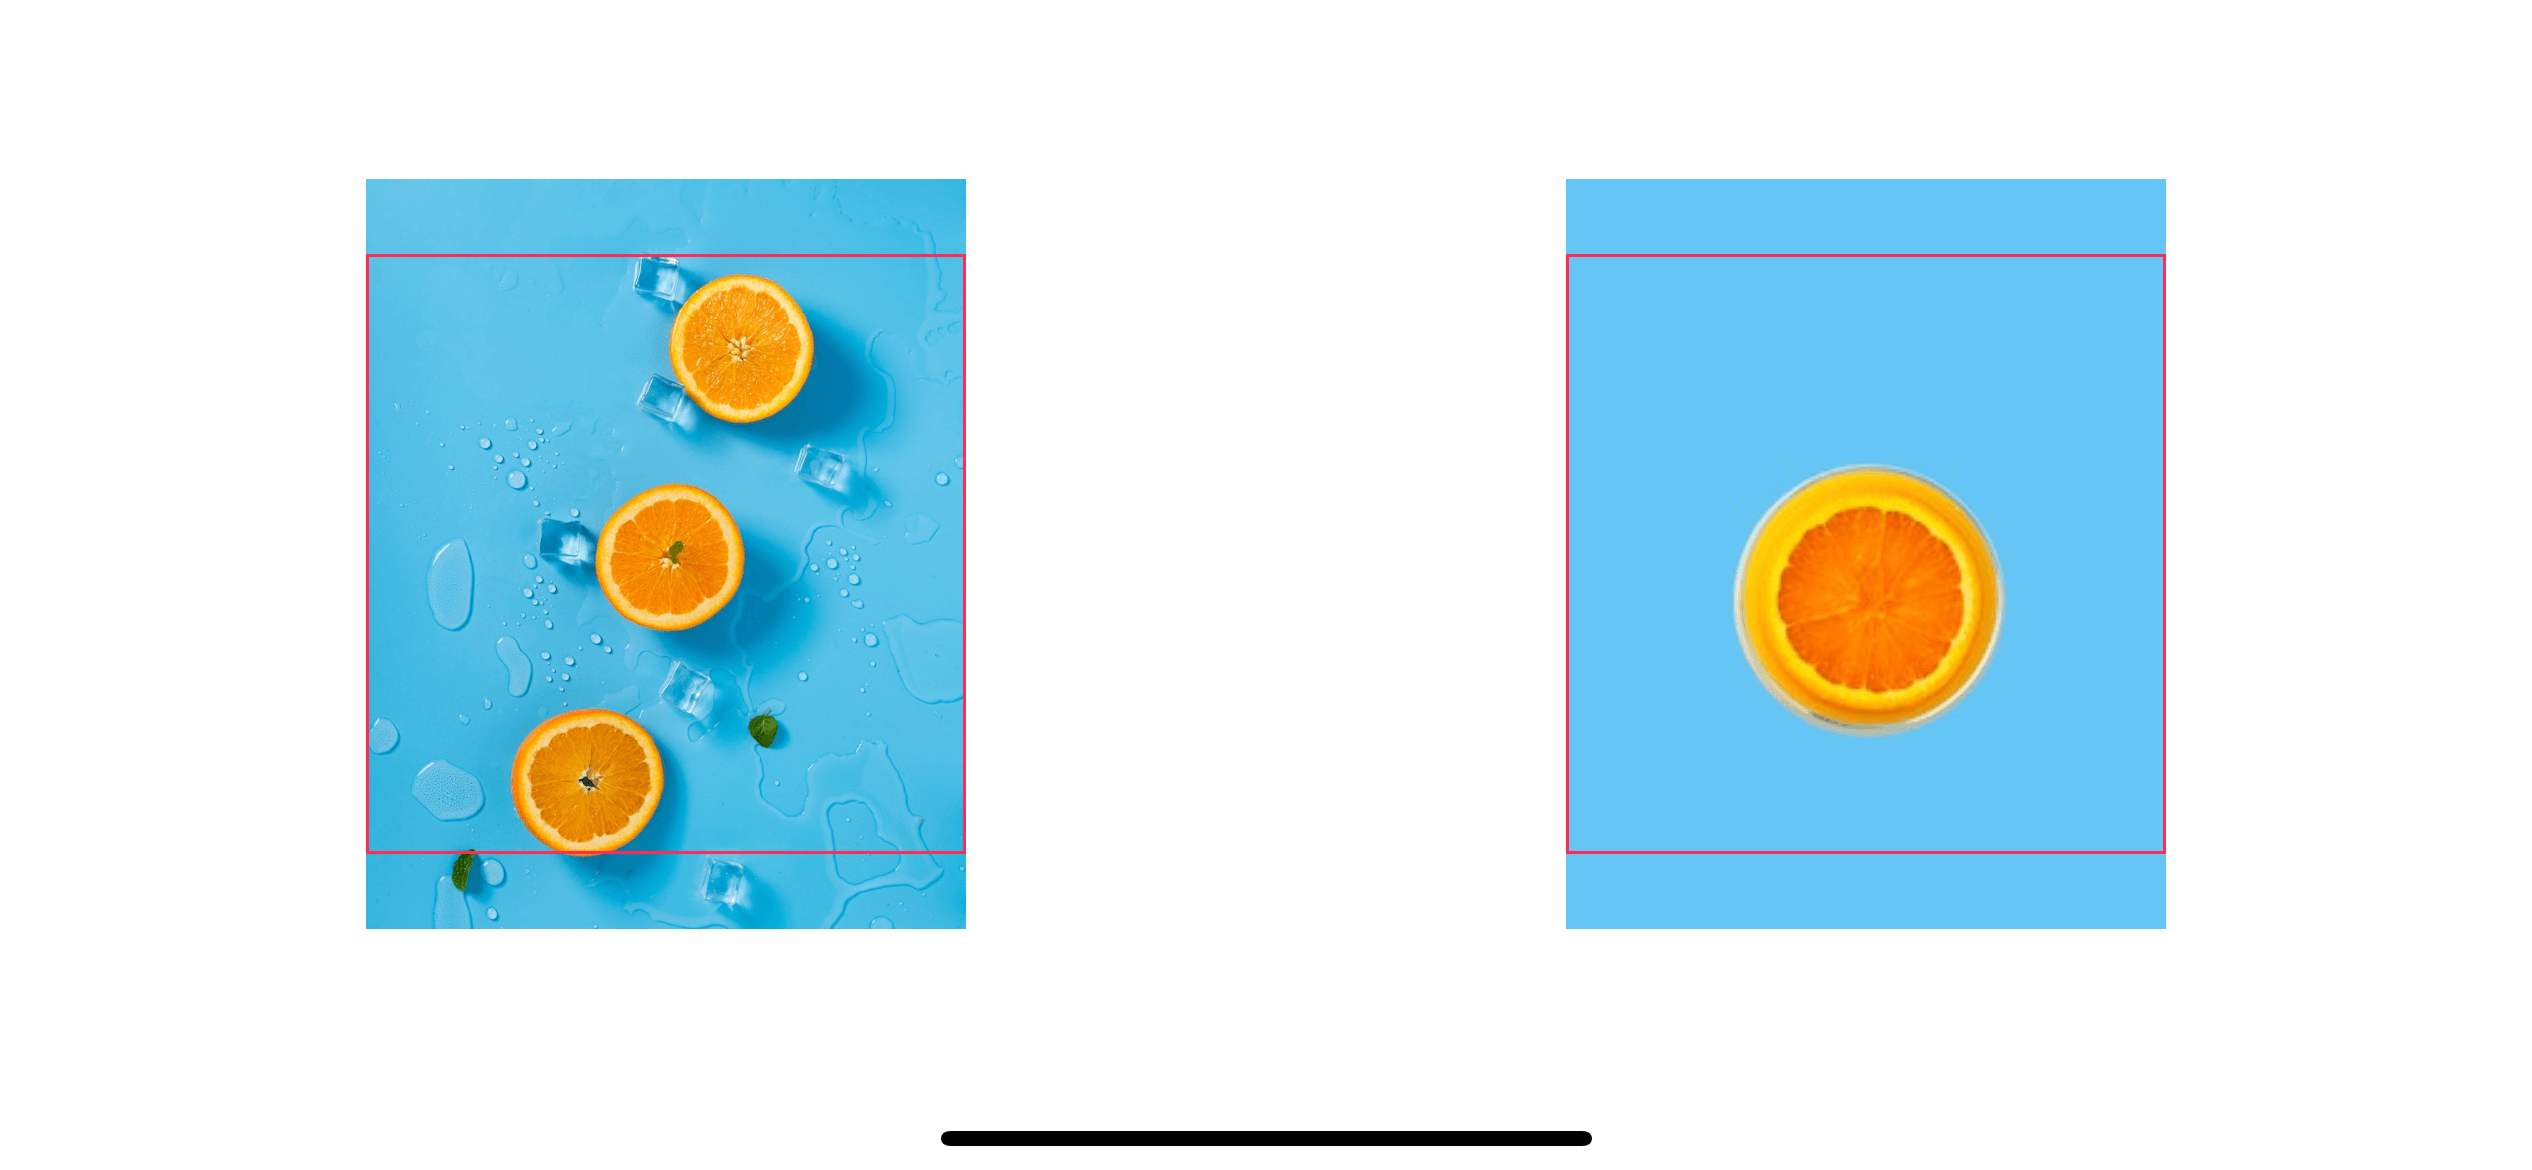 scaleAspectFill
Positioning
We have nine mode to position an image. Each mode will pin the image to the respective position without scaling the image. For example, center will pin the content's center to the view's center, top will pin the content's top to the view's top.
Since we don't need to scale the image, we don't need .resizable() and .aspectRatio() here. We can rely on alignment parameter of .frame(width:height:alignment:).
center
Image("contentmode-large")
.frame(width: 200, height: 200, alignment: .center)
.border(Color.pink)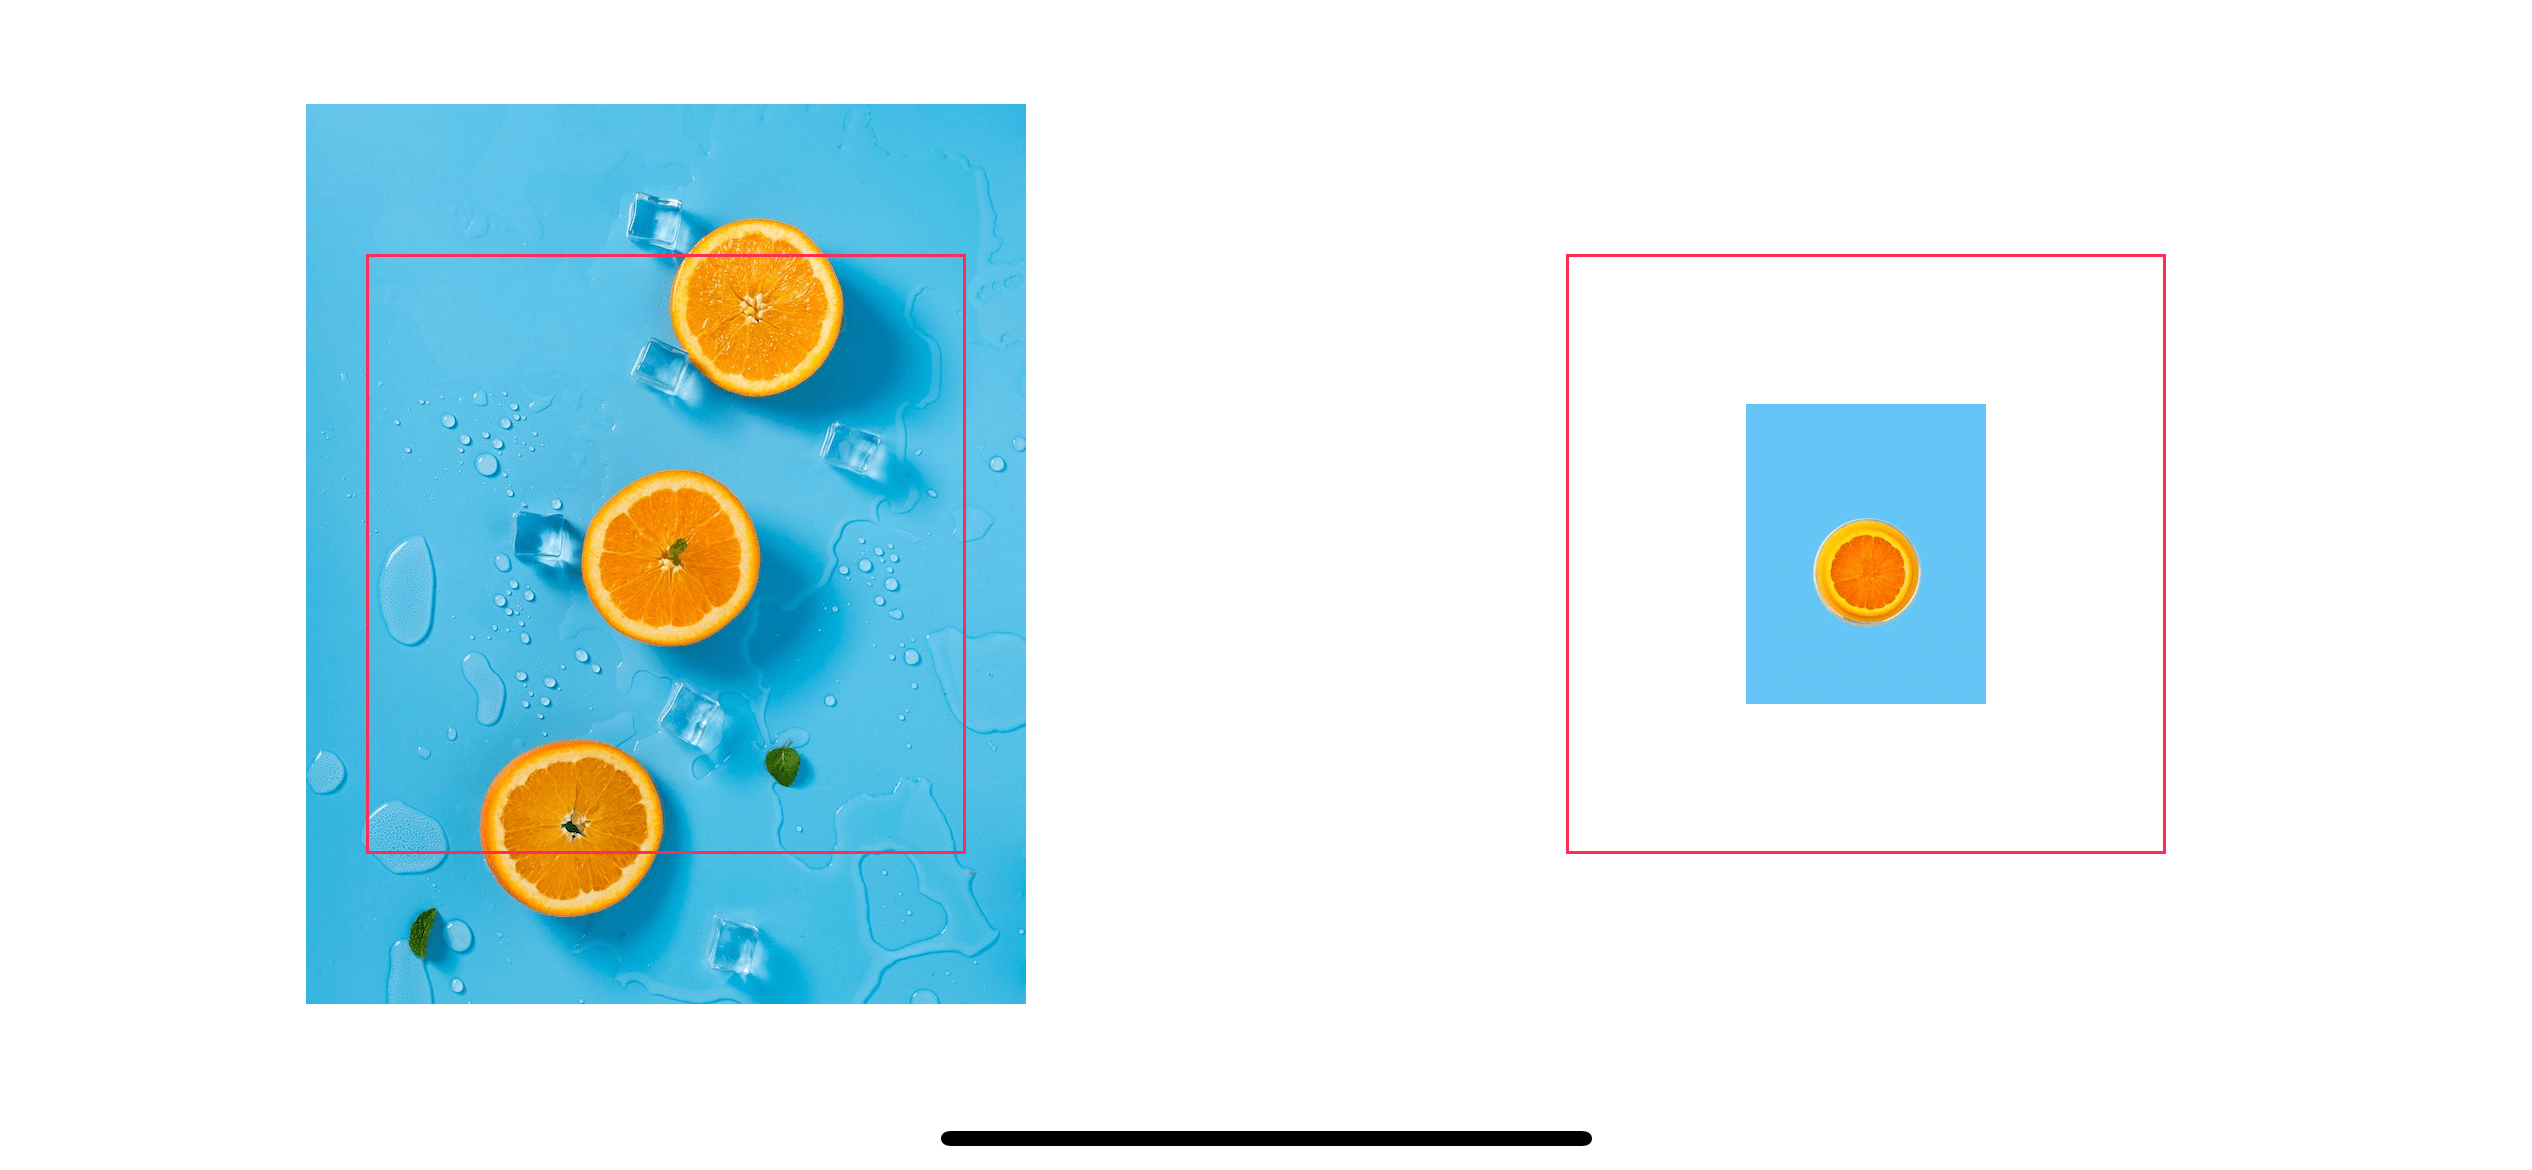 center
Image("contentmode-large")
.frame(width: 200, height: 200, alignment: .top)
.border(Color.pink)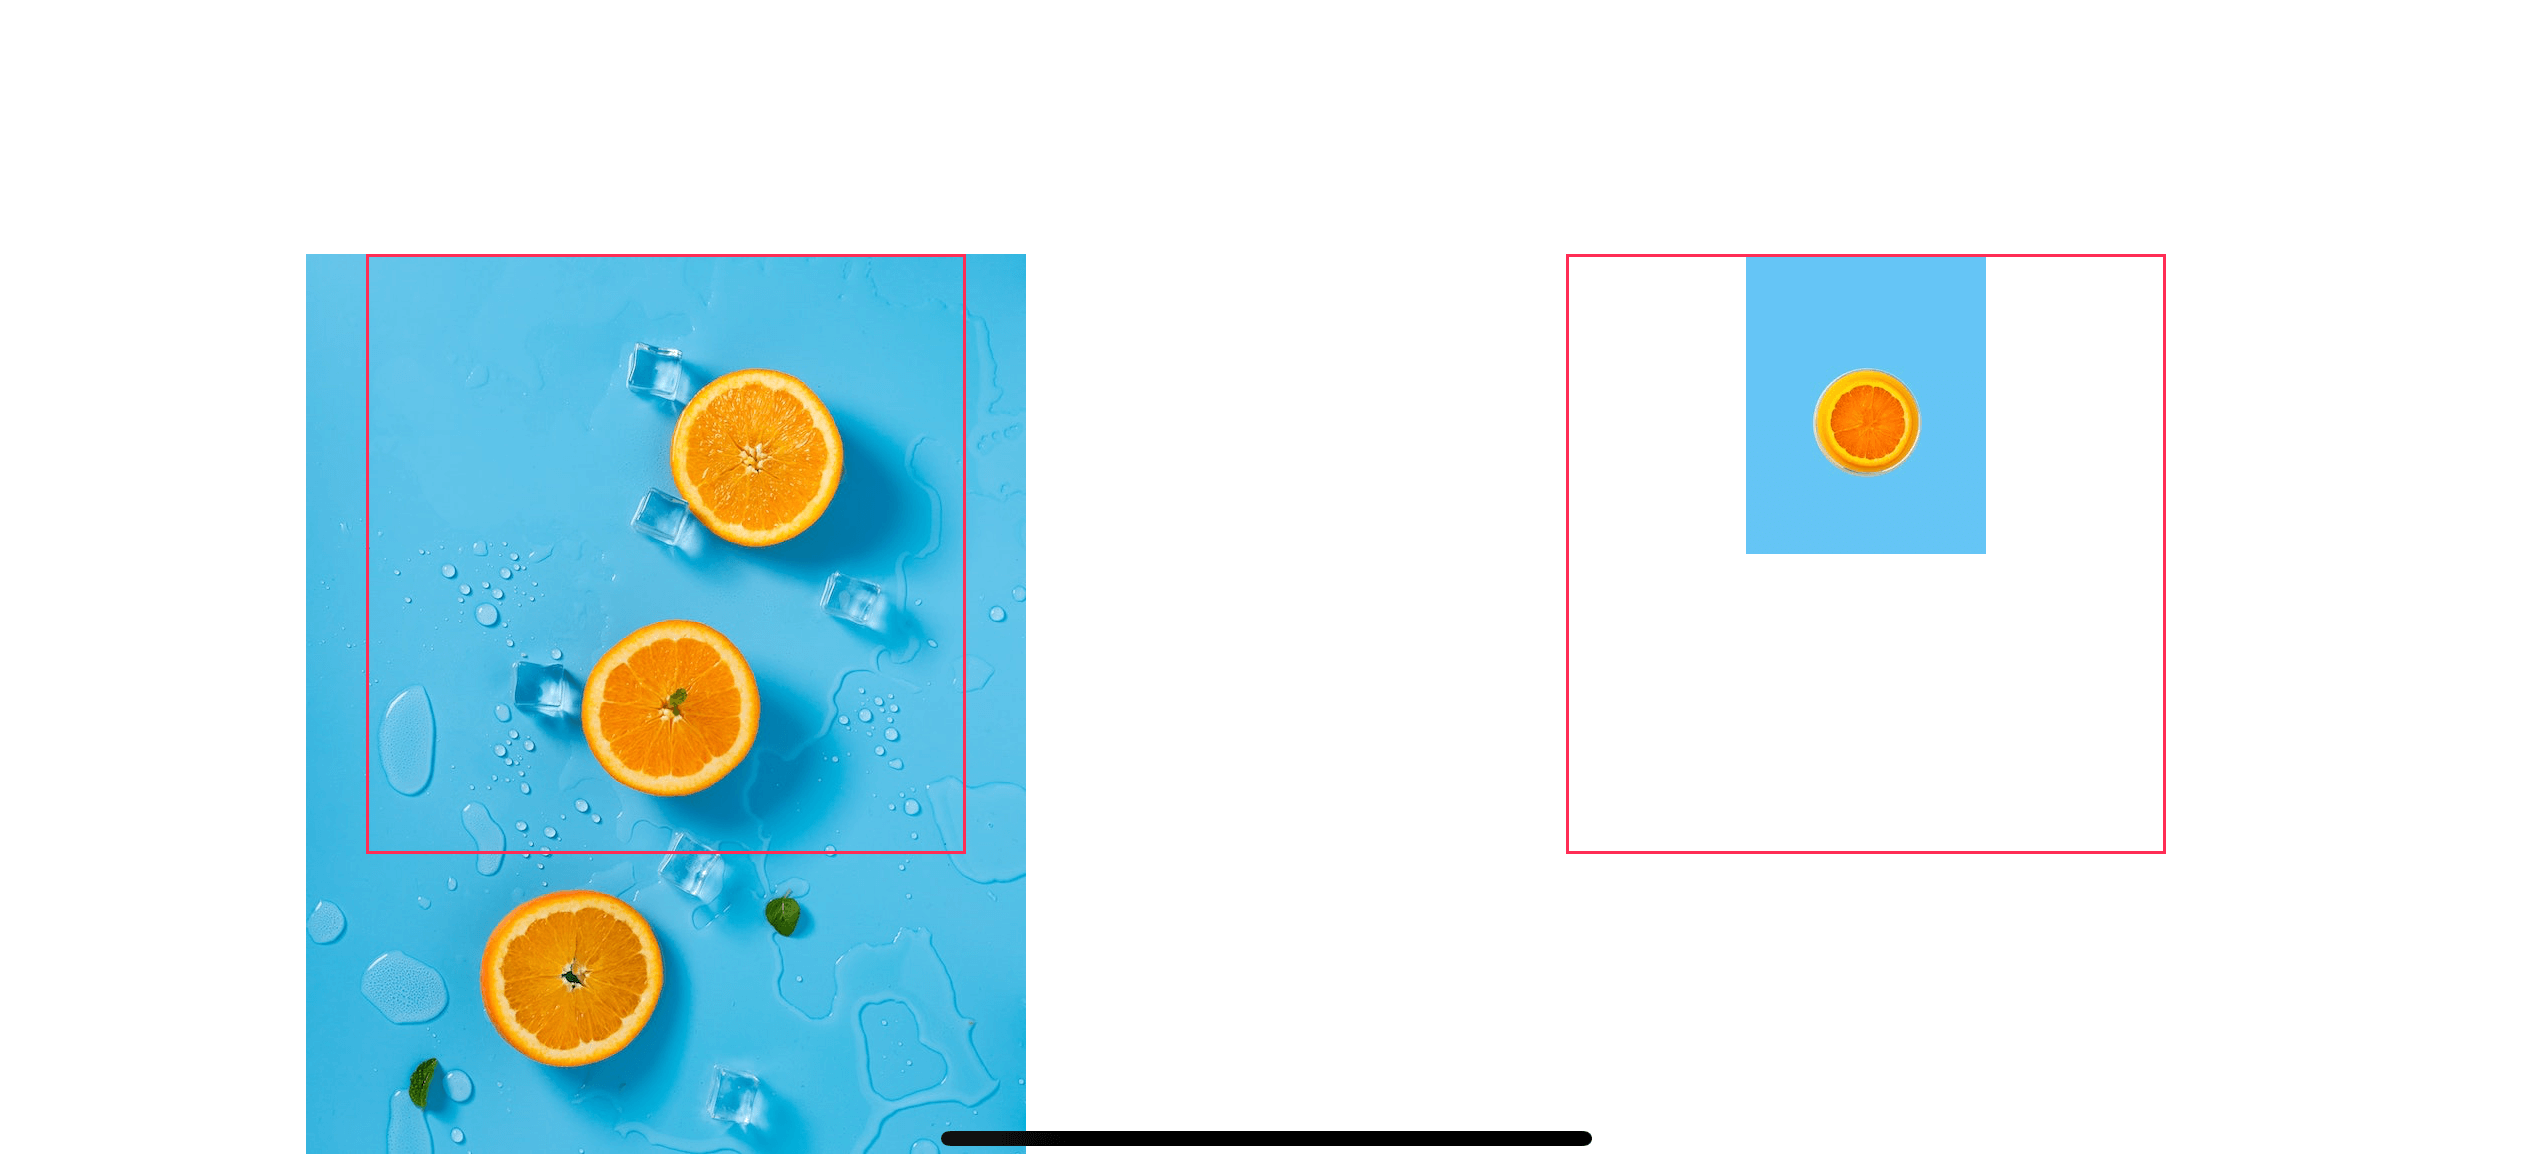 top
topbottom
Image("contentmode-large")
.frame(width: 200, height: 200, alignment: .bottom)
.border(Color.pink)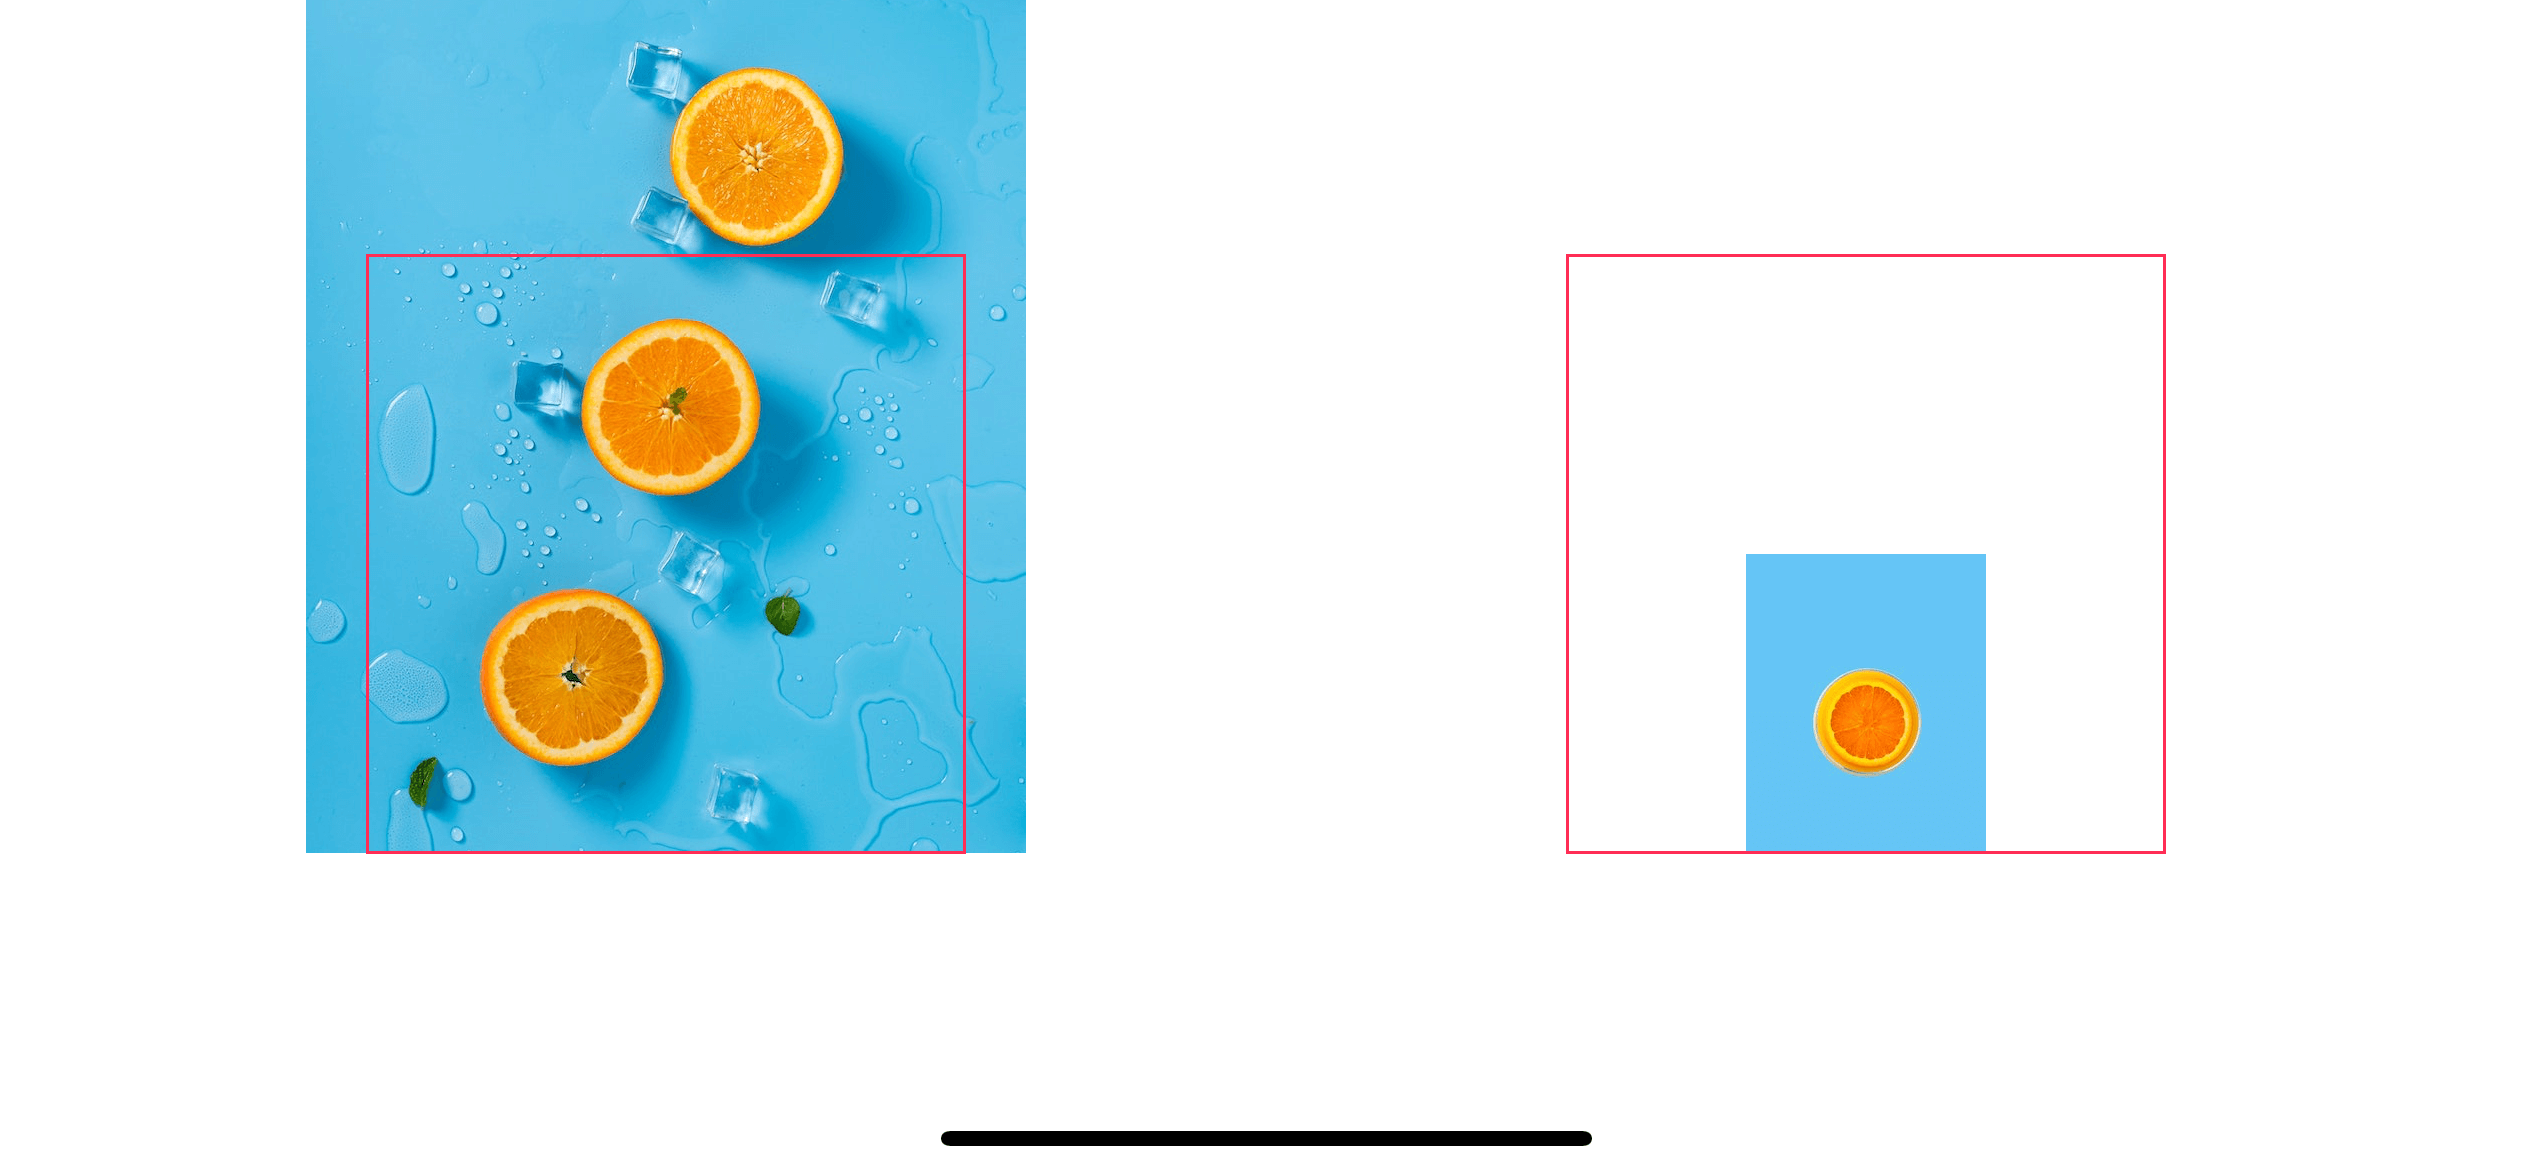 bottom
Image("contentmode-large")
.frame(width: 200, height: 200, alignment: .leading)
.border(Color.pink)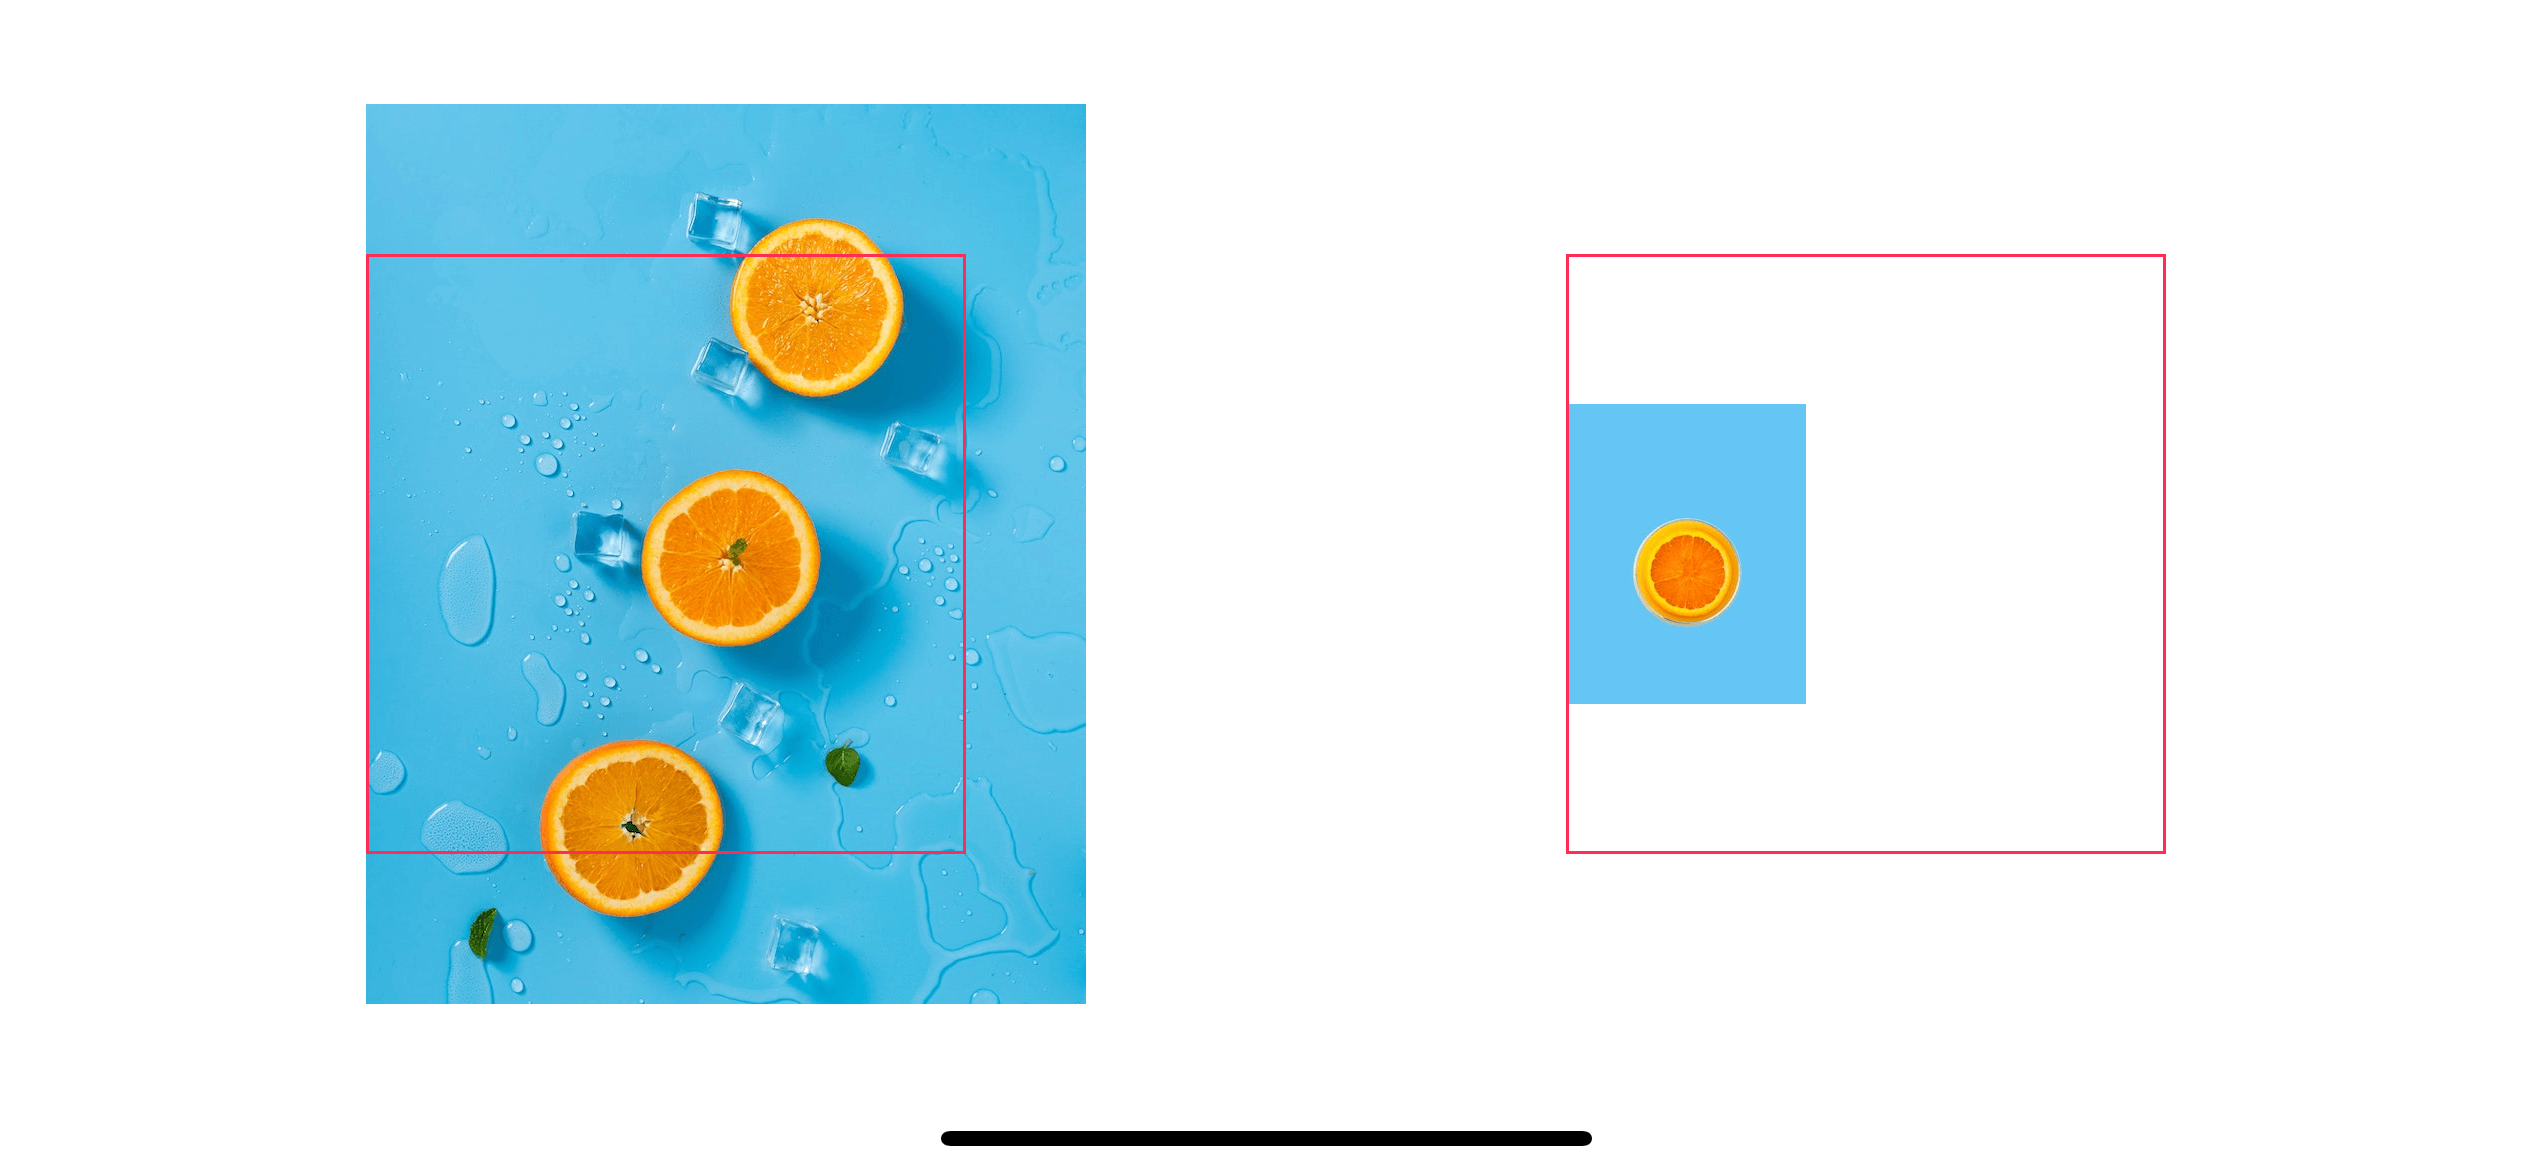 left
leftright
Image("contentmode-large")
.frame(width: 200, height: 200, alignment: .trailing)
.border(Color.pink)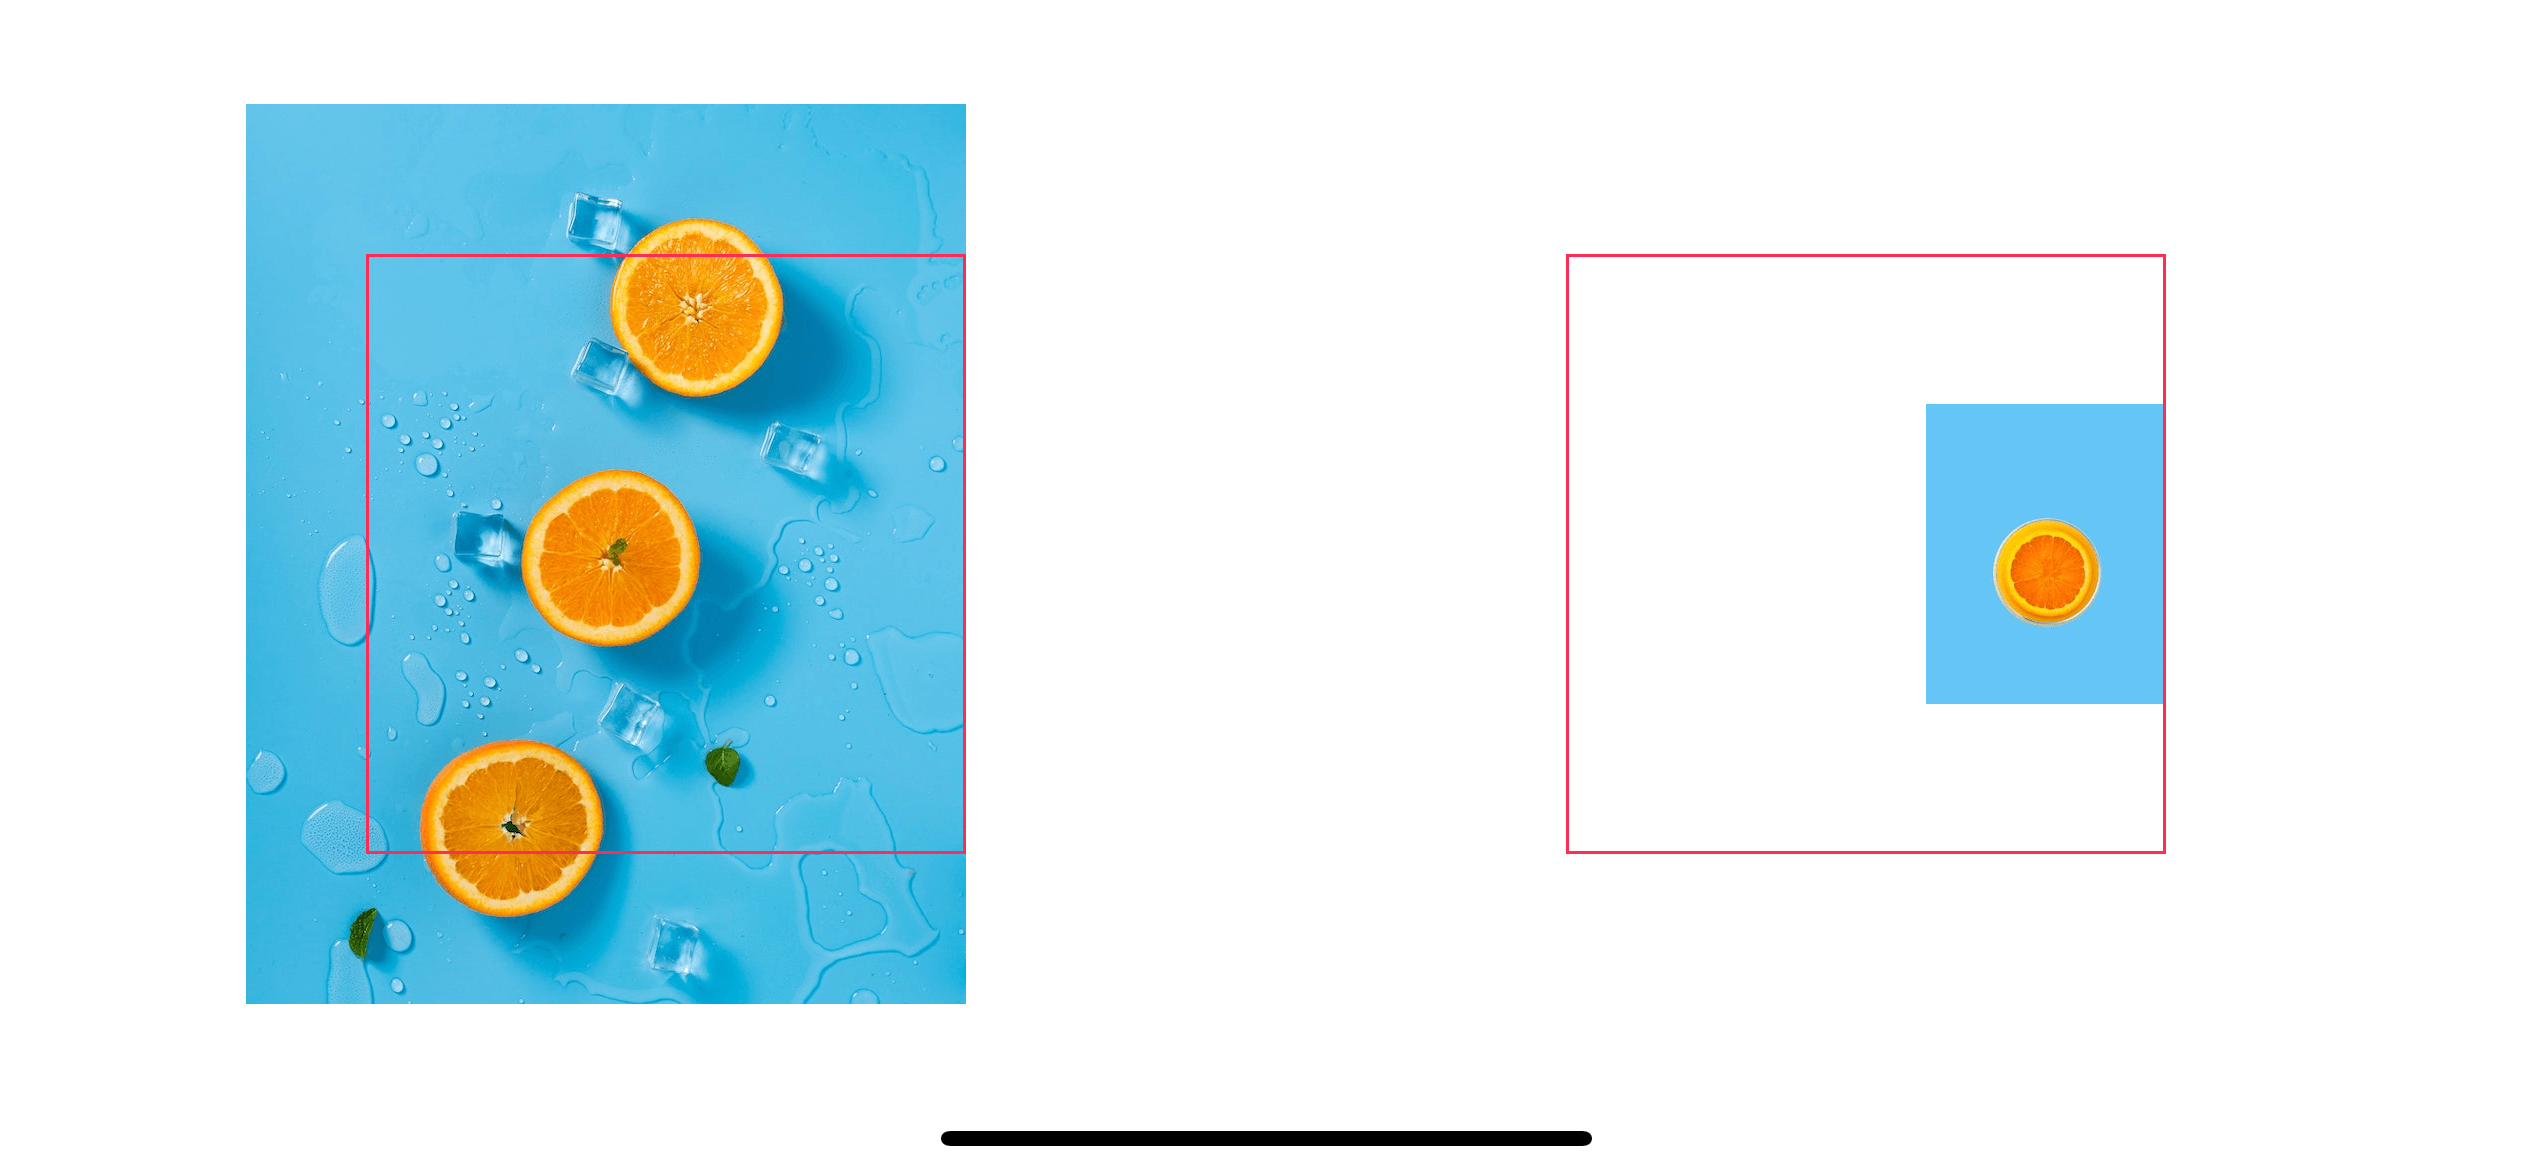 right
righttopLeft
Image("contentmode-large")
.frame(width: 200, height: 200, alignment: .topLeading)
.border(Color.pink)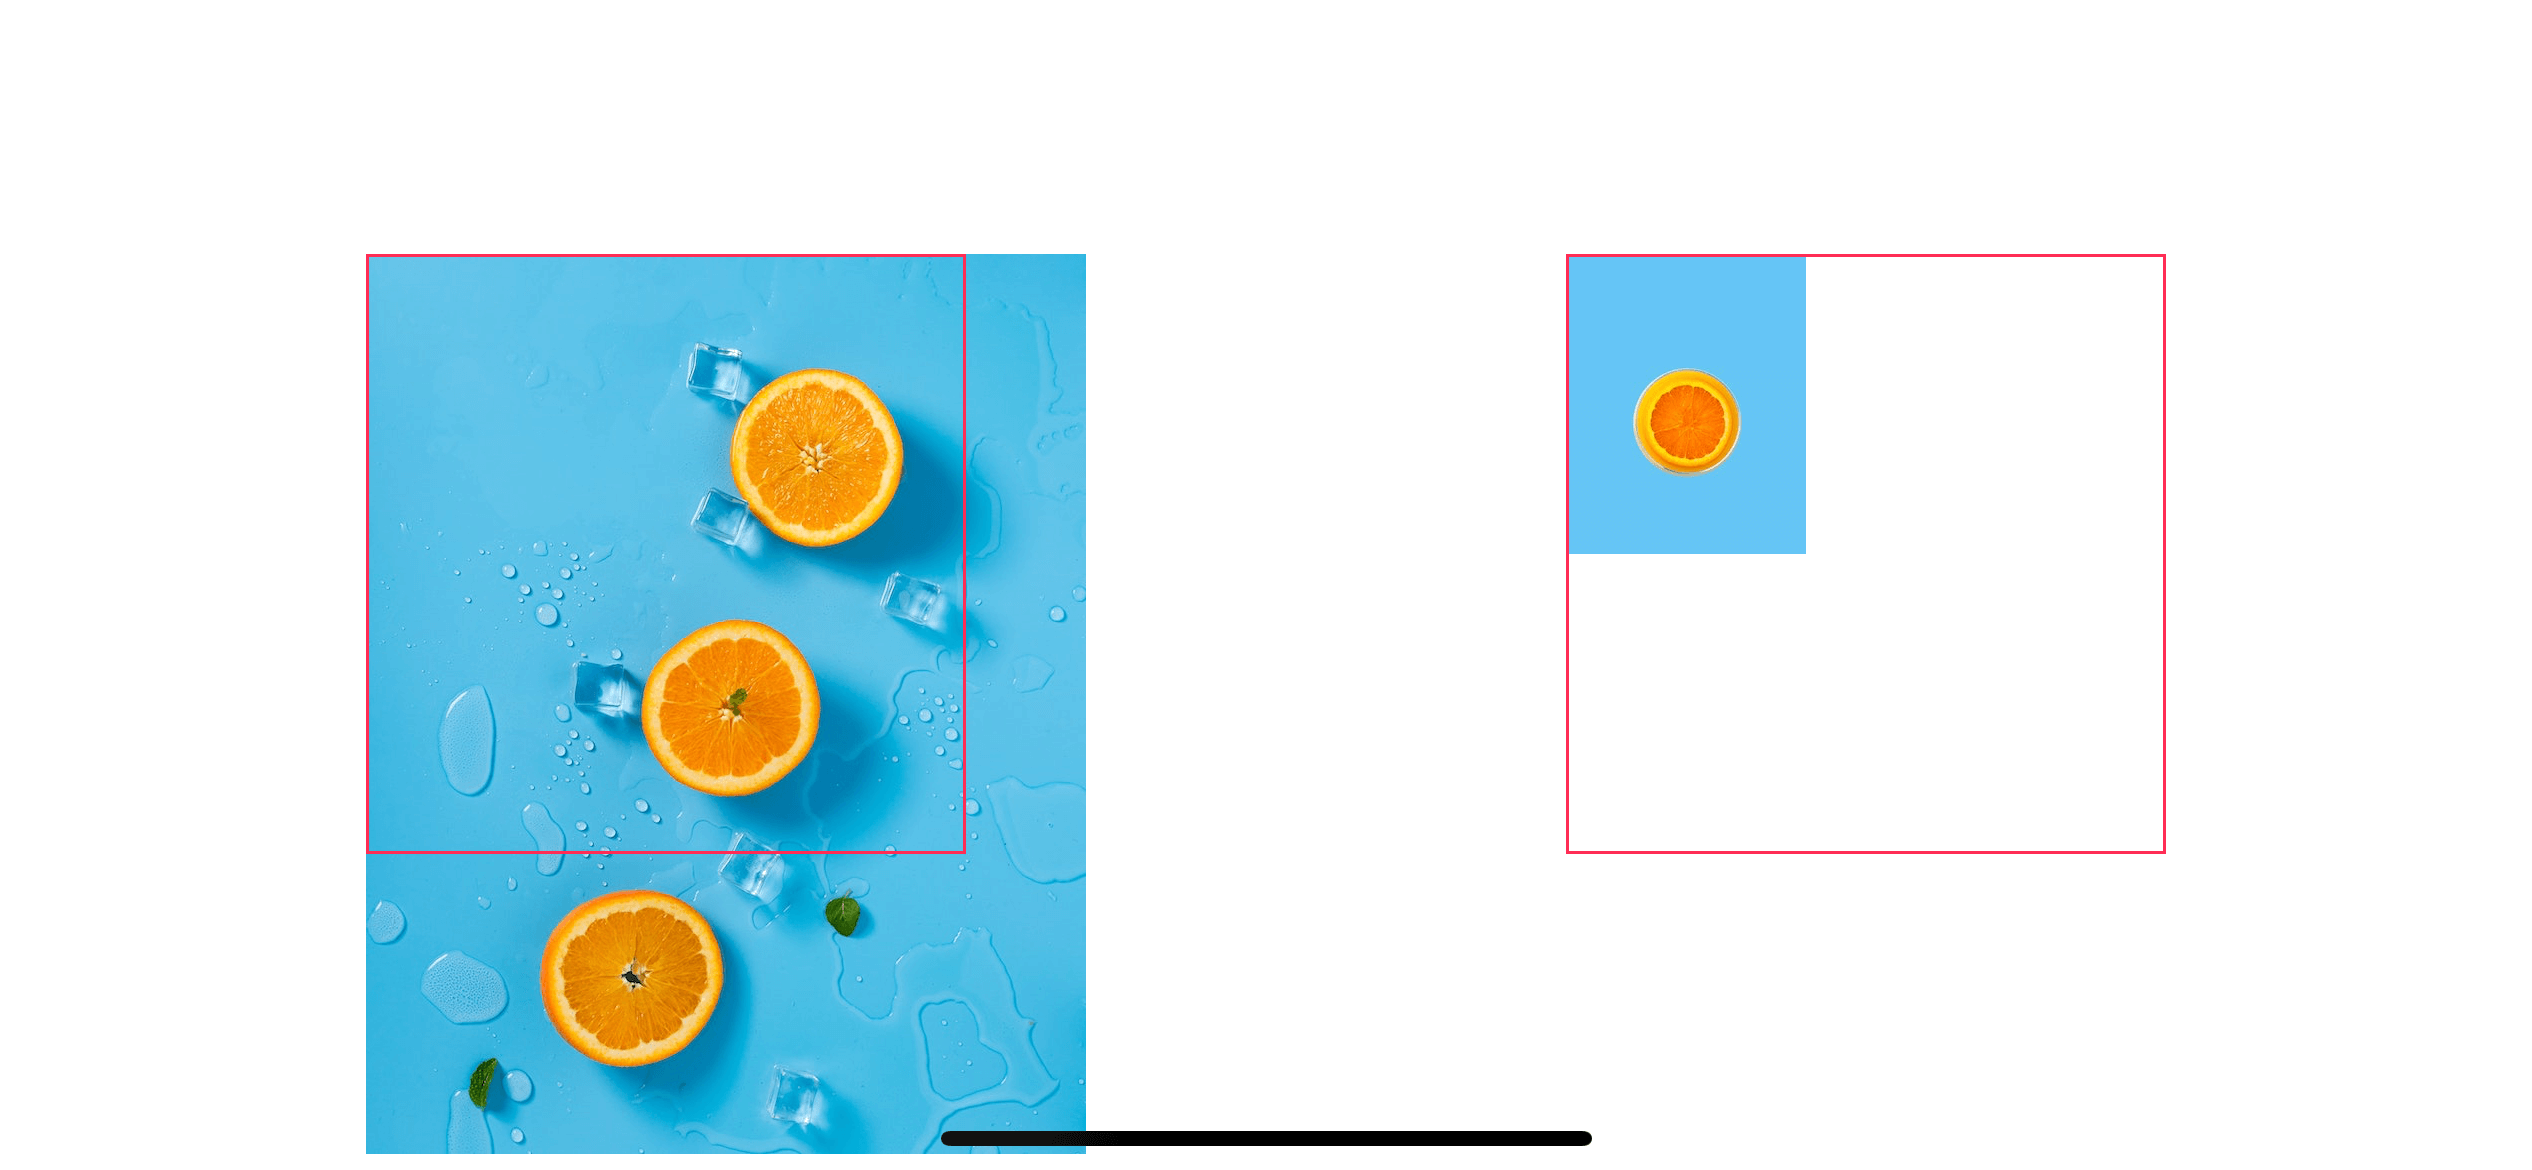 topLeft
topRight
Image("contentmode-large")
    .frame(width: 200, height: 200, alignment: .topTrailing)
    .border(Color.pink)
topRight
bottomLeft
Image("contentmode-large")
    .frame(width: 200, height: 200, alignment: .bottomLeading)
    .border(Color.pink)
bottomLeft
bottomRight
Image("contentmode-large")
.frame(width: 200, height: 200, alignment: .bottomTrailing)
.border(Color.pink)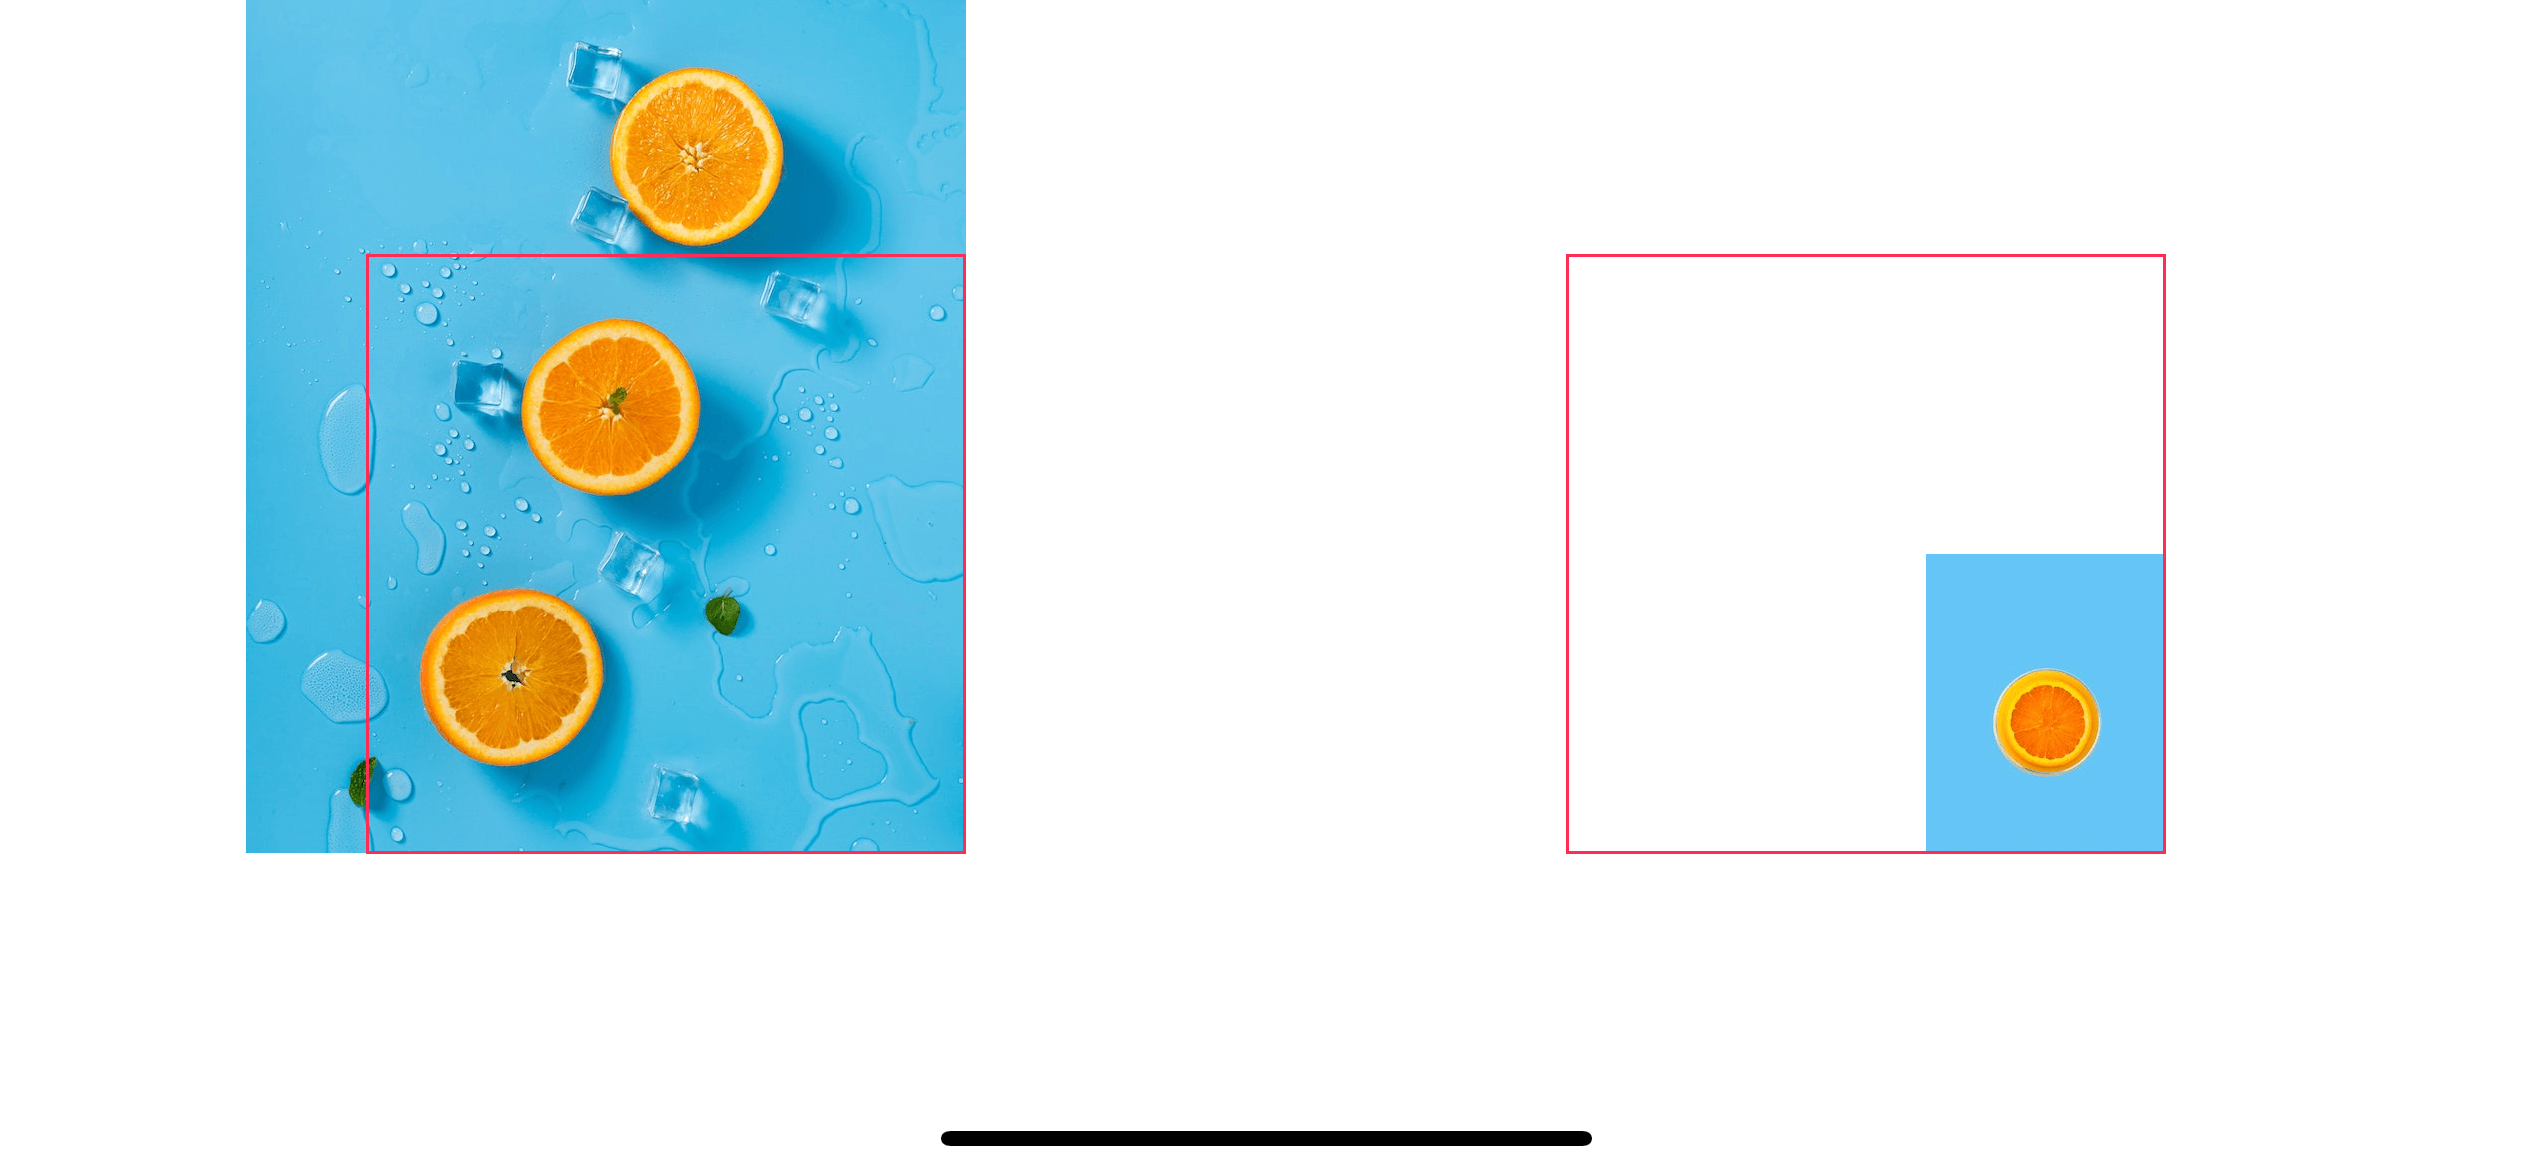 bottomRight
As you can see, the only difference here is we use leading instead of left and trailing instead of right.
I didn't put
.redrawinto consideration here since it is not modify position or size of an image. More detail here ↩︎
Read more article about SwiftUI, Image, Resize,
or see all available topic
Get new posts weekly
If you enjoy this article, you can subscribe to the weekly newsletter.
Every Friday, you’ll get a quick recap of all articles and tips posted on this site — entirely for free.
Feel free to follow me on Twitter and ask your questions related to this post. Thanks for reading and see you next time.
If you enjoy my writing, please check out my Patreon https://www.patreon.com/sarunw and become my supporter. Sharing the article is also greatly appreciated.
How to add background to your view in SwiftUI
Learn how hard or easy it is to add a background view in SwiftUI.
How to resize an image view to fit a container view in SwiftUI
Learn how to fit an image view to any container.
Recommend
-
44
At the current state of SwiftUI not all views are implemented yet. UIKit views can be added in the Swift hierarchy. In this tutorial a url will be displayed in a web view.SwiftUI requires Xcode 11 and MacOS Catalina, for...
-
28
A few weeks ago, we talked about building views like PagerView and BottomSheetView from scratch in SwiftUI . SwiftUI is pretty young and misses some components that we expect to hav...
-
20
咱们最有意思的第四篇 SwiftUI 教程来啦!为什么说是“最有意思”的呢?因为按照约定,在这篇文章里我们会一起来看看用 SwiftUI 开发界面的快捷便利体现在什么地方。相信这会让许多苹果开发者们耳目一新。 信了苹果教之后,每次有什么更新,...
-
10
在上一篇文章中,我们了解了 SwiftUI 的 Text 组件,并通过 Stack 系列的组件对内容进行了一些简单的布局。在这篇文章里,我们会认识一个全新的图片组件...
-
9
UIKit or SwiftUI: what to use in production? 2020, Sep 29 Appl...
-
10
Integrating UIKit & SwiftUIGroupGroupGroupGroupGroupGroupGroupGroupGroupGroupShapeGroupGroupGroupGroupGroupGroupGroupGroupGroupGroupGroupGroupGroupGroupGroupGroupGroupGroupGroupGroupGroupGroupGroupGroupGroupGroupGroupGroupGroupGroupGroupGrou...
-
16
Introspect for SwiftUI Introspect allows you to get the underlying UIKit or AppKit element of a SwiftUI view. For instance, with Introspect you can access UITableView to modify separator...
-
8
How to use SwiftUI in UIKit Using SwiftUI as UIView and UIViewController Table of ContentsIn the previous post (How to use UIKit in SwiftUI)...
-
21
How to resize and position an image in UIImageView using contentMode 29 Mar 2021 ⋅ 3 min read ⋅ UIKit
-
3
访问 SwiftUI 内部的 UIKit 组件 Original...
About Joyk
Aggregate valuable and interesting links.
Joyk means Joy of geeK