

macOS Development for Beginners: Part 2
source link: https://www.raywenderlich.com/730-macos-development-for-beginners-part-2
Go to the source link to view the article. You can view the picture content, updated content and better typesetting reading experience. If the link is broken, please click the button below to view the snapshot at that time.
macOS Development for Beginners: Part 2
Learn how an app starts, how the UI is constructed, and all the way to handling user interaction in this macOS development tutorial for beginners!
Version
In Part 1 of this series, you learned how to install Xcode, how to create a new app, add UI, connect the UI to the code, run the app, debug the app and how to get help. If you are unsure of any of this, go back and run through Part 1 again.
In this part, you are going to create the user interface for a more complex app. You will learn how to allow for resizable windows, as well as designing and navigating to a second window to display your app’s preferences.
Getting Started
Open Xcode and click Create a new Xcode project from the Welcome window or select File/New/Project… Just as you did in Part 1, select macOS/Application/App. Click Next, give your app a name of EggTimer, make sure the language is Swift and that Use Storyboards is checked, everything else should be unchecked. Click Next and choose where to save your project.
Build and run your new app just to make sure that everything is working correctly.
EggTimer App
The app that you are about to build is EggTimer; it counts down from the selected time showing the time remaining. There is a graphic that changes as your egg boils and a sound that plays when your egg is ready. A second window will show the app’s preferences.

Open Main.storyboard from the Project Navigator. As you saw in part 1 of this series, you already have three components:
- Application Scene
- Window Controller Scene
- View Controller Scene
Application Scene contains the menu bar and menus that appear whenever the app is running. Window Controller is the part of the app that defines how the window will behave: how it will resize, how new windows will appear, whether the app will save the window size and location and so forth. A window controller can manage more than one window, but if they need different properties, you will need to add another window controller.
View Controller displays the user interface inside the window — that is where you will layout the UI for the main display.
Notice that the Window Controller has an arrow pointing into it. This indicates it will control the initial display when the app starts up. You can check this by selecting the Window Controller in the Document Outline and going to the Attributes Inspector. Uncheck Is Initial Controller and the arrow will disappear. Check it again as you do want this to be the initial controller.
Window Controller
Before you start on the user interface, make sure you have selected Main.storyboard in the Project Navigator. Click inside the Window Controller to select its window. The Window Controller in the Visual Editor shows the text “View Controller” because this is what it contains. For this app, you do not want to allow the window to shrink below 346 x 471 pixels. This will also be the starting size of the window.
Go to the Size Inspector in Utilities and set the Content Size Width to 346 and the Content Size Height to 471. Check the Minimum Content Size checkbox and make sure the width and height values are the same as for the content size. The Window Controller in the Visual Editor will have resized. You may want to move it now so that it is not overlapping other objects.
While not strictly necessary, it is easier to visualize if you adjust the View Controller to the same dimensions as its containing Window Controller. Click the View Controller making sure that its View is selected in the Document Outline. In the Size Inspector set the width and height to 346 and 471 respectively. Re-position as needed to see all the objects. Now the WindowController and the ViewController are shown at the same size in the Visual Editor.
Select the window in the WindowController and change its title to Egg Timer in the Attributes Inspector. Set the Autosave name to EggTimerMainWindow so that the size and positioning of the window will be saved automatically between launches.
If you are an iOS programmer, you will have dealt with various screen sizes for different device types and rotations. In macOS programming, you have to deal with an infinite variety of window sizes and aspect ratios, which is why I made the initial dimensions for this window a bit weird. Luckily, Auto Layout handles all this for you.
Laying out the UI – part 1
The basic UI consists of 2 stack views. The first one contains the time remaining text and the egg image. The second one contains the 3 buttons along the bottom. Start with the buttons:
- Search for “Button” in the Object Library.
- Drag a Gradient button into the View Controller.
- Using the Attributes Inspector, delete its image and set its title to Start.
- Change the font to System 24.
- Expand the button to show all the text.
- With the Start button selected, press Command-D twice to create 2 more copies.
- Drag the new buttons out so you can see them all.
- Edit the titles of the new buttons to Stop and Reset.
- Select all 3 buttons and choose Editor/Embed In/Stack View.
To make the buttons fill the stack view, select the new Stack View and make the following changes in the Attributes Inspector:
- Distribution: Fill Equally
- Spacing: 0
Click the Add New Constraints button at the bottom of the Visual Editor and set the left, right, bottom and height constraints as shown. Select Update Frames: Items of New Constraints and then click Apply 4 Constraints.
The stack view is now positioned correctly, but the buttons are shorter than the stack view. In the Document Outline, Control-Drag from the Start button to the Stack View and select Equal Heights. Do the same for the other two buttons.
The button stack view is now exactly as you wanted it.
Build and run the app. Try resizing the window: the buttons stick to the bottom of the window and resize to fill the width evenly.
As a final touch, disable the Stop and Reset buttons by unchecking Enabled in the Attributes Inspector. It makes no sense to have them enabled before the timer has started.
Laying out the UI – Part 2
The second stack view contains the time remaining text and the image. Drag a Label into the View Controller, set its Title to 6:00 and its Alignment to center. The current system font (San Francisco) uses proportional spacing for digits which means that if you have a counter, the digits appear to leap around as they change — which is really annoying.
Switch the font to Helvetica Neue to avoid this and set the font size to 100. This will make the text too large to display, so expand the label field until you can see it.
To add the image, search the Object Library by typing “image” in the filter field. This will bring up several possibilities but the one you want is Image View. Drag this into the View Controller underneath the time remaining label.
Download the assets for this project (images and a sound file). Unzip the file and open the Egg Images folder. In Xcode, click in Assets.xcassets in the Project Navigator.
Drag the 6 image files into the Assets library. They will now be available to your app. Because the image file names included “@2x”, they have been automatically allocated to the 2x section for each image asset.
Go back to Main.storyboard, select the Image View you just added and click the Image popup in the Attributes Inspector. You can see the images you just added as well as the built-in images. Select stopped.
Make the second stack view: select the time remaining label and the image view. Choose Editor/Embed In/Stack View. Now you need to configure this stack view to fill the free space. Click the Add New Constraints button at the bottom of the Visual Editor and set these constraints:
The stack view has expanded as required, but the image view is still too small. Select the image view and set its left and right constraints to the Standard Value as shown.
In the Attributes Inspector, set Scaling to Proportionally Up or Down.
Build and run the app. Resize the window to check that all the UI elements are resizing and positioning as expected.
Connecting the UI to the code
As you learned in part 1 of this series, you need to set up @IBOutlets and @IBActions to connect your UI to your code. For this window, you need @IBOutlets for the following elements:
- Time remaining label
- Egg image view
- The 3 buttons
The 3 buttons also need @IBActions to trigger a function when a user clicks them. In the Project Navigator, select Main.storyboard. Option-click on ViewController.swift in the Project Navigator to open it in the Assistant Editor. If you are running out of space, use the buttons in the top right to hide the Utilities and Navigator panels.
Select the countdown timer label and Control-drag into the ViewController class, just as you did in part 1. Set the name of the label to timeLeftField. Repeat for the egg image view, setting its name to eggImageView. Set up outlets for the buttons naming them startButton, stopButton and resetButton.
The buttons also need @IBActions. Control-drag from the Start button but this time change the Connection popup to Action and set the name to startButtonClicked. Repeat for the other buttons creating actions called stopButtonClickedand resetButtonClicked.
The ViewController code should now look like this:
In Part 3 of this series, you will add the code to these functions to make them work. Close the Assistant Editor now and re-open the Navigator and Utilities panels if you had closed them.
Menus
In Main.storyboard, click on the menu bar or Application Scene to select it. The app template provides a default set of menus, but for this app, most of them are unnecessary. The easiest way to explore the menus is using the Document Outline. Use the disclosure triangles to display the View menu and its contents.
The structure of the menu bar is a series of nested menus and menu items. Switch to the Identity Inspector in the Utilities panel so that you can see what each entry in the list really is as you click on it. Main Menu is an instance of class NSMenu. It contains an array of NSMenuItems: View is one of these.
The View menu item contains a sub-menu (NSMenu) with its own NSMenuItems. Notice the Separator item which is just a specialized form of NSMenuItem.
The first thing to do is to delete the menus that you do not need for this app. Select the File menu in the Document Outline and press Delete to remove it. If you select it in the Visual Editor and delete, you will only have deleted the menu inside the File menu item, so you will be left with a space in the menu bar. If this happens, select the space and press Delete again to remove it.
Keep deleting menus until you only have EggTimer, Window and Help.
Now you are going to add a new menu which will mimic the operations of the 3 buttons. Search for “menu” in the Object Library. Remembering that each menu starts with a menu item, drag a Menu Item into the menu bar between EggTimer and Window. It will appear as a blue box, but that is because it doesn’t have a menu with a title yet.
Now drag a Menu into the blue box. If you find it difficult to target the blue box, drag into the Document Outline instead, just under the new Item. The new menu still doesn’t have a title, but it now has three items.
With the menu selected (not the item), switch to the Attributes Inspector and change the title to Timer. This will allocate a name to your new menu. Select Item 1 and change its title to Start either by double-clicking and editing it in place or by using the Attributes Inspector.
Click in the Key Equivalent field in the Attributes Inspector and press Command-S to assign a keyboard shortcut. Normally Command-S means Save, but as you have deleted the File menu this isn’t a conflict, although it is not best practice to re-use common shortcuts for other purposes.
Use the same methods to set the title for the second item to Stop with a shortcut of Command-X and the third item’s title to Reset with Command-R as its shortcut.
You can see four buttons across the top of the menu bar in the Visual Editor. Switch to the Identity Inspector. Clicking on each of these in turn shows that they are links to the Application, the First Responder, the AppDelegate and the Font Manager. First Responder is usually the view controller that is currently frontmost, and it can receive actions from the menu items.
Option-click on ViewController.swift and add the following code below the @IBActions you have for the buttons:
// MARK: - IBActions - menus

@IBAction func startTimerMenuItemSelected(_ sender: Any) {
  startButtonClicked(sender)
}

@IBAction func stopTimerMenuItemSelected(_ sender: Any) {
  stopButtonClicked(sender)
}

@IBAction func resetTimerMenuItemSelected(_ sender: Any) {
  resetButtonClicked(sender)
}
These functions will be called by the menus and they will call the button action functions. You could have the menu items calling the button action functions directly, but I chose to do it this way to make the sequence of events more obvious when debugging. Save the file and close the Assistant Editor.
Control-drag from the Start menu item up to the orange block that indicates the First Responder. A popup will appear showing an enormous list of options. Type “sta” to scroll quickly to the correct section and select startTimerMenuItemSelected.
Connect the Stop menu item to stopTimerMenuItemSelected and the Reset menu item to resetTimerMenuItemSelected in the same way. Now when the EggTimer window is at the front, selecting the menu items will call these functions.
However the 3 buttons are not all going to be enabled at the same time, and the menu items need to reflect the status of the buttons. This cannot happen in the ViewController as it will not always be the First Responder, so the menu items will be controlled in the AppDelegate.
With the Main.storyboard open and the menus visible, option-click on AppDelegate.swift in the Project Navigator. Control-drag from the Start menu into the AppDelegate and assign an outlet name of startTimerMenuItem.
Do the same for the other items, assigning titles of stopTimerMenuItem and resetTimerMenuItem.
In Part 3 you will add code to enable and disable these menu items as required, but for now, you need to turn off the automatic enabling and disabling. Usually, the app will check to see if the current First Responder has an action for the menu item and disables it does not. For this app, you want to control this yourself. Select the Timer menu and uncheck Auto Enables Items in the Attributes Inspector.
Preferences Window
The main window for the EggTimer app is looking good now, but it needs a Preferences window so that the user can choose how well they want their egg cooked.
The Preferences will appear in a separate window with its own window controller. This is because the Preferences window will have a different default size and will not be resizable. It is possible to have more than one view controller displayed by the same window controller, but they then would share the properties of that window controller.
Open Main.storyboard, closing the Assistant Editor if it is still open, and search for “window” in the Objects Library. Drag a new Window Controller into the Visual Editor. It will create a View Controller as well to display its content. Arrange them in the window so they are easy to see and so that the new window controller is close to the menu bar.
Open the EggTimer menu and Control-drag from Preferences… to the new window controller. Choose Show from the popup that appears. This creates a segue so that whenever a user selects Preferences… from the EggTimer menu, this window controller will display the new view controller.
The Preferences window controller will display a new view controller, so now you need to make the class for that view controller. In the Project Navigator, select the existing ViewController.swift file; this makes sure your new file will be in a logical place in the Project Navigator. Choose File/New/File…
Choose macOS/Cocoa Class and click Next. Set the class name to PrefsViewController and make it a subclass of NSViewController. Check that the language is set to Swift and uncheck Also create XIB file for user interface. Click Next and Create to save the file.
Back in Main.storyboard, select the new view controller. Make sure you select the view controller itself, not its view; this is easier using the Document Outline. In the Identity Inspector, set its class to PrefsViewController.
Select the window in the preferences window controller and use the Attributes Inspector to set its title to Preferences. Do not set an autosave name, as this window is going to be centered in the screen every time it appears. Uncheck the Minimize and Resize controls so that the window size is fixed.
Go to the Size Inspector and enter a width of 416 and a height of 214 for the Content Size.
Under Initial Position, select Center Horizontally and Center Vertically from the 2 popups.
Select the View in the PrefsViewController and change its width to 416 and height to 214 using the Size Inspector.
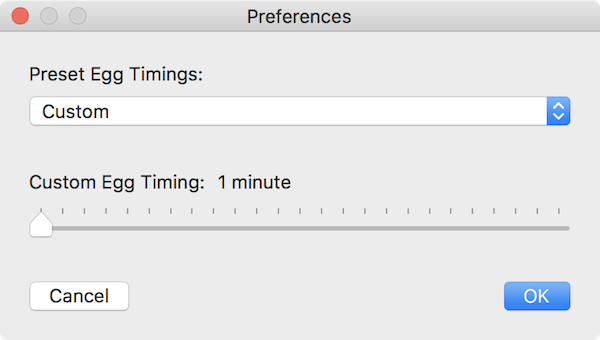
The PrefsViewController is going to display a popup for selecting from a preset time and a slider for selecting a custom time. It will have labels for each of these and two buttons: Cancel and OK. There will also be a dynamic label that shows the currently selected time.

Drag the following controls into the view controller arranging them as shown:
- Label – set title to “Preset Egg Timings:”
- Pop Up Button
- Label – set title to “Custom Egg Timing:”
- Label – set title to “6 minutes”
- Horizontal Slider
- Push Button – set title to “Cancel”
- Push Button – set title to “OK”
Because this window does not resize, there is no need to apply any auto-layout constraints – the objects will always appear as you have arranged them. Drag the objects around to position them, using the blue guidelines to help you. Extend the width of the “6 minutes” label to near the right side of the window as it may contain more text. Double-click the Pop Up Button to see the first three items and set their titles to:
- For runny soft-boiled eggs (barely set whites): 3 minutes
- For slightly runny soft-boiled eggs: 4 minutes
- For custardy yet firm soft-boiled eggs: 6 minutes
Drag in two more Menu Items from the Objects Library, then a Separator Menu Item and finally another Menu Item. If you are having any trouble positioning them, use the Document Outline.
Set the titles for the remaining menu items to:
- For firm yet still creamy hard-boiled eggs: 10 minutes
- For very firm hard-boiled eggs: 15 minutes
- Custom
I don’t pretend to have any great knowledge in regard to boiling eggs, so I got these times and descriptions from The Kitchn.
Select the popup itself, not any of the items, and set its Selected Item to the 6 minute option.
Now here is where you are going to do a very neat trick that will allow the app to know exactly how many minutes have been selected. For each of the menu items in the popup, set its tag to the number of minutes: 3, 4, 6, 10, 15 in the Attributes Inspector. Leave the tag for the Custom menu item at 0.
Now select the Slider and in the Attributes Inspector set Tick marks to 25, Minimum Value to 1, Maximum Value to 25, Current Value to 6 and check Only stop on tick marks. Once the tick marks are visible, you may want to move the slider down a few pixels. Disable the slider by unchecking Enabled – it will only be enabled if Custom is selected in the popup.
Connecting up the Preferences Objects
Option-click on PrefsViewController.swift in the Project Navigator and hide the side panels if you need the room. You need @IBOutlets for the popup, the slider and the label showing “6 minutes”. Control-drag from each of these into the PrefsViewController giving them the following outlet names:
- Popup:
presetsPopup - Slider:
customSlider - Label:
customTextField
Next, Control-drag to create the @IBActions, remembering to set the Connection popup to Action each time:
- Popup:
popupValueChanged - Slider:
sliderValueChanged - Cancel button:
cancelButtonClicked - OK button:
okButtonClicked
Your code should now look like this:
The layout of the Preferences window is now complete. Build and run the app and select Preferences from the EggTimer menu. Click the red close blob in the title bar button to close the window when you are done giving it a look.

App Icon
The only part left in the UI now is to add an icon for your app. You already downloaded a folder of assets for the app and installed some of the images into Assets.xcassets. Open the folder again and find the egg-icon.png file.
Select Assests.xcassets from the Project Navigator, click on AppIcon and drag egg-icon.png into the Mac 256pt 1x box. As discussed in Part 1, for a production app you would supply all the sizes shown in AppIcon, but for this app, a single size is sufficient.

Build and run your app to confirm that the new icon appears in the Dock. If you still see the default icon, chose Clean from Xcode’s Product menu and try again.

Where To Go From Here?
You now have the UI fully implemented for your app, but the app doesn’t do anything yet. If you got lost anywhere, you can download the Xcode project which has all the UI implemented ready for the next part.
In Part 3 of this tutorial series, you will add the code that makes the app work.
If you have any questions or comments on this tutorial, please join the discussion below!
raywenderlich.com Weekly
The raywenderlich.com newsletter is the easiest way to stay up-to-date on everything you need to know as a mobile developer.
Get a weekly digest of our tutorials and courses, and receive a free in-depth email course as a bonus!
Recommend
About Joyk
Aggregate valuable and interesting links.
Joyk means Joy of geeK