

Multiplatform App Tutorial: SwiftUI and Xcode 12
source link: https://www.raywenderlich.com/19611194-multiplatform-app-tutorial-swiftui-and-xcode-12
Go to the source link to view the article. You can view the picture content, updated content and better typesetting reading experience. If the link is broken, please click the button below to view the snapshot at that time.
Multiplatform App Tutorial: SwiftUI and Xcode 12
Learn how to use Xcode 12’s multiplatform app template and SwiftUI to write a single app that runs on every Apple platform.
Version
Since Mac Catalyst was announced, Apple has been paving the way to let iOS developers bring their apps to the Mac. Expansions to SwiftUI — Apple’s simple, declarative approach to building user interfaces — now let you use it to build an entire app. These expansions, along with the multiplatform app template that’s new in Xcode 12, let you use one code base to build apps for every Apple platform.
In this tutorial, you’ll learn about:
- Xcode 12’s multiplatform app template
- The
Appprotocol - How the
App,Scenes andViews fit together - The way the same code adapts to each platform
- How to make a custom UI for each platform while reusing views
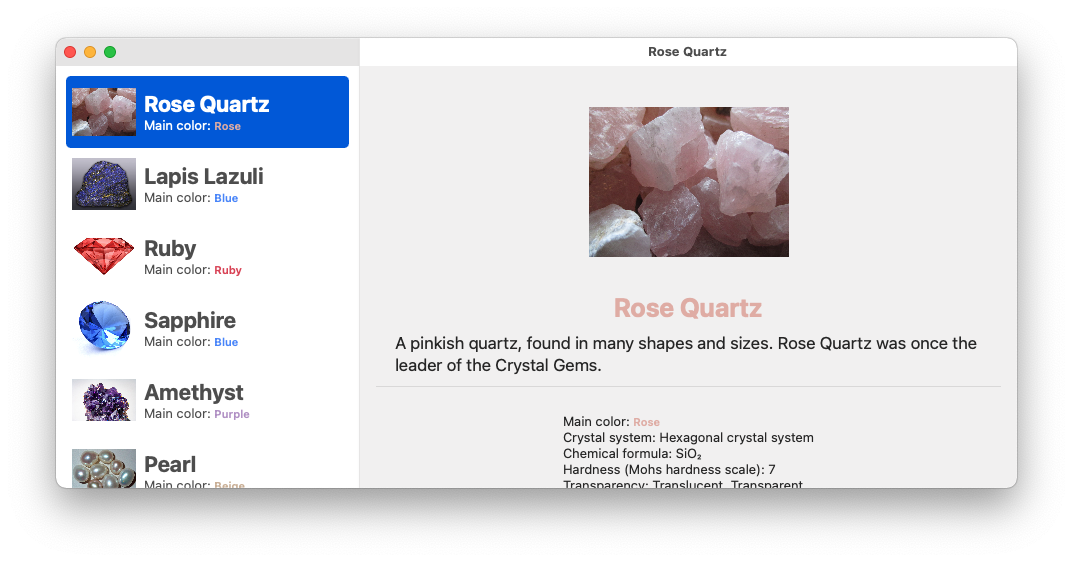
You’ll learn all of this by adding new features to RayGem — an app that displays information about different gemstones — for iOS, iPadOS and macOS.
Getting Started
Download the project materials by clicking the Download Materials button at the top or bottom of the tutorial. Open RayGem.xcodeproj inside the starter folder. Build and run.

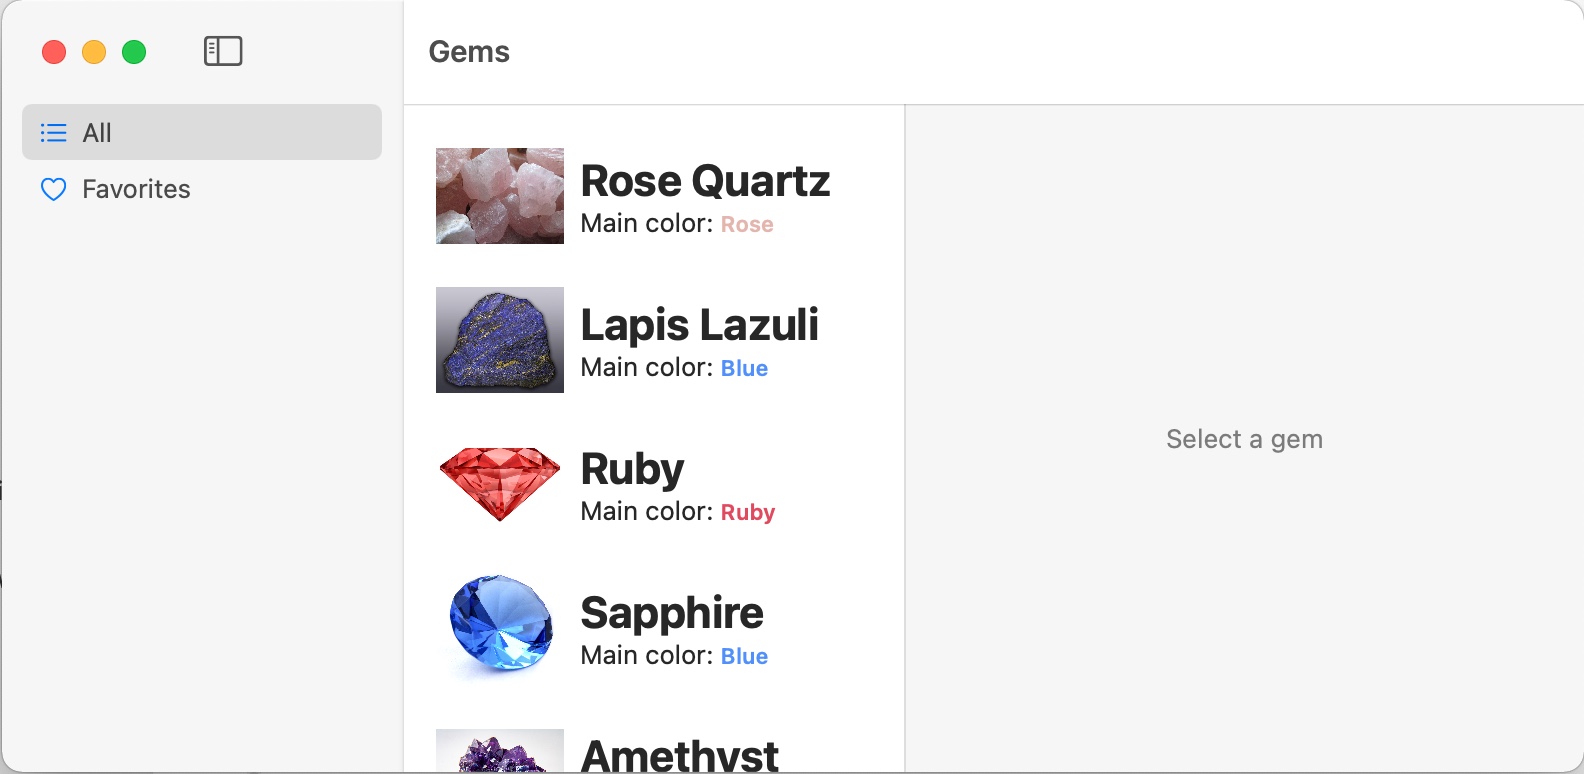
RayGem is a simple multiplatform app that lists a collection of gems, which are precious or semiprecious stones. Users can read interesting facts about them and save their favorites.
You can already scroll and tap gems to read facts about each one. The app has the code to fetch and save favorite gems from Core Data, but it can neither save nor list favorites yet. You’ll add this feature during this tutorial.
Open the different views inside the starter project to become familiar with the app. The main view of the app is in GemList.swift, showing a list of rows found in GemRow.swift that are fetched from a Core Data store. By tapping a row, you navigate to a details view located in DetailsView.swift.
Considering the Project Structure
Before you start making any changes, take a look at the starter project. Notice how the groups are different than those in your usual iOS starter project.

When creating a new project, Xcode 12 has a new section called Multiplatform. In it, you’ll find the new template for multiplatform apps. The starter project for this tutorial was built using this template.

This template creates three groups:
- iOS: iOS-specific code
- macOS: macOS-specific code
- Shared: code for both platforms, including models, business logic and reusable views
SwiftUI lets you share UI code between platforms, and it automatically adapts the UI depending on the device. You can create views that are reusable on each platform, but some behaviors are better suited for certain platforms. As such, having a group for each platform allows you to write specific code for each while still reusing a lot of code.
Understanding the New App and Scene Protocol
Open AppMain.swift inside the Shared group.
@main
struct AppMain: App {
  let persistenceController = PersistenceController.shared

  var body: some Scene {
    WindowGroup {
      ContentView()
        .environment(
           \.managedObjectContext,
           persistenceController.container.viewContext)
    }
  }
}
In iOS 14, Apple introduced the new App protocol, which handles the app lifecycle and replaces the old AppDelegate.swift and SceneDelegate.swift.
Much like the View protocol, the App protocol requires you to implement a body by returning a Scene. The body will be the root view of your app. Usually, you’ll return a WindowGroup, a special type of Scene made to be a container for your app’s view hierarchy. SwiftUI and WindowGroup together take care of presenting your app differently on each platform. For instance, on macOS, WindowGroups will automatically have window management options in their menu bar and support gathering all of your app’s windows in tabs.
Swift 5.3 introduced the new @main attribute to indicate the entry point of an app. By adding this attribute to a struct that implements App, SwiftUI will use that struct as your app’s starting point.
Running on macOS
The app already has its basic functionality working on iOS, but how about macOS? Change the target from RayGem (iOS) to RayGem (macOS) and build and run again.
The app doesn’t feature any iOS or macOS specific code, it’s all built using plain old SwiftUI as you would build any other app. But still, you can already run your app on iOS and macOS! Isn’t that cool?
Using the new Multiplatform app template, Xcode creates two targets for your app: one for running on iOS and iPadOS and another for running on macOS. It uses these targets to run your app on each corresponding platform.
Understanding how SwiftUI Adapts to the Platform
Notice how SwiftUI adapted the UI for each platform. On iOS, it uses a navigation view with a list. When the user taps a row, it pushes the destination view of that row. On macOS, it uses a window with a side list and a content view. When the user clicks a row, the content view updates with the destination view of that row.
Now, switch the target back to RayGem (iOS) and build and run on an iPad simulator.

When the app runs on iPadOS, the list stays hidden on the left side of the view, and when the user selects a gem, the main view displays the destination view.
Polishing the macOS app
The UI already adapts to different device sizes, and even window resizing on macOS, but sometimes, you might want to add a few restrictions on some devices while keeping the behavior the same on others. Thankfully, SwiftUI includes a lot of modifiers to influence how it adapts your views to different platforms. You’ll make your app a better macOS citizen by telling SwiftUI what to do with your app.
Adding a minimum width to your list
Right now, you can resize the side list of gems on macOS and shrink it down to nothing.

This is a behavior that might confuse some users. SwiftUI gives you modifiers to handle this kind of situation without writing specific code for each platform.
Open GemList.swift, find // TODO: Add min frame here. and add this line below the comment:
.frame(minWidth: 250)
Build and run on an iPhone simulator to see the result.
This modifier adds a minimum width to the list. This might not make much sense on iOS, since a List will use the entire width of the view. However, on macOS, this modifier ensures the List keeps its width to a minimum of 250 points, while still allowing the user to resize it.
Change the target to RayGem (macOS) and build and run again. Try to resize the list.
Notice how the side list can still be resized, but it always stays wider than 250 points.
Adding a navigation title
Still in GemList.swift, notice the modifier at the bottom of the List, navigationTitle(_:). This is a new modifier, introduced on iOS 14, to configure the view’s title. On iOS and watchOS, it will use the string as the title of the navigation view. iPadOS will set the primary navigation view title and the title in the App Switcher. This is important to differentiate instances of your app. On macOS, the window title bar and Mission Control use this string as the title.
Working With Toolbars
Now, it’s time to give users the power to save their favorite gems.
Inside DetailsView.swift, add the following to the bottom of the view:
func toggleFavorite() {
  gem.favorite.toggle()
  try? viewContext.save()
}
This method toggles the favorite property on the current gem and saves the change to Core Data.
Next, find // TODO: Add favorite button here and add the following code below the comment:
// 1
.toolbar {
  // 2
  ToolbarItem {
    Button(action: toggleFavorite) {
      // 3
      Label(
        gem.favorite ? "Unfavorite" : "Favorite",
        systemImage: gem.favorite ? "heart.fill" : "heart"
      )
      .foregroundColor(.pink)
    }
  }
}
Here’s a breakdown of the code:
- iOS 14 introduced a new view modifier:
toolbar(content:). This modifier takes aToolbarItemthat represents the contents of the toolbar. - Add a
ToolbarItemwith a single button to togglefavoriteon thegem. - Next, add a
Labelas the content of the button, with the title being “Favorite” or “Unfavorite” and the image of a heart.
Build and run. Then, favorite a gem.

Now, build and run on macOS. Favorite a gem to see the result.

SwiftUI takes the ToolbarItem and places it in the expected position of each platform. On iOS, it uses the image of the Label as the button on the navigation bar, following the color scheme of the bar. On macOS, it also uses the image of the Label. However, if you resize the window and leave no space for the buttons on the toolbar, it creates a menu button with the title of the Label.
Resize the window to the minimum width possible to see this.

SwiftUI adapts the UI for each platform, finding the best way to display the button, even when you resize the window.
Understanding tab views on different platforms
Now that users can favorite their gems, it would be nice to have a way to list these favorites.
The starter project already comes with the code for this, the FavoriteGems view. This view fetches and lists all the gems with the favorite property set to true.
Open ContentView.swift and add the following enum to the top of the file:
enum NavigationItem {
  case all
  case favorites
}
This enum describes the two tabs of your app. Next, add a tab view by replacing the contents of body with the following:
// 1
TabView {
  // 2
  NavigationView {
    GemList()
  }
  .tabItem { Label("All", systemImage: "list.bullet") }
  .tag(NavigationItem.all)

  // 3
  NavigationView {
    FavoriteGems()
  }
  .tabItem { Label("Favorites", systemImage: "heart.fill") }
  .tag(NavigationItem.favorites)
}
Here’s what the code above does:
- First, create a
TabViewas the root view. - Next, add
GemListas its first view, with aLabelwith the title “All” and the image of a list bullet. - Add
FavoriteGemsas the second view, with aLabelwith the title Favorites and the image of a heart.
Build and run on iOS. Favorite some gems and open the Favorites tab to see them listed there.

Next, change the target to macOS. Build and run to see how SwiftUI adapts the UI on macOS.

Fantastic! You already have a simple app that runs on iOS and macOS! Take a moment to enjoy what you’ve accomplished so far. :]
Optimizing the User Experience for Each Platform
SwiftUI tries to adapt the UI declared in code to each platform. A TabBar on iOS has its bar at the bottom and an image and text as buttons. On macOS, it uses a bar on the top of the view with titles, a lot like a segmented view.
Even though SwiftUI handles adapting the UI on each platform, that doesn’t mean it always creates what a user expects. Instead of using a TabBar on macOS, a better layout would be a Sidebar with a list of categories. Then, a list would display each element of the selected category.

Your app already works on both platforms, but users expect an optimal experience everywhere. Thankfully, Apple added a way to create platform-specific views in multiplatform apps. This is exactly what the macOS and iOS groups in Xcode are for! You’ll update the tab bar in your app to use a sidebar layout for macOS now.
Updating the macOS UI
Create a new SwiftUI View file inside the macOS group and name it GemListViewer.swift. Select the macOS target membership only.

First, add a new property and method to the view:
@State var selection: NavigationItem? = .all

func toggleSideBar() {
  NSApp.keyWindow?.firstResponder?.tryToPerform(
    #selector(NSSplitViewController.toggleSidebar),
    with: nil)
}
This is a state variable that you’ll update with the currently selected category in the sidebar: all gems or only the favorite ones. toggleSideBar() will show or hide the sidebar when the user clicks a button; you’ll hook that up in a bit.
Next, add the following computed property to the view:
var sideBar: some View {
  List(selection: $selection) {
    NavigationLink(
      destination: GemList(),
      tag: NavigationItem.all,
      selection: $selection
    ) {
      Label("All", systemImage: "list.bullet")
    }
    .tag(NavigationItem.all)
    NavigationLink(
      destination: FavoriteGems(),
      tag: NavigationItem.favorites,
      selection: $selection
    ) {
      Label("Favorites", systemImage: "heart")
    }
    .tag(NavigationItem.favorites)
  }
  // 3
  .frame(minWidth: 200)
  .listStyle(SidebarListStyle())
  .toolbar {
    // 4
    ToolbarItem {
      Button(action: toggleSideBar) {
        Label("Toggle Sidebar", systemImage: "sidebar.left")
      }
    }
  }
}
You create a sidebar view that contains a List with two NavigationLinks — one for GemList and one for FavoriteGems. By using SidebarListStyle you tell SwiftUI to display this List as a sidebar for users to select which category they want to see. You also create a ToolbarItem inside the toolbar with a button to toggle the sidebar. It’s expected behavior in macOS apps to have the ability to hide and show the sidebar.
Next, replace the contents of body with the following:
NavigationView {
  sideBar
  Text("Select a category")
    .foregroundColor(.secondary)
  Text("Select a gem")
    .foregroundColor(.secondary)
}
This shows your sidebar together with some text.
Finally, replace the content of previews with the following:
GemListViewer()
  .environment(
    \.managedObjectContext,
    PersistenceController.preview.container.viewContext)
You’re done with your macOS UI, but you can’t see it just yet. First, you’ll move on to the iOS UI.
Updating the iOS UI
Create another SwiftUI View in the iOS group and name it GemListViewer.swift. This time, make sure to only select the iOS target.

Replace the contents of the view’s body with the following:
// 1
TabView {
  // 2
  NavigationView {
    GemList()
      .listStyle(InsetGroupedListStyle())
  }
  .tabItem { Label("All", systemImage: "list.bullet") }
  .tag(NavigationItem.all)
  // 3
  NavigationView {
    FavoriteGems()
      .listStyle(InsetGroupedListStyle())
  }
  .tabItem { Label("Favorites", systemImage: "heart.fill") }
  .tag(NavigationItem.favorites)
}
Here’s what’s happening in the code above:
- Declare the
TabViewas the root view, but this time, only for iOS. - Add
GemListas the first view. - Next, add
FavoriteGemsas the second view.
Notice this is exactly the code you currently have in **ContentView.swift**.
Next, replace the contents of previews with the following code:
Group {
  GemListViewer()

  GemListViewer()
    .previewDevice(PreviewDevice(rawValue: "iPad Air 2"))
}
.environment(
  \.managedObjectContext,
  PersistenceController.preview.container.viewContext)
You set up a preview that will use an iPhone layout by default and, then, add a second preview with an iPad Air 2 layout specified.
Finally, open ContentView.swift once again and replace all of the contents of body with the following single line of code:
GemListViewer()
Build and run the iOS target.

Now, build and run the macOS target.
ContentView is a shared view between both platforms. However, your project has two GemListViewers, but one is included only in the macOS target, and the other is included only in the iOS target. With this kind of setup, your app uses the correct GemListViewer for each platform. This opens the possibility of reusing the core views of your application on each platform, but also allows for custom behavior and UIs on each. Having different versions of the same view for each platform allows you to access platform-specific APIs and features like the iOS InsetGroupedListStyle or the macOS sidebar toggle.
Understanding Independent Scenes and View States
SwiftUI already bundles a lot of multiplatform app functionality. Using WindowGroup, you can add support for multiple instances of the app on iPadOS and multiple windows on macOS. It even adds the common keyboard shortcut for opening new windows on macOS, Command-N.
Build and run on macOS. Select a gem and then open a new window with File ▸ New Window. Or, use the keyboard shortcut Command-N.
Notice that using one window doesn’t affect the other’s state. The old window keeps its state, showing the gem you selected. Meanwhile, the new window behaves as a new instance of the app, independent of the original one.
Each scene handles the state of the app and updates its views, but it doesn’t directly influence another scene.
Another common feature SwiftUI brings to macOS is the ability to merge all windows into tabs. Go to Window ▸ Merge All Windows.
Each tab behaves as a different scene with its own state.
Adding Extra Functionality for macOS
A common feature of most macOS apps is the Preferences… menu command. Users will expect to be able to change a setting by going to RayGem ▸ Preferences or using the Command-, shortcut.
You’ll add a simple settings view to the macOS version for users to see useful information about the app like the version number and a button to clear their favorite gems.
Creating the Preferences View
Create a new SwiftUI View file inside the Views group. Name it SettingsView.swift and select the macOS target. Start by adding a couple of methods and a property to the view:
// 1
@State var showAlert = false
// 2
var appVersion: String {
  Bundle.main.infoDictionary?["CFBundleShortVersionString"] as? String ?? ""
}
// 3
func showClearAlert() {
  showAlert.toggle()
}
// 4
func clearFavorites() {
  let viewContext = PersistenceController.shared.container.viewContext
  let gemEntity = Gem.entity()
  let batchUpdateRequest = NSBatchUpdateRequest(entity: gemEntity)
  batchUpdateRequest.propertiesToUpdate = ["favorite": false]

  do {
    try viewContext.execute(batchUpdateRequest)
  } catch {
    print("Handle Error: \(error.localizedDescription)")
  }
}
Here’s what each of these methods and properties does:
- First, declare a
@Stateproperty,showAlert, for showing an alert when users try to clear their favorite gems. - Next, declare the
appVersionproperty, which retrieves this fromCFBundleShortVersionStringin the app bundle. - Create a method that shows the alert when the user clicks Clear Favorites.
- Finally, declare the method to clear the favorite gems from Core Data.
Next, replace the content of body with the following code:
ScrollView {
  VStack {
    Text("Settings")
      .font(.largeTitle)
      .frame(maxWidth: .infinity, alignment: .leading)
      .padding()
    Image("rw-logo")
      .resizable()
      .aspectRatio(contentMode: .fill)
      .frame(width: 400, height: 400)
    Text("RayGem")
      .font(.largeTitle)
    Text("Gem Version: \(appVersion)")
    Section {
      Button(action: showClearAlert) {
        Label("Clear Favorites", systemImage: "trash")
      }
    }
  }
  .frame(width: 600, height: 600)
  .alert(isPresented: $showAlert) {
    Alert(
      title: Text("Are you sure?")
        .font(.title)
        .foregroundColor(.red),
      message: Text("This action cannot be undone."),
      primaryButton: .cancel(),
      secondaryButton: .destructive(
        Text("Clear"),
        action: clearFavorites))
  }
}
Here you create the view’s body with a title, app icon, app name and a Clear Favorites button. You’ll also present an alert when users try to clear their favorite gems, saving them from accidentally deleting all of their favorites.
Next, open AppMain.swift and find the comment // TODO: Add Settings view here. Add this code below the comment:
// 1
#if os(macOS)
// 2
Settings {
  // 3
  SettingsView()
}
#endif
Here’s what this does:
- Test whether the current platform is
macOSusing the#if ospreprocessor directive. This ensures this code only compiles for the macOS version of the app. You can add these checks anywhere in your app to add platform-specific code. Other values you can check includeiOS,tvOSandwatchOS. - Create a second scene of the
Settingstype. - Add the
SettingsViewto that scene.
Build and run. Open the Preferences view by using the keyboard shortcut Command-,. Scroll down and press Clear Favorites.
Your macOS app now has a separate platform-specific preferences window!
Adding a Keyboard Shortcut
Another cool feature on macOS and iPadOS is that of keyboard shortcuts for executing actions. Instead of opening Preferences, scrolling down and clicking the button to clear their favorites, users can use a keyboard shortcut.
Create a new Swift file in the Model group and select both targets. Name it GemCommands.swift and add the following code to the file:
import SwiftUI
import CoreData

// 1
struct GemCommands: Commands {
  var body: some Commands {
    // 2
    CommandMenu("Gems") {
      Button(action: clearFavorites) {
        Label("Clear Favorites", systemImage: "trash")
      }
      // 3
      .keyboardShortcut("C", modifiers: [.command, .shift])
    }
  }

  // 4
  func clearFavorites() {
    let viewContext = PersistenceController.shared.container.viewContext
    let batchUpdateRequest = NSBatchUpdateRequest(entity: Gem.entity())
    batchUpdateRequest.propertiesToUpdate = ["favorite": false]
    do {
      try viewContext.execute(batchUpdateRequest)
    } catch {
      print("Handle Error: \(error.localizedDescription)")
    }
  }
}
Here’s what the code does:
- Define a new type that conforms to the
Commandsprotocol. Like theViewprotocol, this protocol requires you to implement abodyproperty of some commands. - Use
CommandMenuto define a menu on the status bar. Inside theCommandMenu, you define a button to clear favorites. - Add a modifier to the button to add a keyboard shortcut to perform that action.
keyboardShortcut(_:modifiers:)takes two parameters: aStringfor the keyboard shortcut and anOptionSetofEventModifiersto combine to trigger this shortcut. - Define the method to clear the favorites.
Go back to AppMain.swift and add the following code under WindowGroup:
.commands { GemCommands() }
This modifier adds commands to the scene. On macOS, it adds the commands to the status bar.
Build and run on macOS. Favorite some gems and clear them by using the keyboard shortcut Command-Shift-C.
Great work!
Where to Go From Here?
Download the final project by clicking the Download Materials button at the top or bottom of the tutorial.
In this tutorial, you learned how SwiftUI makes it easier to create a multiplatform app that runs on iOS, iPadOS and macOS. Not only that, but you learned how to reuse views on both platforms and create custom behaviors and UIs for each, all in the same project.
Apple’s promise to create a framework that works on all its platforms doesn’t end here. Using this project, you can create watchOS and tvOS versions of the app while sharing the same code base.
To dive deeper into the expansion of SwiftUI and how Apps, Scenes and Views fit together, start by watching App essentials in SwiftUI from WWDC 2020. This session links to several related videos if you want to keep exploring.
We hope you enjoyed this tutorial. If you have any questions or comments, please join the forum discussion below!
raywenderlich.com Weekly
The raywenderlich.com newsletter is the easiest way to stay up-to-date on everything you need to know as a mobile developer.
Get a weekly digest of our tutorials and courses, and receive a free in-depth email course as a bonus!
Recommend
About Joyk
Aggregate valuable and interesting links.
Joyk means Joy of geeK