

Spring Boot集成 Sentinel 实现接口流量控制 - InfoQ 写作平台
source link: https://xie.infoq.cn/article/f026552e0ccd71f3d9279b518
Go to the source link to view the article. You can view the picture content, updated content and better typesetting reading experience. If the link is broken, please click the button below to view the snapshot at that time.
Spring Boot 集成 Sentinel 实现接口流量控制
Hello,大家好,我是麦洛,今天带大家来了解一下 SpringBoot 如何继承 Sentinel 来实现接口流量控制
Sentinel 控制台搭建
在我的上一篇文章阿里出品的 Sentinel 到底是个什么玩意?中,已经介绍过如何准备 Sentinel 控制台,大家可以直接参考;
Sentinel 客户端
首先我们来创建一个测试项目,这里初始化项目的url建议大家填写阿里云的地址,会有惊喜😅
http://start.aliyun.com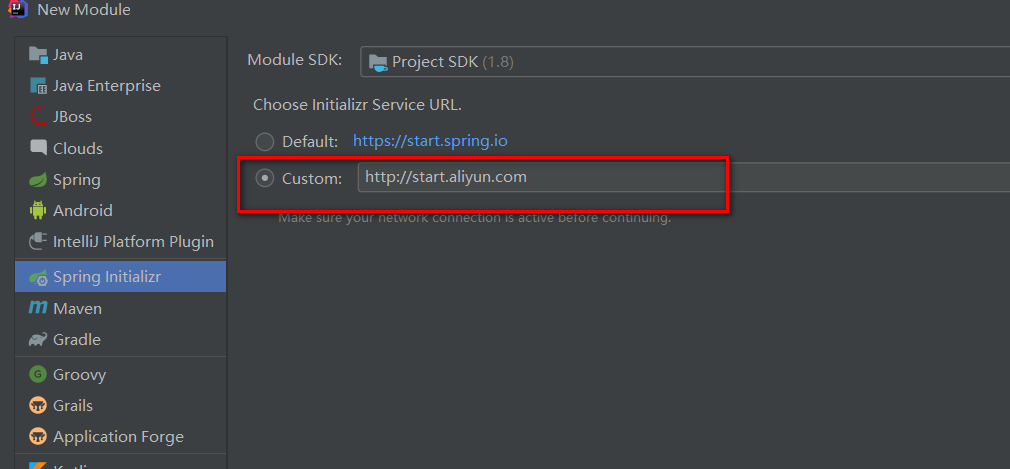
接下来就是常规操作,一路 next,在下图的位置稍微注意一下
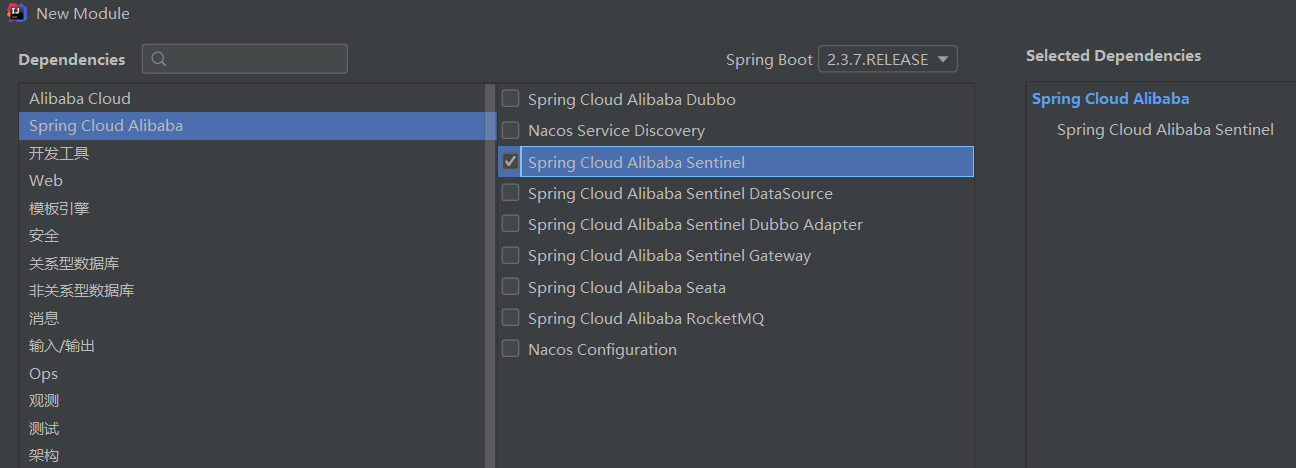
同大家以前创建项目一样,只需要在这里勾选 Sentinel 就可以啦🚀
项目创建好以后,我们发现 pom 文件中引入了下面的依赖
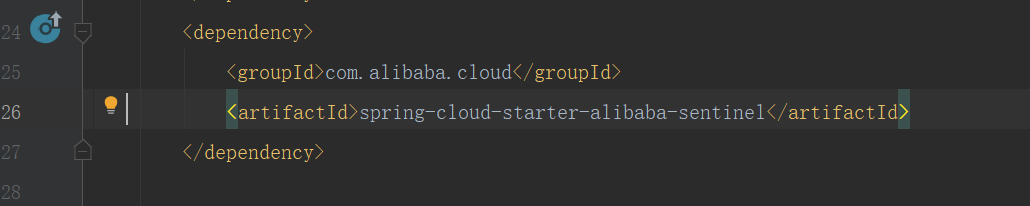
有的小伙伴看网上博客,也会有下面的方式,指定版本号
<!-- sentinel --><dependency><groupId>com.alibaba.cloud</groupId><artifactId>spring-cloud-starter-alibaba-sentinel</artifactId><version>2.1.0.RELEASE</version></dependency>
如果你使用我推荐的阿里云的 Url,会发现 Sentinel 的版本号都定义父工程,Cloud 的各个组件的兼容性就不要大家操心了
<dependencyManagement><dependencies><dependency><groupId>org.springframework.boot</groupId><artifactId>spring-boot-dependencies</artifactId><version>${spring-boot.version}</version><type>pom</type><scope>import</scope></dependency><dependency><groupId>com.alibaba.cloud</groupId><artifactId>spring-cloud-alibaba-dependencies</artifactId><version>${spring-cloud-alibaba.version}</version><type>pom</type><scope>import</scope></dependency></dependencies></dependencyManagement>
打开项目配置文件,会发现它已经为我们自动加好了配置,真的超级方便👏
server.port=8083# 应用名称spring.application.name=springcloud-sentinel# Sentinel 控制台地址spring.cloud.sentinel.transport.dashboard=localhost:8080# 取消Sentinel控制台懒加载# 默认情况下 Sentinel 会在客户端首次调用的时候进行初始化,开始向控制台发送心跳包# 配置 sentinel.eager=true 时,取消Sentinel控制台懒加载功能spring.cloud.sentinel.eager=true# 如果有多套网络,又无法正确获取本机IP,则需要使用下面的参数设置当前机器可被外部访问的IP地址,供admin控制台使用# spring.cloud.sentinel.transport.client-ip=# sentinel 配置spring.application.name=frmsspring.cloud.sentinel.transport.dashboard=localhost:8080spring.cloud.sentinel.transport.heartbeat-interval-ms=500
如何定义资源
编程式定义
官网提供的 demo
package com.milo.sentinel;import com.alibaba.csp.sentinel.Entry;import com.alibaba.csp.sentinel.SphU;import com.alibaba.csp.sentinel.slots.block.BlockException;import com.alibaba.csp.sentinel.slots.block.RuleConstant;import com.alibaba.csp.sentinel.slots.block.flow.FlowRule;import com.alibaba.csp.sentinel.slots.block.flow.FlowRuleManager;import org.springframework.boot.SpringApplication;import org.springframework.boot.autoconfigure.SpringBootApplication;import java.util.ArrayList;import java.util.List;/*** 项目入口* @author Milo Lee* @date 2021-3-20 19:07**/@SpringBootApplicationpublic class SentinelApplication {public static void main(String[] args) {SpringApplication.run(SentinelApplication.class, args);// 配置规则.initFlowRules();while (true) {// 1.5.0 版本开始可以直接利用 try-with-resources 特性try (Entry entry = SphU.entry("HelloWorld")) {// 被保护的逻辑Thread.sleep(300);System.out.println("hello world");} catch (BlockException | InterruptedException ex) {// 处理被流控的逻辑System.out.println("blocked!");}}}private static void initFlowRules(){List<FlowRule> rules = new ArrayList<>();FlowRule rule = new FlowRule();rule.setResource("HelloWorld");rule.setGrade(RuleConstant.FLOW_GRADE_QPS);// Set limit QPS to 20.rule.setCount(20);rules.add(rule);FlowRuleManager.loadRules(rules);}}
注解式定义
@SpringBootApplicationpublic class Application {public static void main(String[] args) {SpringApplication.run(ServiceApplication.class, args);}}@Servicepublic class TestService {@SentinelResource(value = "sayHello")public String sayHello(String name) {return "Hello, " + name;}}@RestControllerpublic class TestController {@Autowiredprivate TestService service;@GetMapping(value = "/hello/{name}")public String apiHello(@PathVariable String name) {return service.sayHello(name);}}
@SentinelResource 注解用来标识资源是否被限流、降级。上述例子上该注解的属性 sayHello 表示资源名。
启动控制台
java -Dserver.port=8080 -Dcsp.sentinel.dashboard.server=localhost:8080 -Dproject.name=sentinel-dashboard -jar sentinel-dashboard-1.8.1.jar
控制台操作介绍
控制台的操作我们用编程式定义的例子来演示,大家启动我们的服务
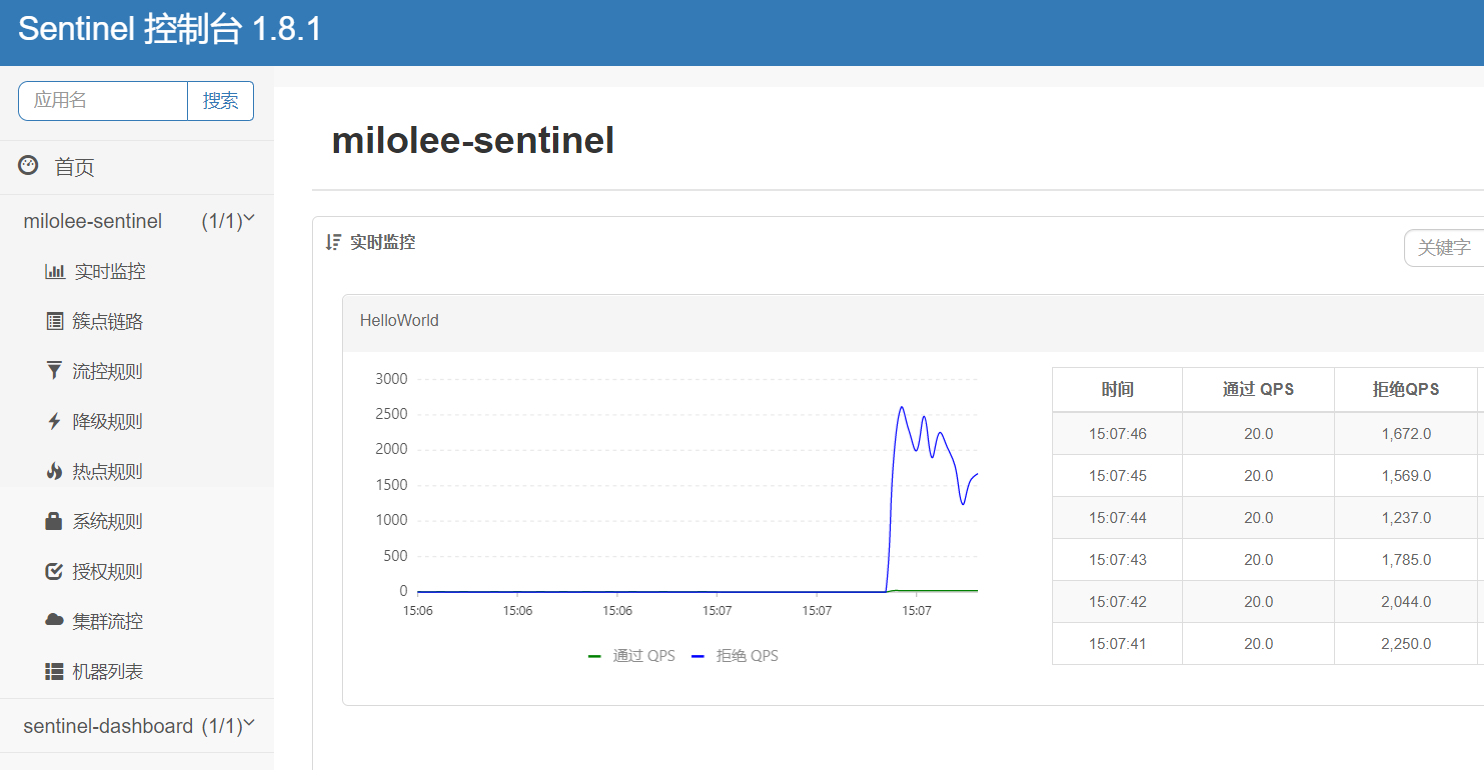
我们会发现除了 sentinel-dashboard 之外,多了一个 milolee-sentinel,这个就是我们的服务,它的名称其实对应我们配置文件定义的应用名称:
# 应用名称spring.application.name=milolee-sentinel
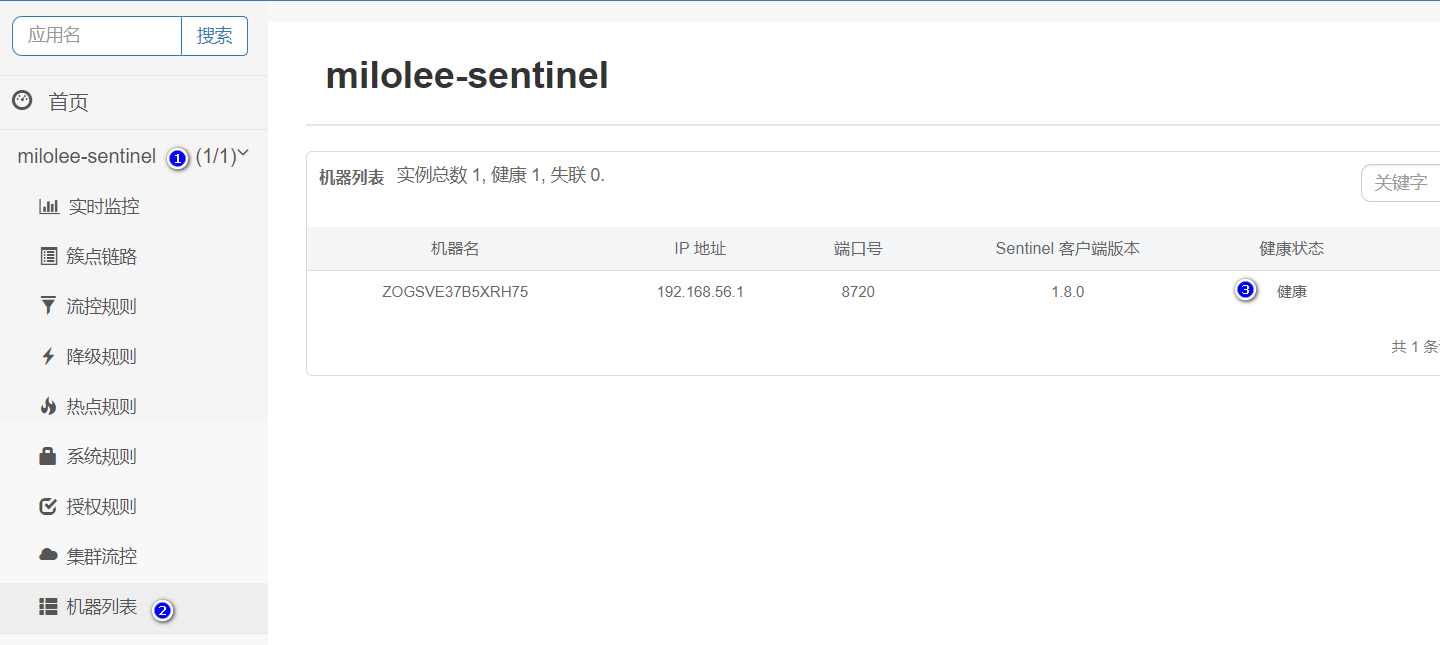
点击机器列表,这这里如果能发现你的机器,那就是成功上线了
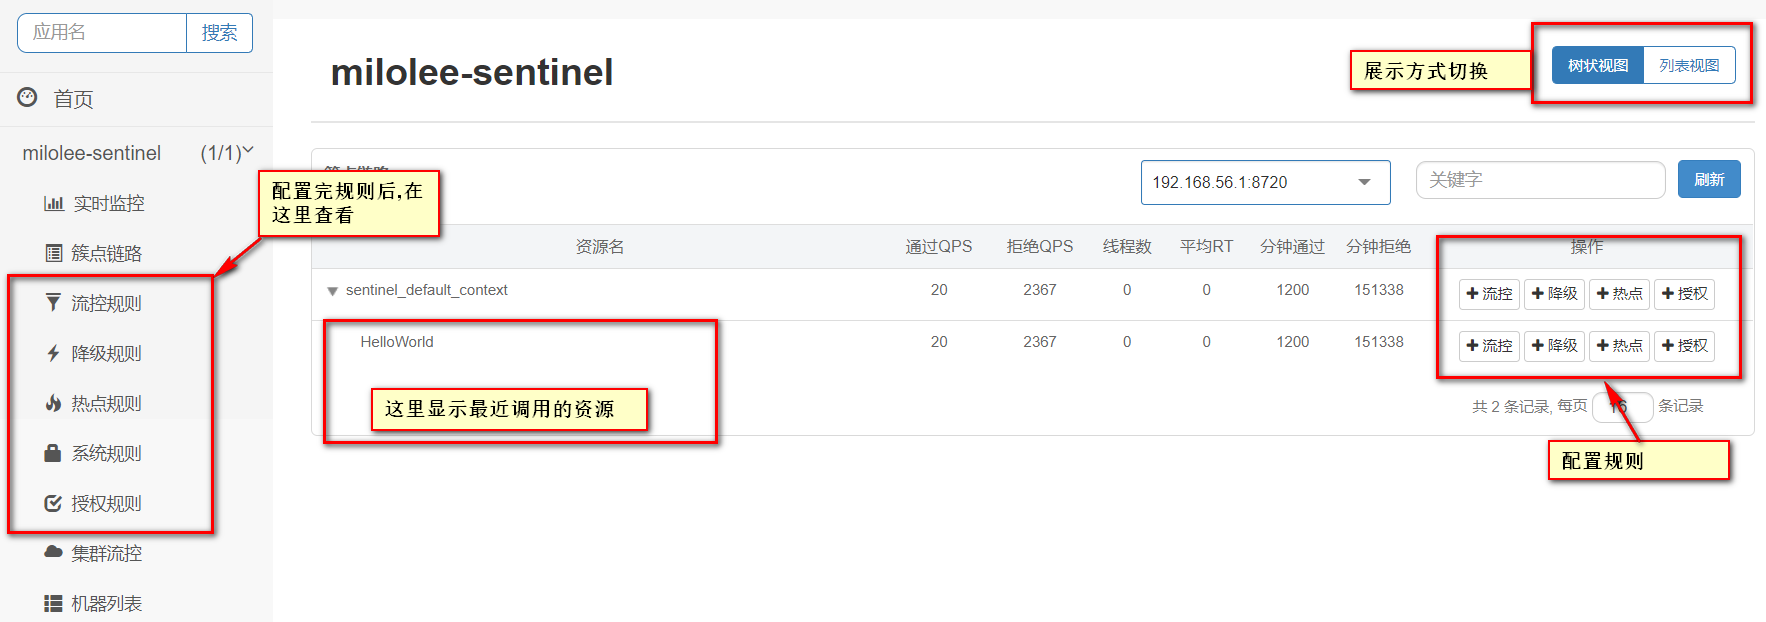
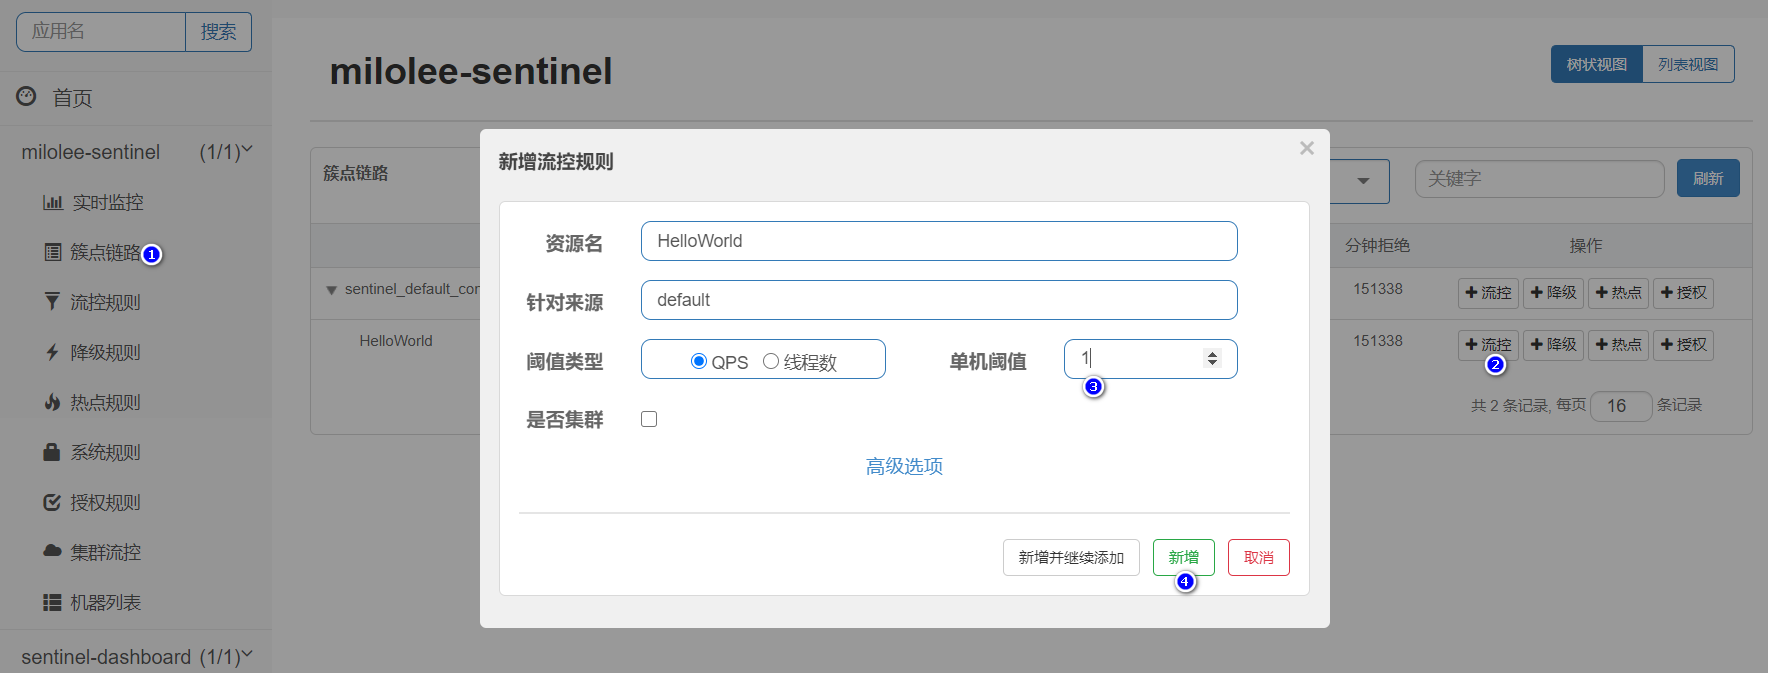
流控规则配置
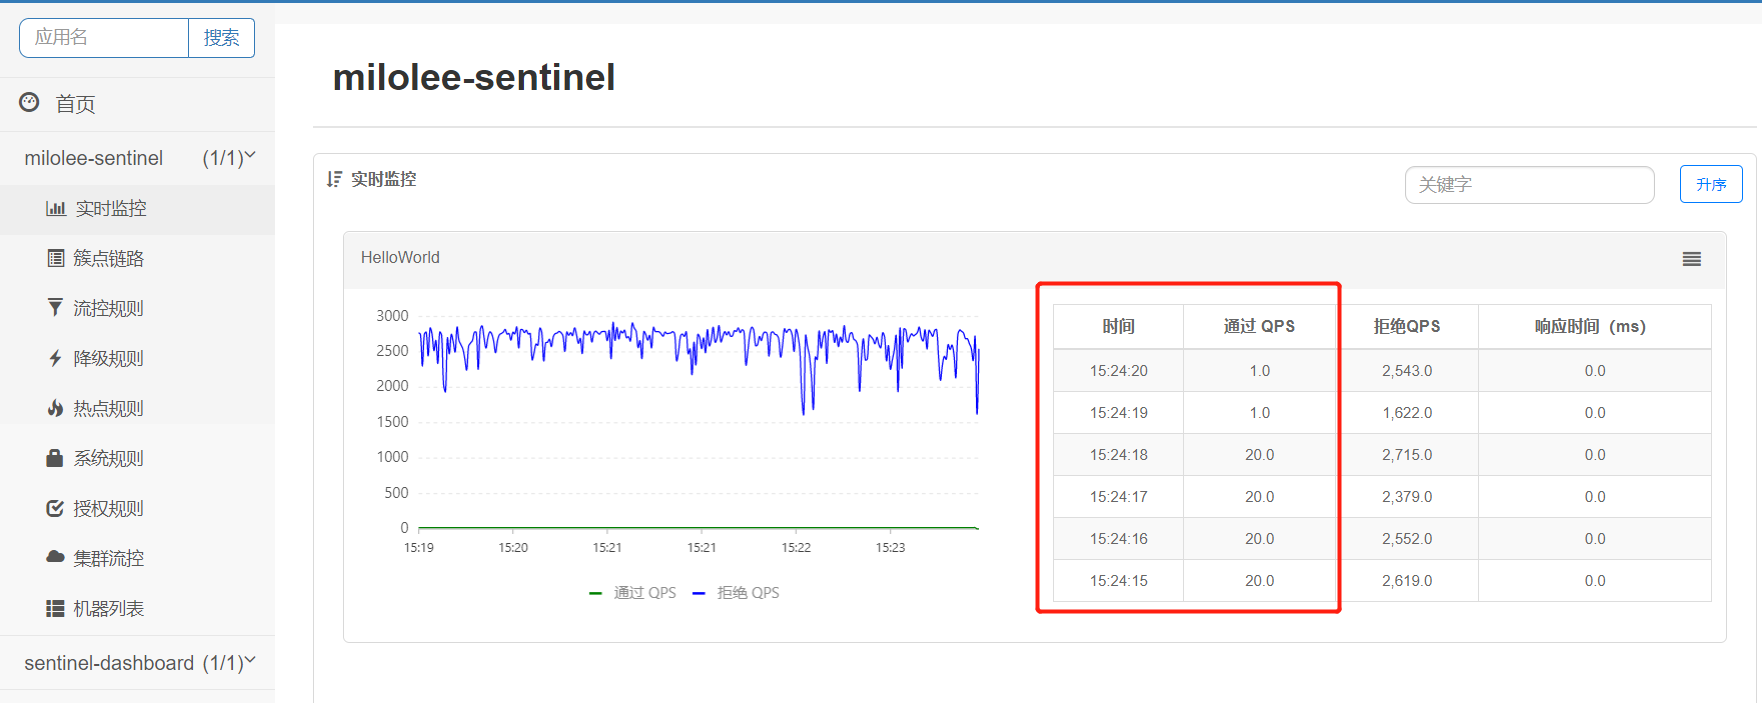
给我们的资源HelloWorld配置流控规则,它的QPS(每秒请求数)为 1,如图:
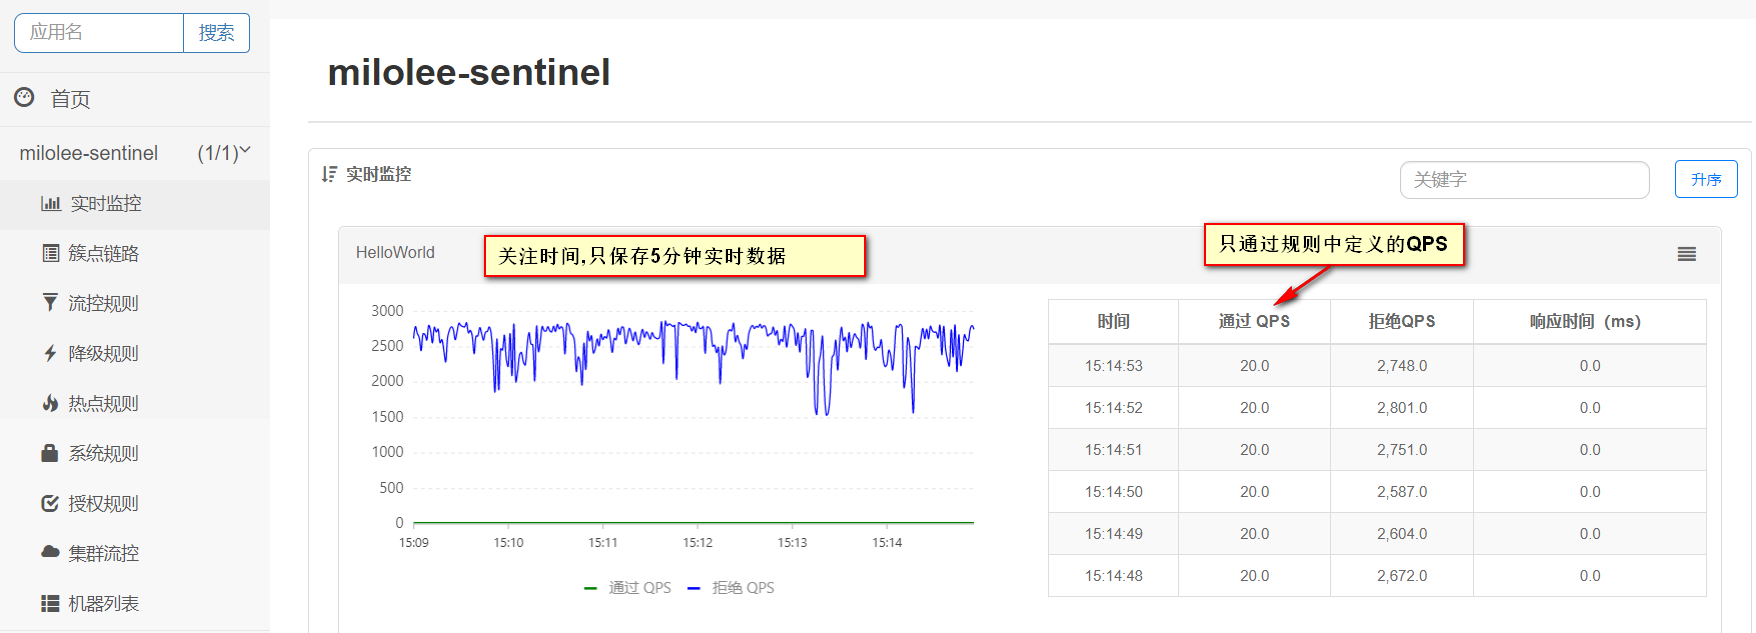
通过查看实时监控,我们发现已经生效
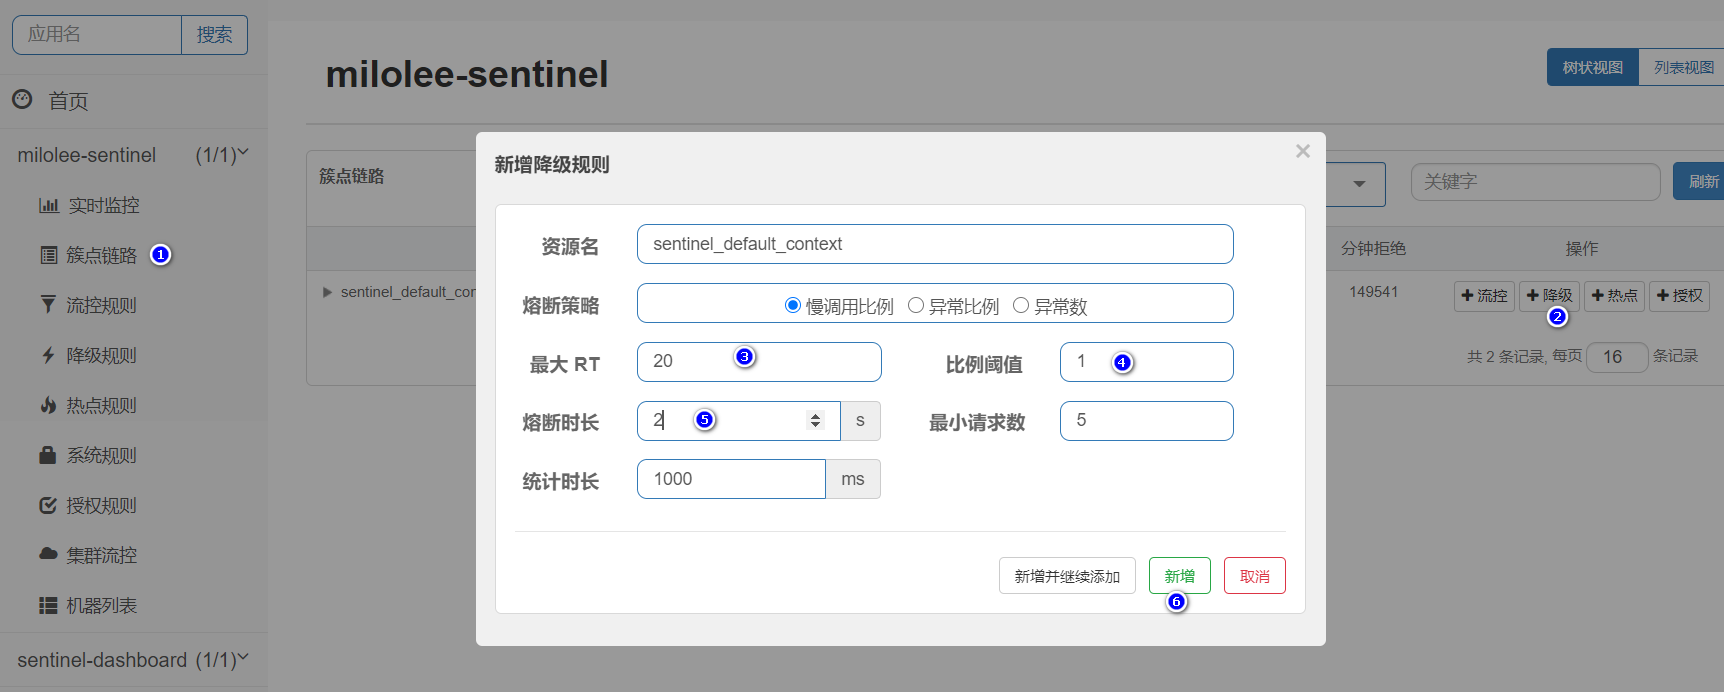
降级规则配置
给我们的资源HelloWorld添加一个降级规则配置,如果QPS大于 1,且平均响应时间大于20ms,则接口下来接口在 2 秒钟无法访问,之后自动恢复。
目前这些规则仅在内存态生效,应用重启之后,该规则会丢失。后续文章我们会继续学习动态规则
关于控制台的使用,大家可以参考官方文档,比较详细https://sentinelguard.io/zh-cn/docs/dashboard.html
版权声明: 本文为 InfoQ 作者【麦洛】的原创文章。
原文链接:【https://xie.infoq.cn/article/f026552e0ccd71f3d9279b518】。
本文遵守【CC-BY 4.0】协议,转载请保留原文出处及本版权声明。

麦洛
与其等待未来,不如创造未来 2020.04.10 加入
非科班程序员
Recommend
About Joyk
Aggregate valuable and interesting links.
Joyk means Joy of geeK