

How to resize a SwiftUI Image and keep its aspect ratio
source link: https://sarunw.com/posts/how-to-resize-swiftui-image-and-keep-aspect-ratio/
Go to the source link to view the article. You can view the picture content, updated content and better typesetting reading experience. If the link is broken, please click the button below to view the snapshot at that time.

How to resize a SwiftUI Image and keep its aspect ratio
Table of Contents
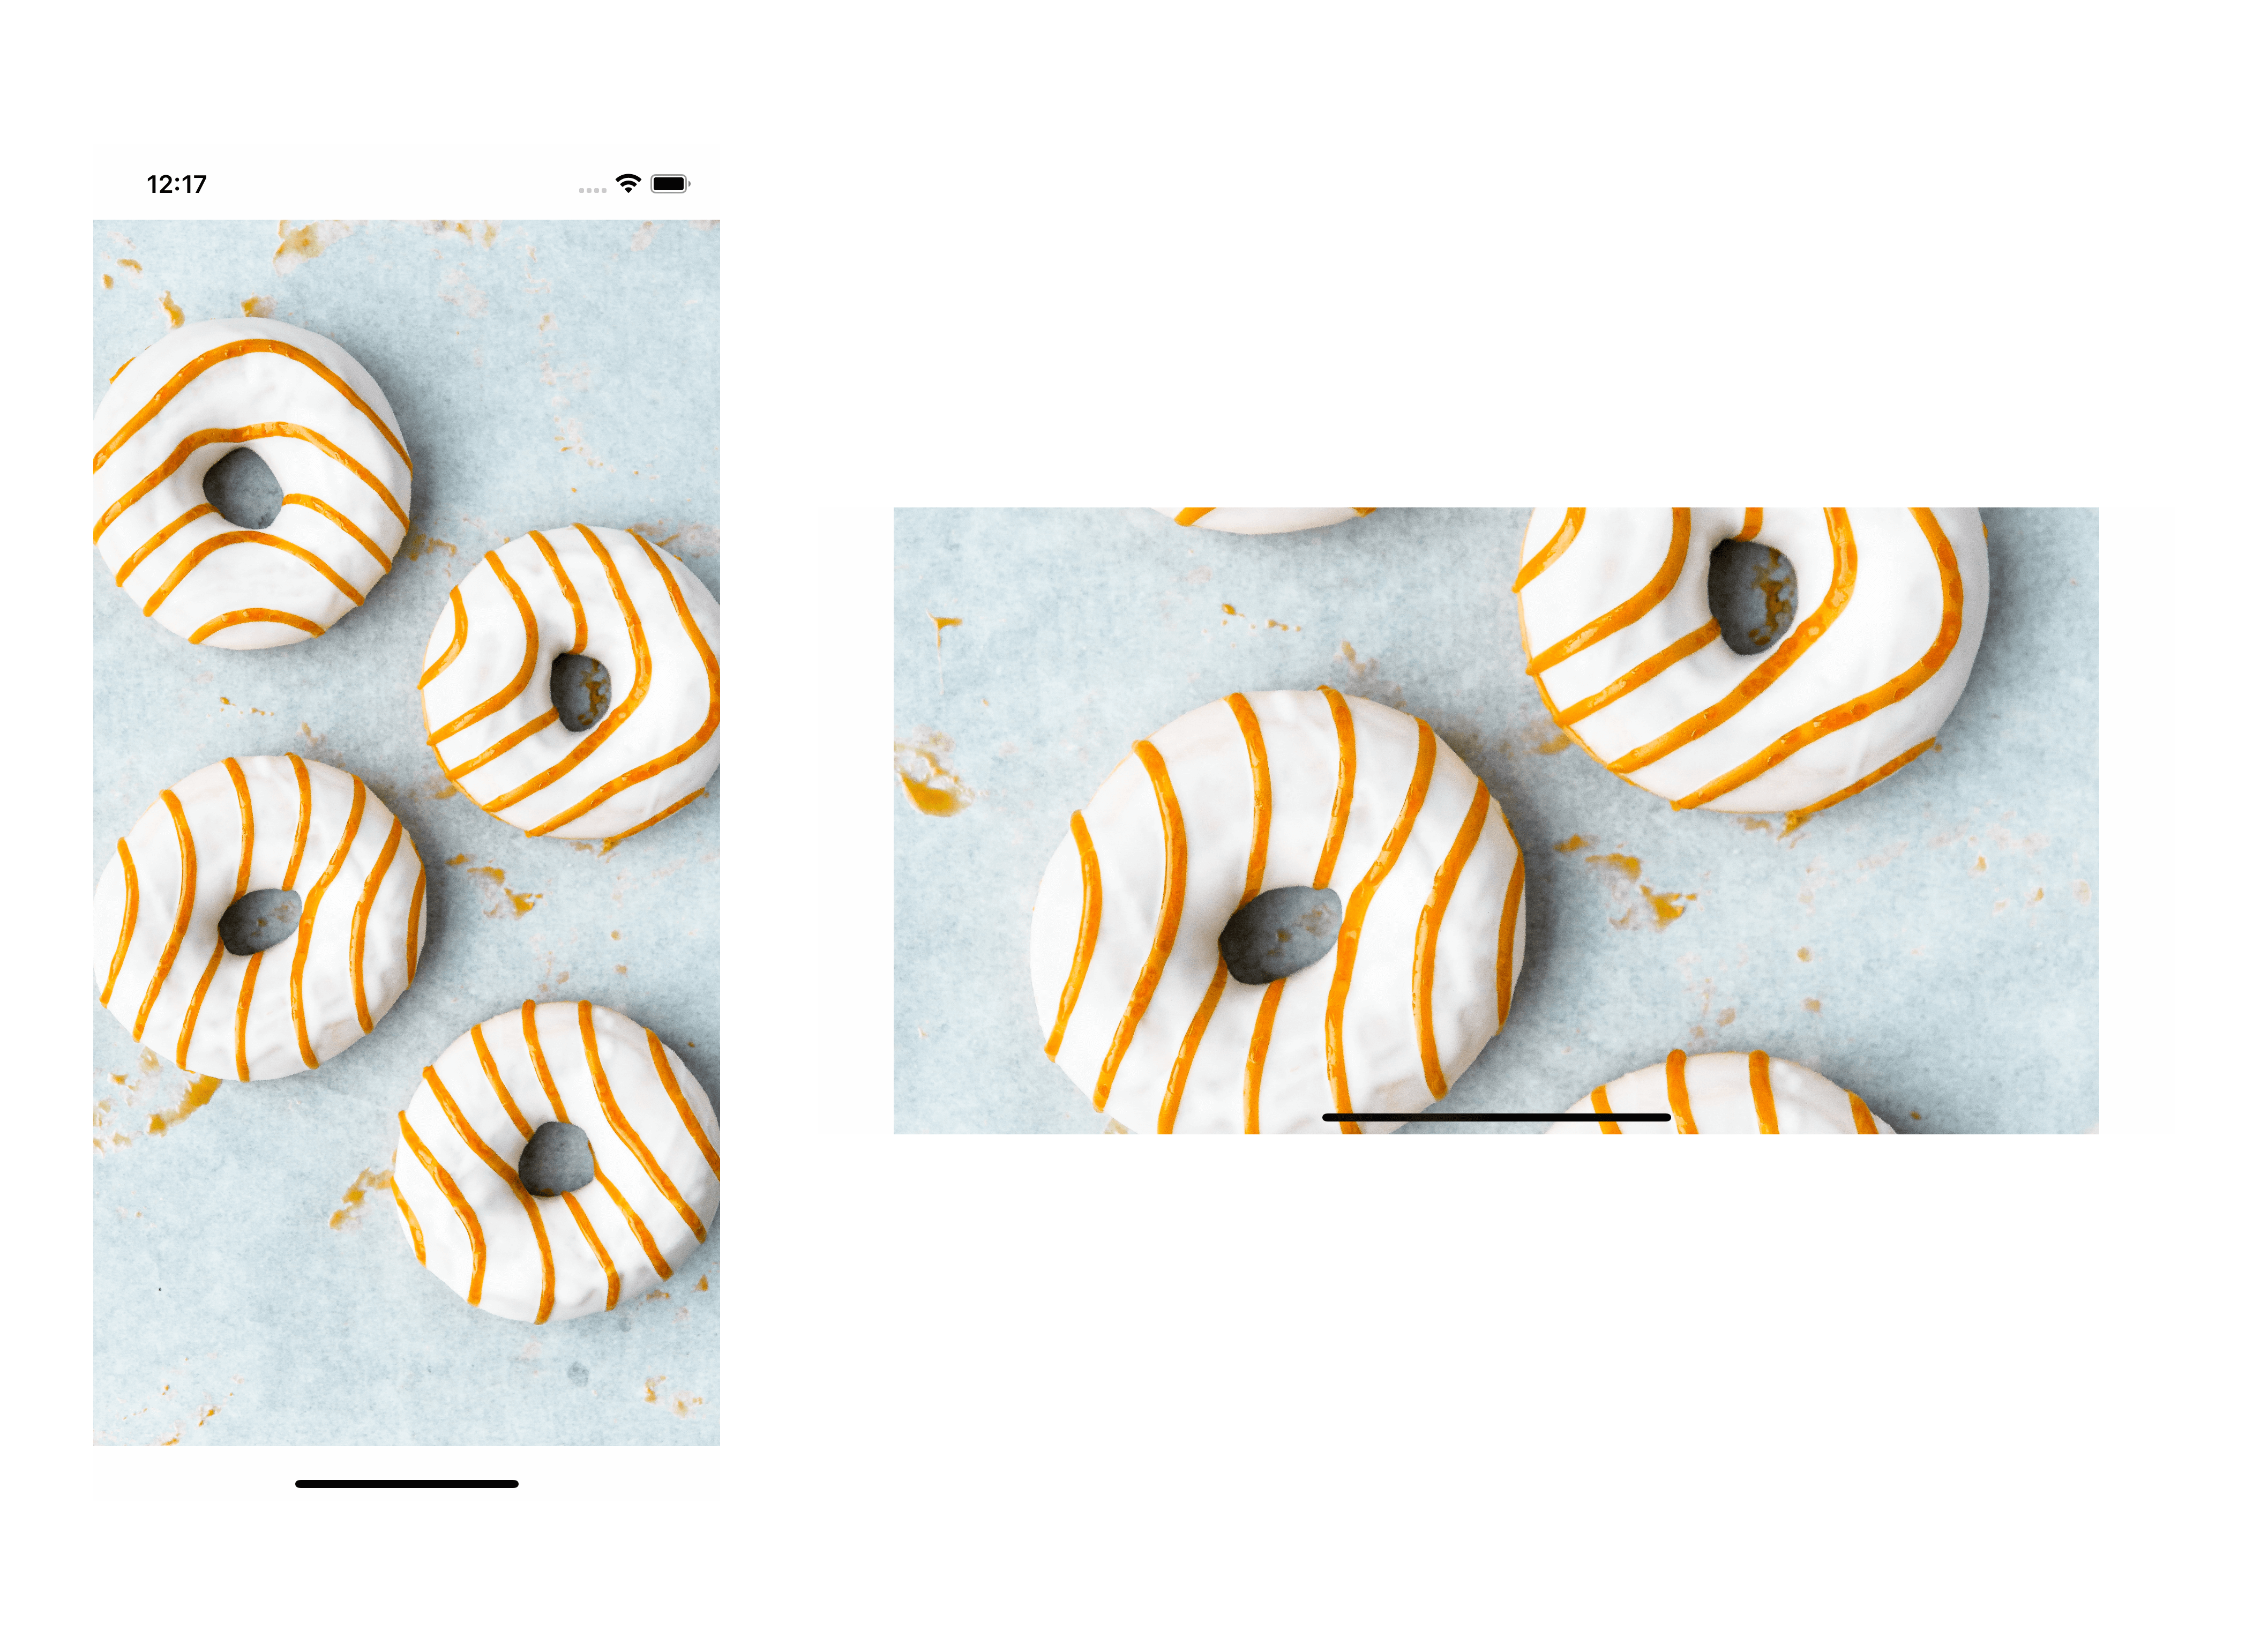
By default, SwiftUI's Image views automatically size themselves to their image contents. If the image is larger than the device screen, it will go beyond it.
struct ContentView: View {
    var body: some View {
        Image("donuts")
    }
}
The image will render at its actual size, which is larger than the device, so you will only see a portion of it.[1]
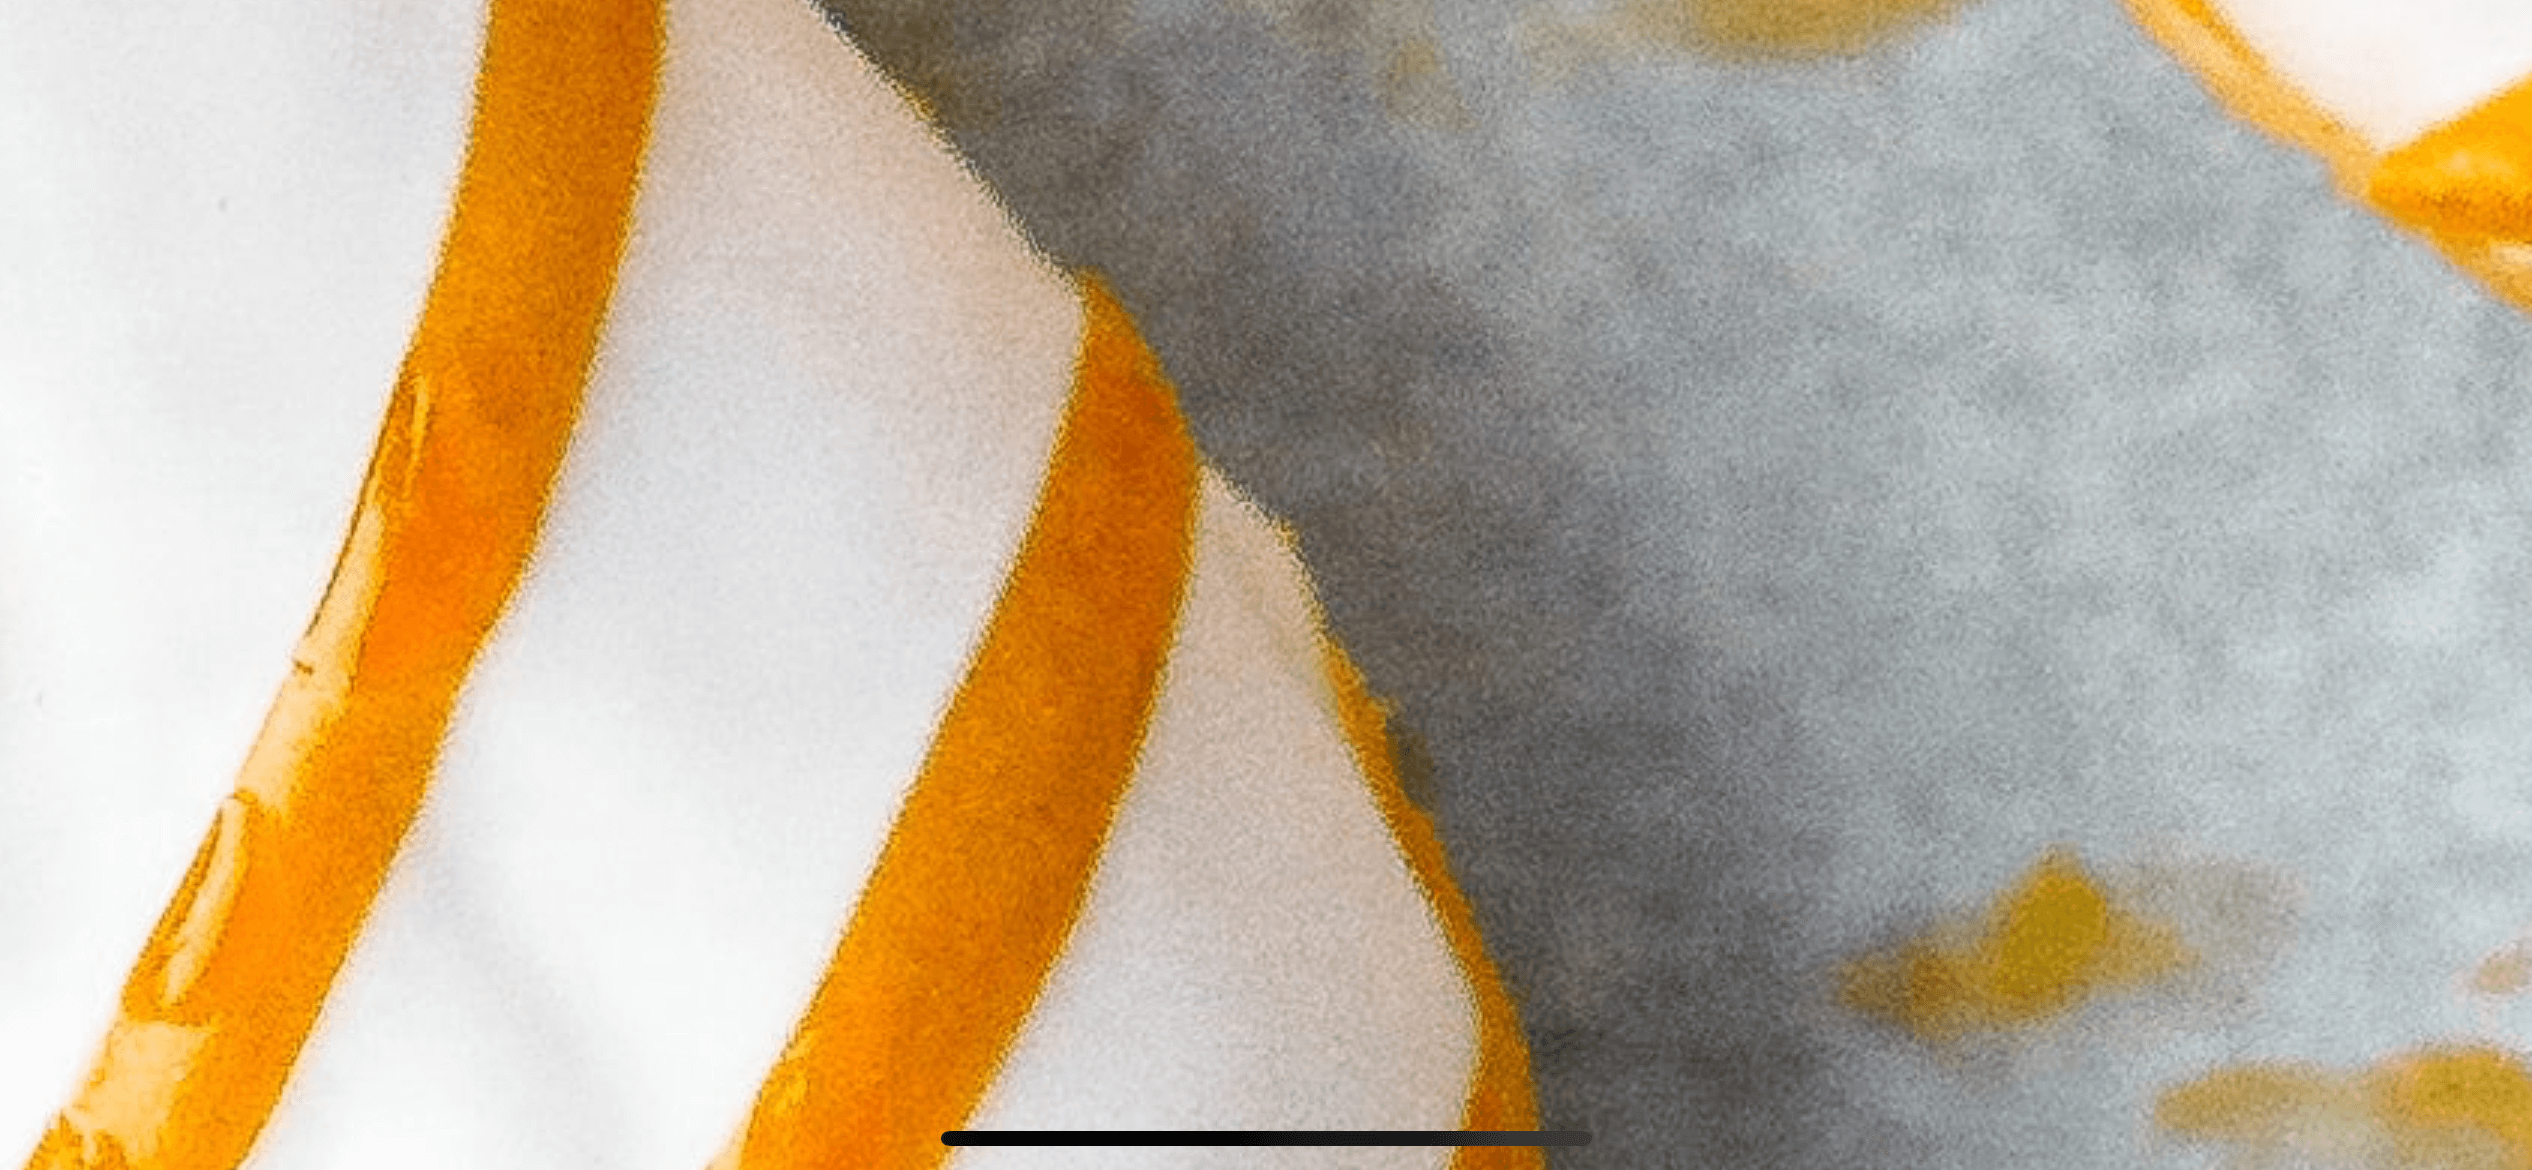 The actual size of the image is 4016x6016 which is larger than the device 844x390 (landscape).
Resizable
To make an image scales to fit the current view, we use the resizable() modifier, which resizes an image to fit available space.
struct ContentView: View {
    var body: some View {
        Image("donuts")
            .resizable()
    }
}
We can see the whole image now, but it got stretched out and losing its aspect ratio, which is usually not the behavior we want.
 The image view resize to fit available space.
Aspect ratio
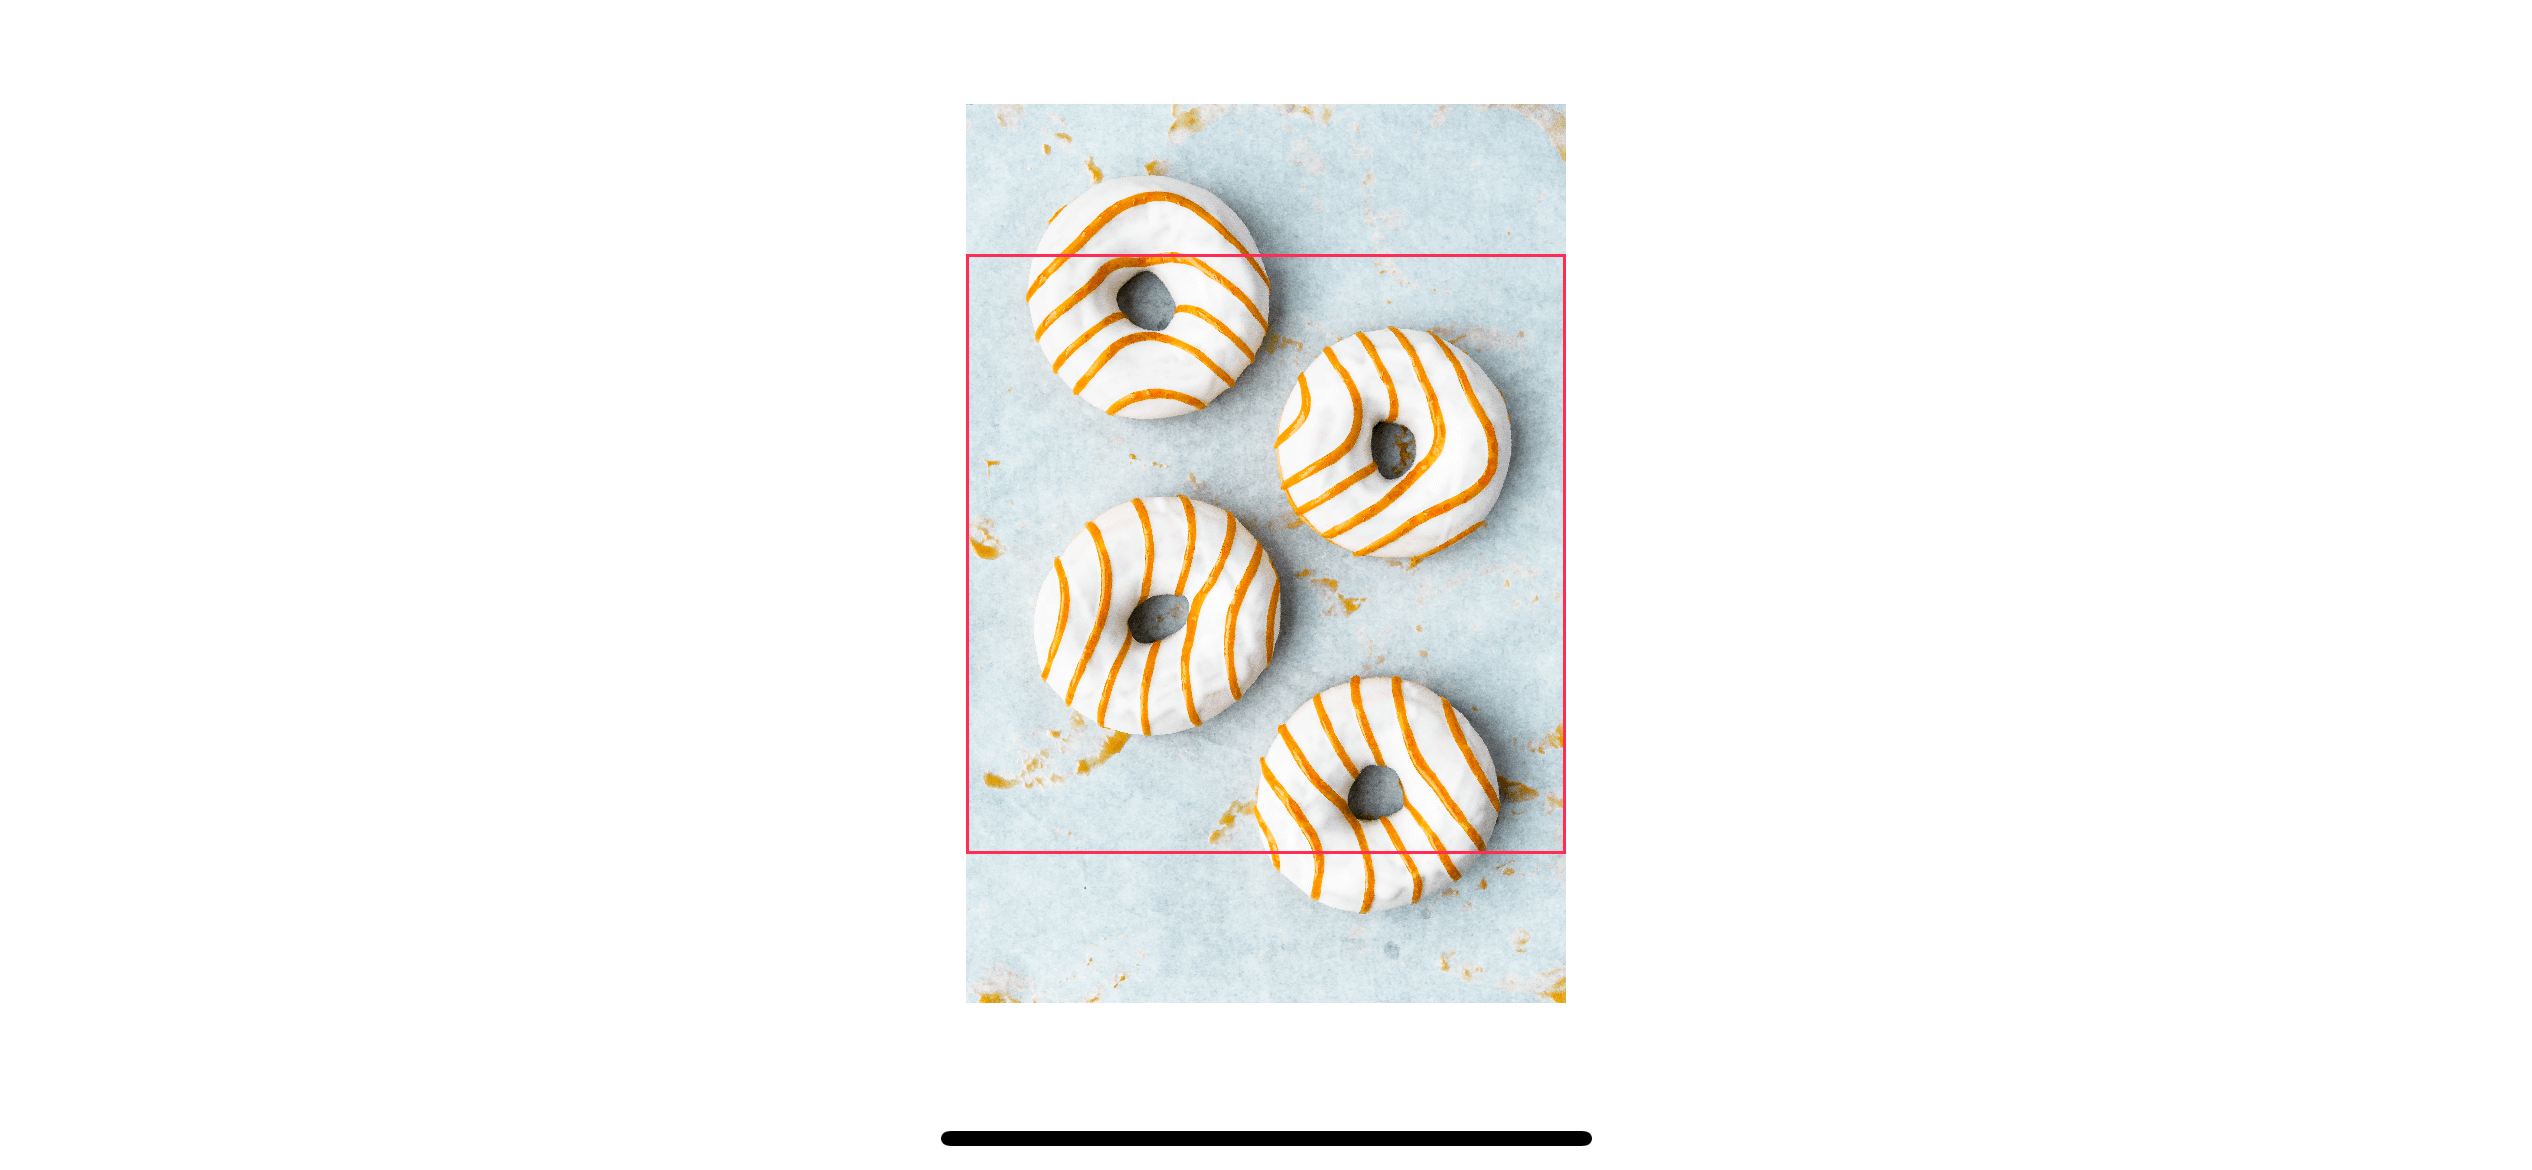
We use .aspectRatio(_:contentMode:) modifier to constraints the view dimensions. The method accept one of two strategies of ContentMode, fit and fill.
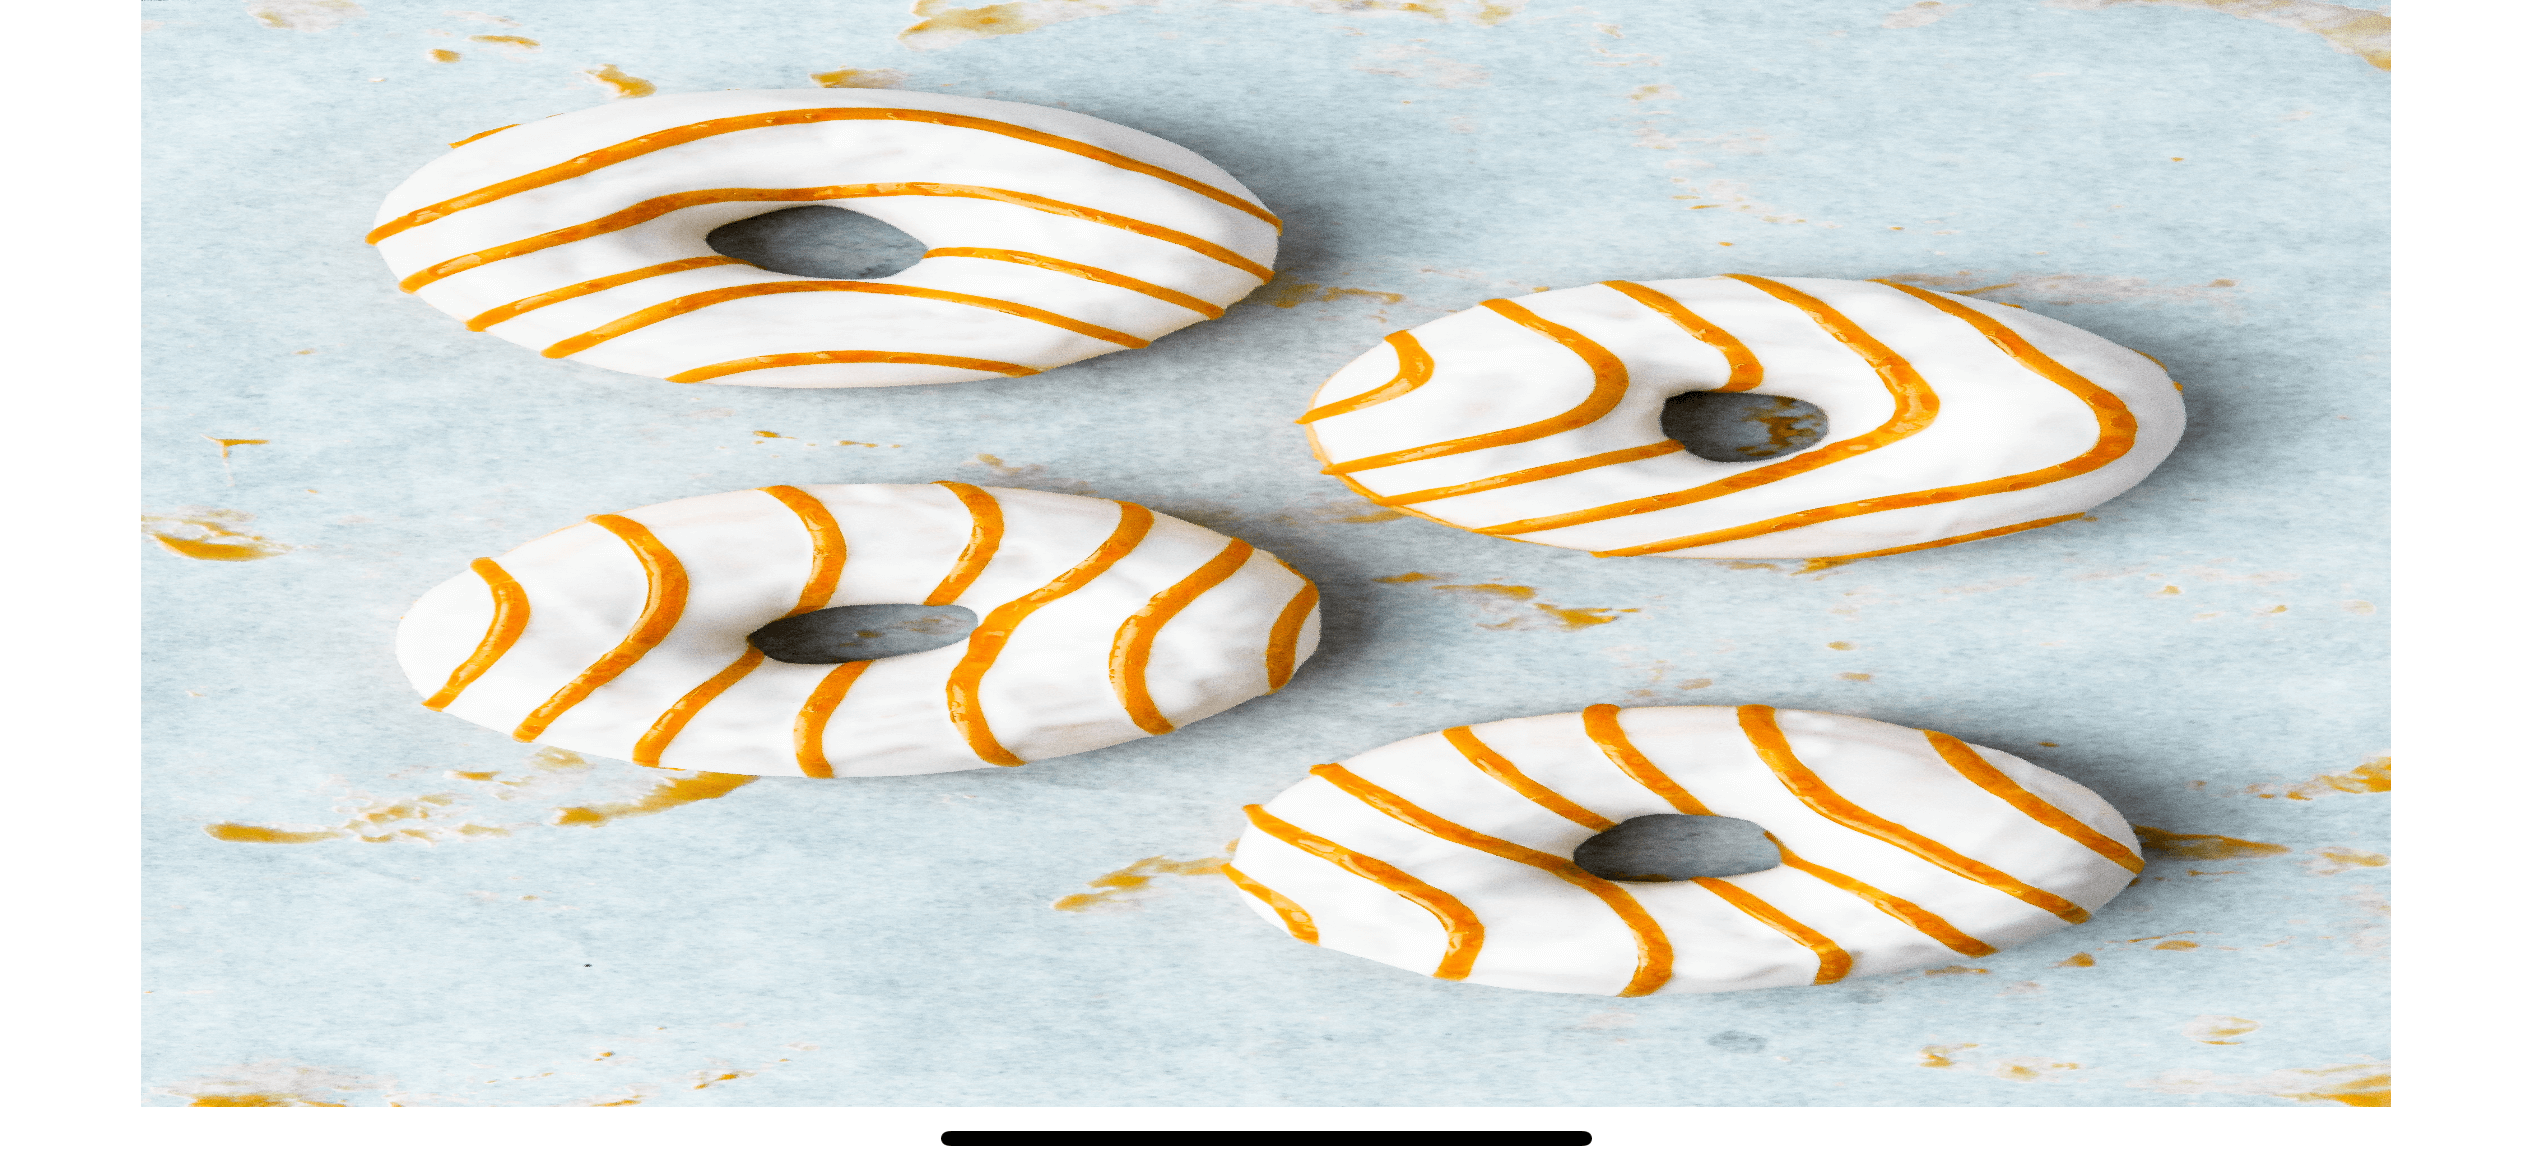
Fit content mode attempts to show the whole image by scales the image to fit the view size along one axis, possibly leaving empty space along the other axis. The result would guarantee that the whole image is shown.
struct ContentView: View {
    var body: some View {
        Image("donuts")
            .resizable()
            .aspectRatio(contentMode: .fit)
    }
}
Aspect fit.
You can also scaledToFit() which produce the same effect as .aspectRatio(contentMode: .fit).
struct ContentView: View {
    var body: some View {
        Image("donuts")
            .resizable()
            .scaledToFit()
    }
}
Fill content mode attempts to fill the image to available space by scales the image to fill the entire view leaving no empty space in any axis. This leads to a potential of an image go beyond the view's bounds.
struct ContentView: View {
    var body: some View {
        Image("donuts")
            .resizable()
            .aspectRatio(contentMode: .fill)
    }
}
Aspect fill.
You can also scaledToFill() which produce the same effect as .aspectRatio(contentMode: .fill).
struct ContentView: View {
var body: some View {
Image("donuts")
.resizable()
.scaledToFill()
}
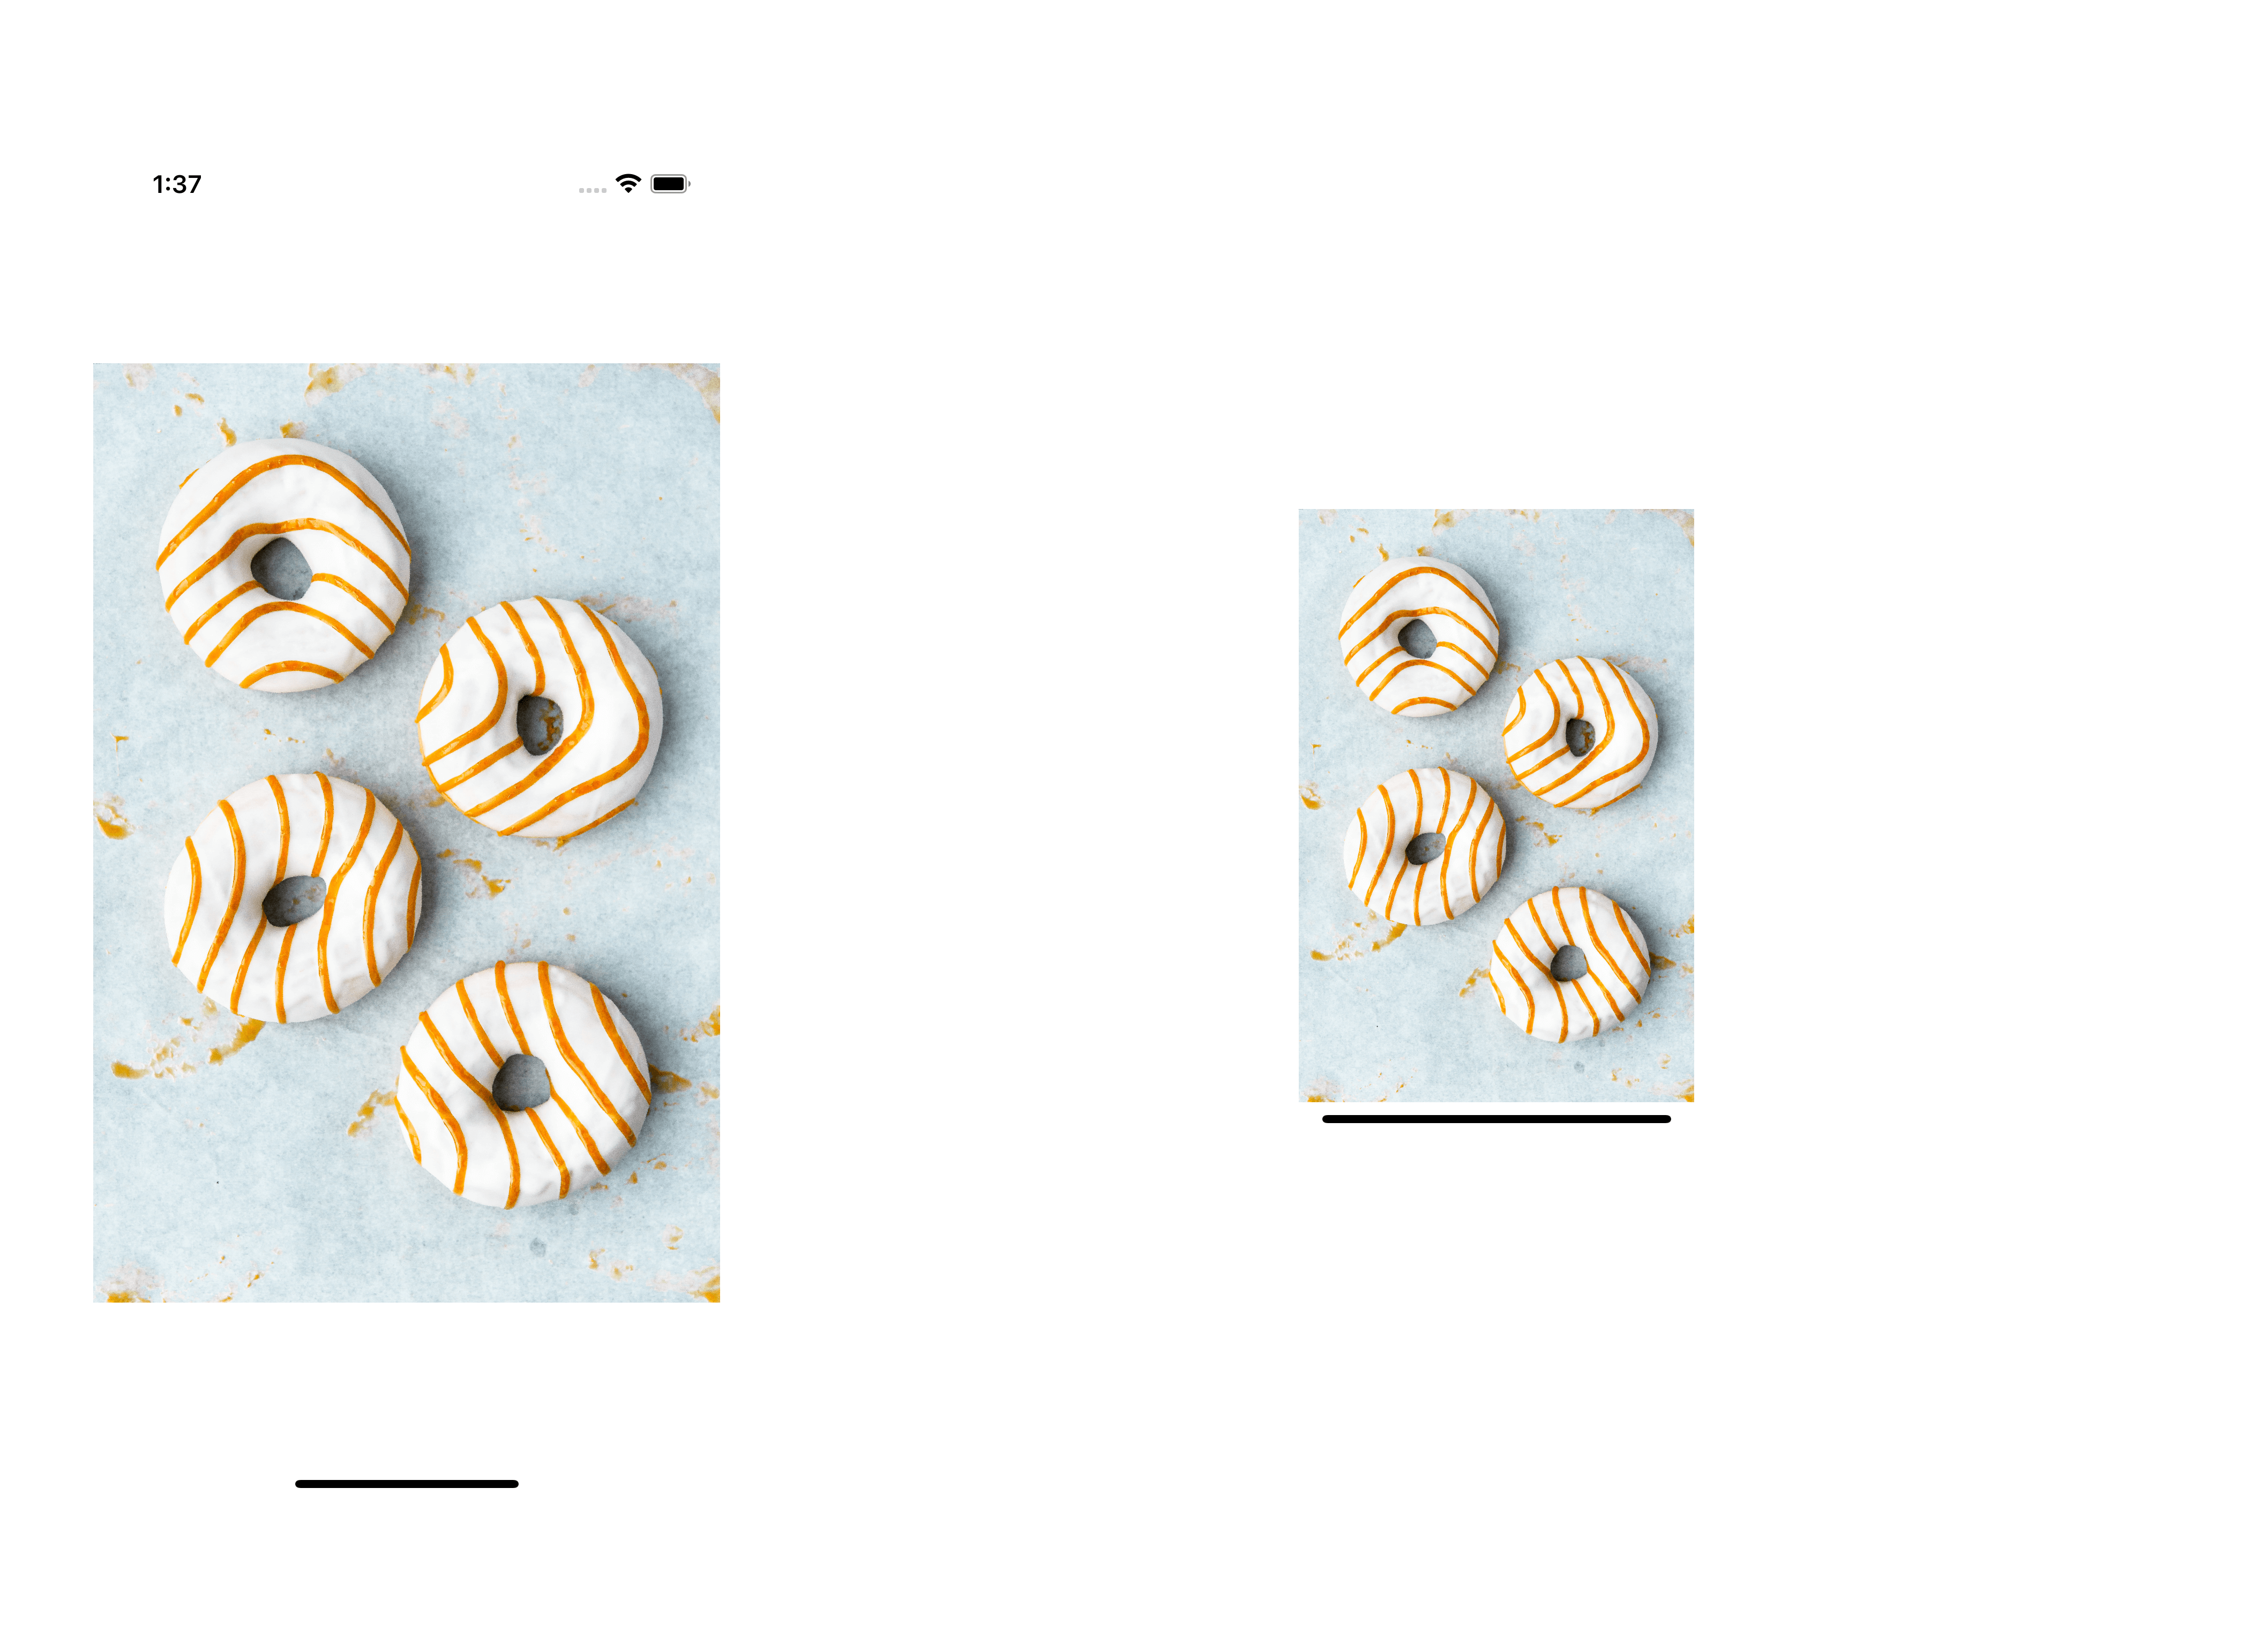
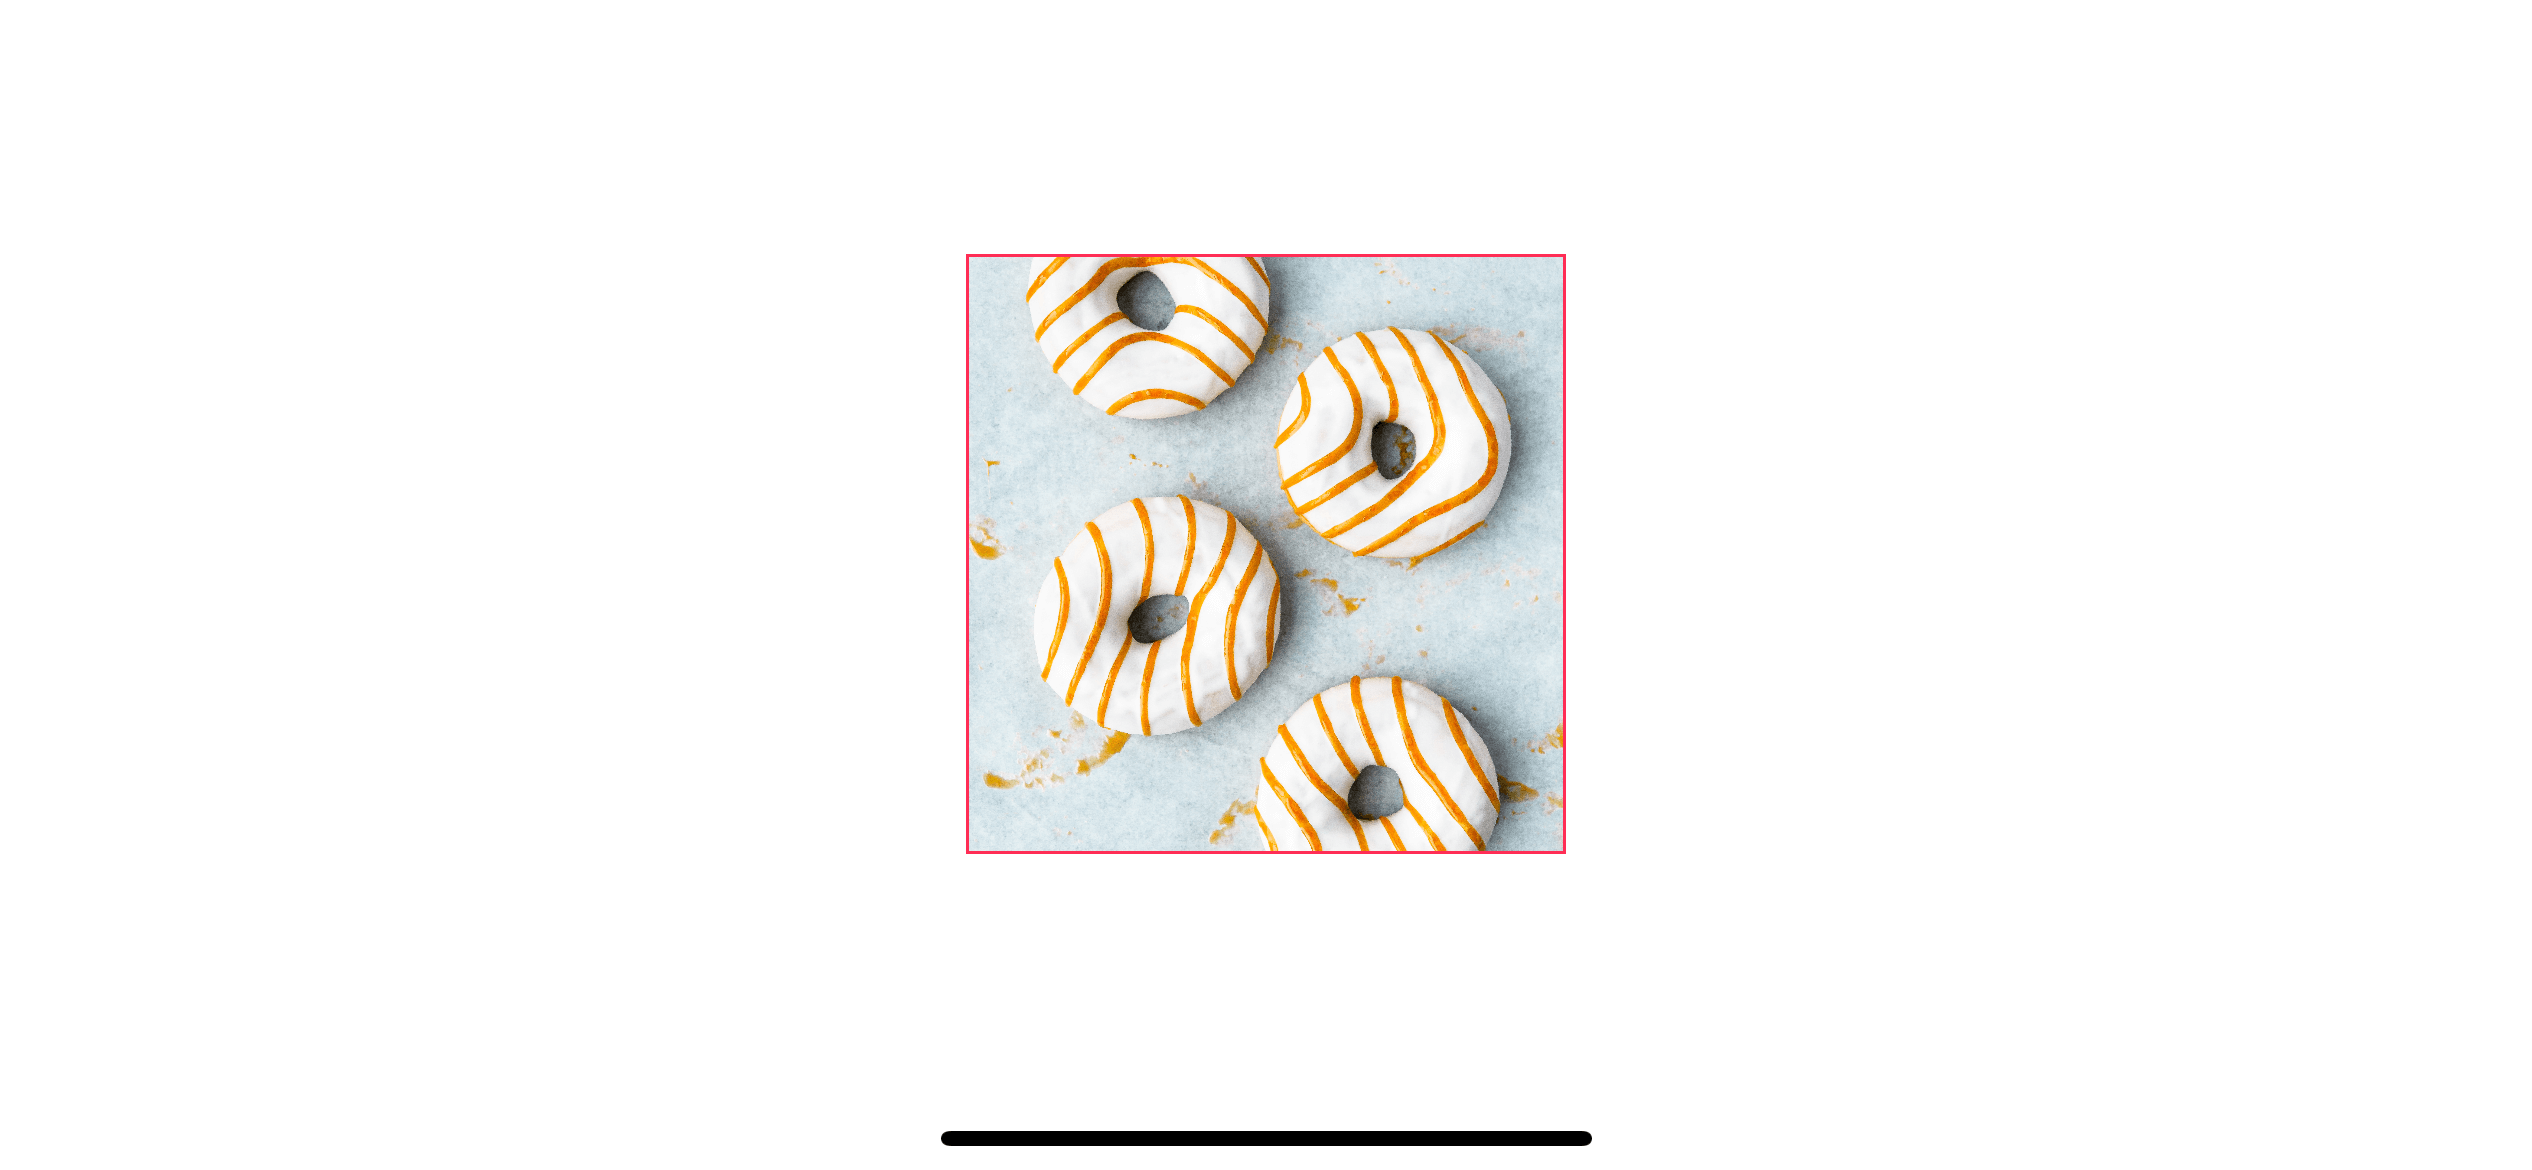
}One thing you need to know, which is not obvious from our example, is that the fill content mode can lead to a potential of an image go beyond the view's bounds. And the image portion that goes beyond the image view won't get clipped.
To demonstrate this, I frame the image view to 200x200 and set fill content mode. I also add a pink border to make it easier to visualize the problem.
struct ContentView: View {
    var body: some View {
        Image("donuts")
            .resizable()
            .scaledToFill()
            .frame(width: 200, height: 200)
            .border(Color.pink)
    }
}
As you can see, the image fills within an image view frame, but the extending part doesn't get clipped. We have to clip it manually.
 A portion of an image may extend beyond the view’s bounds in the fill content mode.
Clipping
To clip the image content within its view's bounds, we use clipped().
struct ContentView: View {
    var body: some View {
        Image("donuts")
            .resizable()
            .scaledToFill()
            .frame(width: 200, height: 200)
            .border(Color.pink)
            .clipped()
    }
}
`.clipped()` modifier cuts off excess image part that goes beyond bounding frame.
You may also like
Learn how to fit image view to any container by changing Content Hugging Priority and Content Resistance Priority.
ResizeLearn a crucial concept in SwiftUI, view modifier, and a guide of how to create your custom modifier.
SwiftUIRead more article about SwiftUI, Image, Resize,
or see all available topic
Get new posts weekly
If you enjoy this article, you can subscribe to the weekly newsletter.
Every Friday, you’ll get a quick recap of all articles and tips posted on this site — entirely for free.
Feel free to follow me on Twitter and ask your questions related to this post. Thanks for reading and see you next time.
If you enjoy my writing, please check out my Patreon https://www.patreon.com/sarunw and become my supporter. Sharing the article is also greatly appreciated.
Tuist scaffold: How to use the Tuist template to create a new module for an ongoing project
Learn how the scaffold command helps you to bootstrap new components or features such as a new VIPER module or a new framework for your new feature.
What is the difference between Tuist init and scaffold
A brief summary of init and scaffold commands.
Recommend
-
25
Oh hey! A brand new property that affects how a box is sized! That’s a big deal. There are lots of ways already to make an aspect-ratio sized box (and I’d say
-
12
iPad Pro Ipad 11 inch aspect ratio ...
-
12
byzhangxinxu from https://www.zhangxinxu.com/wordpress/?p=9860 本文欢迎分享与聚合,全文转载就不必了,尊重版权,圈子就这么大,若急用可以联系授权。
-
11
原文链接:https://web.dev/aspect-ratio/ 摘要:在响应式网页设计中,保持一致的宽高比,即所谓的长宽比,对于防止布局累积偏移至关重要。在 Chromium 88、Firefox 87 和 Safari Technology...
-
13
Having a consistent ratio between the width and height of images and other responsive elements is important. In CSS, we used the padding hack for many years, bu...
-
12
What Is the Difference Between Aspect Ratio and Resolution? By Emma Garofalo Published 13 hours ago Learn the technical jargon a...
-
11
LG's new DualUp monitor targets multitaskers with a 16:18 aspect ratio Coming to CES 2022 alongside a new 4K UltraFine monitor By...
-
14
In this blog, you will learn how to make an image responsive without any media queries. We will use the Aspect ratio to make our image responsive. Video tutorial I have already made a video about it on my youtube chan...
-
8
Aspect Ratio is Great Tue Feb 08 2022 Maybe it’s just me, but I feel like a lot of the time learning new CSS f...
-
20
Lenovo’s new IdeaPad Gaming 3 is a more budget-friendly 16:10 aspect ratio laptop The lineup is comprised of four laptops If you buy som...
About Joyk
Aggregate valuable and interesting links.
Joyk means Joy of geeK