

Building Cross-Platform Desktop Applications
source link: https://www.textcontrol.com/blog/2021/03/25/building-cross-platform-desktop-applications-with-electron/
Go to the source link to view the article. You can view the picture content, updated content and better typesetting reading experience. If the link is broken, please click the button below to view the snapshot at that time.
Electron is a framework that allows you to develop native cross-platform desktop applications based on HTML, JavaScript and CSS. It uses Chromium to render the content and Node.js to access the local file system and the operating system. That allows you to create a Windows or Mac application with local file access.
In combination with DS Server, you can create a desktop application to edit documents using the HTML5-based document editor with local file access.
The following sample shows how to integrate DS Server into an Electron desktop application.
Prerequisites
-
Create your free DS Server trial token here:
Trial Token -
Install Node.js® and npm, if not done before.
Creating the Project
-
Create a folder for your project and install Electron there:
mkdir my-electron-app && cd my-electron-app
npm init -y
npm i --save-dev electron
-
Install Node.js® and npm, if not done before.
Create the Main Script File
-
Open the project folder in VS Code or your favorite editor:
code .
-
In the root of your application, create a file named main.js and add the following content:
const { app, Menu, BrowserWindow, dialog } = require('electron');
var fs = require('fs');
function createWindow () { const win = new BrowserWindow({ width: 800, height: 600, icon: 'favicon_32x32.png', webPreferences: { nodeIntegration: true, } })
const isMac = process.platform === 'darwin'
const template = [ // { role: 'appMenu' } ...(isMac ? [{ label: app.name, submenu: [ { role: 'about' }, { type: 'separator' }, { role: 'services' }, { type: 'separator' }, { role: 'hide' }, { role: 'hideothers' }, { role: 'unhide' }, { type: 'separator' }, { role: 'quit' } ] }] : []), // { role: 'fileMenu' } { label: 'File', submenu: [{ label: 'Open', accelerator: 'CmdOrCtrl+O', click() { dialog.showOpenDialog({ properties: ['openFile'] }) .then(function(fileObj) { if (!fileObj.canceled) {
fs.readFile(fileObj.filePaths[0], 'base64', function (err, data) { if(err){ alert("An error ocurred reading the file :" + err.message); return; } // call external JS to load the document into TXTextControl win.webContents.executeJavaScript( `loadDocument('${data}', '${fileObj.filePaths[0]}')` ); }); } }, ) .catch(function(err) { console.error(err) }) } } ] }, // { role: 'viewMenu' } { label: 'View', submenu: [ { role: 'reload' }, { role: 'forceReload' }, { role: 'toggleDevTools' }, { type: 'separator' }, { role: 'resetZoom' }, { role: 'zoomIn' }, { role: 'zoomOut' }, { type: 'separator' } ] }, // { role: 'windowMenu' } { label: 'Window', submenu: [ { role: 'minimize' }, { role: 'zoom' }, ...(isMac ? [ { type: 'separator' }, { role: 'front' }, { type: 'separator' }, { role: 'window' } ] : [ { role: 'close' } ]) ] } ]
const menu = Menu.buildFromTemplate(template)
Menu.setApplicationMenu(menu) win.loadFile('index.html') win.show() }
app.whenReady().then(() => { createWindow();
app.on('activate', () => { if (BrowserWindow.getAllWindows().length === 0) { createWindow(); } })
})
app.on('window-all-closed', () => { if (process.platform !== 'darwin') { app.quit() } })
The main script defines the entry point of your Electron application that runs the Main process. In this sample, it also contains the application menu definitions. A File menu is added to load a local document into TX Text Control.
-
In the root of your application, create a file named index.html and add the following content:
<!DOCTYPE html> <html> <head> <meta charset="UTF-8"> <title>Hello Text Control in Electron!</title> <meta http-equiv="Content-Security-Policy" content="script-src 'self' 'unsafe-inline';" /> <script src="textcontrol/txtextcontrol-ds-1.0.0.js"></script> <script src="textcontrol/fileHandler.js"></script> <link href="styles.css" rel="stylesheet"> </head> <body style="background: white;"> <style> #txDocumentEditorContainer { width: 100%; height: 100vH; position: relative; } </style>
<div id="txDocumentEditorContainer"></div>
<script> window.addEventListener("load", function () { TXTextControl.init({ containerID: "txDocumentEditorContainer", serviceURL: "https://trial.dsserver.io", authSettings: { clientId: "", clientSecret: "" } }); }); </script>
</body> </html>
In line 32 and 33, add your private DS Server OAuth credentials.
-
Open the package.json file and replace is with the following content:
{ "name": "my-electron-app", "version": "0.1.0", "author": "your name", "description": "My Electron app", "main": "main.js", "scripts": { "start": "electron ." } }
Adding Text Control Script Files
-
Create a folder in the root of your project named textcontrol.
-
In that new folder, create a file named fileHandler.js and add the following content:
function loadDocument(document, filename) {
var st = TXTextControl.StreamType.InternalUnicodeFormat;
if (filename.endsWith(".docx") === true) { st = TXTextControl.StreamType.WordprocessingML; } else if (filename.endsWith(".doc") === true) { st = TXTextControl.StreamType.MSWord; } else if (filename.endsWith(".rtf") === true) { st = TXTextControl.StreamType.RichTextFormat; } else if (filename.endsWith(".html") === true) { st = TXTextControl.StreamType.HTMLFormat; } else if (filename.endsWith(".txt") === true) { st = TXTextControl.StreamType.PlainText; }
TXTextControl.loadDocument(st, document);
}
-
In that new folder, create a file named txtextcontrol-ds-1.0.0.js. Using a browser, navigate to the following URL and copy the content into the newly created file:
https://trial.dsserver.io/documenteditor/JS/txtextcontrol-ds-1.0.0.js
Starting the Application
-
In the command line console, start the application by typing the following command:
npm start
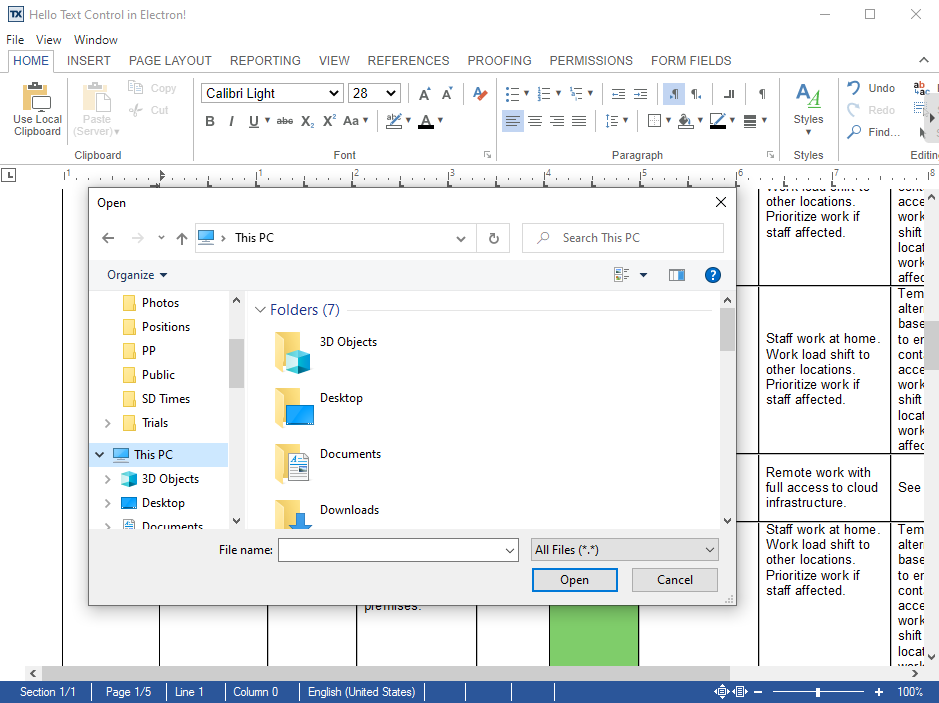
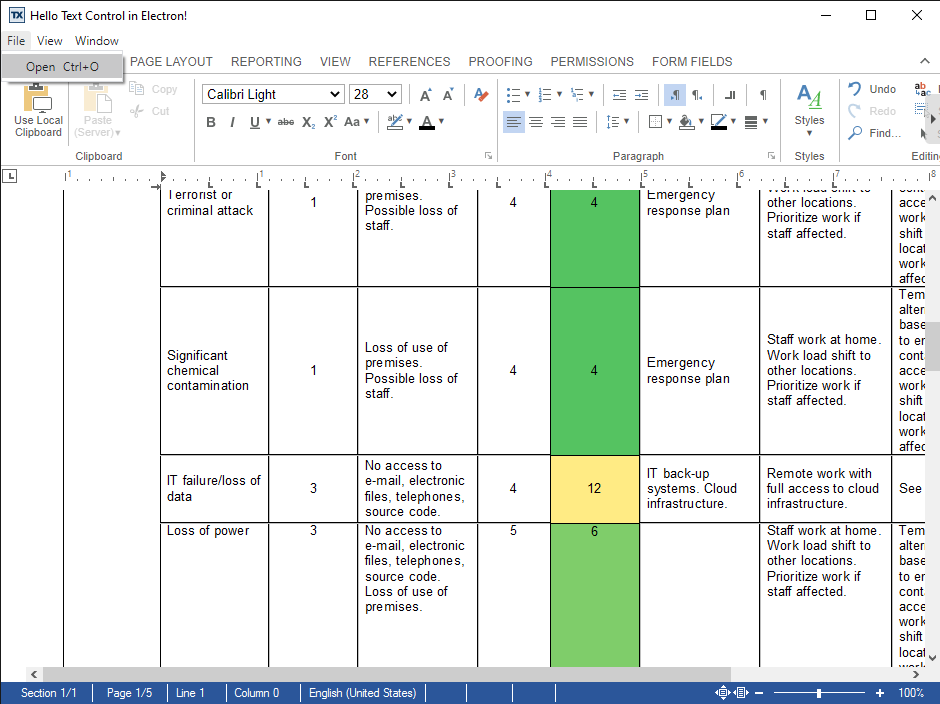
A new native application is started with the TX Text Control (DS Server) document editor. Using the application menu File -> Load, you can open local documents (DOC, DOCX, RTF, HTML and TX):
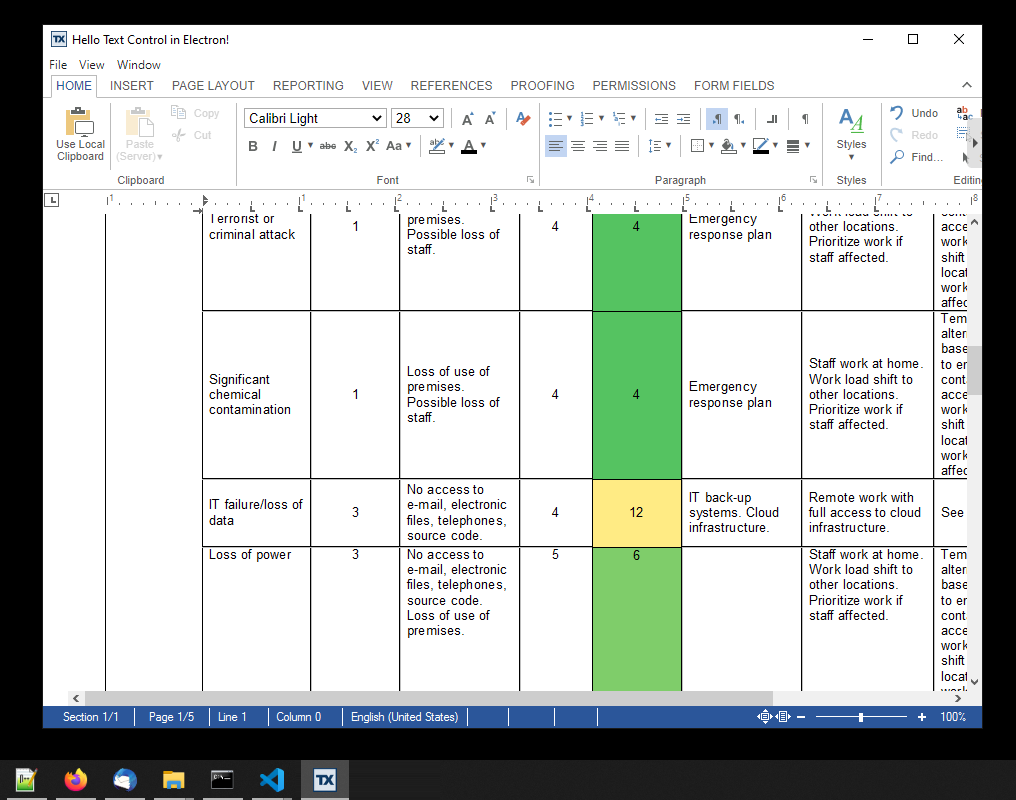
The application is also displayed in the native Windows task bar:
Package the Application
The application can be packaged and deployed using Electron Forge. It creates an executable application and a setup the fetches used packages during the installation.
-
Use the following commands to install Electron Forge in your app folder:
npm install --save-dev @electron-forge/cli
npx electron-forge import
-
Use the following command to create the distributable:
npm run make
You can test this on your own by downloading the sample application from our GitHub account.
![]()
Download and Fork This Sample on GitHub
We proudly host our sample code on github.com/TextControl.
Please fork and contribute.
Requirements for This Sample
- DS Server (trial token or on-premise)
- Node.js
Related Posts
Track Changes: Show 'Original' and 'No Markup'
by Bjoern Meyer| February 18, 2021The redlining feature is very helpful when working on the same document with multiple authors specifically with legal or healthcare documents where changes need to be tracked and safely logged. This article shows how to use JavaScript to accept or reject all changes.
JavaScript Helper Classes: Converting Selected Text to Form Fields
by Bjoern Meyer| February 13, 2021This quick tutorial shows how to implement JavaScript helper classes for typical tasks. In this sample, a function is implemented that converts selected text in a document into a text form field with a single function call.
DS Server: Using DocumentViewer with pure HTML and JavaScript
by Bjoern Meyer| January 28, 2021We provide Angular and .NET Core client-side libraries to use the DocumentViewer with DS Server, but it can be used with pure HTML and JavaScript as well. This article shows how to create a simple HTML based application.
DS Server Released: On-Premise Document Services
by Bjoern Meyer| January 21, 2021We are very excited to announce the release of our new product DS Server. Bring document processing, editing, sharing, collaboration and creation to any app on any platform.
Recommend
-
4
Build cross-platform desktop apps with JavaScript, HTML, and CSS. Build cross-platform desktop apps with JavaScript, HTML, and CSS
-
29
Introducing .NET Multi-platform App UI (MAUI) .NET MAUI is: Multi-platform native UI Deploy to multiple devices across mobile & desktop Using a single project, single codebase Evolution of
-
4
How I Built a Cross-Platform Desktop Application with Svelte, Redis, and Rust Luke Edwards on Jul 26, 2021 Learn Development at
-
9
Creating Cross-platform C# Applications with Uno Platform ~ Matt LaceyThat sounds like a good name for a book. Doesn't it? ;)And it is.I know that when I finished my first book I...
-
5
An Introduction To Quasar Framework: Building Cross-Platform Applications ...
-
3
tailwindcss-react-native Use Tailwindcss in your cross platform React Native applications. This library is currently under active devel...
-
2
TABLE OF CONTENTS I. Introduction II. Prerequisites III. Setting up the Development Environment IV. Creating the User Interface V. Building the Application Logic VI. Packaging and Distributi...
-
2
Creating Cross-Platform/Multi-Platform .NET Applications with Windows App SDK (WinUI) and the Uno Platform April 16, 2023 by
-
5
...
-
4
React Native Responsive Scalability The package provides utility hooks that help React Native developers create responsive, cross-platform applications that are aware of orientation changes. About the Project Take a look...
About Joyk
Aggregate valuable and interesting links.
Joyk means Joy of geeK