

Real time Dashboard using Azure Cosmos DB, Azure functions , Azure SignalR servi...
source link: https://dotnetgik.com/2021/03/22/real-time-dashboard-using-azure-cosmos-db-azure-functions-azure-signalr-service-and-blazor/
Go to the source link to view the article. You can view the picture content, updated content and better typesetting reading experience. If the link is broken, please click the button below to view the snapshot at that time.

Real time Dashboard using Azure Cosmos DB, Azure functions , Azure SignalR service and Blazor
Problem Statement
Consider a situation where we are asked to develop a solution which will give us real time update on the weather. One traditional approach for such kind of application is to adopt a timer-based fetching of the data from the server which is called as Polling based design this will have a typical architecture like below
Polling based Dashboard
In this situation we will have a browser app which will trigger the request after some interval in response the server will send the needed data which the browser can show on the UI. This seems perfectly fine till now right everything is working, and user can see the data.
Though the current solution works fine we have some drawbacks with this approach like below
- The Client app contacts server whether data is available or not
- Once data is returned the client app is updated regardless of any change in the data or not
- Selecting the interval is also a difficult choice to make considering the cost of the call to the backend and how quickly you want to respond to new data. This causes delay in availability of the data and its detection by the app.
- As the application grow the amount of data exchanged between the client and server will become a problem considering the size of the Http Request which might be overhead to the servers
Now we know what the limitations of the polling-based app are we will have a new architecture which will reduce the traffic and makes a more efficient UI by only updating it as the data changes. For this we will use Azure Cosmos DB, Azure functions and Azure SignalR service and Blazor as UI framework
Figure 1 image taken from https://docs.microsoft.com/en-us/azure/azure-signalr/signalr-concept-azure-functions
As Data changes in the database i.e., Azure Cosmos DB exposes a change feed, this listens to database containers for changes and outputs the list of the changed documents in the order these documents are modified by using these change feeds our application can automatically respond to the data changes.
Whenever the change is made in the Cosmos Db container that change is propagated to the change feed which in turn triggers the Azure function which will use the Cosmos Db trigger in next step SignalR service output binding of the azure function publishes a message to the Azure SignalR service, which in turn publishes the message to all the clients connected.
Till now we have the idea of how the architecture of this application is going to be let us have a closer look how these services can be interconnected with each other we will divide the article in the following sections
- Azure functions development with Cosmos Db change feed
- Azure functions with Azure SignalR service
- Azure SignalR service Configurations
- Implementing the UI using Blazor and Blazor Charts
Azure Functions with Cosmos Db Change feed
To make use of the Cosmos DB change feed we need to use Azure functions trigger for Cosmos DB which will be a simple azure function which will be triggered whenever the new event in our container change feed the code for this function will be like below
To implement this change feed, we will need two containers in the cosmos Db
- Monitored container : The Container on which actual change occurs and which is being monitored.
- Lease Container : This container is used to maintain the states across the multiple azure functions and used to implement dynamic scaling
The following example shows a C# function which will be called when the insert or update in the monitored container happens
public static class RealTimeDashboard{[FunctionName("Dashboard")]public static Task AcceptAndBroadcastDataToDashBoard([CosmosDBTrigger(databaseName: "SampleDb",collectionName: "weather",ConnectionStringSetting = "CosmosDbConnectionstring",LeaseCollectionName = "leases")]IReadOnlyList<Document> documents, ILogger log){var message = documents?.Select(doc => new DashboardMessage { Id = doc.GetPropertyValue<string>("CityId"), Details = doc.GetPropertyValue<string>("temprature") }).ToList();log.LogInformation($"Message arrived from Cosmos Db");}}Now when we look at the configuration values that we have set in our azure function we have following attributes
1. CosmosDbTrigger
This attribute tells which type of trigger we are going to use, and, in our case, it will be CosmosDbTrigger
2 .databaseName
This will be the name of the cosmos Db database having the collection to monitor
3. collectionName
This will be the name of the collection to be monitored
4. ConnectionStringSetting
Key Name from app setting which holds the connection string to the Cosmos Db
5. LeaseCollectionName
The name of the collection used to store leases
The second part of this function is the document list which will be available whenever the change feed arrives at the function and log is the build in logger object used to log the things
In above, we can see the LeaseCollectionName this is the collection which is used to store the lease over the partition keep in mind these collections must be present so that trigger can work
Now that we have seen how we have developed our CosmosDbTrigger Azure function now let us check how we can design the Azure function with the SignalR service
Azure Functions with Azure SignalR service
Now we have integrated the Cosmos DB with the Azure functions now it’s time to integrate the Azure SignalR service with the Azure functions. Azure function uses Azure SignalR service bindings to add the SignalR services capabilities before going into designing and configuring our application lets have a brief look at the various bindings which are available with the SignalR service
SignalR service bindings
There are three types of service bindings which can be used with the azure functions these bindings are
1. Trigger Binding
This binding is used to respond to messages sent from Azure SignalR services in serverless mode it uses Upstream feature to send the message from client to Azure function and in return the azure function uses this binding to handle the message
2.Input Binding
In order to initiate the communication between client and SignalR service client needs some data like endpoint URL and access token. Input bindings of the SignalR are responsible for these two things which are used by the client to connect to the service. We will see how we can use the input bindings in our application
3. Output Bindings
We can use this binding to send messages to the clients connected to the service we can broadcast the message to the connected clients or the groups or the to the specific user.We will be using this binding to broadcast our message to the client
We have seen what the various bindings with the SignalR service are let us explore some configuration of the SignalR service
SignalR Service Configuration
The service can be configured in various options the options that are available in the Azure SignalR service are as follows
SignalR service configuration
There are mainly three modes of the Azure SignalR service can be configured
1.Default mode :
This is the default mode of the Azure SignalR service when the new service is created this is the mode which is automatically selected . When created with this mode our application will work as a typical ASP.NET SignalR application where we will have a hub server and clients will be able to have real time communication .
2.Serverless
As its name implies there are no hub server involved in this and clients does not require a hub server to connect all connections are made to the service which will maintain all the client connections. When using with the Azure functions it is always recommended to use the serverless mode for the Azure SignalR Service.
3.Classic
This is the combination of Default and Serverless mode and used mainly for the backword compatibility It is recommended that not to use the Classic mode anymore and made obsolete .
In our case we are using Azure functions and we do not require the hub server so we will be using the serverless mode for the Azure SignalR service .
Azure Functions Development with the Azure SignalR service
We have seen various bindings and configuration that are involved with the Azure SignalR service let us see how we can use them in our application . below is the code that we will have for this
namespace RealTimeDashboard{public static class RealTimeDashboard{// This will manage connections to SignalR[FunctionName("negotiate")]public static SignalRConnectionInfo GetConnectionInfo([HttpTrigger(AuthorizationLevel.Anonymous, "post")] HttpRequest req,[SignalRConnectionInfo(HubName = "Dashboard")] SignalRConnectionInfo connectionInfo){return connectionInfo;}[FunctionName("Dashboard")]public static Task AcceptAndBroadcastDataToDashBoard([CosmosDBTrigger(databaseName: "SampleDb",collectionName: "weather",ConnectionStringSetting = "CosmosDbConnectionstring",LeaseCollectionName = "leases")]IReadOnlyList<Document> documents,[SignalR(HubName = "Dashboard")] IAsyncCollector<SignalRMessage> signalrMessageForDashboard,ILogger log){var message = documents?.Select(doc => new DashboardMessage { Id = doc.GetPropertyValue<string>("CityId"), Details = doc.GetPropertyValue<string>("temprature") }).ToList();log.LogInformation($"Message arrived from Cosmos Db");return signalrMessageForDashboard.AddAsync(new SignalRMessage { Target = "dashboardMessage", Arguments = new[] { message } });}}}. Typically, Azure function development with Azure SignalR service will need two functions one to get the access token and endpoint URL and another to handle the message which will be received from Cosmos Db change feed. Let us see in detail what these functions are
- Negotiate Function
We have seen in the above sections that in order to start communication between client and Service we need a valid access token and a URL . In our case as we are using the Serverless configuration bindings we will need an Endpoint named as a “negotiate” which will return us the connection information .
If you see the first part of our function, we will have code like below
// This will manage connections to SignalR[FunctionName("negotiate")]public static SignalRConnectionInfo GetConnectionInfo([HttpTrigger(AuthorizationLevel.Anonymous, "post")] HttpRequest req,[SignalRConnectionInfo(HubName = "Dashboard")] SignalRConnectionInfo connectionInfo){return connectionInfo;}In this we have a Http Triggered function which has SignalRConnectionInfo as an input binding which will generate the token information . The above function can be invoked with the http Request which will return the SignalR connection info for the Hub name “Dashboard”
Azure function for Receiving and Broadcasting the Messages
We have designed the function which will give us the connection info now our client has the connection info and access token now it is time to Receive and broadcast the message to the clients our code will look like below
[FunctionName("Dashboard")]public static Task AcceptAndBroadcastDataToDashBoard([CosmosDBTrigger(databaseName: "SampleDb",collectionName: "weather",ConnectionStringSetting = "CosmosDbConnectionstring",LeaseCollectionName = "leases")]IReadOnlyList<Document> documents,[SignalR(HubName = "Dashboard")] IAsyncCollector<SignalRMessage> signalrMessageForDashboard,ILogger log){var message = documents?.Select(doc => new DashboardMessage { Id = doc.GetPropertyValue<string>("CityId"), Details = doc.GetPropertyValue<string>("temprature") }).ToList();log.LogInformation($"Message arrived from Cosmos Db");return signalrMessageForDashboard.AddAsync(new SignalRMessage { Target = "dashboardMessage", Arguments = new[] { message } });}}In the first part of the code, we have a Cosmos Db trigger we have seen that in previous section how we can use the Cosmos Db trigger to invoke the function now once we have the data from the trigger, we need to broadcast this data to the client. For this we will use the Output Binding of the SignalR service which will broadcast the message to all the clients connected .
In above case the Target is the name of the method which is present on the client side and which will be invoked when the trigger happens Arguments will be the actual data which will be passed to the clients Target method.
Once these things are setup till now, we have an Azure function with Cosmos Db Trigger another negotiate function which will provide us the Connection info now its time to design our UI which will show the Real time data in the browser .
UI development with Blazor
For UI we are going to use Blazor , for people who does not know about Blazor it is client-side UI framework like Angular or react which provides the ways to develop the Web Apps using the Html , CSS and C#
To show the real time data changes we will use line chart and bar chart which will be updated whenever the event is pushed to the UI.
Setting up the Blazor Project
First step in this application will be to add the Blazor project for this purpose we will use Blazor web assembly template which can be added like below

Then on next step selecting the Blazor web assembly template from the wizard like below
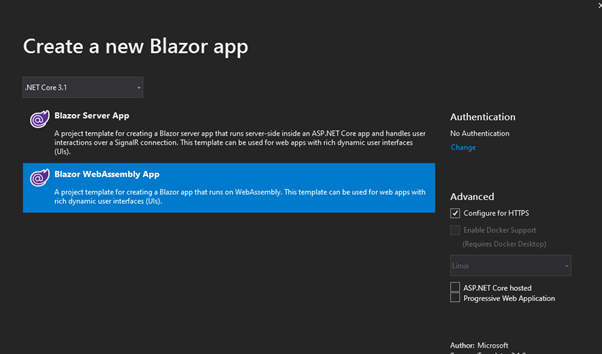
Once we are done with this, we will have a Blazor application now it is time to integrate the Azure SignalR service with the Blazor web assembly
Integrating Azure SignalR service with Blazor Application
Integrating the Azure SignalR service with the Blazor application involves few steps .
1.Install the SignalR service client Package
First step to get started with this is to install the client package in the UI application in order to install the package just go to the package manager console and use following command
PM> Install-Package Microsoft.AspNetCore.SignalR.Client
2. Connect to Hub
To establish the connection with the Azure SignalR service we use HubConnectionBuilder and call Build method the code for the same will be like below
private HubConnection SignalRHubConnection; //for connecting to Signal// Build the Hub connectionSignalRHubConnection = new HubConnectionBuilder().WithUrl(”<<URL for the Azure SignalR service negotiate function goes here >>”).Build();Here we can use the Build method to configure various options like URL, Protocol log levels for the SignalR Connection.
3. Register the Handler
In this case we will use the HubConnection On() method to register a handler which can be invoked whenever the hub method dashboard message is called
SignalRHubConnection.On<List<DashboardMessage>>("dashboardMessage", (clientMessage)=>{// Code to receive the message and update UI goes here });Once this handler is registered, we can write the code which will be used to receive the message and then update the UI
4. Start the Connection
Once we have setup all the stuff now it is time to start the connection and initiate the communication with our SignalR service to start the connection we will use following code
await SignalRHubConnection.StartAsync(); //start connection!Once we are done with the Azure SignalR service now its time to integrate the chart component which be used for the visualisation of the data which is coming from the service.
Integrating ChartJs.Blazor to Blazor application
For integrating charts, we will use the ChartJs.Blazor which is free open-source library for the charts with the Blazor you can find more info about it at this ChartJs Documentation page.
Install ChartJs package
To use ChartJs package we need to install NuGet package which can be done from package manager console using following command
PM>> Install-Package ChartJs.Blazor. ForkUpdate Index.html
Before creating charts, we need to add some static assets in our project for that we need to add following references to the index.html page after body tag
<!-- This is the glue between Blazor and Chart.js --><script src="_content/ChartJs.Blazor.Fork/ChartJsBlazorInterop.js"></script>Update _imports. Razor page
Next step to get going with ChartJs is to add the ChartJs reference in the imports razor page like below
@using ChartJs.Blazor;Adding Chart component in Markup
To use the charts in the application we need to add the Chart component in the Markup like below
<Chart Config="Config"></Chart>Setup Config and Dataset
We have completed the steps needed to add the charts its time to add some configuration for the charts in this we create the config like below in this demo we will be creating a line chart so the configuration for the same will be like below
Config = new LineConfig{Options = new LineOptions{Responsive = true,Title = new OptionsTitle{Display = true,Text = "Temprature"},Tooltips = new Tooltips{Mode = InteractionMode.Nearest,Intersect = true},Hover = new Hover{Mode = InteractionMode.Nearest,Intersect = true},Scales = new Scales{XAxes = new List<CartesianAxis>{new CategoryAxis{ScaleLabel = new ScaleLabel{LabelString = "Time"}}},YAxes = new List<CartesianAxis>{new LinearCartesianAxis{ScaleLabel = new ScaleLabel{LabelString = "Temp (in Celsius ) "}}}}}};Above code snippet will be used to create a line chart with various option to set the labels . for setting up the data we have two dataset which will act as a source to the chart. The dataset can be initialised as follows
/// <summary>/// Data set initialization for city 1 used for the chart component /// </summary>readonly IDataset<int> _dataSetForPune = new LineDataset<int>(new List<int>(InitialCount)){Label = "Pune",BackgroundColor = ColorUtil.FromDrawingColor(Color.FromArgb(255, 99, 132)),BorderColor = ColorUtil.FromDrawingColor(Color.FromArgb(255, 99, 132)),Fill = FillingMode.Disabled};This is one example which holds the data for one of the sources for our chart . We can declare any number of data source for the chart. And this data source can be updated on the On() method which will be a handler. We will have another dataset which will hold the data for another city.
Till now we have seen the basics of the chart creation the complete code for this project can be found here Real Time Dashboard Master Branch
Once we are up and running, we can see the output like below

References
Source code link https://github.com/dotnetgik/RealTimeDashboard/tree/master
Recommend
-
10
As serverless deployment is becoming popular, equipping yourself with some serverless skills will be paramount. In this article, you will learn how to build a CRUD AP...
-
10
Real Time WinUI Dashboard with SignalR BackendA modern desktop dashboard powered by real-time communications. Let's go. Life happens in real time and information exchange should be the same way. This is easier said than done and the ch...
-
3
Getting Started with Serverless SignalR and Azure FunctionsJohn Kilmister, July 28th, 2021 · 3 min read
-
7
Updates Azure Cosmos DB: Azure Functions extension version...
-
7
Samuel Armbrust September 23, 2021 3 minute read
-
3
使用 Azure Functions 搭配 Azure SignalR Service 實現無伺服器架構要在 Azure 實現即時連線式的無伺服器架構(Serverless architecture)其實相當容易,只要學會 Azure Functions 的開發方式,搭配著 Azure SignalR Service 就可以輕鬆實現,本篇文章我將說明實...
-
10
Real-time Speech Translator using Azure SignalR Service, Azure functions Azure Cognitive services and Blazor This is my entry to the Csadvent Calendar for this year Thanks
-
6
Streaming at Scale with Azure Event Hubs, Azure Functions, and Cosmos DB Part 1: Getting Streaming Data into Azure Streaming at Scale with Azure Event Hubs, Azure Functions, and...
-
10
Streaming at Scale with Azure Event Hubs, Azure Functions, and Cosmos DB Part 3: Analyzing and Visualizing the Data Streaming at Scale with Azure Event Hubs, Azure Functions, an...
-
16
Arun Sasi Maliyakkal September 6, 2022 3 minute re...
About Joyk
Aggregate valuable and interesting links.
Joyk means Joy of geeK