

iOS 开发 UI 搭建心得(一)—— 驾驭 StoryBoard
source link: https://blogread.cn/it/article/7886?f=hot1
Go to the source link to view the article. You can view the picture content, updated content and better typesetting reading experience. If the link is broken, please click the button below to view the snapshot at that time.
iOS 开发 UI 搭建心得(一)—— 驾驭 StoryBoard
本系列文章中,我们将一起认识、了解当下 iOS 开发中几种常见的 UI 构建方式,分析他们分别适合的使用场景,以便让我们在以后的开发中,能够在恰当的时间、场景下做出最佳的选择,提升开发效率,增强程序的可维护性。本文作为开篇,我们将一起尝试驾驭强大的 Storyboard。
StoryBoard 的本质
StoryBoard 是苹果在 iOS 5 中引入的新技术方案,目的是给纷繁复杂的 nib、xib 们一个温暖的家,让他们之间的关系更直观地展示出来,并提供了一种新的页面间跳转方式 segue。
StoryBoard 的本质是一个 XML 文件,描述了若干窗体、组件、Auto Layout 约束等关键信息。示例文件:https://github.com/johnlui/AutoLayout/blob/master/AutoLayout/Base.lproj/Main.storyboard
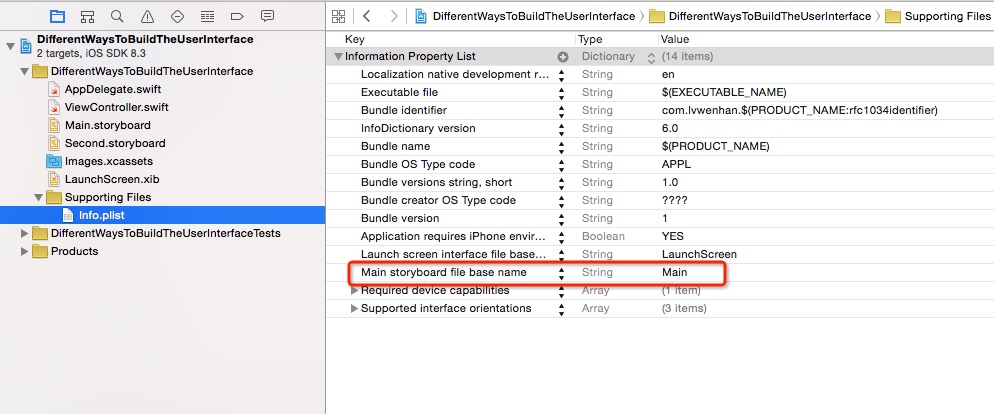
但是,我们应该认识到一个更重要的本质:使用 StoryBoard 的 iOS 项目均以初始化 StoryBoard 文件作为整个程序的初始化入口,UIViewController 类是由于被 StoryBoard 绑定而初始化,从而开始运行的。从下面两个地方可以找到蛛丝马迹:
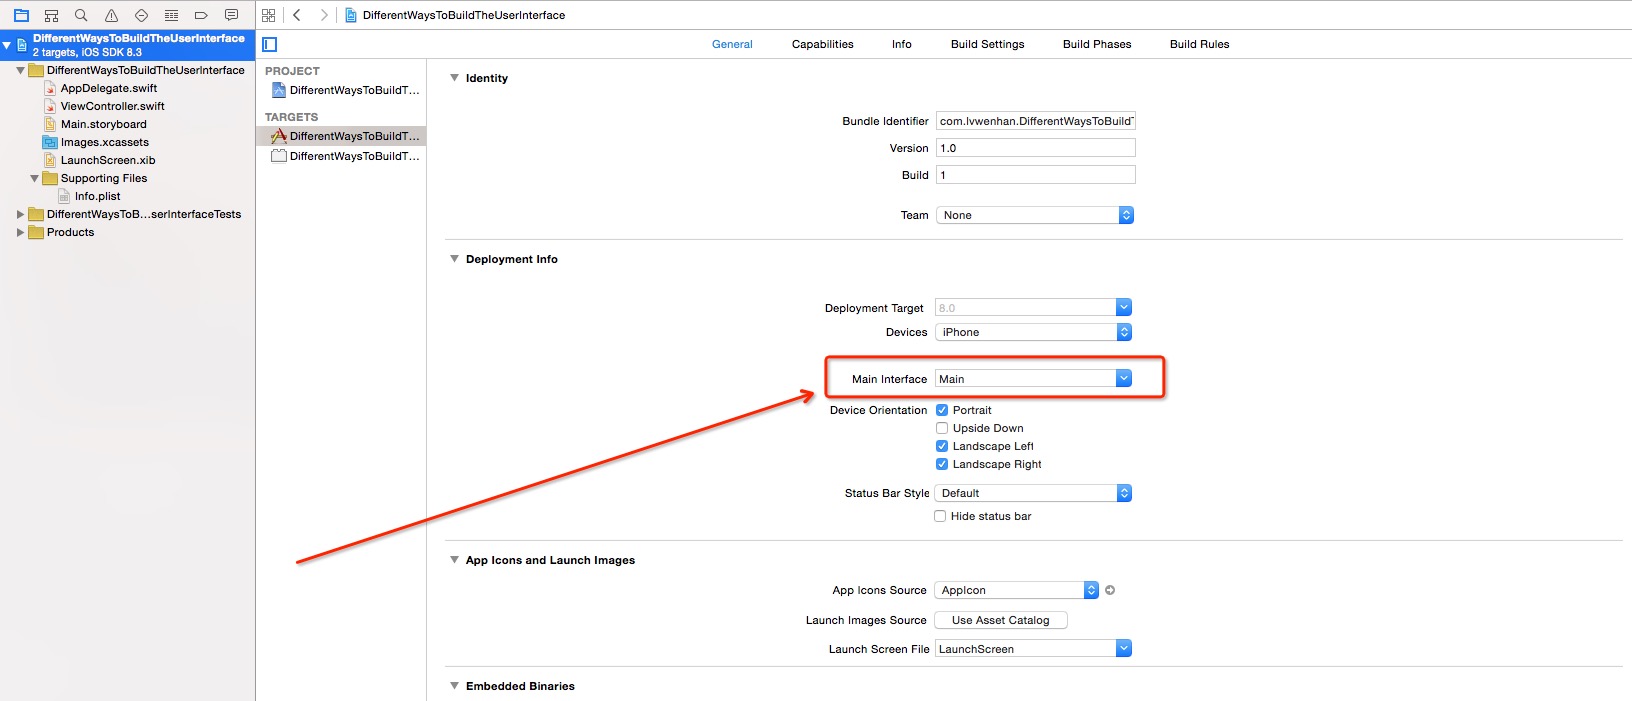
奇怪的 bug
初学 iOS 开发的时候,如果使用了 StoryBoard,大家可能遇到过这个奇怪的 bug,页面全黑:

如果大家跟我一样纯靠找资料自学而没有人教的话,一定出现过死活找不到原因而新建一个项目的尴尬情况吧 o(╯□╰)o,其实秘密在这里:
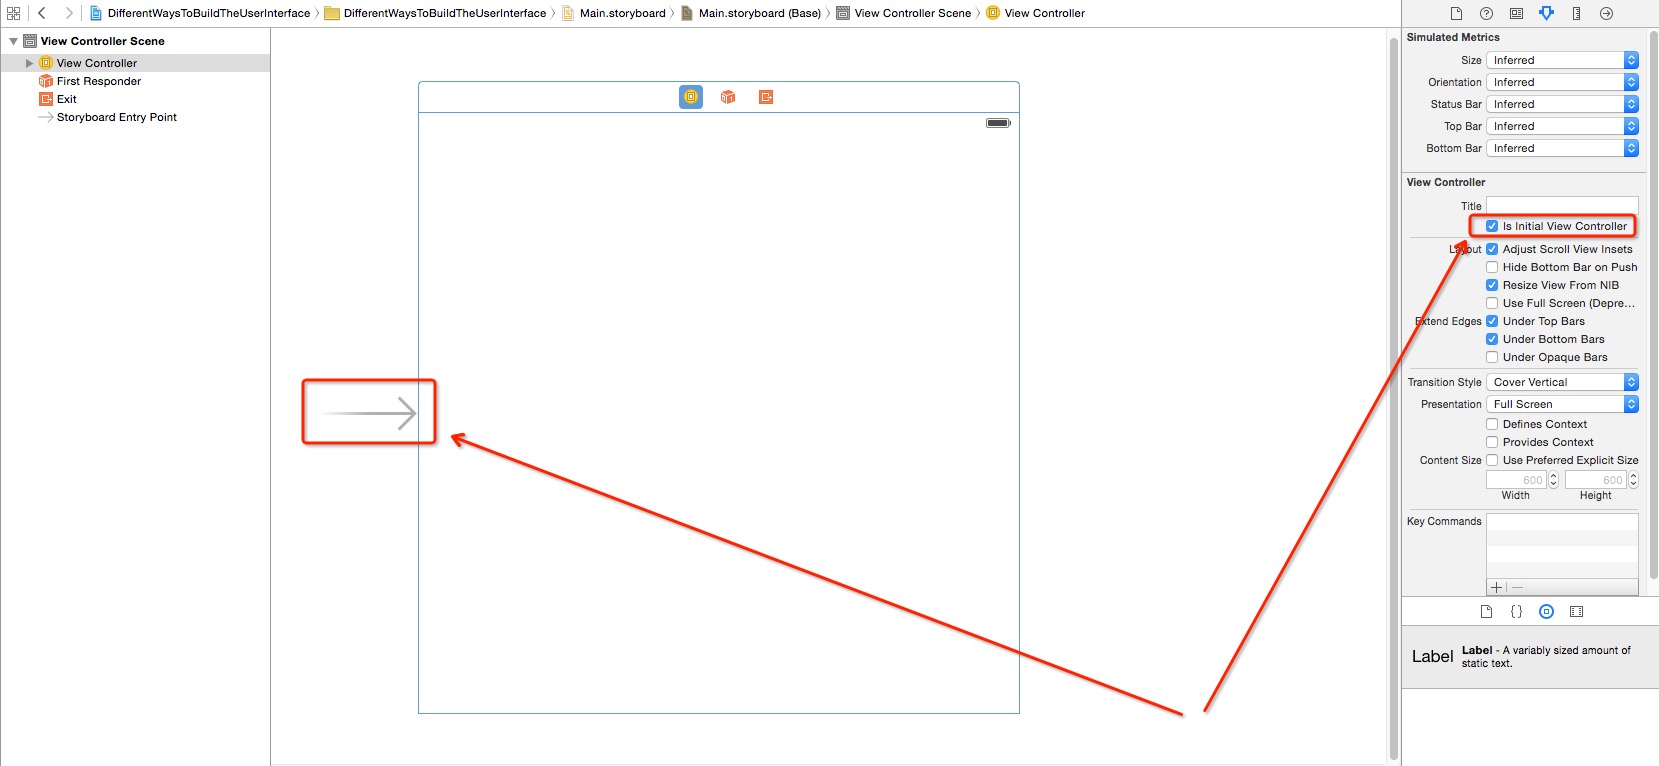
这表示这个窗体是此 StoryBoard 的初始窗体的意思,这样 APP 在启动以后,会先启动主 StoryBoard,主 StoryBoard 会启动它的初始窗体,初始窗体启动跟他绑定的类,这样 APP 就启动完成了。
多 StoryBoard 最佳实践
托福喵 【已下架】1.0 版是我第一个上架的项目,只用了初始化项目时建立的那唯一的 Main.storyboard,里面有二十几个窗体,在 Xcode 里每次点击打开都要等五秒才能完全渲染完毕,而且 Segue 线交错纵横,非常凌乱。这显然不是个好的组织方式。
我现在正在重写的托福喵第二版已经采用了多 StoryBoard 的解决方案,把一些独立的窗体组合放到一起使用一个 StoryBoard 进行组织,比如登陆注册的几个窗体,考试界面的几个窗体,关于我们的几个窗体等。下面我们将一起学习如何使用多 StoryBoard。
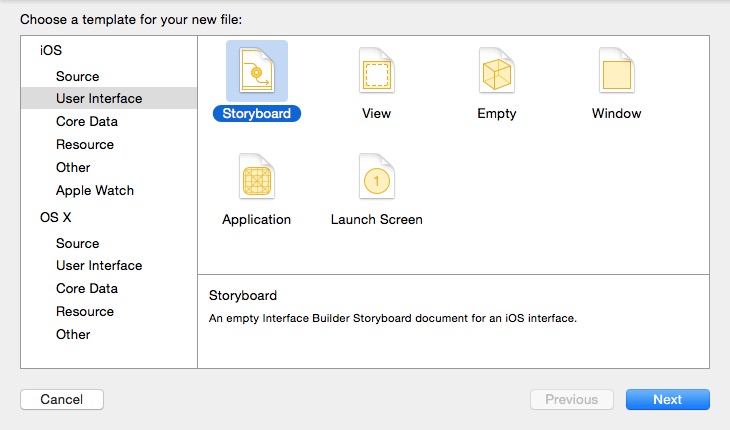
新建第二个 StoryBoard
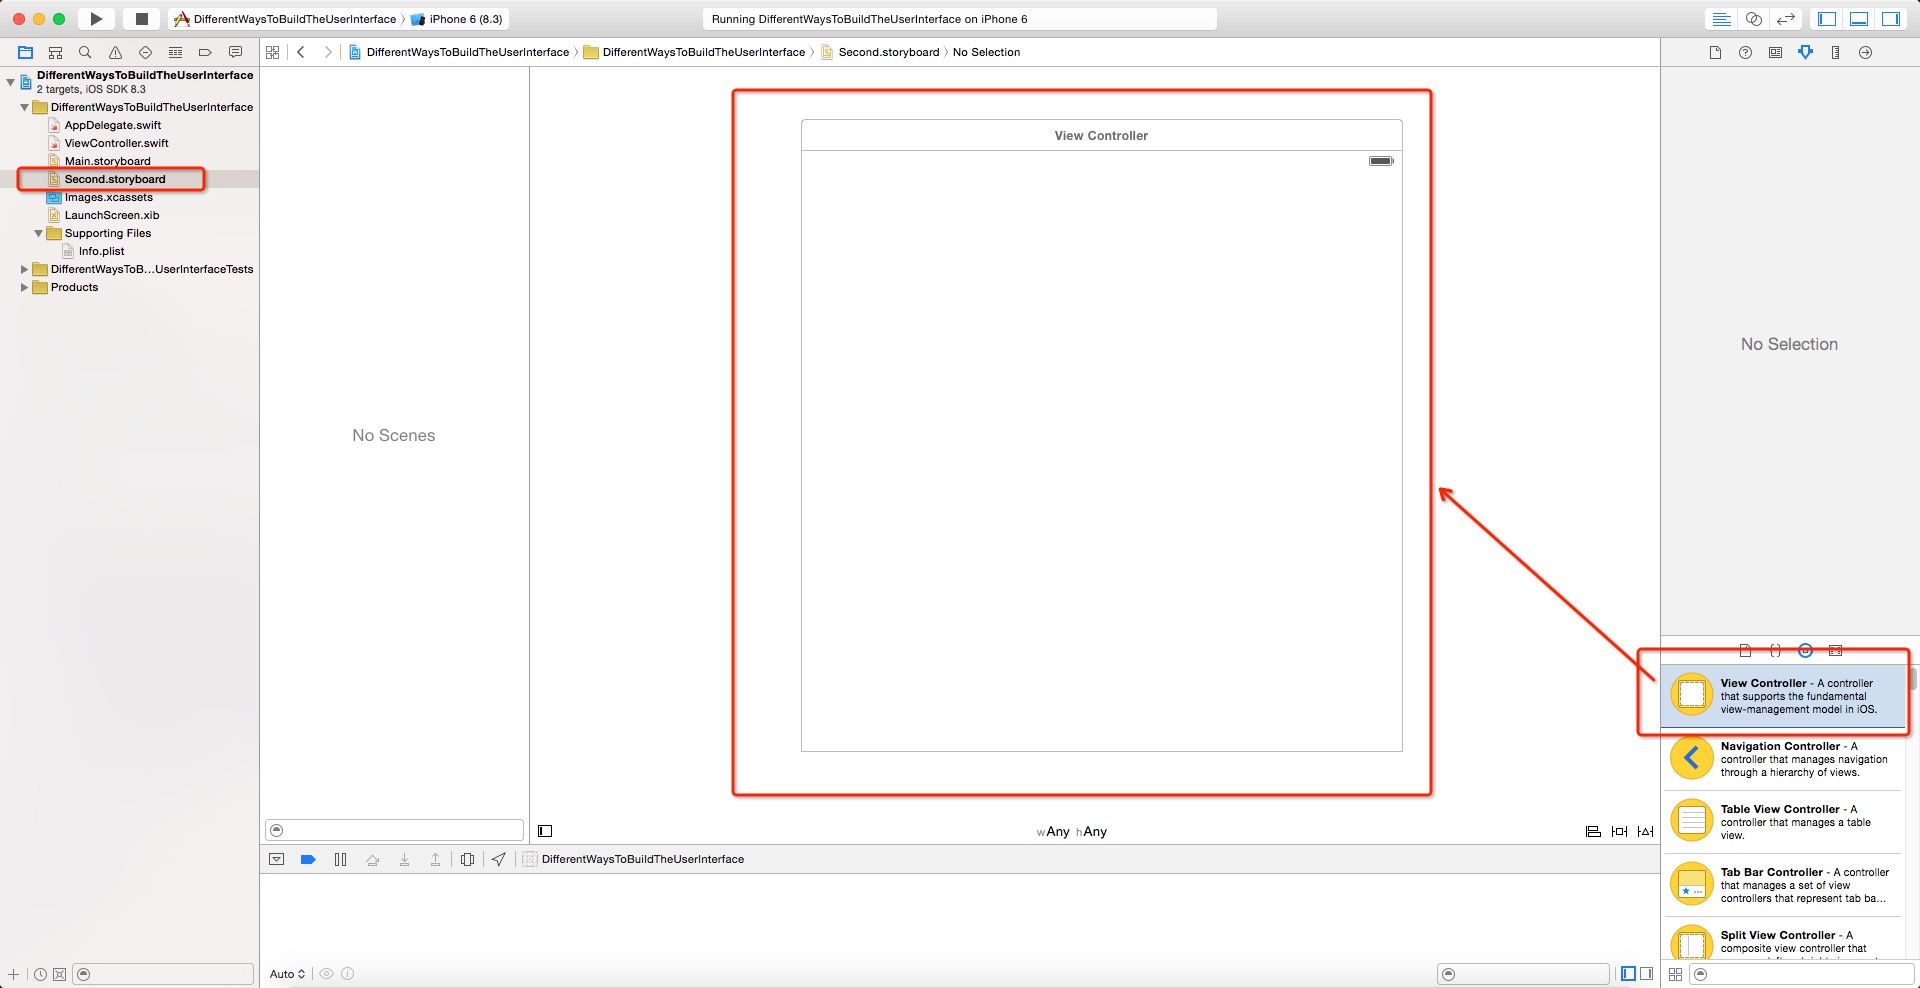
给 Second.storyboard 拖入一个 View Controller:
如何调用 Second.storyboard 中的窗体?
首先,编译项目,我们得到如下警告:
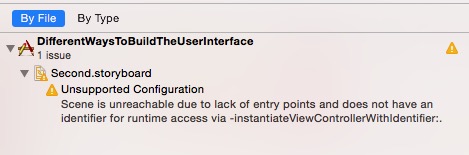
这个警告的意思是,这个窗体没有入口,无法被触达。如何让他能够被触达?两种方式:
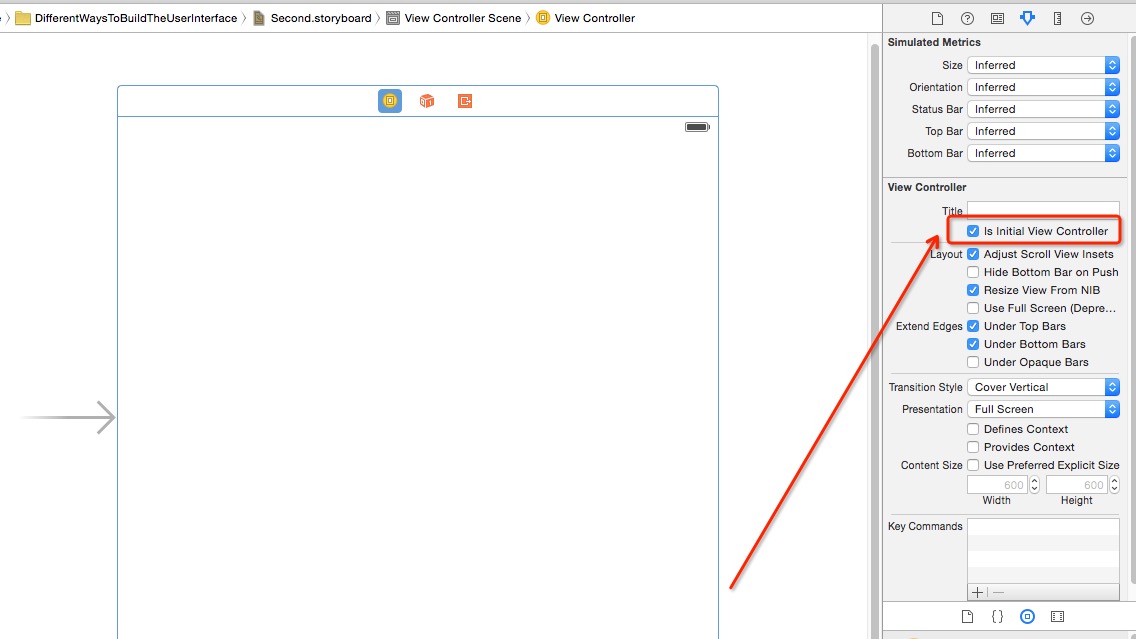
设置为该 StoryBoard 的初始窗体:
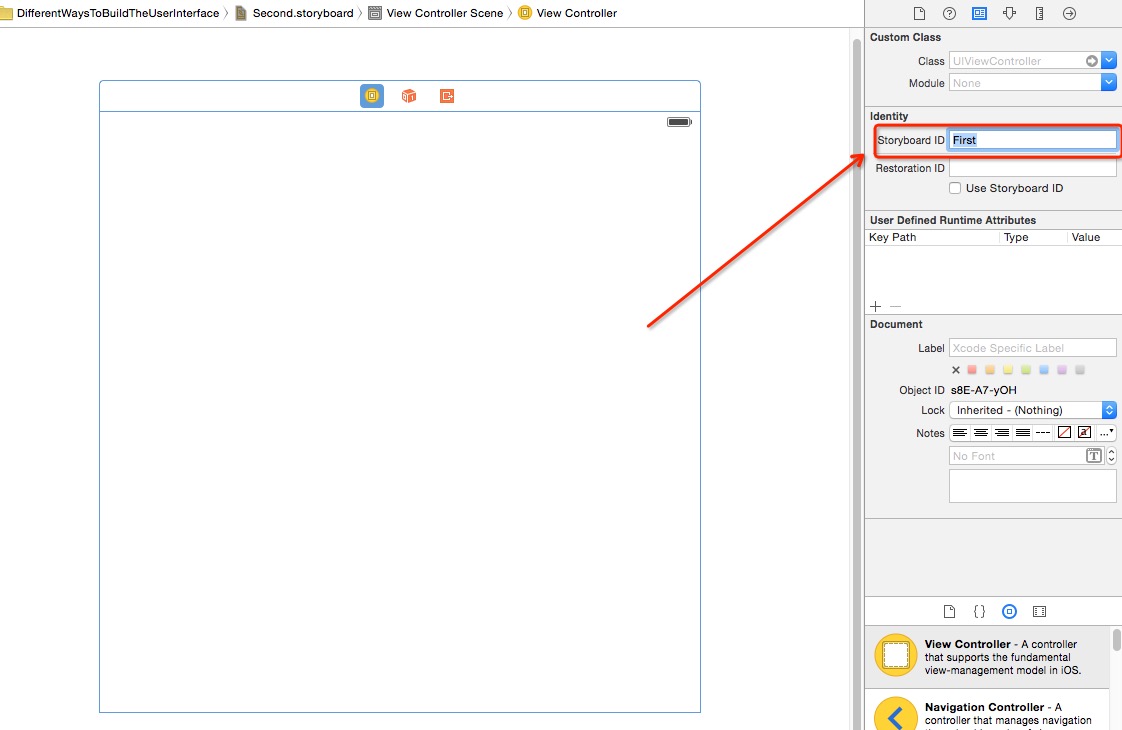
给该窗体设置一个 StoryBoard ID:
能够被触达之后,让我们用代码调用他们:
① 作为初始窗体
let vc = UIStoryboard(name: "Second", bundle: nil).instantiateInitialViewController() as! UIViewController
self.navigationController?.pushViewController(vc, animated: true)
② 设置了 StoryBoard ID
let vc = UIStoryboard(name: "Second", bundle: nil).instantiateViewControllerWithIdentifier("First") as! UIViewController
self.navigationController?.pushViewController(vc, animated: true)
当然,也可以用 self.presentViewController 调用他们。

Auto Layout
Auto Layout 跟 StoryBoard 是天作之合,配合默契,可以大幅提高 UI 开发效率,一次性做出适合所有屏幕尺寸的 UI。关于 Auto Layout 的详细使用方法大家可以参考 Auto Layout 使用心得 系列文章。
代码示例:https://github.com/johnlui/Swift-On-iOS/blob/master/DifferentWaysToBuildTheUserInterface
觉得文章有用?立即:
和朋友一起 共学习 共进步!
建议继续学习:
扫一扫订阅我的微信号:IT技术博客大学习
Recommend
About Joyk
Aggregate valuable and interesting links.
Joyk means Joy of geeK