

How to add Splash Screen in Flutter | No Native Coding
source link: https://kriss.io/how-to-create-splash-screen-in-flutter/#.YFLt33X7RQI
Go to the source link to view the article. You can view the picture content, updated content and better typesetting reading experience. If the link is broken, please click the button below to view the snapshot at that time.

How to add Splash Screen in Flutter | No Native Coding
As the topic suggests, we are going to deal with the integration of the splash screen in Flutter here. However, let us know why having a splash screen in an app is essential. Splash screens are basically an introductory screen displayed just when the user launches the app. It may not look like much because it is shown only for a short duration. But, splash screens really packs a punch as it reflects the first impression of the app. Well, it may look like much and most users generally ignore them consciously. But, they do have an impact on our subconscious mind. It sets the tone for the overall app theme and the user experience. Splash screens can be depicted as a welcoming screen for any app.
Moreover, Splash screens also help to properly represent the loading delays caused by network or error of any short. This can also reflect real-time feedback on the wait time due to connection problems. Overall, splash screens have a noteworthy effect even though some users neglect them. Thus, we as developers should know how to add a proper splash screen to mobile applications.
Overview
Since splash screens represent the valuable initial element in any app, it is essential to learn how to integrate them. And in this tutorial, we are going to learn the integration of splash screens in the flutter eco-system. The exact steps are going to be simple because we have got a package to help us integrate them. The package name is splashscreen. This package allows us to set the splash screen as well as time the splash screen appearance with just a few lines of code. The catch we do not have to touch the native codes. In this tutorial, we are going to add a simple splash screen containing text, an image, and a loading indicator.
Let’s get started!
Create a new Flutter project
First, we need to create a new Flutter project. For that, make sure that the Flutter SDK and other flutter app development related requirements are properly installed. If everything is properly set up, then in order to create a project, we can simply run the following command in the desired local directory:
flutter create splashSceenExample
After the project has been set up, we can navigate inside the project directory and execute the following command in the terminal to run the project in either an available emulator or an actual device:
flutter run
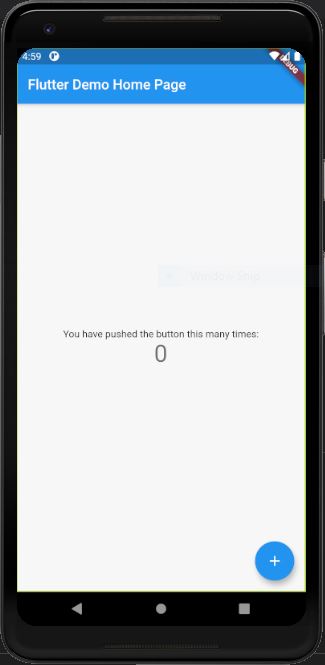
After successfully build, we will get the following result on the emulator screen:
Installing splashscreen package
Now that we have our flutter project up and running, we can go on about installing the required dependencies. Now, we know that splash screens can be added by tampering with native codes in Android and iOS folders but they are the extra things to learn for nonnative developers. But, there is a solution available in the case of Flutter. The availability of splashscreen package makes it easy to add a splash screen in our flutter app. The package offers widgets and various customization parameters to put up a simple introductory splash screen in our app.
In order to use it, we need to add it to our dependency first. For that, we need to copy the piece of code in the code snippet below and paste it into our pubspec.yaml file:
splashscreen: ^1.3.5
The package provides a SplashScreen widget that enables us to form a splash screen before navigating to our app’s primary screen.
Adding Splash Screen
Now, we are going to make use of the SplashScreen widget provided by the splashscreen package. The idea is to apply the SplashScreen widget to the home parameter of our MaterialApp widget. The overall coding implementation is provided in the code snippet below:
class MyApp extends StatelessWidget {
  // This widget is the root of your application.
  @override
  Widget build(BuildContext context) {
    return MaterialApp(
      title: 'Flutter Demo',
      theme: ThemeData(
        primarySwatch: Colors.blue,
        visualDensity: VisualDensity.adaptivePlatformDensity,
      ),
      home: SplashScreen(
        seconds: 8,
        navigateAfterSeconds:MyHomePage(title: 'Flutter Demo Home Page'),
        title: new Text(
          'SplashScreen Example',
          style: new TextStyle(
              fontWeight: FontWeight.bold,
              fontSize: 20.0,
              color: Colors.white),
        ),
        backgroundColor: Colors.lightBlue[200],
      )
    );
  }
}
Here, we have introduced the SplashScreen widget in the home parameter of the MaterialApp. There are several parameters we have configured inside the SplashScreen widget which are explained below:
seconds: The seconds option allows just to enter the time in seconds until which the splash screen is to be displayed.
navigateAfterSeconds: This option allows us to define the Widget or Screen (preferably the Home Screen of the app) which is to be shown after the splash screen ends.
title : This option enables us to add text to our splash screen. Here, we have used Text widget with some styles to do that.
backgroundColor : It allows us to specify the overall background color of the splash screen.
Hence, this is a simple configuration of a splash screen with text. The result is shown in the demo below:
Here, we can notice the Splash Screen appears for few seconds before the default Home page loads. The loader is also shown by default. But, we can control the visibility of the loader by applying the useLoader parameter in the SplashScreen widget which can be either true or false.
Adding Custom Loader
We already have the loader in place by default. But, we can control its color styling using the loaderColor options as shown in the code snippet below:
home: SplashScreen(
        seconds: 8,
        navigateAfterSeconds:MyHomePage(title: 'Flutter Demo Home Page'),
        title: new Text(
          'SplashScreen Example',
          style: new TextStyle(
              fontWeight: FontWeight.bold,
              fontSize: 20.0,
              color: Colors.white),
        ),
        backgroundColor: Colors.blue,
        styleTextUnderTheLoader: new TextStyle(),
        loaderColor: Colors.white
      )
Hence, we will get the result as shown in the demo below:
Here, we can notice that the color of the loader has changed to white.
Adding Image or Logo to Splash Screen
Now to make the splash screen look better, it always needs some sort of pictorial diagram; may it be an image or a logo. The SplashScreen widget provides us with two additional parameters to set the logo correctly in the splash screen. The image option enables us to add an image from assets or network and the photoSize option allows specifying the dimension of the image. Now, we can add a network image or image from the assets. The better one would be to add images from assets because the loading of network images depends on connectivity and sometimes the image may not show up due to a slow internet connection. Hence, we need to get the image to our ./assets directory and then register the path to it in our pubspec.yaml file.
Then, we can use the image and photoSize options as shown in the code snippet below:
home: SplashScreen(
        seconds: 5,
        navigateAfterSeconds:MyHomePage(title: 'Flutter Demo Home Page'),
        title: new Text(
          'SplashScreen Example',
          style: new TextStyle(
              fontWeight: FontWeight.bold,
              fontSize: 20.0,
              color: Colors.white),
        ),
        image: new Image.asset('assets/flut.png'),
        photoSize: 100.0,
        backgroundColor: Colors.blue,
        styleTextUnderTheLoader: new TextStyle(),
        loaderColor: Colors.white
      )
Hence, we will get the result as shown in the code snippet below:

As we can see, we have got the image placed at the top of our text. There are other options available as well which you can explore via documentation of the splash screen package itself.
This was a basic representation of how you can add a simple splash screen easily using splashscreen package without having to touch the native codes. Mind you that this works on both Android and iOS and does not need separate implementations.
Conclusion
There is no doubt that the overall steps were simple and easy to understand. And, the credit goes to the availability of the splashscreen plugin that enabled us to add a splash screen easily. The main aim of this tutorial was to showcase the integration of splash screen in the flutter eco-system without having to touch the native codes. But, there is not so much was can do with this plugin. If you are to create a custom splash screen with full control over what to add to it then we will have to touch the native codes. But for simple splash screens, this plugin does the job for us. Here, we got detailed guidance on how to create a splash screen including text, a loading indicator, and an image. Now, the challenge is to use other remaining parameters provided by the SplashScreen widget.
Remember that the splash screen also helps to delete the waiting anxieties while launching any app. So, it does provide mental health benefits as well. Hence, they are essential components to add to any mobile application.
There is no ads to display, Please add some
Related Posts
-
AirBnB Clone with React Native Part 10: Implementing a splash screen [iOS]
This tutorial is the tenth chapter of our implementation of an AirBnB clone in React…
-
React Native Shopify App UI Clone #1 : Implementing Splash Screen
This tutorial is the first part of our implementation of the React Native Shopify app…
-
Food Delivery App UI Clone in React Native #1 : Splash Screen Integration
This is the first part of our implementation of the React Native Food Delivery app…
-
Build React Native E-commerce App #1 | Splash Screen in iOS
This tutorial is the first part of our implementation of the React Native eCommerce app.…
-
AirBnB Clone with React Native Part 11: Implement a splash screen [Android]
This is the eleventh chapter of our implementation of an Airbnb clone in React Native.…
Recommend
About Joyk
Aggregate valuable and interesting links.
Joyk means Joy of geeK