

Jenkins | Problems you might face while pipe-lining!
source link: https://blog.knoldus.com/jenkins-problems-you-might-face-while-pipe-lining/
Go to the source link to view the article. You can view the picture content, updated content and better typesetting reading experience. If the link is broken, please click the button below to view the snapshot at that time.
Problems you might face while pipe-lining!
Reading Time: 6 minutes
I expect you to be familiar with basics of Jenkins. If you’re not please visit Introduction to Jenkins, this post will take you through very basics of Jenkins. What I want to introduce to you, are post setup type of things. Means, you have already setup Jenkins and now you are worried about how to do pipelining of the project.
I will take you through the problems that might come when you pick working on a Jenkins Pipeline project that uses Docker images. To understand what is a Docker Image please visit Introduction to Docker, this post will take you through the basics of Docker Image.
Pipe-Lining a Maven Project:
Creating a Pipe-line is similar to create a simple Jenkins Job, but in here you have to give some different configurations for your job. Let’s start.
Steps:
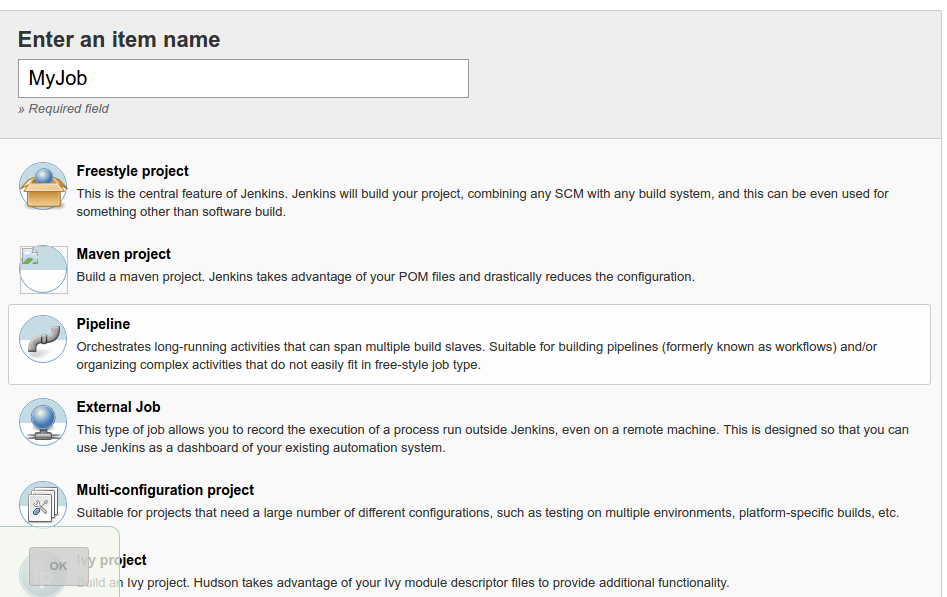
1. Goto Jenkins Home and click new Item.
2. Select the pipeline option and give a suitable job name and press OK.
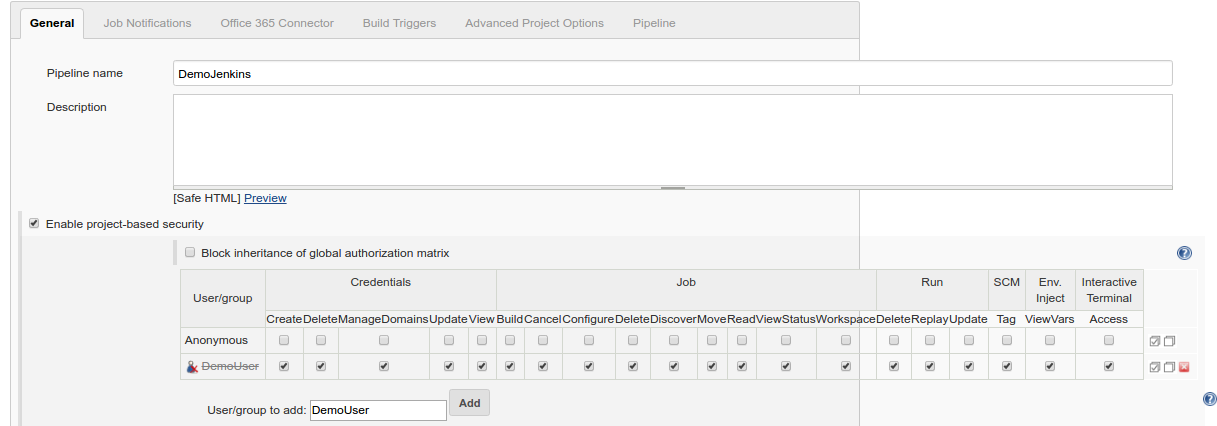
3. Now give proper configurations for this Job as defined below:
a. In General tab you can give the project based security to a particaular person/group of people and define what role/permissions you want this person/group to be involved in.
b. You don’t need to touch other settings in General/Job Notification/Office 365 Connector Tabs for a simple pipeline.
c. In next Tab i.e. Build Triggers, you can define the type of trigger you want to automate to build your Job or you can leave it blank if you want to manually trigger your Build.
d. Then the most important configuraion is Pipeline tab.
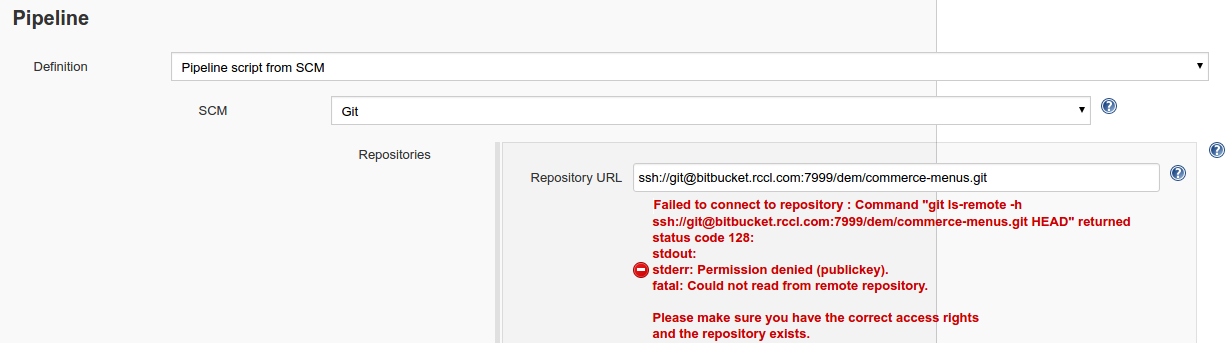
i) There are two ways to make pipeline, first you can write a script in given textbox in Pipeline Script option, second you can select Pipeline Script from SCM, and provide a Jenkinsfile in your project and give the path in script path.
ii) Then define your Source Code Management(SCM) in SCM option i.e. Git in our case.
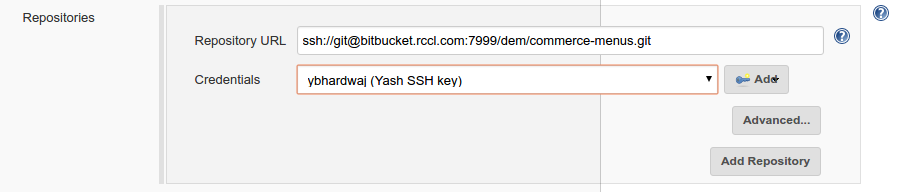
iii) Then define your Git Repository URL, your will see an error as show below in the image steps, the next image show how to resolve it. You’ll have to create a proper Jenkins credential for the given Repo and select it in Credential option. The error will then disapear.
Follow below image references:


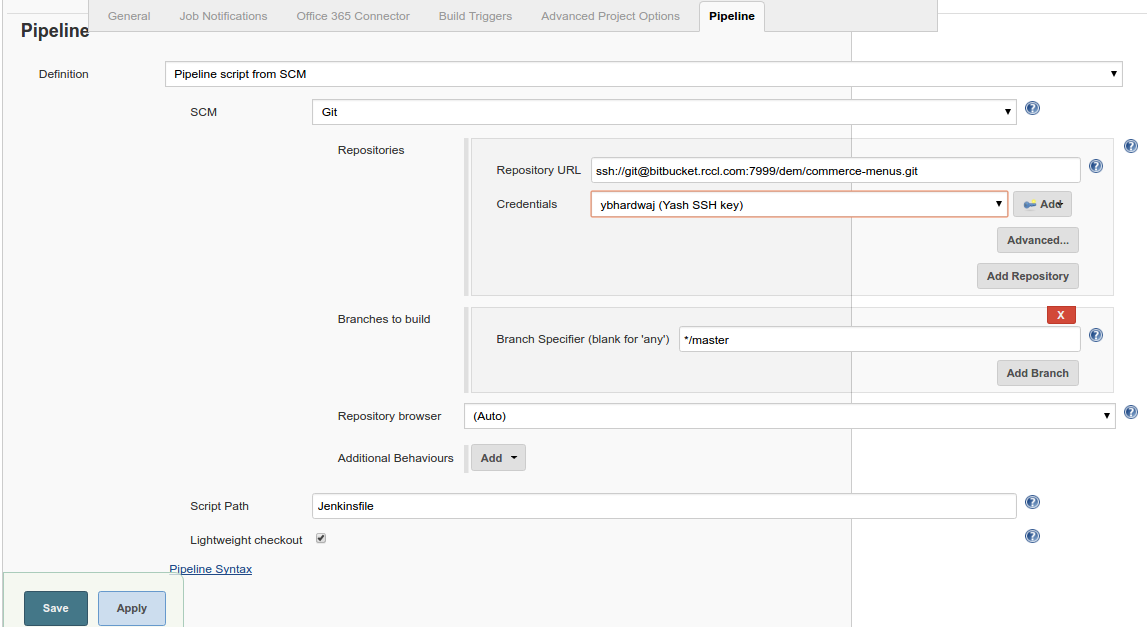
That’s how a Pipeline looks like. Now click Apply and then Save, you’ll be redirected to home. This is how you create a Pipeline on Jenkins. Now Lets try to implement this Pipeline in your given Repo.
How to implement jenkins in Repository:
You need to create and define a Jenkinsfile in your project which can be read by Jenkins Pipeline. So, we’ll create this file in parallel to parent pom.xml just to avoid long paths to find jenkinsfile.
xxxxxxxxxx
@Library('common-jenkinsfile') _
def serviceName = 'demo'
def marathonJson = 'demo-project-impl/app-definition.json'
def serviceImplDir ='demo-project-impl'
def serviceVersion = '2.0.1'
def options = [ 'sonarqube':true, 'checkmarx':false ,'tools':false,'reports':false, 'jacoco':false, 'apigee':true, 'kafka':false,'perftest':false,'pack':true,'publish':true,'deploy':true,'appendCommitHashToImageTag':true]
def teamName = 'commerce'
builderMethod(teamName,serviceName,serviceVersion,marathonJson,serviceImplDir,options)
This is how a Jenkinsfile looks like, this file is written in Groovy mostly and contains all commands which are needed to build your project as per expectation, e.g. the builderMethod method is an automated function which defines all commands that are required to build my application. you may hard code them here in Jenkins File.
Now to Create a Docker Image of your build you can configure Docker in your Project. Open you IMPL pom.xml and define the Docker Properties and profiles there.
xxxxxxxxxx
<properties>
<docker-image-name>venue</docker-image-name>
<docker-image-tag-version>2.0.1</docker-image-tag-version>
<dockerRegistryURI>repositoryURL/repositoryName</dockerRegistryURI>
</properties>
<profiles>
<profile>
<id>local</id>
<activation>
<activeByDefault>true</activeByDefault>
</activation>
<properties>
<maven.test.skip>true</maven.test.skip>
<docketHost>unix:///var/run/docker.sock</docketHost>
<dockerRegistryCertPath>${project}/src/main/docker/registry/aws_dev_test.crt</dockerRegistryCertPath><dcosURI>http://10.167.54.24</dcosURI>
<dcosTokenFile>src/main/deploy/dcosToken</dcosTokenFile>
<skipDockerBuild>false</skipDockerBuild>
<skipDockerPush>false</skipDockerPush>
<ignoreDcosSslCertificateIssue>true</ignoreDcosSslCertificateIssue>
<dcosApplicationDefinitionFile>src/main/deploy/commerce-venue-dev-cloud-deploy.json</dcosApplicationDefinitionFile>
</properties>
</profile>
</profiles>
Now whenever an mvn install will be run on your code, it’ll create an docker image on the defined docker Registry URL. You need some more this docker process. Create a docker folder in your src/main and create a docke-bundle.xml in it. insert following code:
xxxxxxxxxx
<assembly xmlns="http://maven.apache.org/plugins/maven-assembly-plugin/assembly/1.1.3" xmlns:xsi="http://www.w3.org/2001/XMLSchema-instance" xsi:schemaLocation="http://maven.apache.org/plugins/maven-assembly-plugin/assembly/1.1.3 http://maven.apache.org/xsd/assembly-1.1.3.xsd">
<id>conductr-bundle</id>
<formats>
<format>zip</format>
</formats>
<dependencySets>
<dependencySet>
<outputDirectory>lib</outputDirectory>
<outputFileNameMapping>${artifact.groupId}-${artifact.artifactId}-${artifact.version}${dashClassifier?}.${artifact.extension}</outputFileNameMapping><excludes>
<exclude>io.netty-netty-buffer-4.0.36.Final.jar</exclude>
</excludes>
</dependencySet>
</dependencySets>
<fileSets>
<fileSet>
<outputDirectory>/bin</outputDirectory>
<directory>src/main/docker</directory>
<fileMode>0755</fileMode>
</fileSet>
</fileSets>
</assembly>
Now create a simple file named Dockerfile parallel to you docker-bundle.xml and insert following code in it.
xxxxxxxxxx
From openjdk:8-jre-alpine
MAINTAINER [email protected]
ENV APP_DIRECTORY /usr/src/app/serviceName
ENV APP_LIB_DIR /usr/src/app/serviceName/lib/
ENV JMX_PORT 3333
ENV JVM_HEAP_SIZE "-Xms1g -Xmx1g"
ENV APP_DEFAULT_LOGGING_LEVEL ERROR
ENV APP_ROOT_LOGGING_LEVEL ERROR
RUN echo "Creating APP Directory $APP_DIRECTORY"
RUN mkdir -p $APP_DIRECTORY
RUN echo "Creating APP Library Directory $APP_LIB_DIR"
RUN mkdir -p $APP_LIB_DIR
RUN echo "Copying jars to APP Library Directory $APP_LIB_DIR"
COPY ./maven/* $APP_LIB_DIR
RUN echo "Adding entryPoint.sh"
ADD ./maven/bin/entryPoint.sh /entryPoint.sh
EXPOSE 8080
EXPOSE 3333
ENTRYPOINT ["/entryPoint.sh","$APP_DIRECTORY","$APP_LIB_DIR"]
Create an entry Point for your execution i.e. EntryPoint.sh
xxxxxxxxxx
#!/bin/sh
set -e
APP_CLASSPATH=/usr/src/app/commerce-venue/lib/*
PLAY_SECRET=none
CONFIG="-Dplay.crypto.secret=$PLAY_SECRET -Dlagom.cluster.join-self=on"
JVM_OPS="$JVM_HEAP_SIZE $JAVA_OPTS"
JVM_JMX_REMOTE_CONFIG="-Dcom.sun.management.jmxremote -Dcom.sun.management.jmxremote.rmi.port=$JMX_PORT -Dcom.sun.management.jmxremote.port=$JMX_PORT -Djava.rmi.server.hostname=$HOST -Dcom.sun.management.jmxremote.local.only=false -Dcom.sun.management.jmxremote.ssl=false -Dcom.sun.management.jmxremote.authenticate=false"
SOLR_CONFIG="-Dsolr.server.uri=$SOLR_URI"
PLAY_SERVER_START="play.core.server.ProdServerStart"
echo "$APP_CLASSPATH $JVM_OPS $PLAY_SERVER_START $SOLR_CONFIG"
#exec java -version
exec java -cp "$APP_CLASSPATH" -DAEM_VENUE_SERVICE_BASE_URI=$AEM_VENUE_SERVICE_BASE_URI -DAPP_DEFAULT_LOGGING_LEVEL=$APP_DEFAULT_LOGGING_LEVEL -DLOG_HOME=/var/log -DAPP_ROOT_LOGGING_LEVEK=$APP_ROOT_LOGGING_LEVEL $JVM_OPS $JVM_JMX_REMOTE_CONFIG $SOLR_CONFIG $CONFIG $PLAY_SERVER_START
If you want to deploy your docker image on DC/OS then you’ll some certificates also don’t forget to provide the certificates and the DCOS token/credentials of course.
Create a marathon.json for your application/environment level variables. For example see the below code:
xxxxxxxxxx
{"id": "env/teamName/serviceName",
"cpus": 2,
"mem": 4096,
"instances": 4,
"env": {"CAS_NATIVE_URL": "tcp://10.164.76.199:1020/cas_native",
"SOLR_URI": "SolrURI if required",
"JAVA_OPTS": "-Xmx512m -Xms384m -Djavax.net.ssl.keyStorePassword=password -Djavax.net.ssl.trustStorePassword=password -Djavax.net.ssl.keyStore=/etc/ssl/certs/clientkeystore.jks -Djavax.net.ssl.trustStore=/etc/ssl/certs/cacerts.jks -DLOG_HOME=/var/log",
"JVM_HEAP_SIZE": "-Xmx1024m -Xms1024m",
"targetRps": "100",
"servicePort": "10100",
"autoScale": "true",
"maxInstances": "5",
"minInstances": "2"
},
"container": {"type": "DOCKER",
"volumes": [{"containerPath": "/etc/ssl/certs/ca-certificates.crt",
"hostPath": "/opt/mesosphere/active/python-requests/lib/python3.5/site-packages/requests/cacert.pem",
"mode": "RW"
},
{"containerPath": "/etc/ssl/certs/clientkeystore.jks",
"hostPath": "/opt/mesosphere/certs/clientkeystore.jks",
"mode": "RW"
},
{"containerPath": "/etc/ssl/certs/cacerts.jks",
"hostPath": "/opt/mesosphere/certs/cacerts.jks",
"mode": "RW"
}
],
"docker": {"image": "dockerRegisteryURL/imageName",
"network": "BRIDGE",
"portMappings": [{"containerPort": 8080,
"hostPort": 0,
"servicePort": 0
}]
}
},
"labels": {"HAPROXY_GROUP": "external",
"HAPROXY_0_VHOST": "www.example.com",
"HAPROXY_0_HTTP_BACKEND_PROXYPASS_PATH": "/serviceName/2.0.1/",
"HAPROXY_0_PATH": "/serviceName/2.0.1/"
},
"healthChecks": [{"protocol": "HTTP",
"path": "/url/serviceName/health",
"gracePeriodSeconds": 300,
"intervalSeconds": 60,
"timeoutSeconds": 20,
"maxConsecutiveFailures": 3,
"ignoreHttp1xx": false
}]
}
Now, I think your application is ready to deploy. Go ahead and follow below steps:
- Push your code in your repository and press build now in your Jenkins Job.
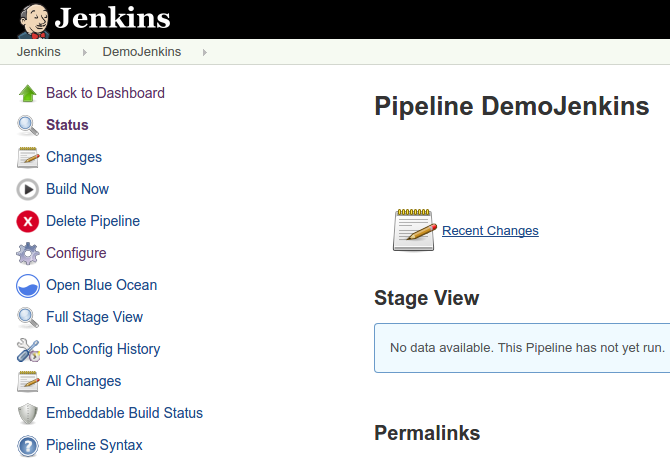
You’ll see your job has started to build. You can check the progress under Stage View.
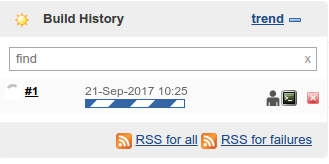
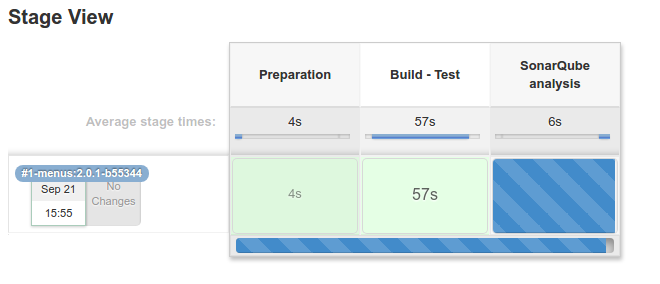
See the console output of a build and read the logs to be sure everything is getting execute by Jenkins. Now your Pipeline has been built and working fine.
Now click on the build and looks at the build name this is the name of your docker image. You can promote this image in any running environment to deploy.
References: These are my finding/understanding while working on my project.
Please post your comments below if I left something and if it could be better someway. Please feel free to add your knowledge of the area in comment or contact me at [email protected].
Recommend
About Joyk
Aggregate valuable and interesting links.
Joyk means Joy of geeK