

Build Real-World React Native App #10 : Setup in-App Purchase in iOS
source link: https://soshace.com/build-real-world-react-native-app-10-setup-in-app-purchase-in-ios/
Go to the source link to view the article. You can view the picture content, updated content and better typesetting reading experience. If the link is broken, please click the button below to view the snapshot at that time.
Build Real-World React Native App #10 : Setup in-App Purchase in iOS
Build Real-World React Native App #10 : Setup in-App Purchase in iOS
The most awaited and considerably the lengthiest chapter is here. In this chapter, we will learn how to add the in-app purchase service in React Native using React Native IAP package The configurations are mainly for the iOS platform. Here, we are going to set up the subscriptions and configure the App Store Connect to enable the in-app purchase feature. The process is somewhat lengthy but make sure to do it carefully. We are also going to implement a tester to test the in-app purchase service. Lastly, we are also going to configure the UI screen for the Remove ads feature.
Let’s get started!
Installing React Native IAP
First, we are going to install a package named react-native iap. This is a react-native native module library project for in-app purchases for both Android and iOS platforms. For that, we need to run the following command in our project terminal:
Setup on iOS
In iOS, we need to run a general command for cacao pod install as shown below:
Then, we need to go to Xcode and add in-app purchase capability as shown in the screenshot below:
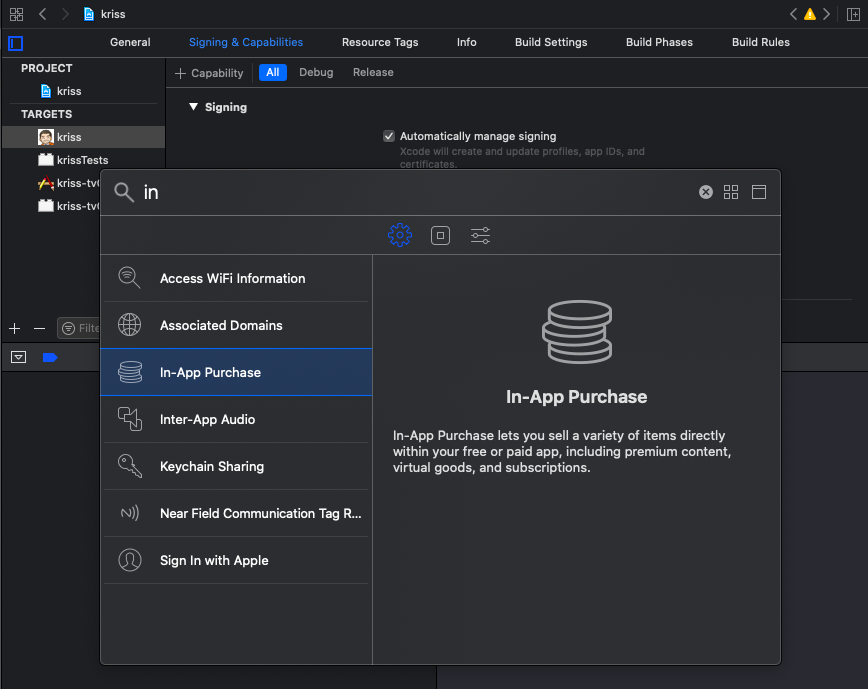
Setup Inapp in Xcode
As we are done in Xcode, we will see the following information:
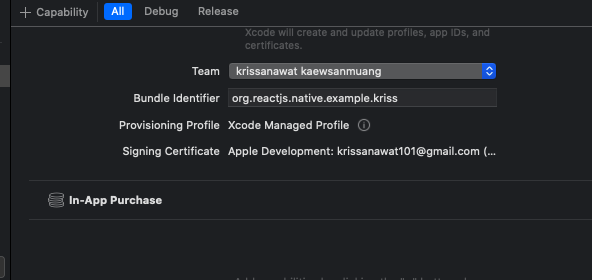
Setup bundle identifier
To use the In-app purchase service, we need to create a Context component named IApController first. Then, we need to import components as shown in the code snippet below:
Then, we need to create an array to contain the product name that will match on both Android and Apple developer dashboard as shown in the code snippet below:
Next, we need to create two states to handle product data and ads status as shown in the code snippet below:
Now, we are going to start with fetching product data from the app store and play store. For Playstore, we need to get a subscription with separate function as shown in the code snippet below:
Product and Subscription
Now, we need to create two more functions to handle user purchases and subscriptions. The idea is to hide the ads when the purchase or subscription is successful. The coding implementation for this is provided in the code snippet below:
Then, we need to create a toggle function to display or hide ads as shown in the code snippet below:
Next, we need to prepare a list of functions that we want to export to use in other components as shown in the code snippet below:
Hence, we have completed the configuration part of the IApController. Our next step is to activate Context in App.js.
First, we start by importing IApController to App.js file as shown in the code snippet below:
Then, we wrap the Navigator with another level of Context component as shown in the code snippet below:
Now, we need to fetch the list of products that we need to activate in Navigator.js. First import the IApContext in Navigator as shown in the code snippet below:
Then by using useEffect hook, we activate it every time the app loads as shown in the code snippet below:
Now, when re-running the app, we get a blank array because we didn’t create a product list on the app store or play store as shown in the screenshot below:

Fetch Iap data
App Store Connect
To register for App store Connect, we require a developer account which costs about 99$ per year. To access this feature, we need to set up financial data first. The screenshot of the App Store Connect console is shown below:
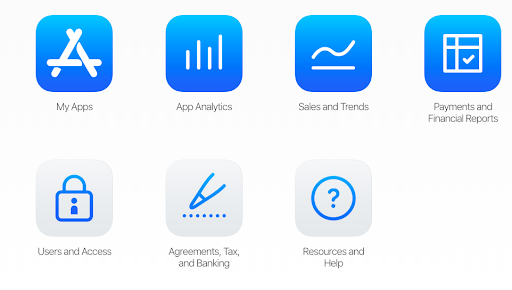
App-store connect dashboard
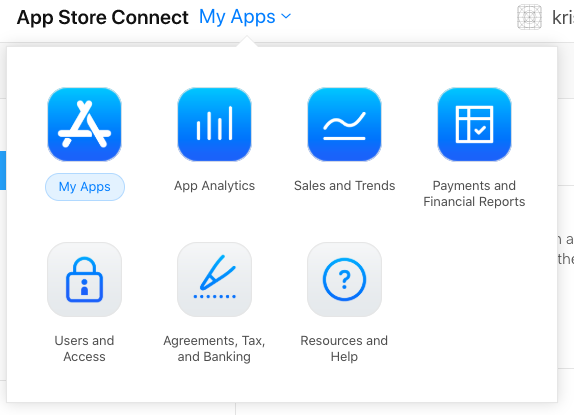
Then, we need to go to the My Apps option and create a new App as directed in the screenshot below:
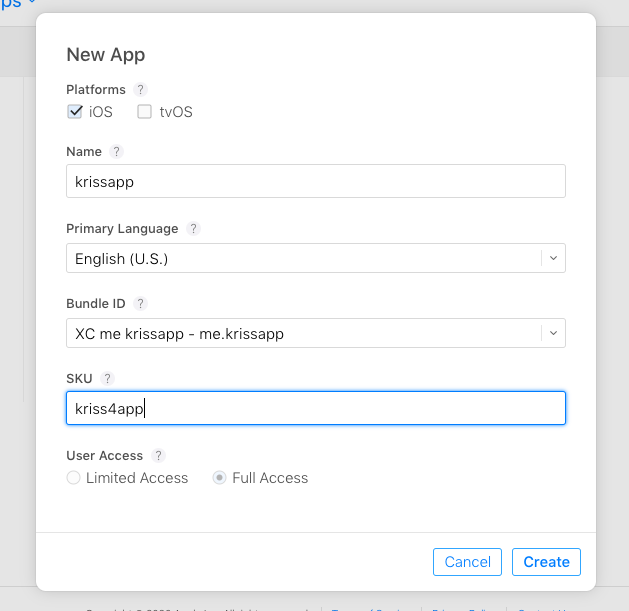
Add a new app to AppStore connect.png
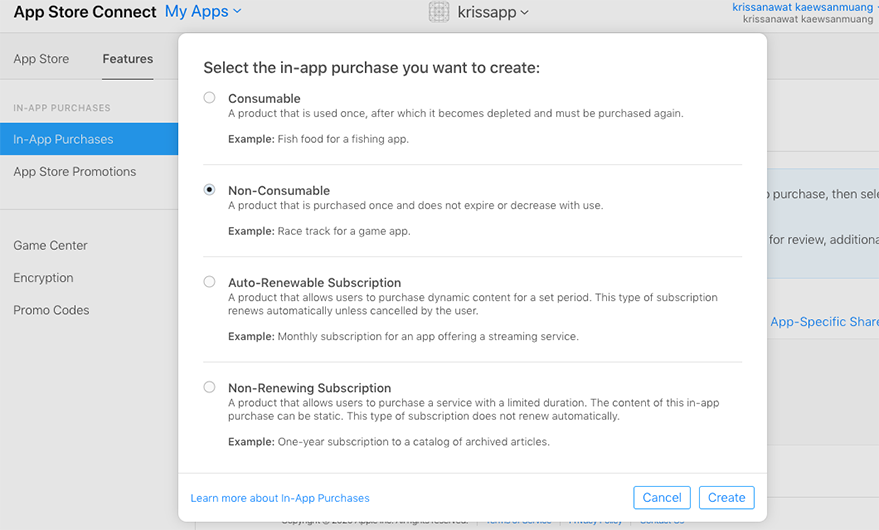
Next, we need to go to the Feature tab as shown in the screenshot below:

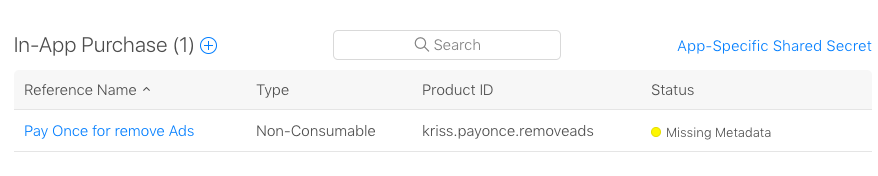
App-store connect feature tabThen, we need to select in-App Purchase and also choose Non-Consumable. Hence, we will use this to offer to remove ads forever as shown in the console screenshot below:
Add new consumable itemWe can provide any name in the Reference Name field but Product ID requires the same ID value that we defined In-app configuration as shown in the screenshot below:
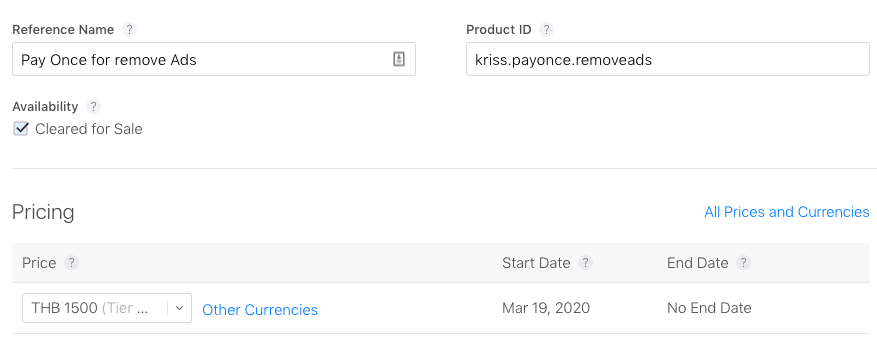
Add product detail
Then, we need to fill in pricing and other description as shown in the screenshot below:
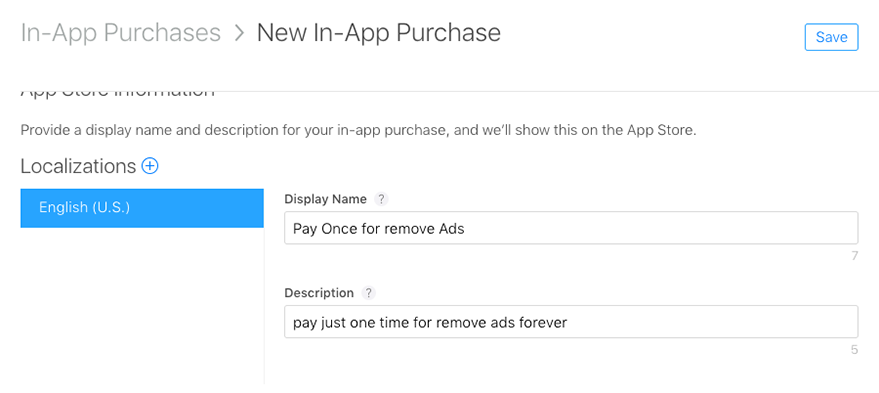
Localize product detail
Now, it is ready to use as displayed in the screenshot below:
First non-consumable product
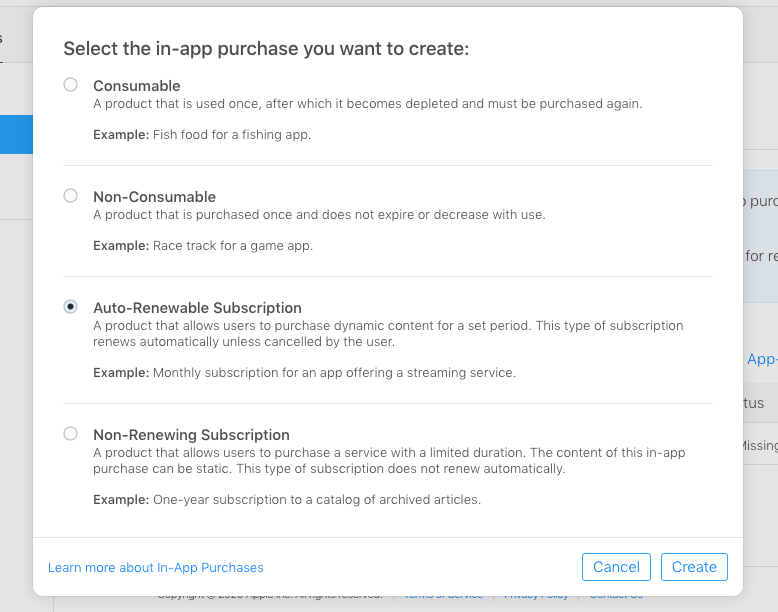
Now next step is to paid subscription option as directed in the screenshot below:
Create auto-renewable subscription
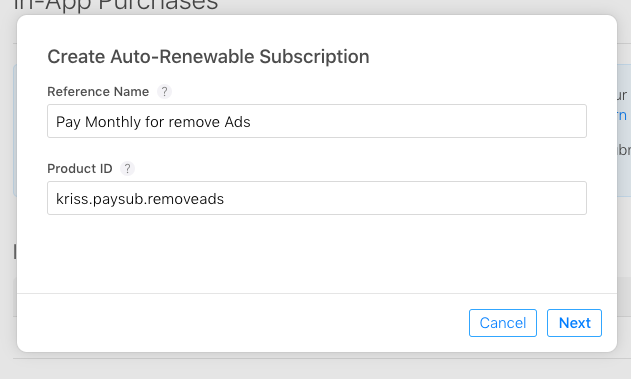
First, we need to choose Auto-Renewable Subscription as shown in the screenshot above and then fill in Reference Name and Product ID as before as shown in the screenshot below:
Add app id and app name
Then, we need to create a subscription group as shown in the screenshot below:
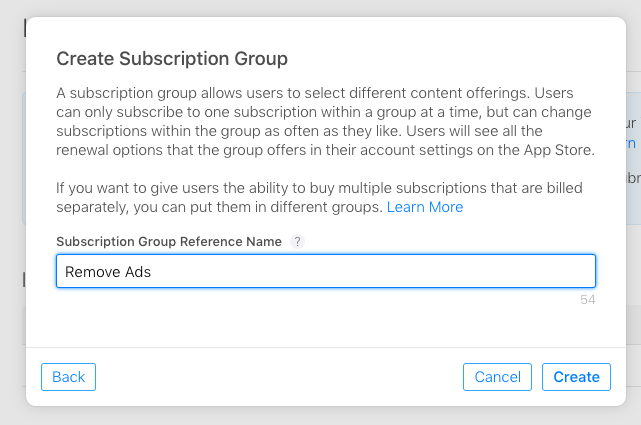
Create subscription group
Next, we need to select the subscription duration which is 1 Month for our app as shown in the screenshot below:
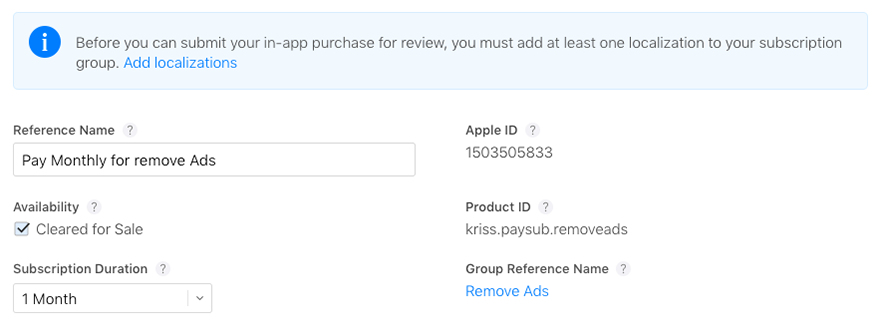
Add subscription duration
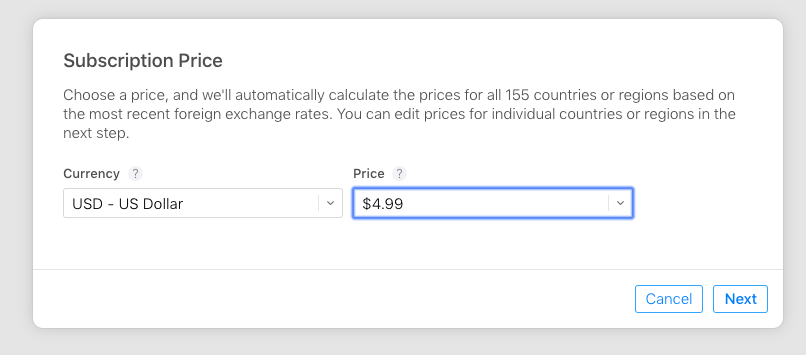
Lastly, we need to select the pricing option which 4.99$ per month as shown in the screenshot below:
Add subscription pricing
Thus, the app store will calculate pricing for every country itself as shown in the screenshot below:
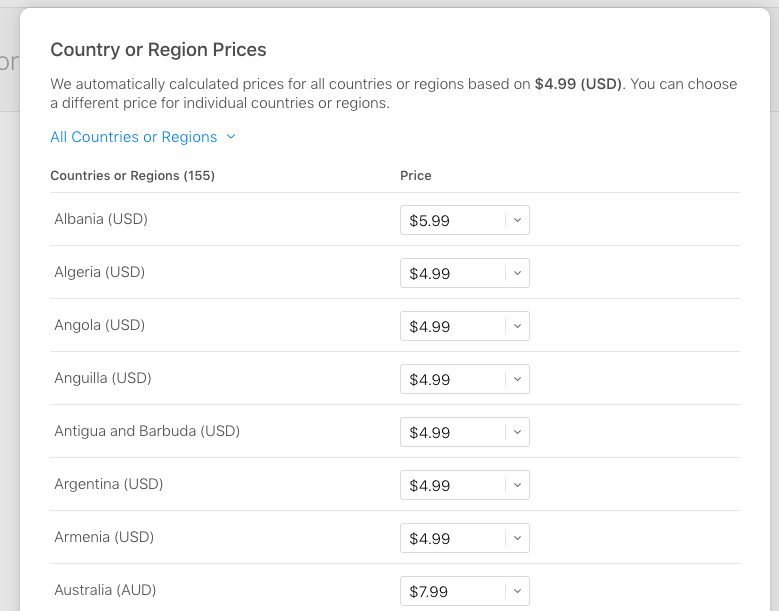
Pricing by country
Hence, we have successfully configured the one-time payment and subscription-based payment option as shown in the screenshot below:

All of app store product
Now, we need to create a Tester.
Creating Tester
First, we need to apply a test for users for initial performance in development mode. Thus, we need to go to User and Access as shown in the screenshot below:
Create app-store tester
Then, we need to create a new tester as directed in the screenshot below:
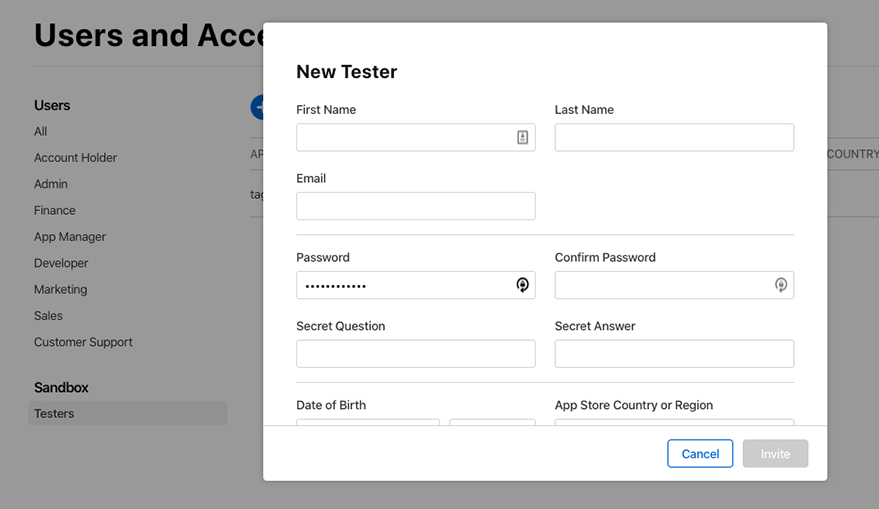
Add tester detail
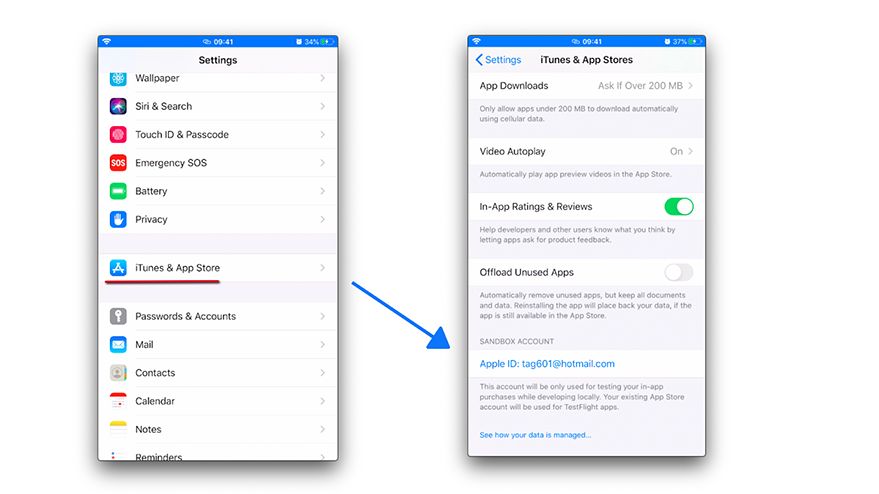
To use this in the iOS platform, we can register as a Sandbox account as shown in the screenshot below:
Add tester to the device
Now, we need to re-run the app again using the following command:
Hence, we will get the product data printed in the terminal as shown in the screenshot below:
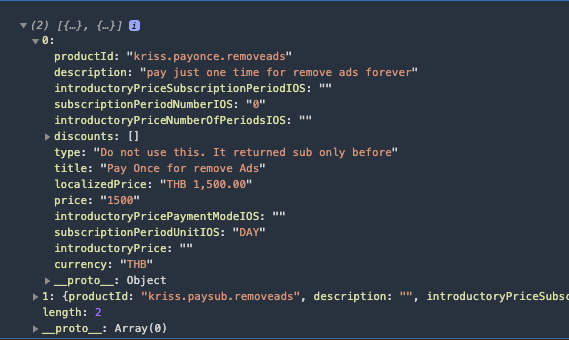
Success fetch app store product
Next, we need to create a new screen to handle the in-app purchases.
For that, we need to create a new screen named RemoveAds and import it to the Navigator.js file as shown in the code snippet below:
Then, we need to add it to the same group on the setting screen as shown in the code snippet below:
Next, we need to go back to the Setting screen and add a new menu option called RemoveAds as shown in the code snippet below:
Now, we have a menu option to navigate to the RemoveAds screen as shown in the emulator screenshot below:
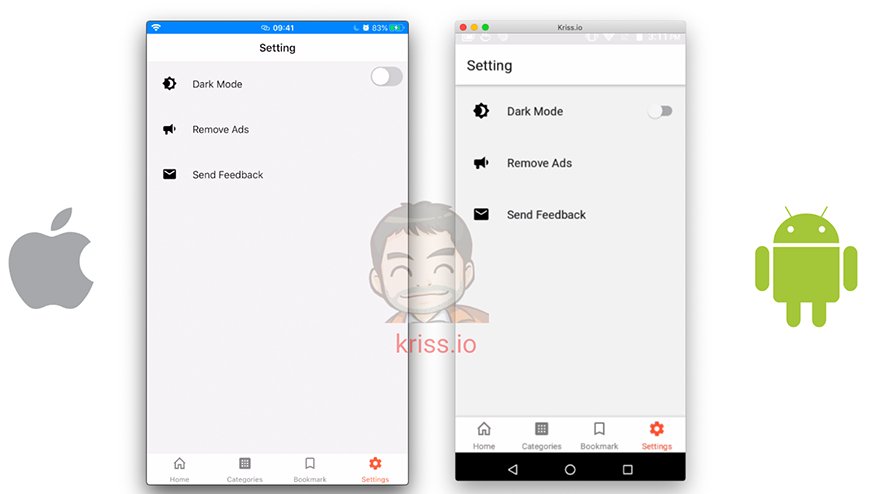
Create remove ads navigation
Implementing RemoveAds screen
On this screen, we are going to perform in-app purchase configurations. Thus, we require a privacy policy and terms of use on this screen. First, we need to import the required packages, modules, and components as shown in the screenshot below:
For UI, we construct the screen using the code from the following code snippet:
Hence, we will get the following result in our emulator screen:
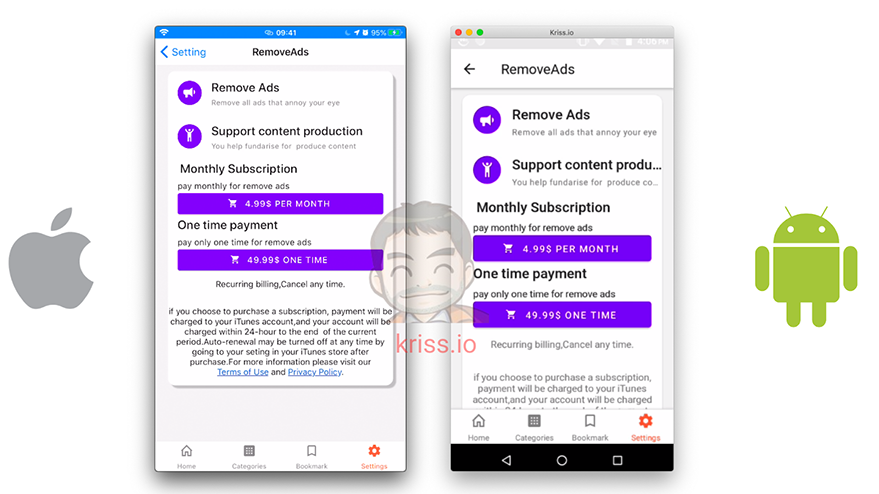
Remove ads screen
Conclusion
Well, this chapter has been an interesting one. We got stepwise guidance on how to configure the in-app purchase in the React Native app using the IAP package. We configured the in-app purchase for the app store configuring the App Store Connect. The main objective of this chapter was to integrate in-app purchase in the React Native project for the iOS platform so that we can use it to buy a subscription to remove ads in the next chapter. To trigger the in-app purchase we also need to UI screen to provide the detailed subscription feature which is connected to the App store connect through the IAP package. Hence, we also created a UI screen to trigger In-app purchases. In this case, to remove the ads.
Hence, in the next chapter, we are going to use it to implement the subscription-based in-app purchase to remove ads from the app.
About the author
Recommend
About Joyk
Aggregate valuable and interesting links.
Joyk means Joy of geeK