
3

安卓学习笔记34:默默工作的服务
source link: https://blog.csdn.net/howard2005/article/details/111879352
Go to the source link to view the article. You can view the picture content, updated content and better typesetting reading experience. If the link is broken, please click the button below to view the snapshot at that time.
零、学习目标
- 了解安卓组件“服务”的作用
- 掌握如何创建服务、注册服务
- 掌握如何启动服务和停止服务
- 掌握如何绑定服务和解绑服务
一、服务(Service)概述
(一)进程优先级
- 应用程序的生命周期是在Android系统中进程从启动到终止的所有阶段,也就是Android从启动到停止的全过程。Android应用程序的生命周期的终结这个动作并非由应用程序进程本身执行,而是取决于Android系统。那么,系统是根据一个怎样的重要性标准来终止Android应用程序呢?Android根据应用程序的组件以及组件当前运行状态将所有的进程按重要性程度从高到低划分为五个,如下图所示:
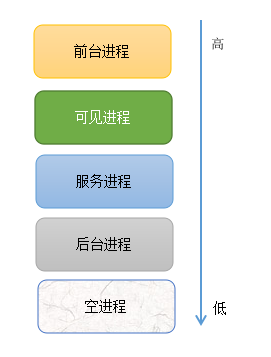
- 前台进程(完全可见的执行Activity)
- 可见进程(局部可见的执行Activity)
- 后台进程(完全不可见的执行Activity)
- 空进程(是为了缓存进程,便于下次更快启动)
- 当执行一个安卓应用程序,如果运行内存不足,安卓系统会按上述优先级杀死进程。
(二)服务的作用
- Service生命力顽强,它有两方面的作用:后台运行、跨进程访问。学习Service基础,利用它可以在后台完成一些耗时的工作,比如网络连接、下载数据、播放音频、播放视频等等。
(三)服务的生命周期

- Service从启动到销毁只有三个阶段:创建服务、开始服务(启动、绑定)、销毁服务。
- 这三个阶段对应三个回调方法:
onCreate()、onStartCommand() / onBind()、onDestroy()。 - 服务启动时,执行一次
onCreate()方法与onStartCommand()方法,再次启动服务,不会再执行onCreate()方法,但是会再执行onStartCommand()方法。停止和解绑服务时,都会执行onDestroy()方法。
二、案例演示 - 启动与停止服务
(一)运行效果

(二)涉及知识点
- 线性布局(LinearLayout)
- 按钮(Button)
- 服务(Service)
- 线程(Thread)
- Runnable接口
- 日志类(Log)
(三)实现步骤
1、创建安卓应用【StartStopService】


2、将背景图片拷贝到drawable目录

3、主布局资源文件activity_main.xml

<?xml version="1.0" encoding="utf-8"?>
<LinearLayout xmlns:android="http://schemas.android.com/apk/res/android"
    xmlns:tools="http://schemas.android.com/tools"
    android:layout_width="match_parent"
    android:layout_height="match_parent"
    android:background="@drawable/background"
    android:orientation="vertical"
    android:gravity="center"
    tools:context=".MainActivity">

    <Button
        android:id="@+id/btnExplicitlyStartService"
        android:layout_width="200dp"
        android:layout_height="wrap_content"
        android:text="@string/explicitly_start_service"
        android:onClick="doExplicitlyStartService"
        android:textSize="20sp"/>

    <Button
        android:id="@+id/btnImplicitlyStartService"
        android:layout_width="200dp"
        android:layout_height="wrap_content"
        android:text="@string/implicitly_start_service"
        android:onClick="doImplicitlyStartService"
        android:textSize="20sp"/>

    <Button
        android:id="@+id/btnStopService"
        android:layout_width="200dp"
        android:layout_height="wrap_content"
        android:text="@string/stop_service"
        android:onClick="doStopService"
        android:textSize="20sp"/>
</LinearLayout>
4、字符串资源文件strings.xml

<resources>
    <string name="app_name">启动与停止服务</string>
    <string name="explicitly_start_service">显式启动服务</string>
    <string name="implicitly_start_service">隐式启动服务</string>
    <string name="stop_service">停止服务</string>
</resources>
5、创建自定义服务类 - CustomService
-
继承Service类,创建CustomService类

-
声明变量与常量

-
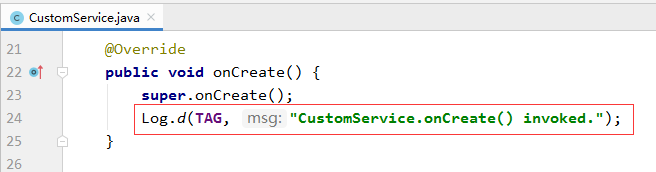
在onCreate()方法里输出调试信息
-
在onStartCommand()方法里启动服务

-
在onDestroy()方法里停止服务

-
查看自定义服务类完整源代码
package net.hw.start_stop_service;

import android.app.Service;
import android.content.Intent;
import android.os.IBinder;
import android.util.Log;

import androidx.annotation.Nullable;

/**
 * 功能:自定义服务类
 * 作者:华卫
 * 日期:2020年12月29日
 */
public class CustomService extends Service {

    private final String TAG = "start_stop_service"; // 标记
    private Thread thread; // 线程
    private boolean isRunning; // 线程循环控制变量

    @Override
    public void onCreate() {
        super.onCreate();
        Log.d(TAG, "CustomService.onCreate() invoked.");
    }

    @Override
    public int onStartCommand(Intent intent, int flags, final int startId) {
        Log.d(TAG, "CustomService.onStartCommand() invoked.");
        // 设置线程循环控制变量为真
        isRunning = true;
        // 判断意图是否为空
        if (intent != null) {
            // 创建线程
            thread = new Thread(new Runnable() {
                @Override
                public void run() {
                    while (isRunning) {
                        Log.d(TAG, "服务正在进行中……startId: " + startId + ", hashCode: " + CustomService.this.hashCode());
                        try {
                            Thread.sleep(1000);
                        } catch (InterruptedException e) {
                            e.printStackTrace();
                        }
                    }
                }
            });
            // 启动线程
            thread.start();
        }
        // 设置服务的非粘性
        return Service.START_NOT_STICKY;
    }

    @Nullable
    @Override
    public IBinder onBind(Intent intent) {
        return null;
    }

    @Override
    public void onDestroy() {
        super.onDestroy();
        Log.d(TAG, "CustomService.onDestroy() invoked.");
        isRunning = false;
        thread = null; // 销毁线程
        stopSelf(); // 停止服务
    }
}
6、在项目清单文件里注册自定义服务类

7、主界面类 - Mainactivity

-
编写代码显式启动服务

-
编写代码隐式启动服务

-
编写代码停止服务

-
查看主界面类完整源代码
package net.hw.start_stop_service;

import android.content.Intent;
import android.os.Bundle;
import android.view.View;

import androidx.appcompat.app.AppCompatActivity;

public class MainActivity extends AppCompatActivity {

    @Override
    protected void onCreate(Bundle savedInstanceState) {
        super.onCreate(savedInstanceState);
        // 利用布局资源文件设置用户界面
        setContentView(R.layout.activity_main);
    }

    /**
     * 显式启动服务
     *
     * @param view
     */
    public void doExplicitlyStartService(View view) {
        // 创建启动指定服务的意图
        Intent intent = new Intent(this, CustomService.class);
        // 按照意图启动指定服务
        startService(intent);
    }

    /**
     * 隐式启动服务
     *
     * @param view
     */
    public void doImplicitlyStartService(View view) {
        // 创建意图
        Intent intent = new Intent();
        // 设置意图动作(暗号或频道)
        intent.setAction("custom_service");
        // 设置意图包名
        intent.setPackage(getPackageName());
        // 按照意图启动服务
        startService(intent);
    }

    /**
     * 停止服务
     *
     * @param view
     */
    public void doStopService(View view) {
        // 创建启动指定服务的意图
        Intent intent = new Intent(this, CustomService.class);
        // 按意图停止服务
        stopService(intent);
    }
}
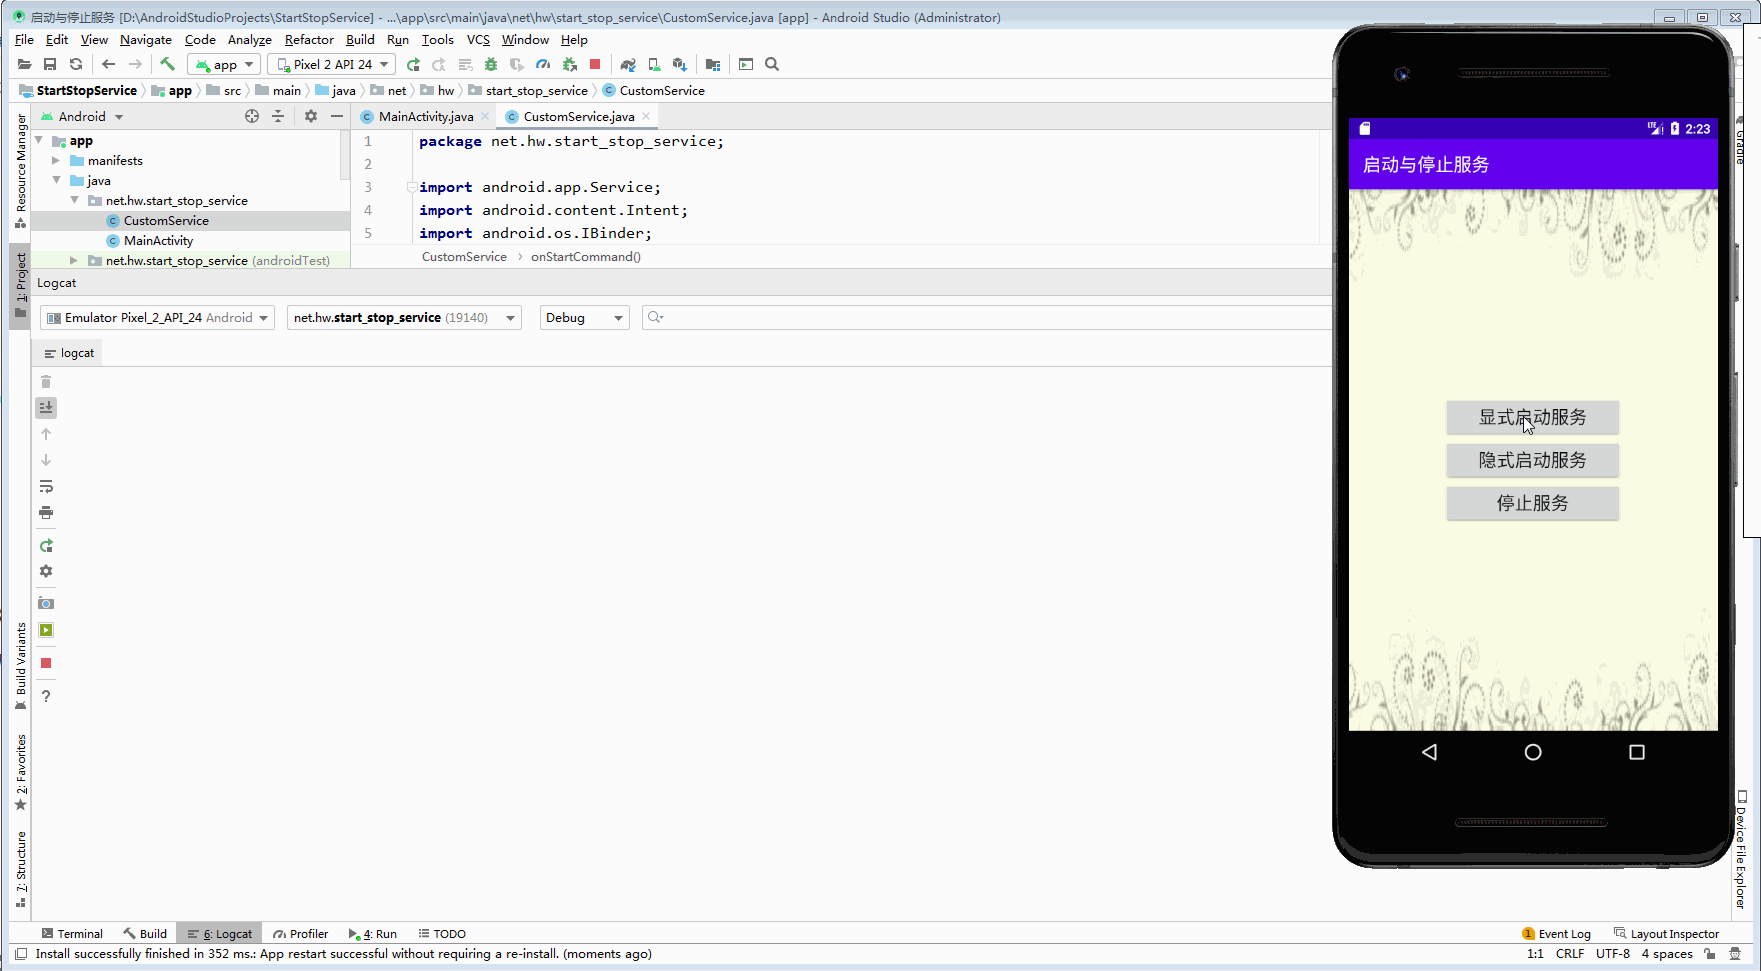
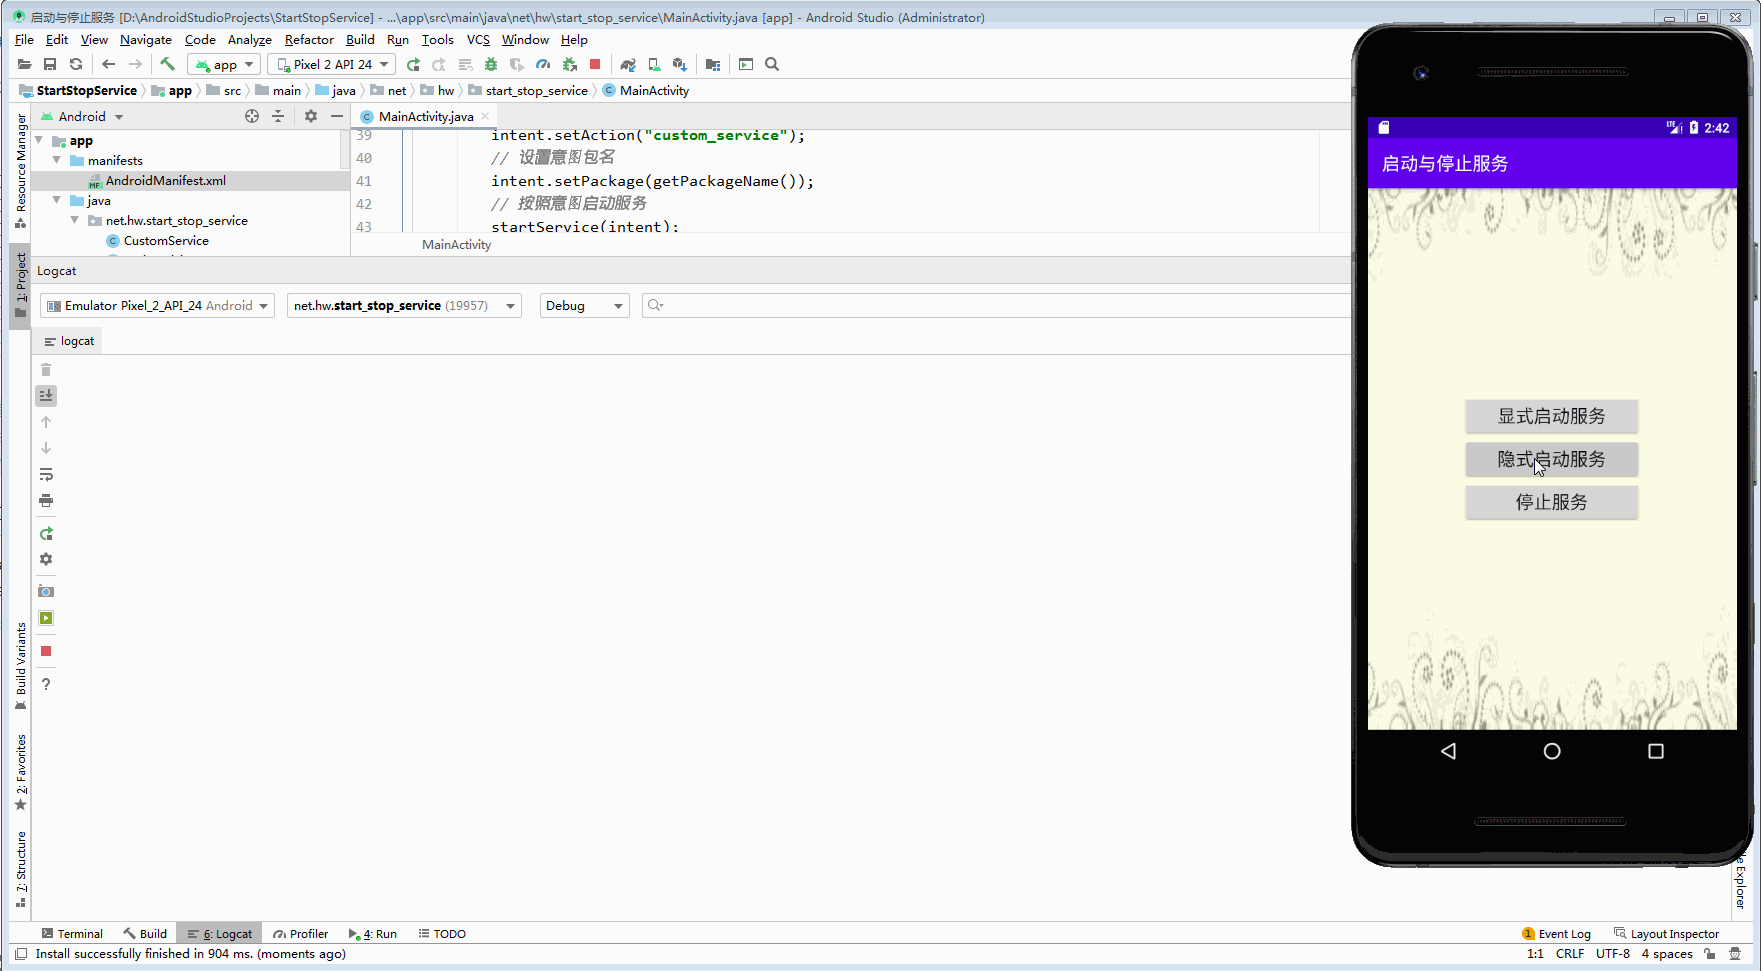
8、启动应用,查看效果
(1)显式启动服务 + 停止服务
服务的生命周期方法:
- onCreate()——只执行一次,一般进行初始化工作
- onStartCommand——执行多次(每次启动服务都会调用它)
- onDestroy()——只执行一次,一般进行扫尾工作
(2)隐式启动服务 + 停止服务

三、案例演示 - 绑定与解绑服务
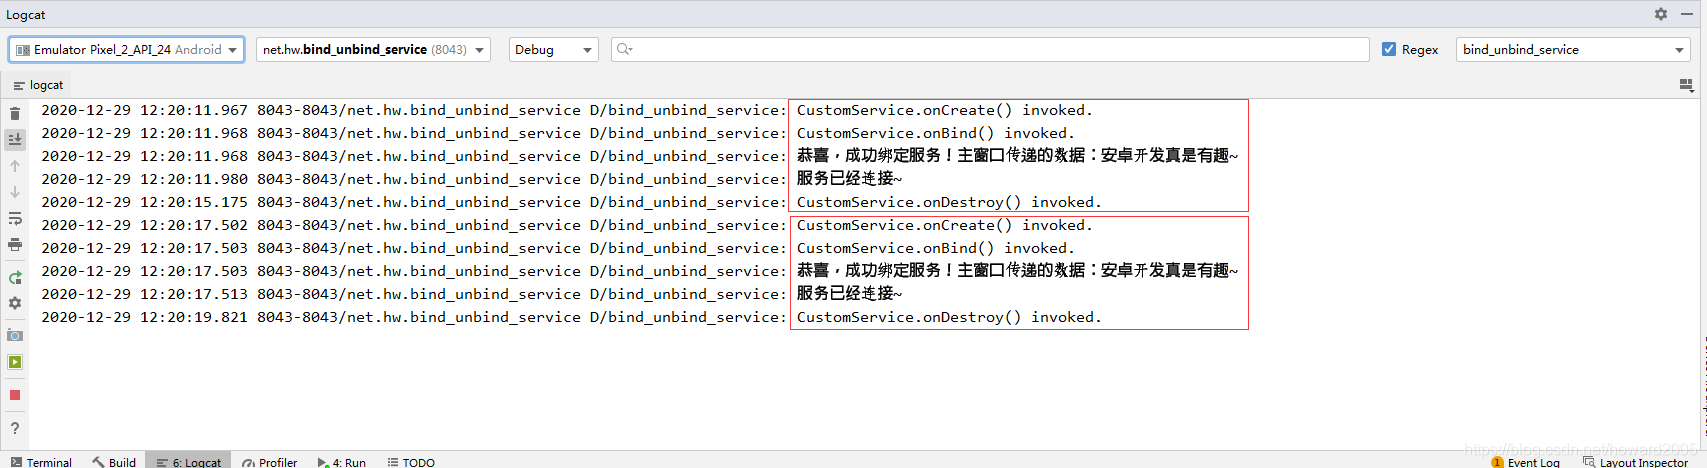
(一)运行效果
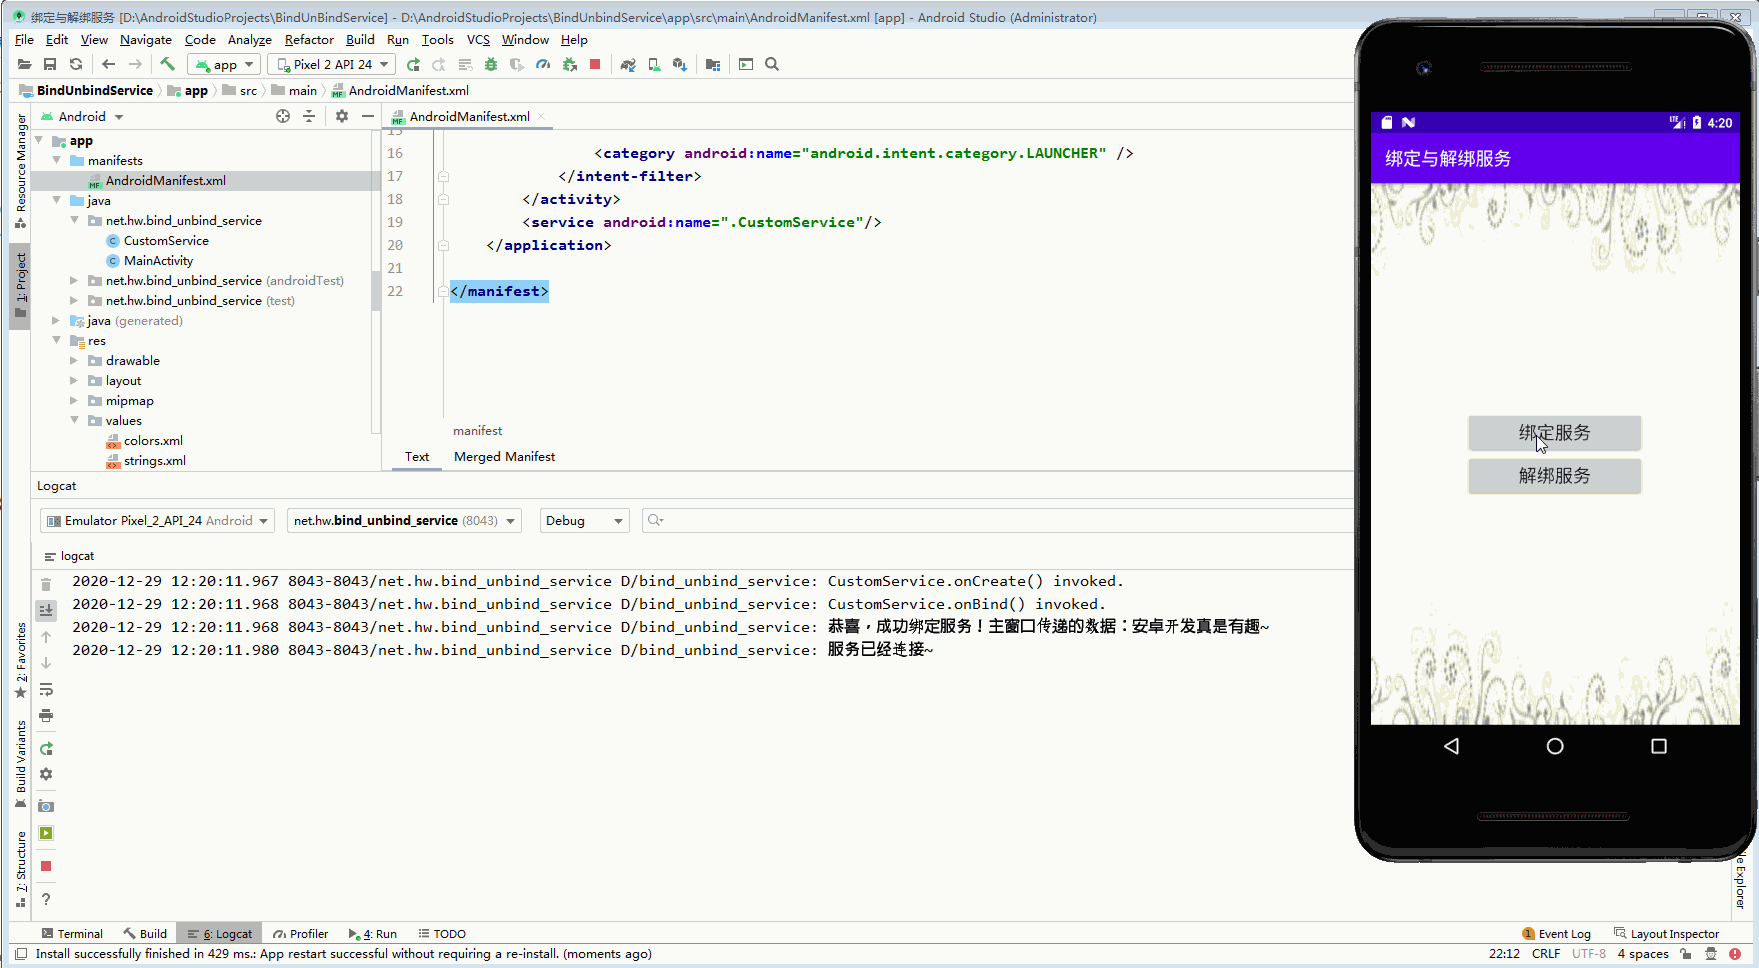
(二)涉及知识点
- 线性布局(LinearLayout)
- 按钮(Button)
- 服务(Service)
- 日志类(Log)
(三)实现步骤
1、创建安卓应用【BindUnbindService】


2、将背景图片拷贝到drawable目录

3、主布局资源文件activity_main.xml

<?xml version="1.0" encoding="utf-8"?>
<LinearLayout xmlns:android="http://schemas.android.com/apk/res/android"
    xmlns:tools="http://schemas.android.com/tools"
    android:layout_width="match_parent"
    android:layout_height="match_parent"
    android:background="@drawable/background"
    android:gravity="center"
    android:orientation="vertical"
    tools:context=".MainActivity">

    <Button
        android:id="@+id/btnBindService"
        android:layout_width="200dp"
        android:layout_height="wrap_content"
        android:onClick="doBindService"
        android:text="@string/bind_service"
        android:textSize="20sp" />

    <Button
        android:id="@+id/btnUnbindService"
        android:layout_width="200dp"
        android:layout_height="wrap_content"
        android:onClick="doUnbindService"
        android:text="@string/unbind_service"
        android:textSize="20sp" />
</LinearLayout>
4、字符串资源文件strings.xml
<resources>
    <string name="app_name">绑定与解绑服务</string>
    <string name="bind_service">绑定服务</string>
    <string name="unbind_service">解绑服务</string>
</resources>
5、创建自定义服务类 - CustomService

-
声明常量

-
编写创建回调方法

-
编写绑定回调方法

-
编写销毁回调方法
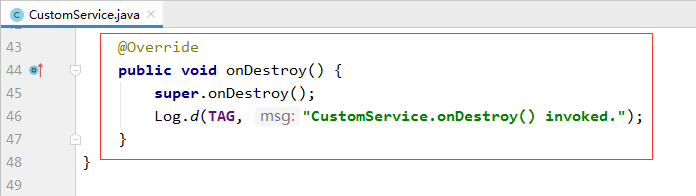
-
查看自定义服务类完整源代码
package net.hw.bind_unbind_service;

import android.app.Service;
import android.content.Intent;
import android.os.Binder;
import android.os.IBinder;
import android.util.Log;

import androidx.annotation.Nullable;

/**
 * 功能:自定义服务类
 * 作者:华卫
 * 日期:2020年12月29日
 */
public class CustomService extends Service {

    private final String TAG = "bind_unbind_service"; // 标记

    @Override
    public void onCreate() {
        super.onCreate();
        Log.d(TAG, "CustomService.onCreate() invoked.");
    }

    @Nullable
    @Override
    public IBinder onBind(Intent intent) {
        Log.d(TAG, "CustomService.onBind() invoked.");
        // 获取从窗口传递过来的数据
        String message = intent.getStringExtra("message");
        // 显示数据
        Log.d(TAG, "恭喜,成功绑定服务!主窗口传递的数据:" + message);
        // 返回绑定器对象
        return new Binder();
    }

    @Override
    public int onStartCommand(Intent intent, int flags, int startId) {
        return super.onStartCommand(intent, flags, startId);
    }

    @Override
    public void onDestroy() {
        super.onDestroy();
        Log.d(TAG, "CustomService.onDestroy() invoked.");
    }
}
6、在项目清单文件里注册自定义服务类

7、主界面类 - MainActivity
-
声明常量与变量

-
编写代码绑定服务

-
编写代码解绑服务

-
重写销毁回调方法

-
查看主界面类完整源代码
package net.hw.bind_unbind_service;

import android.app.Service;
import android.content.ComponentName;
import android.content.Intent;
import android.content.ServiceConnection;
import android.os.Bundle;
import android.os.IBinder;
import android.util.Log;
import android.view.View;

import androidx.appcompat.app.AppCompatActivity;

public class MainActivity extends AppCompatActivity {

    private final String TAG = "bind_unbind_service"; // 标记
    private ServiceConnection conn; // 服务连接对象

    @Override
    protected void onCreate(Bundle savedInstanceState) {
        super.onCreate(savedInstanceState);
        setContentView(R.layout.activity_main);
    }

    /**
     * 绑定服务
     *
     * @param view
     */
    public void doBindService(View view) {
        // 创建意图,显式指明要绑定的服务
        Intent intent = new Intent(MainActivity.this, CustomService.class);
        // 让意图携带数据
        intent.putExtra("message", "安卓开发真是有趣~");
        // 创建服务连接对象
        conn = new ServiceConnection() {

            @Override
            public void onServiceDisconnected(ComponentName name) {
                Log.d(TAG, "服务断开连接~");
            }

            @Override
            public void onServiceConnected(ComponentName name, IBinder service) {
                Log.d(TAG, "服务已经连接~");
            }
        };
        // 按意图绑定服务
        bindService(intent, conn, Service.BIND_AUTO_CREATE);
    }

    /**
     * 解绑服务
     *
     * @param view
     */
    public void doUnbindService(View view) {
        // 判断服务连接是否为空
        if (conn != null) {
            // 解绑服务
            unbindService(conn);
        }
    }

    /**
     * 销毁窗口时解绑服务
     */
    @Override
    protected void onDestroy() {
        super.onDestroy();
        // 判断服务连接是否为空
        if (conn != null) {
            // 解绑服务
            unbindService(conn);
        }
    }
}
8、启动应用,查看效果
- 本次课,我们学习了如何创建服务、注册服务,以及如何启动或绑定服务。我们知道了,在主窗口可以启动或绑定服务,并且可以利用意图将数据传递给后台默默工作的服务,但是现在有一个问题,后台服务完成工作的进度如何传递给前台的窗口并以某种方式显示给用户看呢?那就要用到我们下一讲涉及的内容——广播接收者(BroadcastReceiver)。
- 对于活动窗口(Activity)、服务(Service)与广播接收者(BroadcastReceiver)三个安卓核心组件,需要掌握Activity与Service之间如何利用BroadcastReceiver实现相互通信,这个知识点在我们后面的实训项目《基于媒体库音乐播放器》中会用到。
五、课后作业
任务1、启动服务传递数据
- 界面如下图所示

- 输入数据,单击【启动服务】按钮两次,查看LogCat

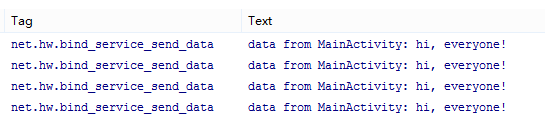
任务2、绑定服务传递数据
- 界面如下图所示

- 输入数据,单击四次【绑定服务】,查看LogCat
Recommend
About Joyk
Aggregate valuable and interesting links.
Joyk means Joy of geeK