

Student Record System using Java Swing - GeeksforGeeks
source link: https://www.geeksforgeeks.org/student-record-system-using-java-swing/
Go to the source link to view the article. You can view the picture content, updated content and better typesetting reading experience. If the link is broken, please click the button below to view the snapshot at that time.

Student Record System using Java Swing
Last Updated: 01-09-2020Consider a scenario of a school where everyday teachers, staff, authorities need to go through the records of their students for various purposes like searching for a particular student’s details. Manually going through records is a tedious job and also time-consuming. Hence, it is better to develop in-school software that allows users to insert, update, search, or delete records without manually going through documents every time a query arises.
In this article, we will see how to quickly create an application using Java Swing to perform operations like create, retrieve, and delete into the database using JDBC.
Before writing the code, a few things need to be kept in mind:
- JDBC API: Java Database Connectivity Application Program Interface is a set of interfaces and classes using which you can write Java programs for accessing and manipulating databases. It acts as a communication between the application and the database.
- JDBC Driver: It enables a Java application to interact with the database. We need to set up different JDBC drivers for different databases.
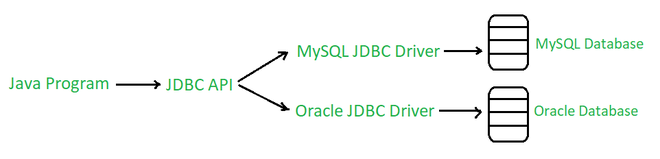
Workflow of a Java application and database interaction through JDBC drivers
Steps to create the application:
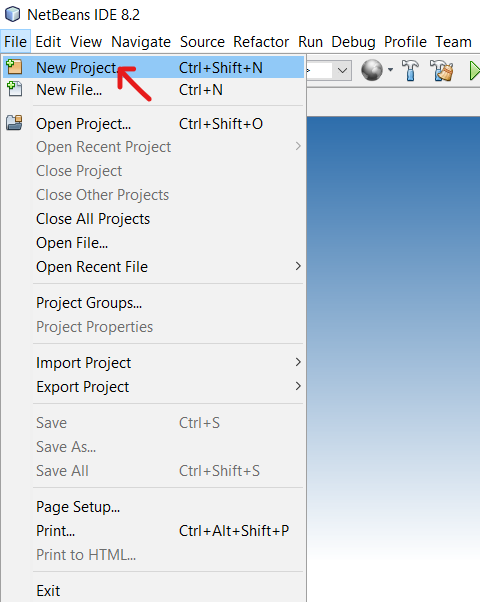
1. First, open Netbeans and click on the File option from the menu bar.

2. Now create a new Java application by clicking on New Project -> Java -> Java Application and give a suitable project name and click finish.
3. Now create a new file by going to the File option again on the menu bar, then New File -> Swing GUI Forms -> JFrame Form, and give a suitable file name click finish.

4. After successful file creation, we will now be presented with the following screen. The 3 important parts of this window are:
- Design: This is the area where we will create the design/template of our application.
- Source: This is where the logic code of the program is written.
- Palette: This component contains all the widgets which we need to drag and drop on the design area

Window displayed after successful Java file creation.
5. Now from the palette situated at the right-hand side of the window, start dragging the toolkit widgets.

Drag Components from palette to design area
6. Since we need to display all data in a tabulated form, drag the table widget from the palette onto the design area. Now to set the headings, right-click on the table, select Properties -> Model ->Add/delete Columns.


7. Now let us create the database to store the data. Open MySQL command client, enter password, and type in the following commands to create a new database, new table, and defining the attributes.
mysql> create database student;
Query OK, 1 row affected (0.14 sec)

mysql> use student;
Database changed
mysql> create table record(
    -> rollno int(3),
    -> name char(20),
    -> class int(2),
    -> section char(2),
    -> address varchar(40));
Query OK, 0 rows affected (2.03 sec)

mysql> describe record;
+---------+-------------+------+-----+---------+-------+
| Field   | Type        | Null | Key | Default | Extra |
+---------+-------------+------+-----+---------+-------+
| rollno  | int(3)      | YES  |     | NULL    |       |
| name    | char(20)    | YES  |     | NULL    |       |
| class   | int(2)      | YES  |     | NULL    |       |
| section | char(2)     | YES  |     | NULL    |       |
| address | varchar(40) | YES  |     | NULL    |       |
+---------+-------------+------+-----+---------+-------+
5 rows in set (0.03 sec)
Going back to NetBeans, we need to follow these steps for database connectivity:
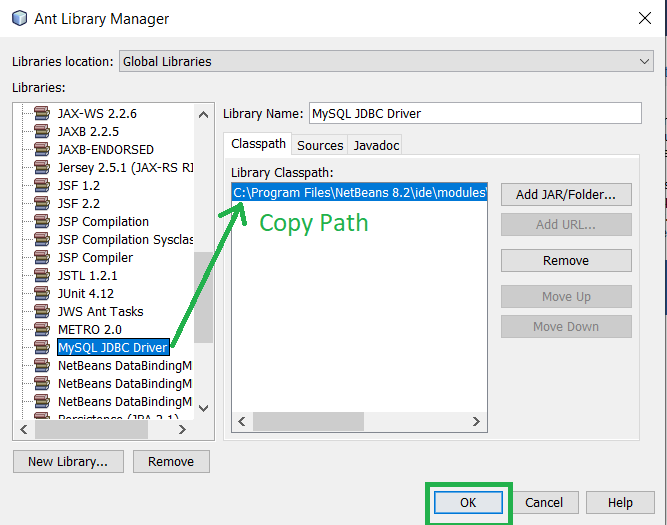
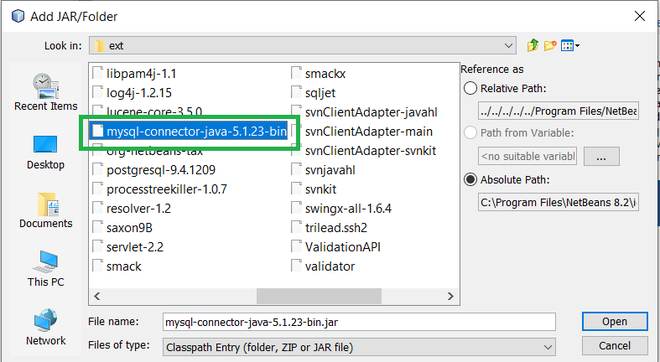
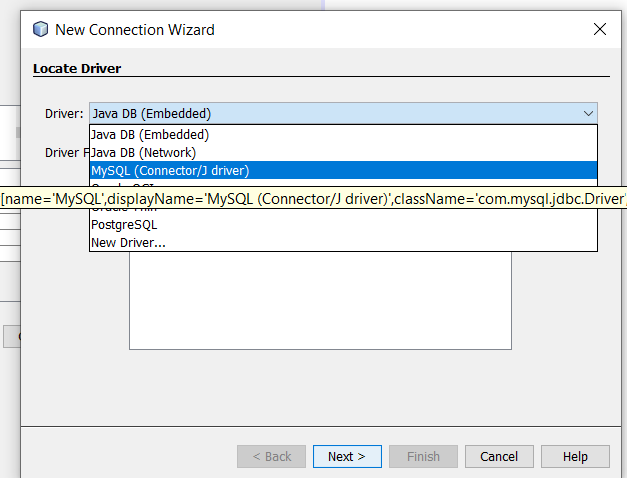
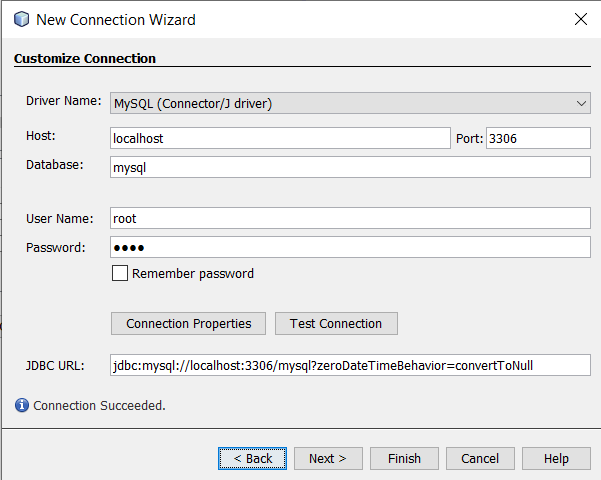
8. We need to import libraries that are needed to set up a connection with the database and retrieve data which is done by – DriverManager Class, Connection Class, and Statement Class. Thus go to the menubar, under Tools->Libraries,and add MySQL JDBC connector. Note down the Library ClassPath and click OK. Now go to Projects toolbar and go to your application’s Libraries. Right-click and select Add Jar/Library and browse the Library classpath noted down previously.

Add Jar file
Add mysql connector
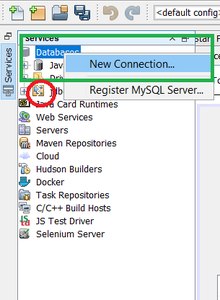
9. Go to Windows->Services->Databases and enter the required credentials of your MySQL username and password. After clicking test connection, if it’s successful, the connector logo appears connected.
Connection is initially broken
10. Now to type the code, double-click on jButton1 (Insert), you will be directed to the source tab. Here type in the following code.
filter_none
edit
close
play_arrow
link
brightness_4
code
// Write the import code at top import java.sql.*; import javax.swing.JOptionPane; import javax.swing.table.DefaultTableModel; public class SchoolRecord extends javax.swing.JFrame { Connection con = null; Statement stmt = null; ResultSet rs = null; // JButton1 Code starts from here try { Class.forName("com.mysql.jdbc.Driver"); Connection con = DriverManager.getConnection( "root"); stmt = con.createStatement(); String rollno = jTextField1.getText(); String name = jTextField2.getText(); String clss = jTextField3.getText(); String sec = jTextField4.getText(); String adr = jTextArea1.getText(); String INSERT = "INSERT INTO RECORD VALUES('"+ rollno + "','" + name + "','"+ clss + "','" + sec + "','" + adr + "');"; stmt.executeUpdate(INSERT); JOptionPane.showMessageDialog( this, "Record Added Successfully"); jButton1.setEnabled(true); } catch (Exception e) { JOptionPane.showMessageDialog( this, "Error In Connectivity"); }In the above code, the following things need to be kept in mind which are:
- Connection Class: It acts as a connection session between the Java program and specific database application. It is through which we send SQL queries to the database.
- Statement Class: A Statement is an interface that represents a SQL statement.
- ResultSet: When you execute Statement objects, and they generate ResultSet objects, which is a table of data representing a database result set. A Connection object is needed to create a Statement object.
- JDBC Driver Registration: To open a connection to the database from Java application, the JDBC driver should be registered with the Device Manager. Hence we use forName() of language package. Here com.mysql.jdbc.Driver is the driver name for MySQL.
- .getConnection(): It is used to establish a physical connection to the database by specifying the database name(student) , username(root) and password(root). This creates a connection object.
- Query Execution: createStatement() creates a statement type object that holds SQL queries. Then executeQuery/executeUpdate method executes the SQL statement. Here it is “INSERT INTO RECORD VALUES….”.
- Data Extraction: The above method creates a resultset object that contains the resultant data. (Now see the code below) rs is the variable that stores the resultant dataset and hence we use a .get<Type>() method to obtain data.
- while(rs.next()): (See code below) Since we need data containing multiple rows, we use a loop to access them. The next() method moves the cursor forward by one row.
- Closing open databases: We close all open databases to clean up the environment. Thus we use- rs.close() , stmt.close() and con.close() methods.
11. Now to display all data, write the following code under the jButton2 ActionPerformed option which can be achieved by clicking twice on View Data Button in the design area.
filter_none
edit
close
play_arrow
link
brightness_4
code
DefaultTableModel model = (DefaultTableModel)jTable1.getModel(); try { Class.forName("com.mysql.jdbc.Driver"); Connection con = DriverManager.getConnection( "root"); String query = "SELECT* FROM RECORD;"; ResultSet rs = stmt.executeQuery(query); while (rs.next()) { String rollno = rs.getString("rollno"); String name = rs.getString("name"); String clss = rs.getString("class"); String sec = rs.getString("section"); String adr = rs.getString("address"); model.addRow( new Object[] { rollno, name, clss, sec, adr }); } rs.close(); stmt.close(); con.close(); } catch (Exception e) { JOptionPane.showMessageDialog(this, "Error In Connectivity"); }12. Now to clear all textfields, textareas and table content write the following code under the jButton3 ActionPerformed option which can be achieved by clicking twice on Clear Button in the design area.
filter_none
edit
close
play_arrow
link
brightness_4
code
jTextField1.setText(""); jTextField2.setText(""); jTextField3.setText(""); jTextField4.setText(""); jTextArea1.setText(""); DefaultTableModel dm = (DefaultTableModel)jTable1.getModel(); dm.getDataVector().removeAllElements(); jTable1.repaint();13. Now to exit from the system, add the following statement under the jButton4 ActionPerformed option which can be achieved by clicking twice on Exit Button in the design area.
System.exit(0);
14. After code is typed, right-click anywhere on the screen and select the Run File option from the drop-down menu. The final output is shown below. Input necessary details and the application is ready!
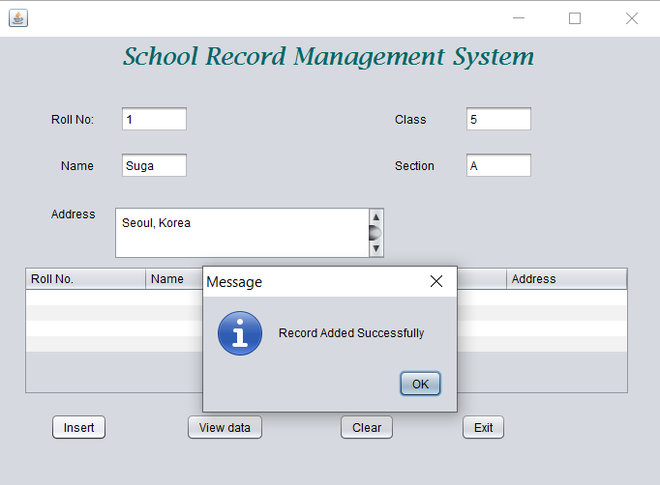
Insert Data
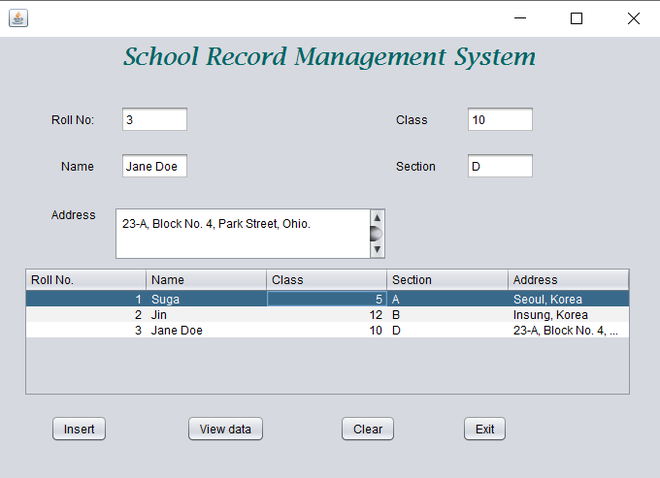
View Data
Output:
Attention reader! Don’t stop learning now. Get hold of all the important Java Foundation and Collections concepts with the Fundamentals of Java and Java Collections Course at a student-friendly price and become industry ready.
If you like GeeksforGeeks and would like to contribute, you can also write an article using contribute.geeksforgeeks.org or mail your article to [email protected]. See your article appearing on the GeeksforGeeks main page and help other Geeks.
Please Improve this article if you find anything incorrect by clicking on the "Improve Article" button below.
Be the First to upvote.
No votes yet.
Recommend
About Joyk
Aggregate valuable and interesting links.
Joyk means Joy of geeK