

Learn About ASP.NET HtmlGenericControl
source link: https://jinnecesario.com/2020/12/12/asp-net-htmlgenericcontrol/
Go to the source link to view the article. You can view the picture content, updated content and better typesetting reading experience. If the link is broken, please click the button below to view the snapshot at that time.
Introduction
Have you ever encountered a scenario in which sometimes, when developing within the space of ASP.NET Webforms, you need to look for the equivalent HTML server controls of the following: span, body, div, font, p, ul, and li? This is where the HtmlGenericControl comes into the picture; it represents the HTML server control element not directly represented by the ASP.NET framework. That’s why in this article, we’ll discuss more of HtmlGenericControl.
OK, let’s get started then.
Background
Before we start, our example was build using ASP.NET Webforms, .NET 4.7.1, and Visual Studio 2019.
I still believe that Webforms is still relevant today because there are still several projects out there using this legacy technology stack.
One more thing before we start, the project we’ve created is a default Webforms project.
See the screenshots below.


What is HtmlGenericControl?
By looking at the source code of this class and according to the comment, it says: “A control representing an unknown HTML tag”.
You can also see it here. Or you can see the screenshot below.

Typically, the HtmlGenericControl class represents server-side tags that do not map directly to a specific HTML control. We can use this by using the designer view of Visual Studio or creating it dynamically in the backend code.
Let’s say, for example, the <ul> tag. Once you have added the attribute runat=" server" gives you the ability to reference this control from your code-behind.
Let us see an example below.
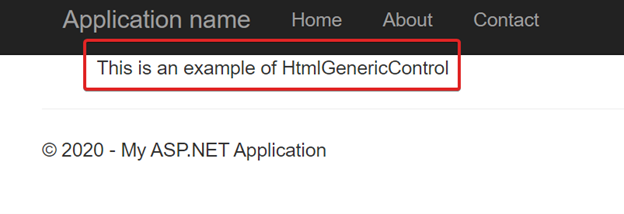
<ul runat="server" id="myULTag"></ul>var result = this.myULTag.GetType() == typeof(HtmlGenericControl);this.myULTag.InnerText = result? "This is an example of HtmlGenericControl" : "";Output
Suppose you are interested in creating a HtmlGenericControl dynamically. In that case, it is another way where you can set or modify attributes and styles, using the Attributes and Styles properties inherited from HtmlControl. Moreover, it has a TagName property that can be changed, which gives you the ability to change it dynamically at runtime even before the page is rendered as HTML and sent to the client browser. We’ll discuss this further in the next section.
Creating an HtmlGenericControl Dynamically
OK, before we start, I would like to show our example’s outcome.
Please see the screenshot below.

The main idea here is to build the tooltip/popover HTML content of the link Show Popover on the server-side. Moreover, we are going to put this within the Page_Load event of the page.
First, we need to declare the HTML required element to build the HTML content of the popover.
See the code below.
//This variable (divPopover) is our div container.protected HtmlGenericControl divPopover = new HtmlGenericControl();//This variable (listPopover) will be our <ul>. protected HtmlGenericControl listPopover = new HtmlGenericControl();//This variable (menu) will be our <li> that will be the child of <ul>protected List<HtmlGenericControl> menu = new List<HtmlGenericControl> { };//This variable (navigationItems) will be the text items of the anchor links that will be the child of li.protected string[] navigationItems = new string[] { "Home", "About", "Contact Us", "Who We Are", "Another Page" };Second, once these variables are available, we need to set its related properties such as TagName, ID and Attributes to make this element easy to identify when rendered in the browser.
See the code below.
//Create the <div> container.if (this.divPopover != null){this.divPopover.TagName = "div";this.divPopover.ID = "menus";this.divPopover.Attributes.Add("class", "hide");}//Create the unordered list <ul>.if (this.listPopover != null){this.listPopover.TagName = "ul";this.listPopover.Attributes.Add("class", "nav nav-pills nav-stacked");}//Create the list item <li>.menu.AddRange(new List<HtmlGenericControl> {new HtmlGenericControl { TagName = "li" },new HtmlGenericControl { TagName = "li" },new HtmlGenericControl { TagName = "li" },new HtmlGenericControl { TagName = "li" },new HtmlGenericControl { TagName = "li" }});Third, once declared and everything set up, including the properties, we can now add the child HTML elements to its specific parent HTML elements.
See the sample code below.
menu.ForEach((item) =>{//Add the list item individually into the unordered list <ul>.listPopover.Controls.Add(item);});//Iterate through the navigation items that will be used as the text of the anchor/<a> tag. for (int i = 0; i < navigationItems.Length; i++){var anchor = new HtmlAnchor{HRef = "#",InnerText = navigationItems[i],Title = navigationItems[i]};anchor.Attributes.Add("class", "nav-link");//Add the navigation item listPopover.Controls[i].Controls.Add(anchor);}//Add all of the constructed HTML structure to the div container.this.divPopover.Controls.Add(listPopover);//Add the div container to our page server controls, which in this case is Panel.this.Panel1.Controls.Add(divPopover);Fourth, after implementing the steps above, we can then check the source/designer of our ASPX page to understand how it will look.
<div class="container"><div class="row" style="margin-top: 100px;"><div class="col-md-6"><!-- start of anchor --><!-- when this anchor is click the panel HTML content will be displayed as a tooltip --><a href="#" rel="popover" data-trigger="focus"data-popover-content="<%=this.Panel1.ClientID%>">Show Popover</a><!-- end of anchor --></div></div></div><% /*Start of the Panel1*/ %><% /* This where the div container will be added.*/%><asp:Panel ID="Panel1" runat="server"></asp:Panel><% /*End of the Panel1*/%>The Panel control will become the placeholder of the <div> container. To see the HTML result assigned to the Panel control, see the resulted code below.
<div id="MainContent_Panel1"><div id="MainContent_menus" class="hide"><ul class="nav nav-pills nav-stacked"><li><a href="#" title="Home" class="nav-link">Home</a></li><li><a href="#" title="About" class="nav-link">About</a></li><li><a href="#" title="Contact Us" class="nav-link">Contact Us</a></li><li><a href="#" title="Who We Are" class="nav-link">Who We Are</a></li><li><a href="#" title="Another Page" class="nav-link">Another Page</a></li></ul></div></div>The HTML result above shows that you can create a similar or any form of HTML structure with the help of the HtmlGenericControl class.
Fifth and last step, for the popover to work, we need a little help from JQuery.
See the code sample below.
$(function () {$('[rel="popover"]').popover({container: 'body',html: true,content: function () {let content = $('#' + $(this).data('popover-content')).clone(true);return $(content).children("div").removeClass("hide");}}).click((event) => event.preventDefault());});For us to see the final output, please see the screenshot below.

Summary
This post has shown us how to use HtmlGenericControl by generating an HTML structure that was rendered in the browser and resulted in a popover/tooltip. Don’t forget that we have used JQuery and Bootstrap, too, to make all of this possible.
I hope you have enjoyed this article, as I have enjoyed writing it. Stay tuned for more. Until next time, happy programming! Please don’t forget to follow/subscribe, bookmark, like, and comment. Cheers! And Thank you!
Recommend
About Joyk
Aggregate valuable and interesting links.
Joyk means Joy of geeK