

Securing an Azure App Service Website under SSL in minutes with Let's Encrypt
source link: https://www.hanselman.com/blog/securing-an-azure-app-service-website-under-ssl-in-minutes-with-lets-encrypt
Go to the source link to view the article. You can view the picture content, updated content and better typesetting reading experience. If the link is broken, please click the button below to view the snapshot at that time.
I run nearly two dozen websites (some small, some significant) on Azure. Given that Chrome 68+ is going to call out non HTTPS sites explicitly as "Not secure" in July, now's as good a time as any for us to get our sites - large and small - encrypted. I have some small static "brochure-ware" sites like http://babysmash.com that just aren't worth the money for a cert. Now it's free, so let's do it.
In some theorectical future, I hope that Azure and Clouds like it will have a single "encrypt it" button and handle the details for us, but as of the date of this blog post, there's some manual initial setup and some great work from the community.
There's a protocol for getting certificates called "ACME" - Automated Certificate Management Environment - and the EFF has a tool called Certbot that helps you request and deploy certs. There is a whole ecosystem around it, and if you are running Windows/IIS you can use a great simple ACME client called "Win-ACME." There are also UI's like Certify SSL Manager and PowerShell commands for ACME and systems like "GetSSL - Azure Automation," so you can feel free to roll your own script in an afternoon. Again, if you have a Windows VM and IIS, it's pretty straightforward and getting easier every day.
I'm currently using Simon J.K. Pedersen's lovely (and volunteer and unsupported, so be nice) Azure Let's Encrypt Web App Site Extension. I followed the instructions here but hit a few snags and a few things that aren't totally obvious. Many kudos and thanks to Simon for his hard work on this, as he's saving us all many hours of trouble!
Securing an Azure Web App with Let's Encrypt and the (unofficial) SJKP Let's Encrypt Site Extension
I'll go and secure BabySmash.com right now. Make a text file and keep track of these few things.
What's our checklist?
- Azure Storage connection string - You'll need one for the extension to store state.
- App Service Hosting Plan and App Service Resource Group Name - Ideally your "plan" (the VM your site runs on) and your site are in the same Resource Group (a resource group is just a name for a pile of stuff)
- Service Principal Client/Application ID - This is like an account that the Site Extension will run as to do its job. It's an "on behalf of" delegate that will automate the changes to your site. You might see "client id" or "application id," they are the same thing.
- Service Principal Client Secret - You'll make a new Key in your Service Principal. I called mine "login" but it doesn't matter, then some value like a generated password (also doesn't matter) and then hit Save. You'll then get a long hashed value - THAT is your Client Secret. Save it, you'll never see it again and you can't get it back.
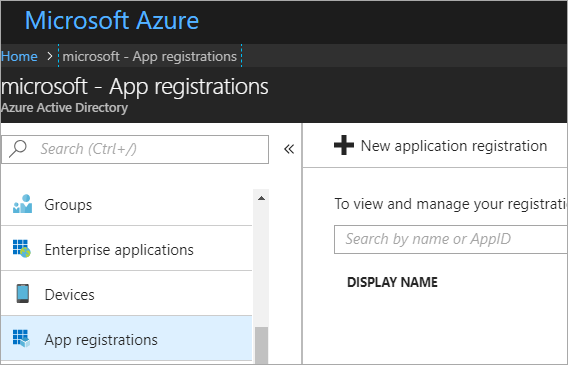
Cool. Let's do it. Again, following along with the wiki, I'll make an App under Active Directory | App Registrations in the Azure Portal at https://portal.azure.com
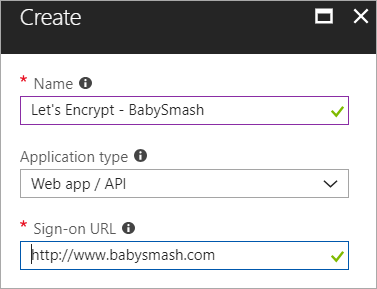
Make a new app...
Now grab the Application ID, aka Client ID and save that in your scratch space/notepad/sticky note/smart brain/don't lose it.
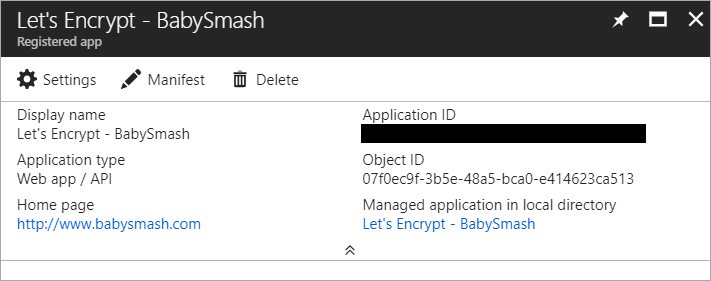
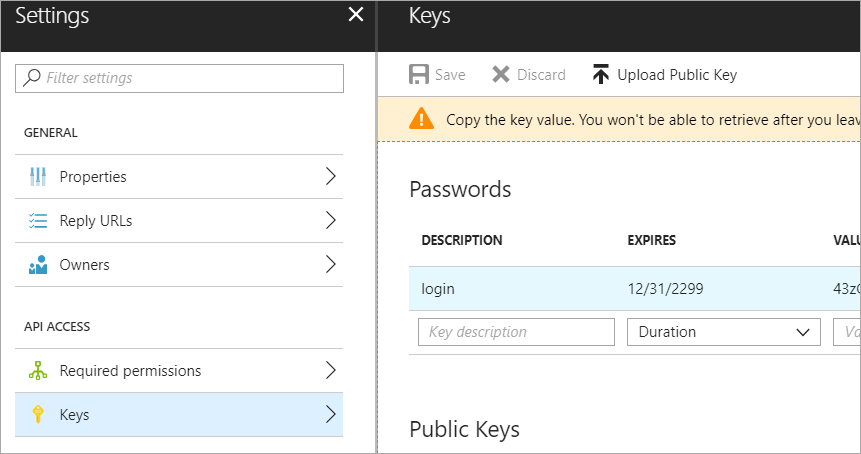
Now click Settings, Keys, make a new one called "login" with a password and click Save. COPY THAT VALUE. You'll never see it again.
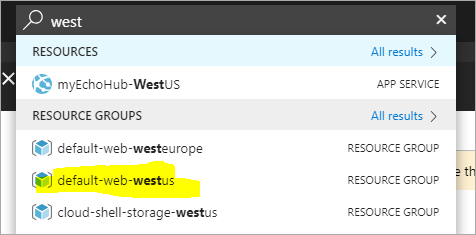
Now, go to the Resource Group for your App Service and App Service Plan. Ideally it'll be the same one, but if it's not, go to each one and keep track of the names. I went there with the search box at the top of the Azure Portal.
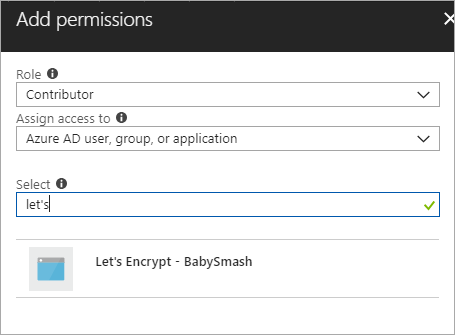
The Portal changes sometimes, and this next step didn't line up to the Wiki instructions exactly. Click add, then make your new App Registration from above a "Contributor" to your Resource Group.
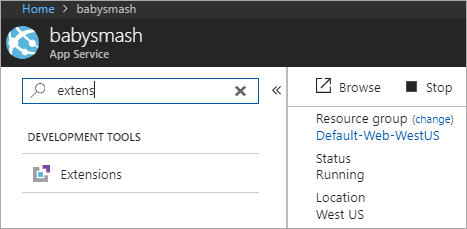
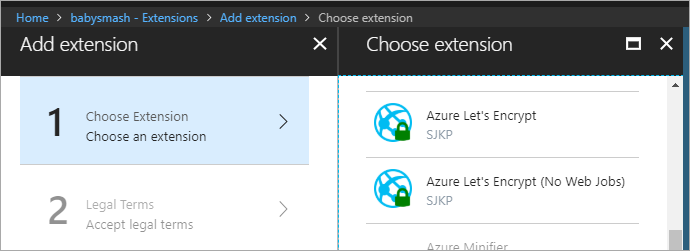
Now head over to your actual App Service, and click Extensions.
I picked Azure Let's Encrypt to have this run as a Web Job in the background.
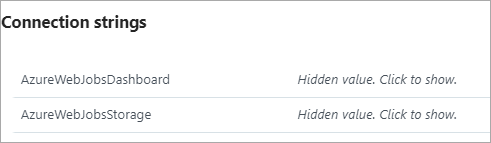
Now, while you're at your Web App/Site, go to Settings and make sure you've set the following two Connection strings AzureWebJobsDashboard and AzureWebJobsStorage - Don't forget this step or it'll all work once but fail in 3 months during the renewal.
Both of these should be set to your Azure Storage Account connection string, e.g. DefaultEndpointsProtocol=https;AccountName=[myaccount];AccountKey=[mykey];
Remember the Web Job needs this storage so it can renew the certs every 3 months. Add them as "Custom."
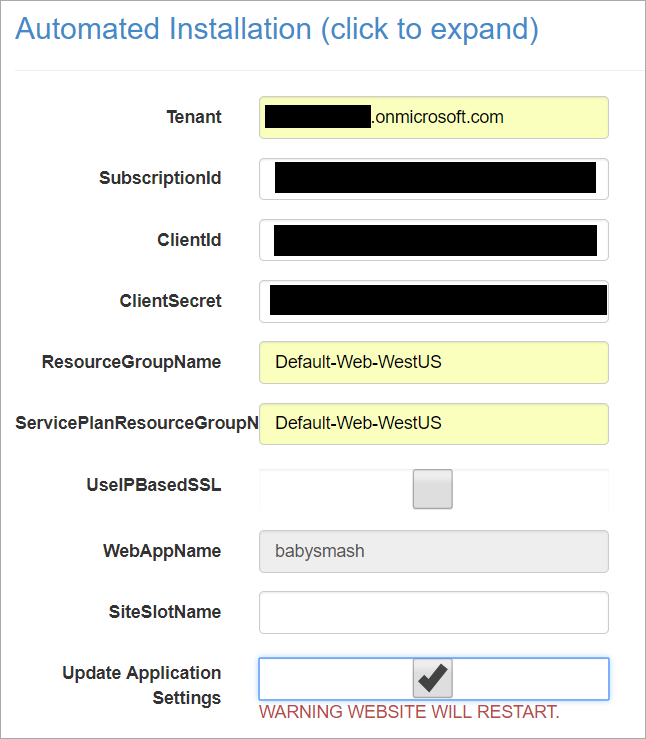
Next, the instructions say to "configure the Site Extension." That can be confusing until you realize a Site Extension is really a "Side car web site." It is its own little website, running off to the side of your site. It will be at http://YOURSITENAME.scm.azurewebsites.net/LetsEncrypt so mine is at http://babysmash.scm.azurewebsites.net/LetsEncrypt.
You'll then want to full this form out. Your "Tenant ID" is your Azure Active Directory URL. You'll find your SubscriptionId in the "Overview" tab.
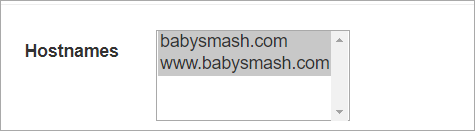
Next next, and then hold down CTRL (as this is a multi-selection dialog) and pick the sites you want a certificate for. Note that www.yourdomin and and .yourdomain (the naked domain) are two different certs.
You'll want to confirm you see "Certificate successfully installed."
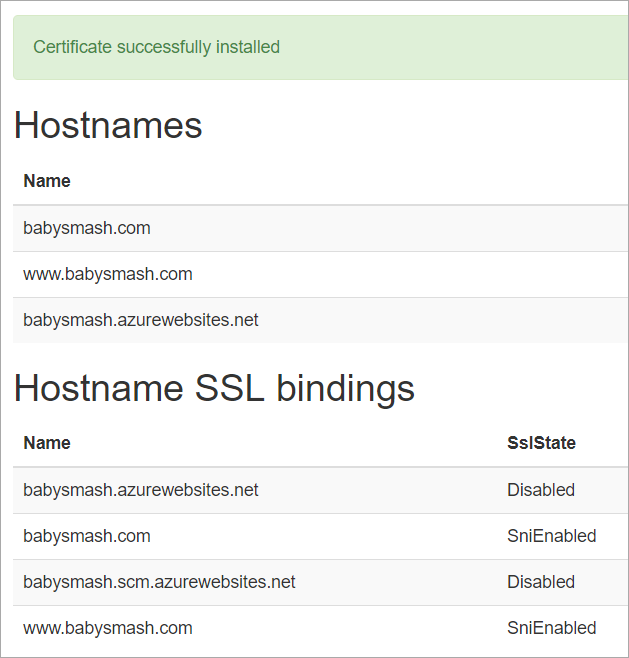
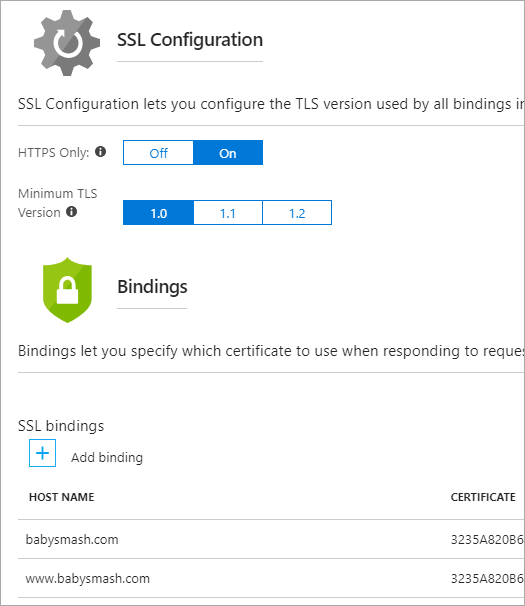
Then head back over to the Azure Portal and turn on HTTPS Only if you'd like Azure itself (versus your code) to ensure and redirect all non-secure links to https://. Also confirm your SSL Bindings are correct. They should have been set up automatically.
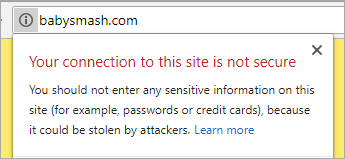
Now I'll go hit https://babysmash.com and...
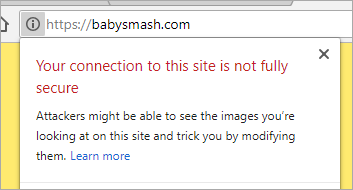
It's not secure! Ah, now my site is in "mixed mode." That means that some of the resources like gifs or css were fetched with non-ssl (HTTP://) links. I'll update my site and all its external resources like YouTube embeds and fonts with https:// so that everything is secure. Since I'm using Git Deploy with Azure Web Apps (Azure App Service) I'll just make the changes and push the site again. You can also look at the elements as they load in F12 Browser Tools if you are having trouble finding out which image, css, or js file came in over http://
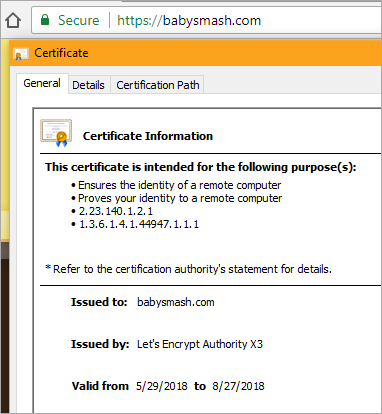
I'll redeploy and after a few tries, boom.

And there's the cert. Note its expiration date. If the Site Extension does its job it will renew the cert before it expires!
Once I knew what I was doing, it took about 10 minutes per site. Thanks Simon for your work, and while there are multiple ways to do this, I found Simon's App Service Extension the easiest. I hope the Azure team comes up with a "One Click Solution" to this.
What do you think?
Sponsor: Learn how .NET in 2018 addresses the challenges developers are working on with future-focused technology. Get the new whitepaper on "The State of .NET in 2018" by the Progress Telerik team!
Recommend
About Joyk
Aggregate valuable and interesting links.
Joyk means Joy of geeK