
占位式插件化之加载Service和动态广播
source link: https://blog.csdn.net/mingyunxiaohai/article/details/99479932
Go to the source link to view the article. You can view the picture content, updated content and better typesetting reading experience. If the link is broken, please click the button below to view the snapshot at that time.
接着上一篇加载Activity来,启动Service和启动Activity的套路是一样的,宿主端定义一个代理的Service,标准的module中定义一个Service的标准接口,然后开始干。
先来到标准module中添加一个Service的标准接口
public interface ServiceInterface {

    /**
     * 把宿主(app)的环境传给插件
     * @param appService
     */
    void insertAppContext(Service appService);

    public void onCreate();

    public int onStartCommand(Intent intent, int flags, int startId);

    public void onDestroy();

}
跟Activity一样,这里可以吧Service的所有生命周期方法都加进来,这里就加入几个主要的方法。
然后来到插件包中,创建一个BaseService来接收宿主传过来的上下文环境
public class BaseService extends Service implements ServiceInterface {

    public Service appService;

    /**
     * 把宿主(app)的环境传给插件
     * @param appService
     */
    public void insertAppContext(Service appService){
        this.appService = appService;
    }

    @Nullable
    @Override
    public IBinder onBind(Intent intent) {
        return null;
    }

    @Override
    public void onCreate() {

    }

    @SuppressLint("WrongConstant")
    @Override
    public int onStartCommand(Intent intent, int flags, int startId) {
        return 0;
    }

    @Override
    public void onDestroy() {

    }
}
BaseService实现了ServiceInterface接口,并实现接口中的方法来公子类调用
然后创建一个测试的Service PluginService
public class PluginService extends BaseService {
    private static String TAG = PluginService.class.getName();
    @Override
    public void onCreate() {
        super.onCreate();
    }

    @Override
    public int onStartCommand(Intent intent, int flags, int startId) {
        new Thread(){
            @Override
            public void run() {
                super.run();
                while (true){
                    try {
                        Thread.sleep(300);
                    } catch (InterruptedException e) {
                        e.printStackTrace();
                    }finally {
                        Log.i(TAG,"插件中的服务在运行......");
                    }
                }
            }
        }.start();
        return super.onStartCommand(intent, flags, startId);
    }

    @Override
    public void onDestroy() {
        super.onDestroy();
    }
}
在PluginService中开启一个线程打印日志用来开启服务之后测试使用
PluginActivity中设置点击开启服务的按钮
  findViewById(R.id.btn_service).setOnClickListener(new View.OnClickListener() {
            @Override
            public void onClick(View v) {
                startService(new Intent(appActivity,PluginService.class));
            }
        });
这里使用了startService方法,根据前面的套路,这个方法也需要安装的上下文环境,所以我们还是得在BaseActivity中重写此方法来转换为宿主传过来的环境。调用宿主中的startService方法,并把当前PluginService的全类名传过去。
 @Override
    public ComponentName startService(Intent service) {
        Intent intentNew = new Intent();
        // PluginService 全类名
        intentNew.putExtra("className", service.getComponent().getClassName());
        return appActivity.startService(intentNew);
    }
OK,插件包中的调用已经完成,下面就来到了宿主中的代理Service中了
public class ProxyService extends Service {

    @Nullable
    @Override
    public IBinder onBind(Intent intent) {
        return null;
    }

    @Override
    public void onCreate() {
        super.onCreate();
    }

    @Override
    public int onStartCommand(Intent intent, int flags, int startId) {
        //PluginService的全类名
        String className = intent.getStringExtra("className");

        try {
            Class mTestServiceClass = PluginManager.getInstance(this).getClassLoader().loadClass(className);
            Object mTestService = mTestServiceClass.newInstance();

            ServiceInterface serviceInterface = (ServiceInterface) mTestService;

            // 注入 组件环境
            serviceInterface.insertAppContext(this);

            serviceInterface.onStartCommand(intent, flags, startId);

        } catch (Exception e) {
            e.printStackTrace();
        }

        return super.onStartCommand(intent, flags, startId);
    }

    @Override
    public void onDestroy() {
        super.onDestroy();
    }
}
ProxyService是一个真实的服务,需要在manifest中注册。
套路跟Activity中一样,先通过intent拿到需要启动的Service的全类名,然后通过类加载工具加载需要启动的服务,强转成对应的标准接口,最后调用接口中的方法来完成。
跟上一篇中的插件内跳转Activity一样,我们需要告诉系统我们需要跳转到哪个Serice,所以重写startService方法
@Override
    public ComponentName startService(Intent service) {
        String className = service.getStringExtra("className");
        Intent proxyIntent = new Intent(this,ProxyService.class);
        proxyIntent.putExtra("className",className);
        return super.startService(proxyIntent);
    }
告诉系统我们要跳转到代理的服务中,通过插件中传过来的intent拿到包名传到代理服务中,这样就完成了。
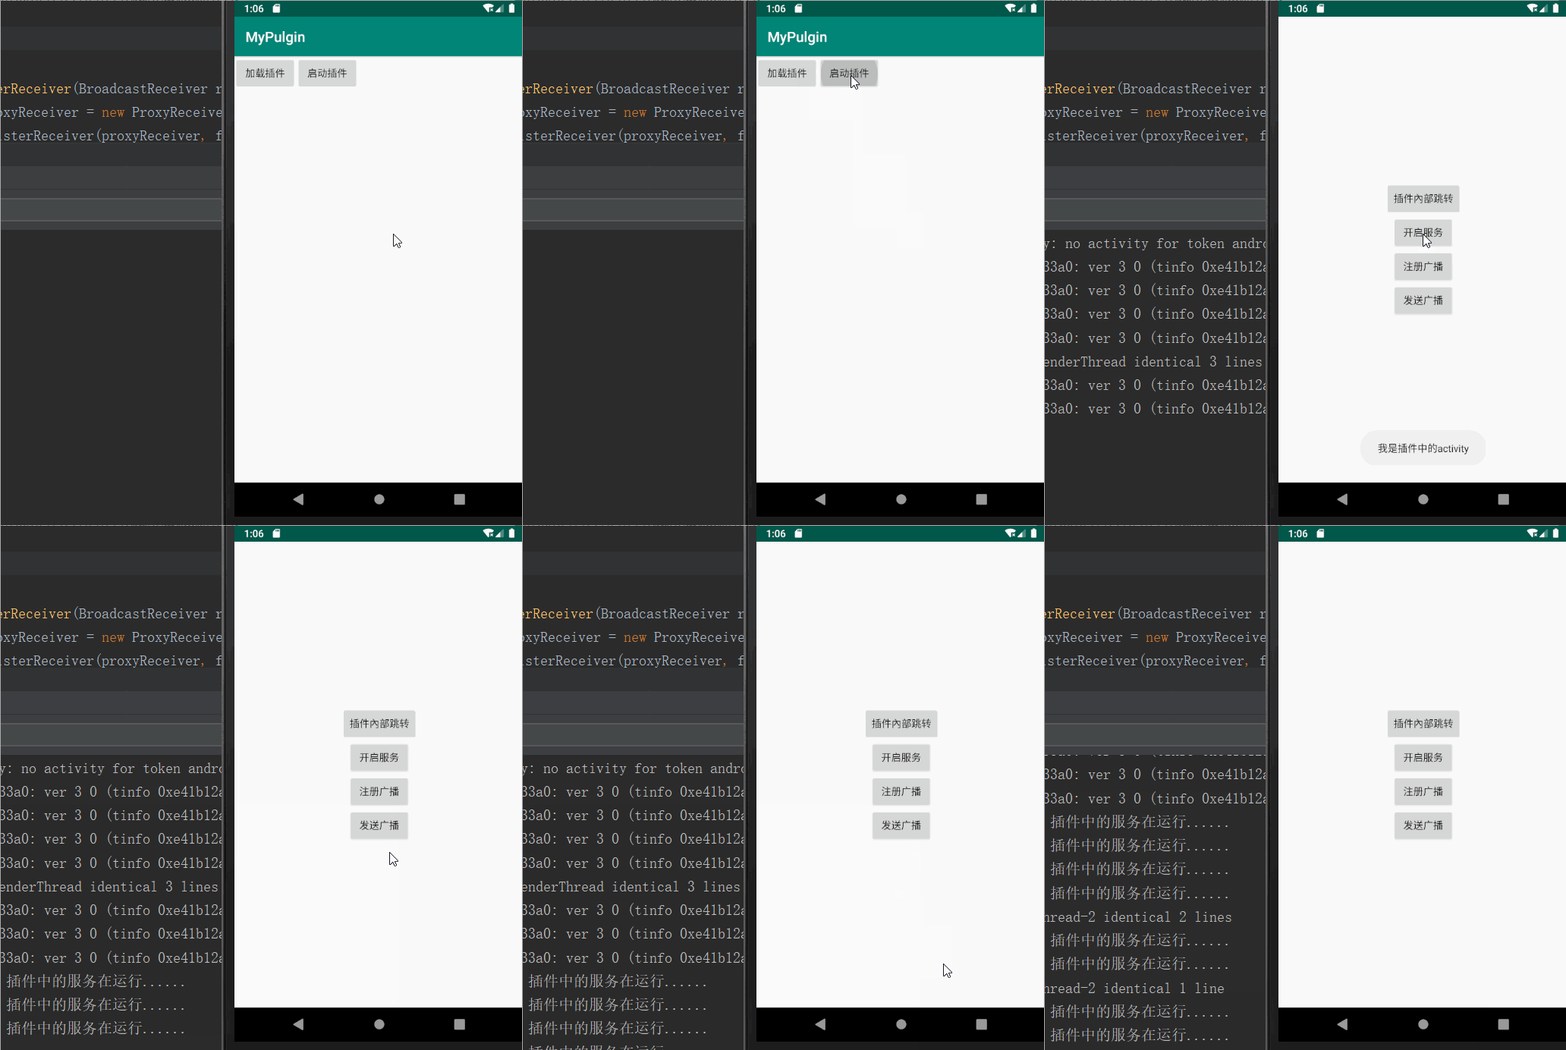
效果如下:

套路都一样,下面把动态广播也一块写了。
先来到标准module中添加广播的标准接口
public interface ReceiverInterface {

    public void onReceive(Context context, Intent intent);

}
然后来到插件包中,创建一个广播,并实现标准接口
public class PluginReceiver extends BroadcastReceiver implements ReceiverInterface {

    @Override
    public void onReceive(Context context, Intent intent) {
        Toast.makeText(context, "我是插件里面的广播接收者,我收到广播啦", Toast.LENGTH_SHORT).show();
    }
}
然后到PluginActivity中添加注册广播和发送广播的按钮
        //注册广播
        findViewById(R.id.btn_receive).setOnClickListener(new View.OnClickListener() {
            @Override
            public void onClick(View v) {
                IntentFilter filter = new IntentFilter();
                filter.addAction("com.chs.plugin_package.FILTER_ACTION");
                registerReceiver(new PluginReceiver(),filter);
            }
        });
        //发送广播
        findViewById(R.id.btn_receive_send).setOnClickListener(new View.OnClickListener() {
            @Override
            public void onClick(View v) {
              Intent intent = new Intent();
              intent.setAction("com.chs.plugin_package.FILTER_ACTION");
              sendBroadcast(intent);
            }
        });
这里的registerReceiver和sendBroadcast和之前的startActivity和startService一样,都是通过安装环境来调用,所以依然需要在BaseActivity中重写一些转换成宿主的环境
    @Override
    public Intent registerReceiver(BroadcastReceiver receiver, IntentFilter filter) {
        return appActivity.registerReceiver(receiver, filter);
    }

    @Override
    public void sendBroadcast(Intent intent) {
        appActivity.sendBroadcast(intent);
    }
最后回到宿主APP中,使用一个代理的广播来接收
public class ProxyReceiver extends BroadcastReceiver {

    //插件中 PluginReceiver的全类名
    private String pluginReceiverName;
    public ProxyReceiver(String name) {
        pluginReceiverName = name;
    }

    @Override
    public void onReceive(Context context, Intent intent) {
        try {
            Class<?> pluginServiceClass = PluginManager.getInstance(context).
                    getClassLoader().loadClass(pluginReceiverName);
            Object pluginService = pluginServiceClass.newInstance();

            ReceiverInterface receiverInterface = (ReceiverInterface) pluginService;
            receiverInterface.onReceive(context,intent);

        } catch (Exception e) {
            e.printStackTrace();
        }
    }
}
ProxyReceiver也是一个真实的广播,可以接收到广播。前面Activity和Service都是通过Intent来传递插件中对应类的全类名的,这里不大一样,可以通过构造方法直接传过来。然后就是类加载,强转为对应的标准接口,最后调用接口中的方法啦
我们也需要在ProxyActivity中重写一下注册广播的方法,然后拿到插件中广播类的全类名然后传到代理广播中
  @Override
    public Intent registerReceiver(BroadcastReceiver receiver, IntentFilter filter) {
        ProxyReceiver proxyReceiver = new ProxyReceiver(receiver.getClass().getName());
        return super.registerReceiver(proxyReceiver, filter);
    }
OK广播也完成啦
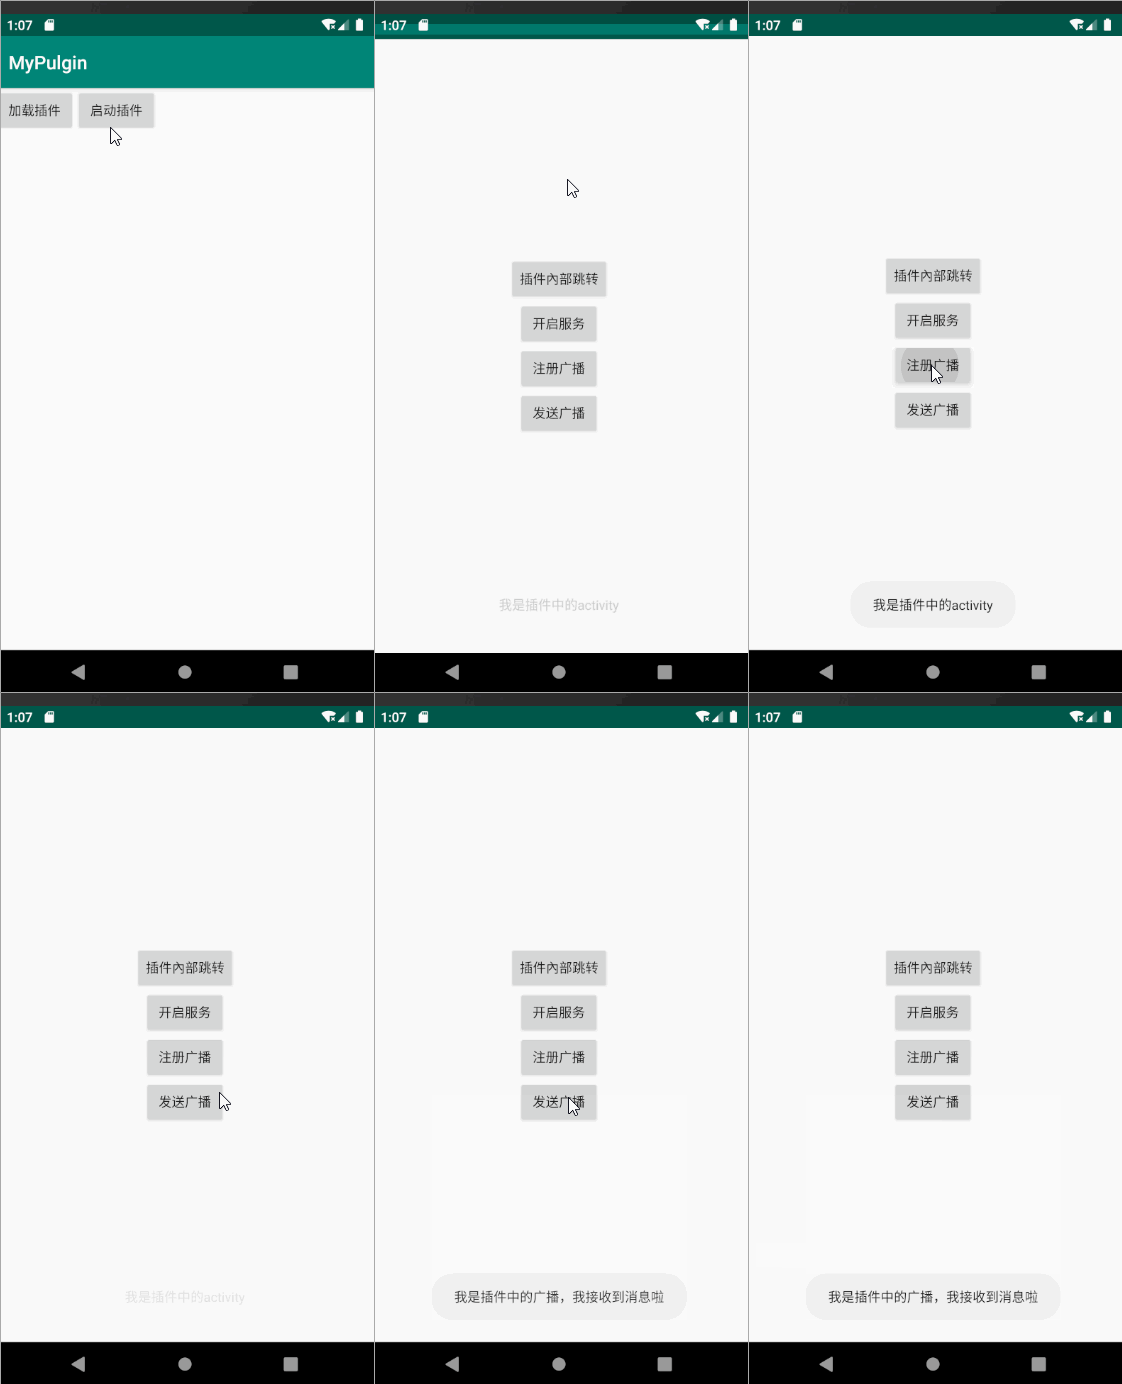
效果:

Recommend
About Joyk
Aggregate valuable and interesting links.
Joyk means Joy of geeK