
WebGL 2 Development with PicoGL.js, Part 5: A Particle System
source link: https://tsherif.wordpress.com/2017/08/13/webgl-2-development-with-picogl-js-part-5-a-particle-system/comment-page-1/
Go to the source link to view the article. You can view the picture content, updated content and better typesetting reading experience. If the link is broken, please click the button below to view the snapshot at that time.
WebGL 2 Development with PicoGL.js, Part 5: A Particle System

This post is part of the series WebGL 2 Development with PicoGL.js.
We’ve now covered all the basic drawing tools of PicoGL.js. We’ll finish off the series by using those tools to implement a simple particle system that does a gravitational simulation on the GPU using transform feedback. Our simulation will consist a large number of particles attracted to three centers of gravity. We’ll be updating our particles using the equation for gravitational acceleration, g = GM/r2, where M is the mass of one of our gravitational centers, r is the distance between it and a given particle, and G is the gravitational constant.
We’ll start, as always, with our boilerplate page and fill in the vertex shader:
#version 300 eslayout(location=0) in vec3 aPosition;layout(location=1) in vec3 aVelocity;layout(location=2) in vec3 aColor;layout(std140) uniform Mass {vec4 mass1Position;vec4 mass2Position;vec4 mass3Position;float mass1GM;float mass2GM;float mass3GM;};out vec3 tfPosition;out vec3 tfVelocity;out vec3 vColor;void main() {vec3 position = aPosition;vec3 velocity = aVelocity;vec3 massVec = mass1Position.xyz - position;float r2 = max(0.01, dot(massVec, massVec));vec3 acceleration = mass1GM * normalize(massVec) / r2;massVec = mass2Position.xyz - position;r2 = max(0.01, dot(massVec, massVec));acceleration += mass2GM * normalize(massVec) / r2;massVec = mass3Position.xyz - position;r2 = max(0.01, dot(massVec, massVec));acceleration += mass3GM * normalize(massVec) / r2;velocity += acceleration;position += velocity;tfPosition = position;tfVelocity = velocity;vColor = aColor;gl_PointSize = 2.0;gl_Position = vec4(position, 1.0);}This is a more complex vertex shader than we’ve seen so far, so we’ll go through it step by step:
- Lines 3-5: We have three
invariables,aPosition,aVelocityandaColor.aPositionandaVelocitywill be used in the simulation, whileaColoris simply passed to the fragment shader as the color of each particle. - Lines 7-14: A uniform block with the positions and masses for the three centers of gravity. To reduce the number of multiplications we perform in the vertex shader, we’re combining the G and M terms from the gravitational equation into a single variable for each center. Note that although we’re using 3D positions, we declare the positions as
vec4s to avoid bugs in some implementations of the std140 layout. - Lines 16-18: We declare three
outvariables.tfPositionandtfVelocitywill be captured in transform feedback buffers.vColoris passed to the fragment shader. - Lines 23-25: This is the core physics calculation of our simulation. We first calculate
massVec, which is a vector pointing from our particle’s position to the first center of mass.r2is the square of the distance from our particle to the center of mass. The lower bound onr2is to avoid dividing by 0. The magnitude of the acceleration vector is calculated using the equation presented above: g = GM/r2. - Lines 27-33: Repeat the physics calculations for the other two centers of mass.
- Lines 35-36: The velocity vector is updated by adding the acceleration vector. The position is then updated by adding the new velocity.
- Lines 38-39: Write the updated position and velocity to our transform feedback varyings so they can be used as inputs for the next frame.
- Lines 41-43: We finish up by setting the variables that will be used for drawing. The only thing we haven’t seen before is gl_PointSize, which we use to set the size of the particles.
The fragment shader is straightforward:
#version 300 esprecision highp float;in vec3 vColor;out vec4 fragColor;void main() {float alpha = 0.3;fragColor = vec4(vColor * alpha, alpha);}We’re making our particles slightly transparent to improve the look. Also note that we’re premultiplying the alpha to avoid rendering problems related to the browser’s compositing.
We create our app as usual, but this time, we enable blending so our transparent particles render correctly.
var app = PicoGL.createApp(canvas).clearColor(0.0, 0.0, 0.0, 1.0).blend().blendFunc(PicoGL.ONE, PicoGL.ONE_MINUS_SRC_ALPHA);We create our program, passing the names of the position and velocity transform feedback varyings as the final argument to createProgram().
var vsSource = document.getElementById("vertex-shader").text.trim();var fsSource = document.getElementById("fragment-shader").text.trim();var program = app.createProgram(vsSource, fsSource, ["tfPosition", "tfVelocity"]);Now on to the most involved part of our example: setting up our buffers for transform feedback.
var NUM_PARTICLES = 200000;var positionData = new Float32Array(NUM_PARTICLES * 3);var colorData = new Float32Array(NUM_PARTICLES * 3);for (var i = 0; i < NUM_PARTICLES; ++i) {var vec3i = i * 3;positionData[vec3i] = Math.random() * 2 - 1;positionData[vec3i + 1] = Math.random() * 2 - 1;positionData[vec3i + 2] = Math.random() * 2 - 1;colorData[vec3i] = Math.random();colorData[vec3i + 1] = Math.random();colorData[vec3i + 2] = Math.random();}var positionsA = app.createVertexBuffer(PicoGL.FLOAT, 3, positionData);var velocitiesA = app.createVertexBuffer(PicoGL.FLOAT, 3, positionData.length);var positionsB = app.createVertexBuffer(PicoGL.FLOAT, 3, positionData.length);var velocitiesB = app.createVertexBuffer(PicoGL.FLOAT, 3, positionData.length);var colors = app.createVertexBuffer(PicoGL.FLOAT, 3, colorData);var vertexArrayA = app.createVertexArray().vertexAttributeBuffer(0, positionsA).vertexAttributeBuffer(1, velocitiesA).vertexAttributeBuffer(2, colors);var vertexArrayB = app.createVertexArray().vertexAttributeBuffer(0, positionsB).vertexAttributeBuffer(1, velocitiesB).vertexAttributeBuffer(2, colors);var transformFeedbackA = app.createTransformFeedback().feedbackBuffer(0, positionsA).feedbackBuffer(1, velocitiesA);var transformFeedbackB = app.createTransformFeedback().feedbackBuffer(0, positionsB).feedbackBuffer(1, velocitiesB);- Lines 1-15: We start out by creating two float arrays containing the initial vertex data for the 200,000 particles we’ll be rendering. Each particle is initialized with a random position in clip space and a random color.
- Lines 17-20: We create pairs of buffers for the attributes that will be involved in transform feedback, position and velocity. As discussed in part 4, we’ll use one of each pair of buffers as input to the vertex shader on each frame, while the other buffer captures results. On the following frame, the input and output buffers are swapped.
- Line 22: We only create one color buffer, since it’s not involved in the transform feedback.
- Lines 24-32: Set up two vertex arrays, one for each possible set of input buffers to our vertex shader. They share the same color buffer.
- Lines 34-40: Set up two transform feedback objects, one for each possible set of output buffers from our vertex shader. Note that the indices we give to
feedbackBuffer()have to match the indices of the transform feedback varying names in the array we passed tocreateProgram()above.
Creating a uniform buffer for our simulation parameters is relatively straightforward:
var massUniforms = app.createUniformBuffer([PicoGL.FLOAT_VEC4,PicoGL.FLOAT_VEC4,PicoGL.FLOAT_VEC4,PicoGL.FLOAT,PicoGL.FLOAT,PicoGL.FLOAT]).set(0, new Float32Array([Math.random() * 2.0 - 1.0,Math.random() * 2.0 - 1.0,Math.random() * 2.0 - 1.0,1.0]).set(1, new Float32Array([Math.random() * 2.0 - 1.0,Math.random() * 2.0 - 1.0,Math.random() * 2.0 - 1.0,1.0]).set(2, new Float32Array([Math.random() * 2.0 - 1.0,Math.random() * 2.0 - 1.0,Math.random() * 2.0 - 1.0,1.0]).set(3, Math.random() / 30000).set(4, Math.random() / 30000).set(5, Math.random() / 30000).update();The layout matches the uniform block in our vertex shader. The first three items are the positions of the centers of gravity, which are set to random locations in clip space. The remaining three are the GM (mass multiplied by the gravitational constant) parameters for each center, which are also initialized to random values.
With all that set up, we can create our draw calls:
var drawCallA = app.createDrawCall(program, vertexArrayA, PicoGL.POINTS).transformFeedback(transformFeedbackB).uniformBlock("Mass", massUniforms);var drawCallB = app.createDrawCall(program, vertexArrayB, PicoGL.POINTS).transformFeedback(transformFeedbackA).uniformBlock("Mass", massUniforms);We have one draw call for each configuration of input and output buffers. drawCallA takes positionsA and velocitiesA as input and writes to positionsB and velocitiesB. drawCallB switches the input and output buffers. As in the last lesson, we’ll draw with one of these draw calls on a given frame and then switch to the other on the subsequent frame.
With all that setup out of the way, our render loop is quite simple:
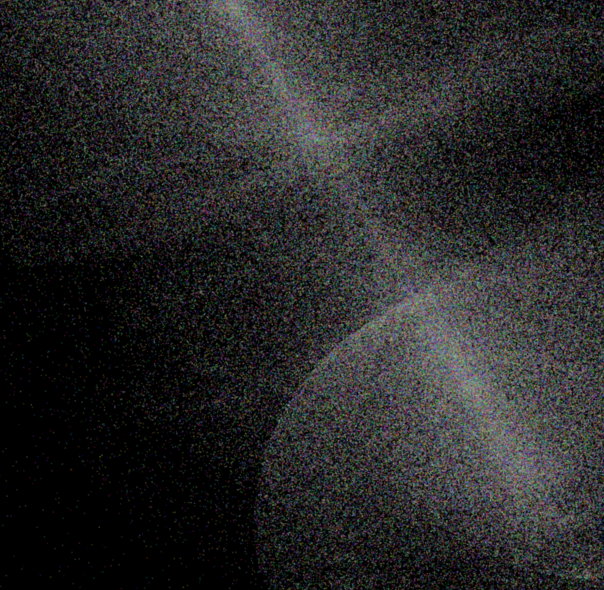
var currentDrawCall = drawCallA;function draw() {app.clear();currentDrawCall.draw();currentDrawCall = currentDrawCall === drawCallA ? drawCallB : drawCallA;requestAnimationFrame(draw);}requestAnimationFrame(draw);We reference the draw call to use on the current frame in currentDrawCall. On each frame, we draw using currentDrawCall and then swap to the other draw call for the next frame. If all went well, you should see a particle system similar to the one in the image at the top of this post. A live version is available here. Since we randomized many of the parameters, you’ll see some variation in the animation each time you load the page.
The complete code for this example is available here. If you have any questions, feel free to post them in the comments, visit the PicoGL.js Gitter chat room, or look me up on Twitter.
That concludes this PicoGL.js tutorial series! You now know enough to use PicoGL.js for some sophisticated rendering algorithms. Check out the PicoGL.js website for some examples of what to do next. The source code for all of them is available here. Happy coding, and if you draw anything interesting with PicoGL.js, let me know!
Recommend
About Joyk
Aggregate valuable and interesting links.
Joyk means Joy of geeK