

Disassembling the SDS7102 bootloader
source link: http://blog.weinigel.se/2016/05/14/disassembling-the-sds7102-bootloader.html
Go to the source link to view the article. You can view the picture content, updated content and better typesetting reading experience. If the link is broken, please click the button below to view the snapshot at that time.

Disassembling the SDS7102 bootloader
May 14, 2016
This is a post in a series about me poking at the insides of my OWON SDS7012 oscilloscope. You might want to start reading at the beginning.
S3C2416 NAND Boot
The main processor in the SDS7102 is a Samsung S3C2416 System On a Chip (Soc) with a DDR SDRAM as main memory and a NAND flash for storage. A basic embedded system very similar to the Samsung SMDK2416 reference design.
I’ve worked with other SoCs in the S3C24xx family before, so I kind of knew what to expect from the bootloader. NAND flash is a bit unreliable in a way, it’s normal for it to develop bit errors over time and that some flash pages are so damaged that they can’t be used at all. Any decent NAND flash file system will have to support error correcting codes (ECC) to fix bit errors and have mechanisms to remap bad flash pages. Most NAND manufacturers guarantee that the first sector or three in flash will not develop any errors, and thus it’s possible to put a minimal first stage bootloader there.
The S3C2416 has 64k of internal RAM and some code in ROM that reads the first 8k the NAND flash into RAM and then starts executing it. This first stage bootloader usually performs some basic setup such as a fixed GPIO configuration, DDR memory initialization. It then loads a bigger second stage bootloader from flash into DDR memory and jumps to it. The first stage bootloader should support ECC and simple flash page remapping so that it can work reliably with the limitations of NAND flash.
The second stage bootloader is the what a user normally thinks of as the bootloader proper. It usually has a command prompt which is usable over a serial port or USB. It has code to load the operating system from flash, maybe even with support for a some kind of flash file system. To simplify development the bootloader might even be able to load the operating system over a serial port, USB or ethernet.
Flash contents
The first thing I did when I managed to connect to the scope using JTAG was to make a complete dump of the flash contents. The S3C2416 loads the first stage bootloader from the first 8kBytes of flash so that was what I wanted to look at. I found some strings that matched what was seen on the serial port when the scope was powered on, and some other strings that hinted that it does some kind of memory initialization and memory test. Good, it seems to do what I expected it to do.
00000a30  30 31 32 33 34 35 36 37  38 39 41 42 43 44 45 46  |0123456789ABCDEF|
00000a40  4c 49 4c 4c 49 50 55 54  0d 0a 00 44 53 4f 20 54  |LILLIPUT...DSO T|
00000a50  41 52 47 45 59 20 42 4f  41 52 44 20 56 45 52 20  |ARGEY BOARD VER |
00000a60  31 2e 30 0d 0a 00 54 45  53 54 20 53 44 52 41 4d  |1.0...TEST SDRAM|
00000a70  20 4d 45 4d 4f 52 59 0d  0a 00 4d 45 4d 4f 52 59  | MEMORY...MEMORY|
00000a80  20 41 4c 4c 20 4f 4b 0d  0a 00 4d 45 4d 4f 52 59  | ALL OK...MEMORY|
00000a90  20 54 45 53 54 20 46 41  49 4c 0d 0a 00 45 52 4f  | TEST FAIL...ERO|
00000aa0  52 52 20 41 44 44 52 45  53 53 20 00 4f 4b 20 00  |RR ADDRESS .OK .|
00000ab0  45 4e 54 45 59 20 4d 41  49 4e 00 00 04 f0 1f e5  |ENTEY MAIN......|
The first stage would probably be followed by the second stage bootloader. And yes, later in the dump I found a list of strings that looked like commands available in the bootloader. This looks promising.
0000f760  78 64 6f 77 6e 6c 6f 61  64 00 70 72 69 6e 74 00  |xdownload.print.|
0000f770  72 75 6e 00 68 65 6c 70  00 66 6c 61 73 68 00 63  |run.help.flash.c|
0000f780  6f 6d 70 00 63 6f 70 79  00 65 72 61 73 75 72 65  |omp.copy.erasure|
0000f790  00 65 6e 63 72 79 70 74  00 73 65 63 69 64 00 6b  |.encrypt.secid.k|
0000f7a0  65 79 70 72 74 00 62 69  6f 73 00 6f 73 00 68 7a  |eyprt.bios.os.hz|
0000f7b0  00 74 78 74 00 66 70 67  61 00 62 6d 70 00 6d 65  |.txt.fpga.bmp.me|
0000f7c0  00 2d 73 00 2d 72 00 2d  73 20 2d 72 00 00 00 00  |.-s.-r.-s -r....|
0000f7d0  50 6c 65 61 73 65 20 58  64 6f 77 6e 6c 6f 61 64  |Please Xdownload|
0000f7e0  20 42 69 6f 73 20 46 69  6c 65 2e 2e 2e 2e 2e 2e  | Bios File......|
It also looked like the bootloader understands yaffs, a common NAND flash file system for Linux which is also available under a commercial license for other platforms.
00010990  70 61 72 61 6d 20 6f 70  65 6e 20 79 61 66 66 73  |param open yaffs|
000109a0  5f 66 64 3d 25 64 2c 20  25 73 28 25 64 29 2d 25  |_fd=%d, %s(%d)-%|
000109b0  73 0a 00 00 79 61 66 66  73 5f 63 6f 6d 6d 61 6e  |s...yaffs_comman|
000109c0  64 2e 63 00 72 65 61 64  46 53 46 69 6c 65 00 00  |d.c.readFSFile..|
It was fairly obvious where the bootloader ended. About 75kBytes into the dump the flash pages started being all 0xff (all ones, the default value a NAND flash gets when it is erased) and this continued all the way up to 640kBytes where something that looked like it could be a file system started.
I copied the first 75kBytes from the dump into into its own file.
Disassemblers
What to do now that I had a copy of the bootloader in a file?
One of the ways one can discover more is to disassemble the firmware, that is, take the binary machine code and use a tool called a disassembler to turn it into symbolic assembly language that a human can read. A naive tool will mechanically translate machine code into the symbolic instruction names, a smarter tool can analyze the instruction flow and figure out the structure of the code. Some tools are interactive and will let you annotate or change the interpretation of the machine code on the fly. Some tools called decompilers can even translate the machine code into some high level language such as C or Go. I wanted something that would let me look at parts of the code and annotate it as I figure out more and more about how the code works.
There are a lot of disassemblers out there.
- IDA is one of the best known commercial alternatives. I used it ten years ago and even if it was a bit quirky it was also very competent and is probably even better today. But its quite expensive for ARM and I wasn’t quite willing to spend that much money on a hobby project.
I tried some online disassemblers but couldn’t get them to work with raw ARM memory dump
Anyway, I like open source and wanted to see if any of the open source tools would be usable. A lot of open source tools seem to be one off hacks or hadn’t been updated for many years. But I did look at a few:
-
I tried Radare. It seems to be competent, but also seems to be written by a bunch of people that believe in “if it was hard to write it should bloody well be hard to use”. I did not understand the documentation, it felt more like a cheat sheet for somebody that already understands everything, and I did not get along with the user interface at all.
-
Capstone looks like promising technology. It’s a fork of the parts of LLVM that works with machine instructions. I like the idea of reusing the LLVM infrastructure since that means it will probably be able to support any processors that LLVM supports, and that’s a lot. But Capstone is “only” infrastructure and I couldn’t find any interactive tools built upon it that I liked and I really don’t have the time write something like that myself.
-
Valgrind is a memory checker that does its job by binary translation. It decodes the machine code in memory to an intermediate language which it modifies to add memory checks and than encodes back into machine code. Valgrind is supported on ARM and the intermediate language seemed to be a fairly nice and usable. But once again, it’s infrastructure and I’d have to write everything else myself.
-
Then I found Medusa. It’s incomplete, fails to disassemble a lot of instructions correctly, is a bit unstable and has a bunch of bugs. But it comes with source which means that I could work around some of the bugs and I could fix or add decoding for some of the instructions that were missing.
Good enough, Medusa it is then.
I loaded my file into Medusa and started figuring out how Medusa works.
One of the nice things about Medusa is that the Medusa database is a text file with a format that’s pretty easy to understand. I edited this file to add some memory regions with labels for all the Samsung SoC registers which makes the disassembly much easier to read and understand.
First Stage
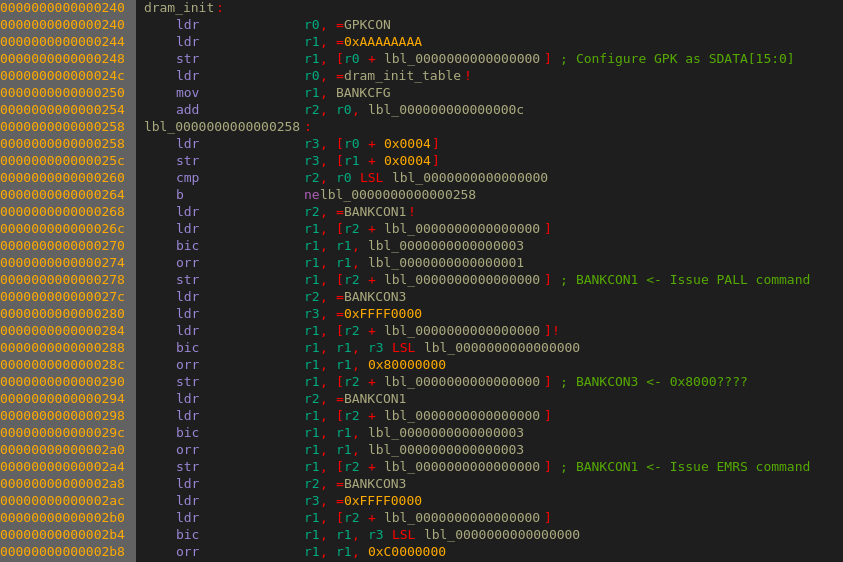
I first started looking at the first stage bootloader since it’s small and self contained. Perfect for getting started with an unfamiliar tool. I could see some accesses to the GPIO registers and some code that talked to the DDR memory controller, some code that talked to the coprocessor that Medusa failed to disassemble correctly and after that some code that talked to the NAND flash controller.
I didn’t look very closely at the code, I sort of knew what is was supposed to do and most of the details weren’t that important. What I did want to know was where the second stage would be loaded into DDR memory and where it would start executing.
I found some code that loaded the first 128kBytes of flash into to address 0x30000000 which is the start of DDR memory. It then copied about 70kBytes from offset 0xac4 to address 0x33c00000, the last 512kBytes of DDR memory and which then jumped into that code:

Second Stage
I created a new Medusa database with just the second stage bootloader at the correct address and started working on that.
I didn’t dig down too deep into the second stage either. Even disassembling as little machine code as 75kBytes is kind of painful so I mostly just skimmed through the code. I quickly discovered that some of the code was Thumb instructions which Medusa had big problems with. I just hoped that nothing important would be in those parts of the code. I followed the main code flow and found a lot of initialization of different data structures that I mostly skipped, but also some more interesting code that talked to the SoC registers.
There was a section of code that set up a pointer to the string “param” followed by a function call which ended up talking to the NAND controller. Hmm, what could this be a call to “open”? It was then followed by using the return value from open, setting up a pointer to some memory outside of the code loaded from flash and another register with the value 460. Could this be a call to “read”? Probably.
After I while I found some code that referenced the strings “Boot to load (Y/N)?” and “Wait for Enter”. Probably printf or puts calls. There was also some calls to code that talked to the serial port and then did a comparison with 0x75. 0x75 is ASCII for ‘u’ so I tried typing ‘u’ at the serial console while the booting the scope and yes, it printed “Enter USB–download Mode” and stopped there, probably waiting for some commands over USB.
If the bootloader timed out it would load the file “os” at address 0. It hen seemed to do some kind of checksum calculation on it, because if the return value from a function did not match a value from some location in RAM it would try to load “oscp”, call the same function and comparison again and then print the message “open or read OS ERR” if that also failed. So yes, this was probably the part that loaded the operating system and then verified a checksum to see that the file was not corrupt.

I looked but could not find any way of getting to a command prompt. My guess is that they have disabled all of that for the production version of the bootloader and that the commands strings that looked so interesting are just leftovers that can’t be used.
In a way none of this was all that interesting. It was nice to figure out that what the ‘u’ key did and a bit disappointing to find out that there didn’t seem to be any way to get to a command prompt. But were no big surprises, the code did I was assuming that it would do: set up a bit more of hardware, print some messages and finally load the operating system from flash.
I could probably have disassembled the open and read functions to figure out the flash file format that way, but that would have been a lot of work and I’m lazy.
This was a start though. I had gotten a feel for how the bootloader worked and where to look if I needed more information. And I had gotten a bit familiar with Medusa which was good.
Time to take a look at the file system, but that’s something for next time.
Recommend
About Joyk
Aggregate valuable and interesting links.
Joyk means Joy of geeK