

A guide to customising the Windows Terminal
source link: https://freshman.tech/windows-terminal-guide/
Go to the source link to view the article. You can view the picture content, updated content and better typesetting reading experience. If the link is broken, please click the button below to view the snapshot at that time.
A guide to customising the Windows Terminal
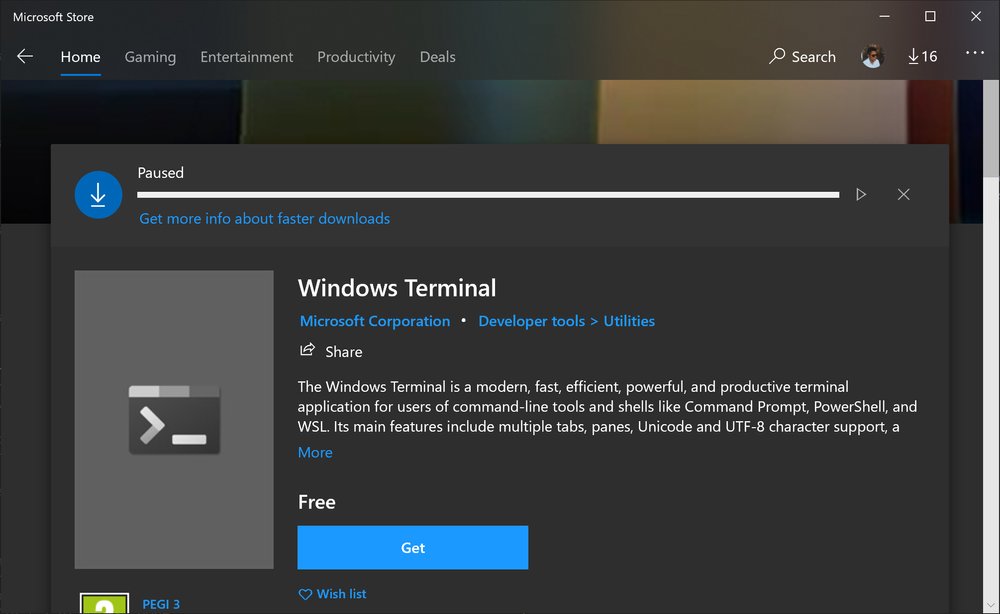
The Windows terminal provides a much improved command line experience in Windows 10. It’s packed with useful features like GPU acceleration, tabs, panes, themes, and shortcuts, along with full support for different environments such as PowerShell, Command Prompt, and WSL. In this article, I’ll describe a few ways to tailor the terminal experience to your needs along with tips and tricks to make development much easier.The Windows terminal app is available on the Microsoft Store. If you open the store and search for “Windows terminal”, it should be the first item on the list. It’s also available on its GitHub releases page but you miss out on automatic updates. You can also install the Preview version if you want to be on the bleeding edge of features.
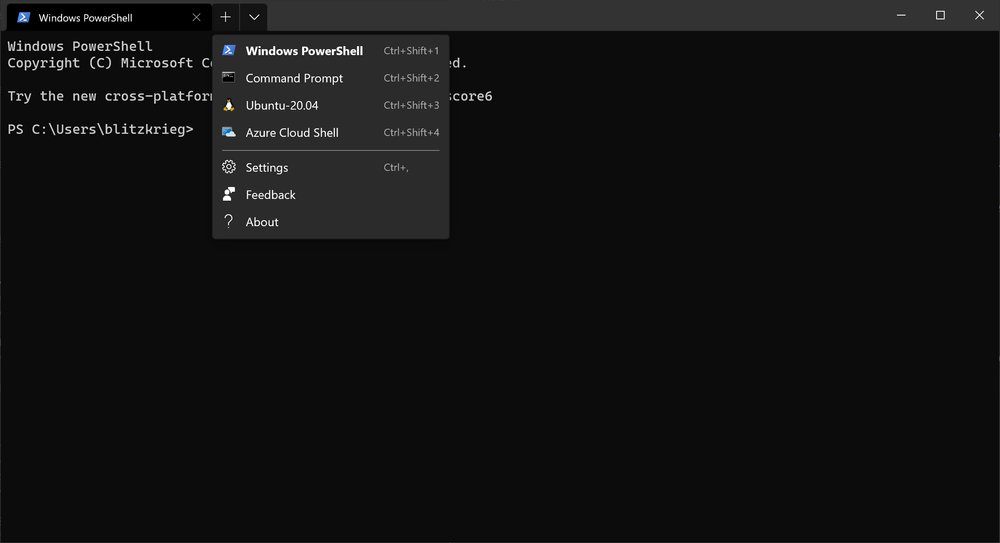
Once installed, launch the terminal. The interface is quite straightforward with tabs at the top and a dropdown menu for switching between the different profiles.
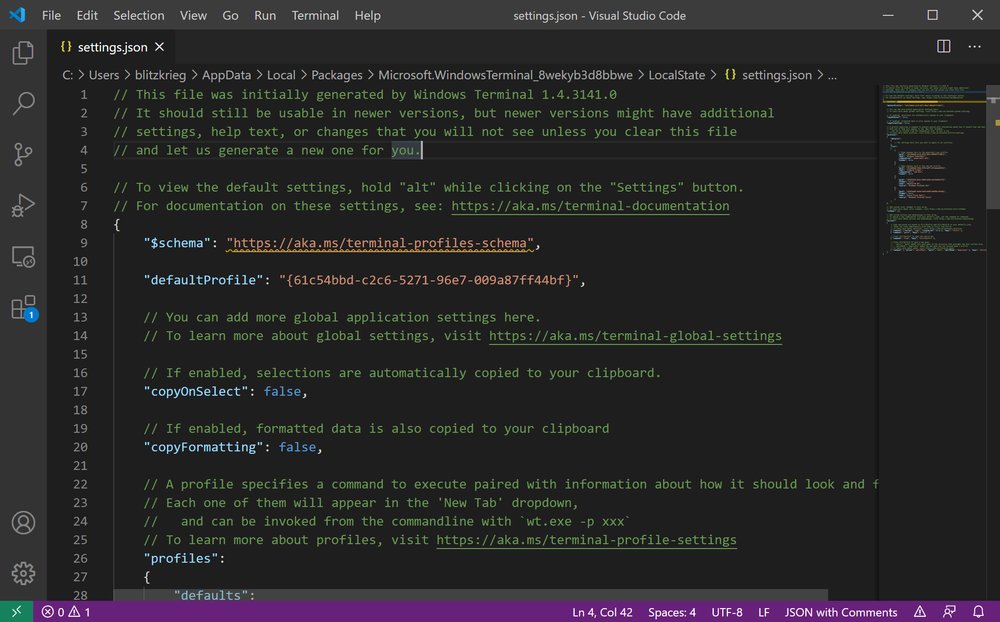
You can open the Settings through the dropdown menu or by pressing Ctrl + , on your keyboard. The terminal settings is managed through a JSON file which will open in your default app for JSON files.
Launch the terminal with a keyboard shortcut
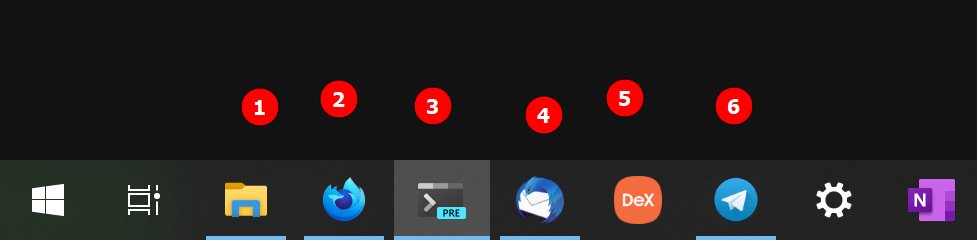
The easiest way to bind the Windows terminal to a keyboard shortcut is to pin it to the task bar and press the Win key plus the number corresponding to the position of the program on the taskbar. For example, Win + 3 launches or focuses the terminal window on my computer.
If you have AutoHotkey installed, you can run or raise a Windows terminal instance with the help of this script. All you need to do is:
- Create a new text file with a
.ahkextension. - Copy and paste the above script into the file.
- Double click the file to run it.
Once that’s done, you’ll be able to bring up the Windows terminal with a keystroke. The linked script uses Win + `, but you can change it to your preferred key binding. Instead of running the script manually everytime, you can follow these instructions to make it run automatically on system startup.
Launch the terminal from Windows Explorer
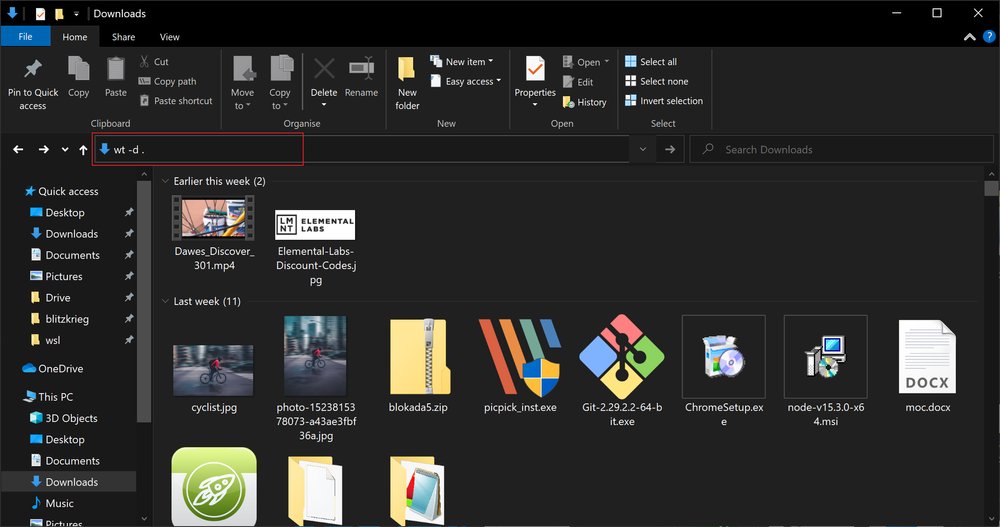
You can launch the Windows terminal from the File Explorer by typing wt and
Enter in the address bar. This will launch a new terminal window in
your default user directory. To specify the current directory instead, use wt -d ..
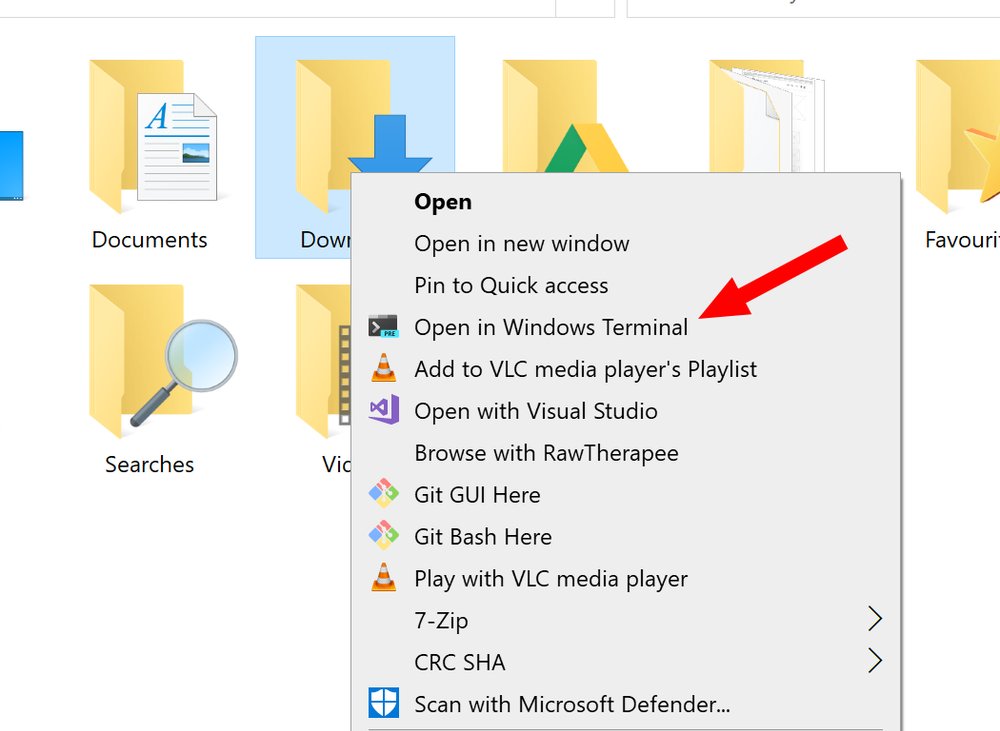
Additionally, you can right click on a directory in File Explorer and select “Open in Windows Terminal”. This will launch Windows Terminal with your default profile in the selected directory.
Change the default profile
The default profile is what appears when you open the Windows terminal or a new
tab. By default, it’s a profile for Windows Powershell. If you prefer to work in
a Linux distribution, it may be more convenient to change the default profile to
your preferred WSL profile. To do so, update the value of the
defaultProfile property in the settings.json file with the guid of your
preferred profile.
{
    "$schema": "https://aka.ms/terminal-profiles-schema",

    "defaultProfile": "{07b52e3e-de2c-5db4-bd2d-ba144ed6c273}",

    "profiles":
    {
        "defaults": {},
        "list":
        [
            {
                "guid": "{07b52e3e-de2c-5db4-bd2d-ba144ed6c273}",
                "hidden": false,
                "name": "Ubuntu-20.04",
                "source": "Windows.Terminal.Wsl"
            }
        ]
    }
}
At this point, when you open a new window or tab, it should default to the chosen profile.
Customise the tab settings
From v1.5, the Windows terminal tab switcher displays currently open tabs in
a vertical list, navigable with the keyboard or mouse. This feature had to be
activated in earlier versions by setting the useTabSwitcher property (now
deprecated) to true.
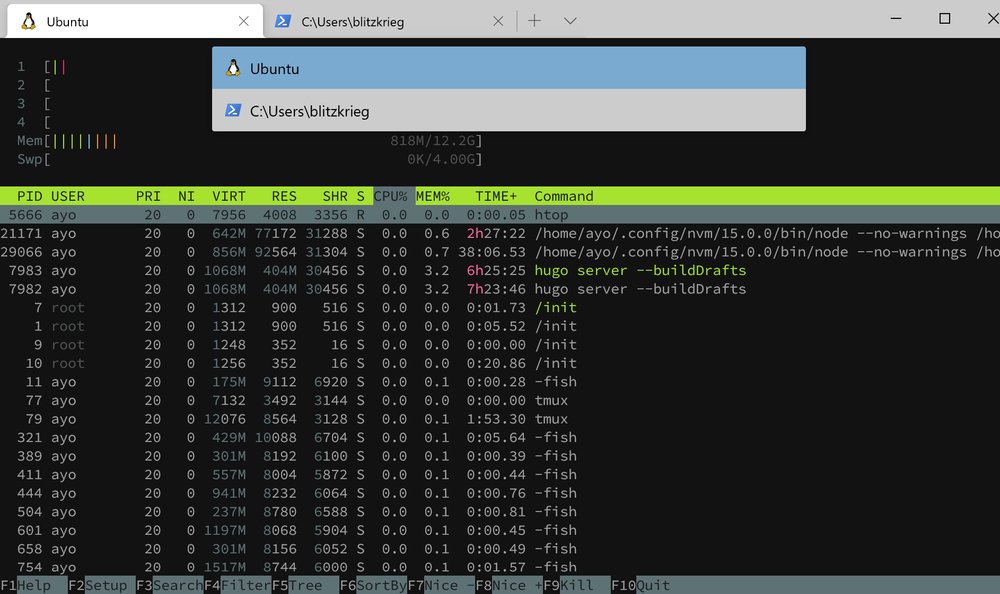
Tab switcher mode enabled in Windows Terminal Preview v1.5
You can opt out of the tab switcher experience in v1.5 or later by setting
tabSwitcherMode to false or "disabled". When the tab switcher is disabled,
pressing ctrl + tab or ctrl + shift + tab will switch tabs in a
similar manner to web browsers. If you want to control the order of the tabs in
the tab switcher, you can set tabSwitcherMode to mru or inOrder which will
list the tabs either in most recently used order or in order of their layout in
the terminal.
// Enables the tab switcher
"tabSwitcherMode": "mru",
"tabSwitcherMode": "inOrder"

// Disables the tab switcher
"tabSwitcherMode": "disabled"
You can also search your open tabs with the tabSearch command but you have to
create a binding for it first:
{
    "actions": [
        { "command": "tabSearch", "keys": "ctrl+t" }
    ]
}
Customise the profile settings
The profile settings can be accessed through the profiles property. If you
want any setting to apply to all profiles, add it to the defaults property.
Otherwise, add it to the relevant object in the list array.
"defaults":
{
    // SETTINGS TO APPLY TO ALL PROFILES
},
"list":
[
    // PROFILE OBJECTS
]
Below are some of the profile settings you may want to tweak.
Change the starting directory
The starting directory for all shells is the Windows User directory
("%USERPROFILE%") by default, but you probably want the Linux home directory
instead in your WSL profiles. You can add the startingDirectory
property to your WSL
distribution profile object as shown below to override this setting.
{
    "guid": "{07b52e3e-de2c-5db4-bd2d-ba144ed6c273}",
    "hidden": false,
    "name": "Ubuntu-20.04",
    "source": "Windows.Terminal.Wsl",
    "startingDirectory": "\\\\wsl$\\Ubuntu-20.04\\home\\<username>"
}
Hide a profile
To hide a profile from the dropdown menu, set the hidden property on the
profile object to true.
{
    "guid": "{b453ae62-4e3d-5e58-b989-0a998ec441b8}",
    "hidden": true,
    "name": "Azure Cloud Shell",
    "source": "Windows.Terminal.Azure"
}
Turn off the scroll bar
If you use tmux like myself, you may want to turn off the scroll bar for your
WSL profile by setting the scrollbarState option to hidden.
{
    "guid": "{07b52e3e-de2c-5db4-bd2d-ba144ed6c273}",
    "hidden": false,
    "name": "Ubuntu-20.04",
    "source": "Windows.Terminal.Wsl",
    "startingDirectory": "\\\\wsl$\\Ubuntu-20.04\\home\\<username>",
    "scrollbarState": "hidden"
}
You can read the documentation for the profile settings to find out all the options available to you.
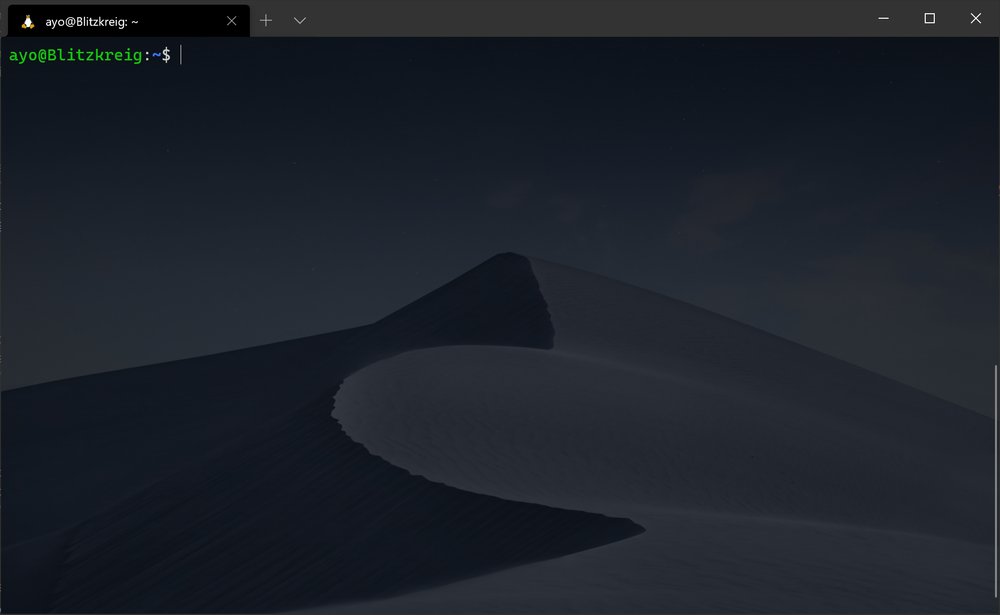
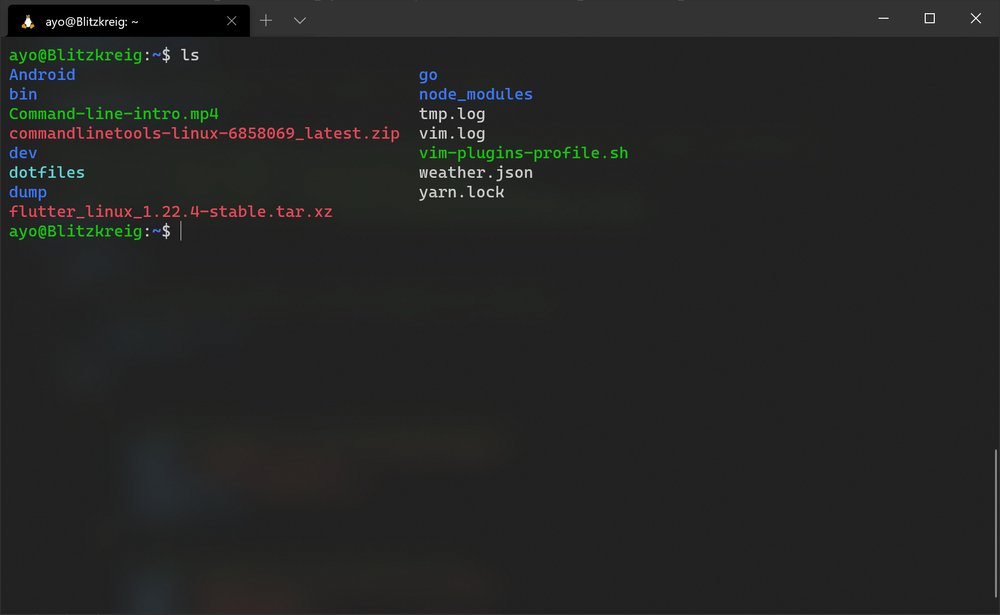
Customise the background
It’s possible to customise the Windows terminal with background images. The
backgroundImage property can be set to an image URL, a local file
path or the desktopWallpaper string (from v1.5), and the image in question may
be of JPEG, PNG or GIF formats. You also
have control over related settings such as opacity, alignment, and stretching.
These settings can be configured globally for all profiles or per profile.
{
    "backgroundImage": "https://images.unsplash.com/photo-1554110397-9bac083977c6?ixid=MXwxMjA3fDB8MHxwaG90by1wYWdlfHx8fGVufDB8fHw%3D&ixlib=rb-1.2.1&auto=format&fit=crop&w=2100&q=80",
    "backgroundImageOpacity": 0.4,
    "backgroundImageAlignment": "center"
}
You can also use animated GIFS if you’re so inclined:
The Windows terminal also supports the acrylic effect in Windows 10 for the
background which you can enable by setting useAcrylic to true. The
transparency of the effect can be controlled with acrylicOpacity (accepts a
floating point between 0 and 1). You can use these settings with or without a
background image.
{
    "useAcrylic": true,
    "acrylicOpacity": 0.5
}
Customise the colour scheme
Windows terminal includes a few colour schemes in its defaults.json file which
can be accessed by pressing the Alt key while clicking the Settings
option in the dropdown menu. Each colour scheme is listed as an object in the
schemes array and they all have the following format:
{
    "name" : "Campbell",
    "cursorColor": "#FFFFFF",
    "selectionBackground": "#FFFFFF",
    "background" : "#0C0C0C",
    "foreground" : "#CCCCCC",
    "black" : "#0C0C0C",
    "blue" : "#0037DA",
    "cyan" : "#3A96DD",
    "green" : "#13A10E",
    "purple" : "#881798",
    "red" : "#C50F1F",
    "white" : "#CCCCCC",
    "yellow" : "#C19C00",
    "brightBlack" : "#767676",
    "brightBlue" : "#3B78FF",
    "brightCyan" : "#61D6D6",
    "brightGreen" : "#16C60C",
    "brightPurple" : "#B4009E",
    "brightRed" : "#E74856",
    "brightWhite" : "#F2F2F2",
    "brightYellow" : "#F9F1A5"
}
You can switch between the included colour schemes by setting the colorScheme
option to the name of the theme in your settings.json file. This option can
be set globally for all profiles or per profile.
{
    "guid": "{61c54bbd-c2c6-5271-96e7-009a87ff44bf}",
    "name": "Windows PowerShell",
    "commandline": "powershell.exe",
    "colorScheme": "Campbell Powershell",
    "useAcrylic": true,
    "acrylicOpacity": 0.9
}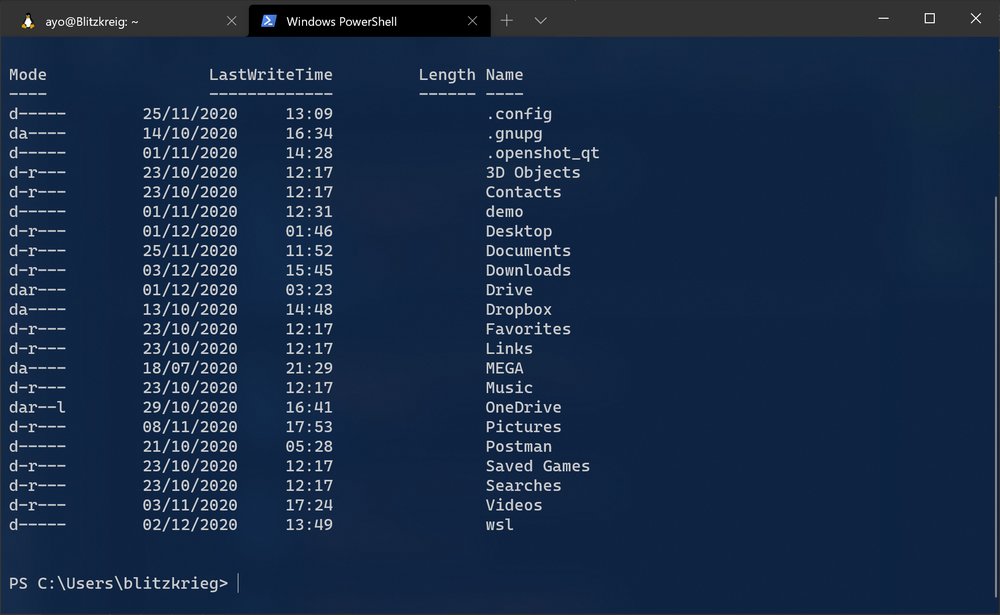
The Campbell Powershell colour scheme
You can install extra colour schemes by defining the scheme object in the
schemes array in your settings.json file. A great place to source for colour
schemes is the Windows Terminal Themes website.
You can preview each available theme then click the Get theme button to copy the
JSON object to your clipboard.
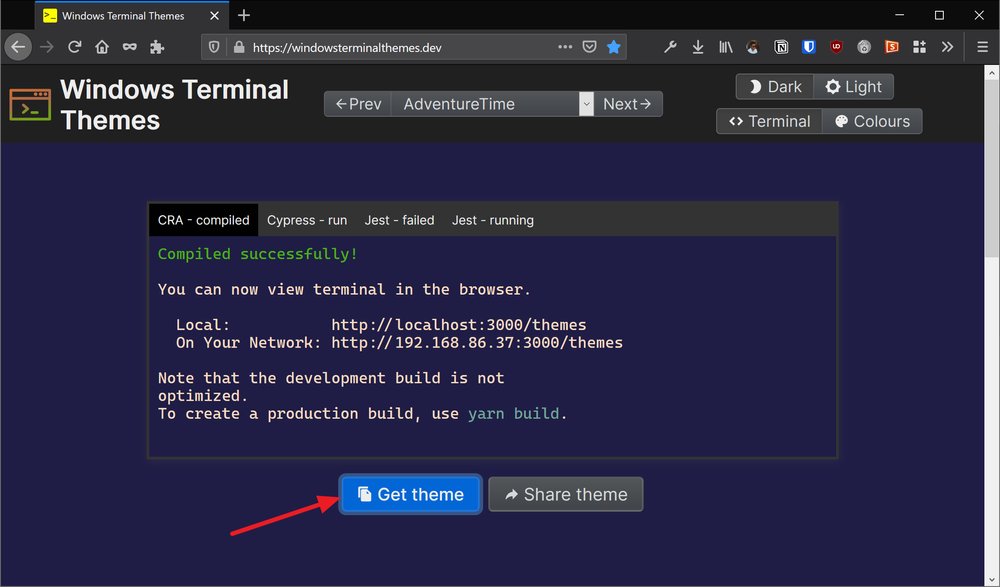
Place the JSON object in the schemes array, then set the
colorScheme property to the theme name. The theme should take effect once you
save the file.
{
    "schemes": [
        {
            "name": "AdventureTime",
            "black": "#050404",
            "red": "#bd0013",
            "green": "#4ab118",
            "yellow": "#e7741e",
            "blue": "#0f4ac6",
            "purple": "#665993",
            "cyan": "#70a598",
            "white": "#f8dcc0",
            "brightBlack": "#4e7cbf",
            "brightRed": "#fc5f5a",
            "brightGreen": "#9eff6e",
            "brightYellow": "#efc11a",
            "brightBlue": "#1997c6",
            "brightPurple": "#9b5953",
            "brightCyan": "#c8faf4",
            "brightWhite": "#f6f5fb",
            "background": "#1f1d45",
            "foreground": "#f8dcc0"
        }
    ]
}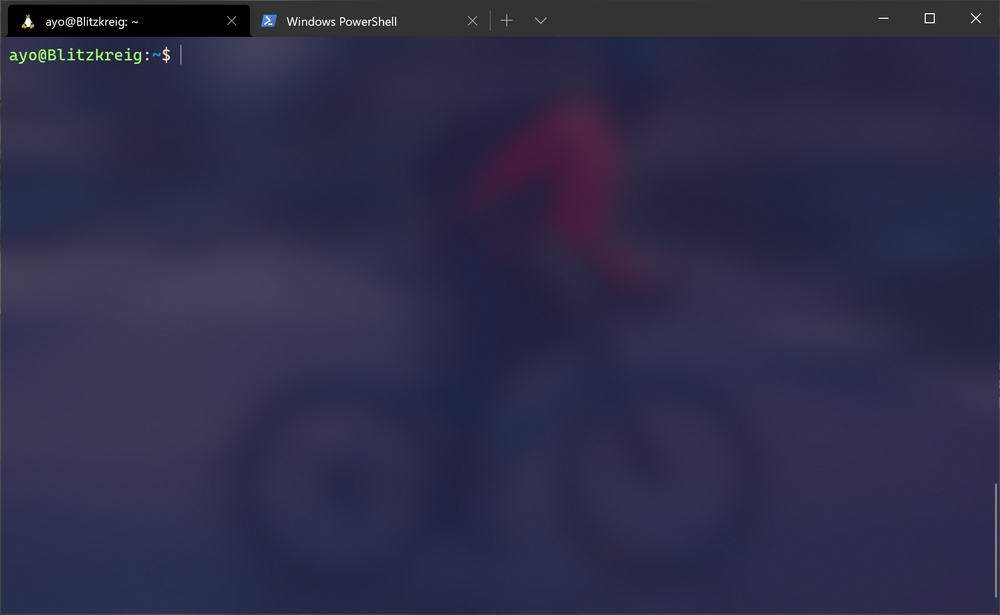
AdventureTime colour scheme with acrylic background enabled
Make your prompt pretty with Powerline
Powerline provides a customised command prompt experience that looks great and displays some handy information to give you context of what you’re doing.
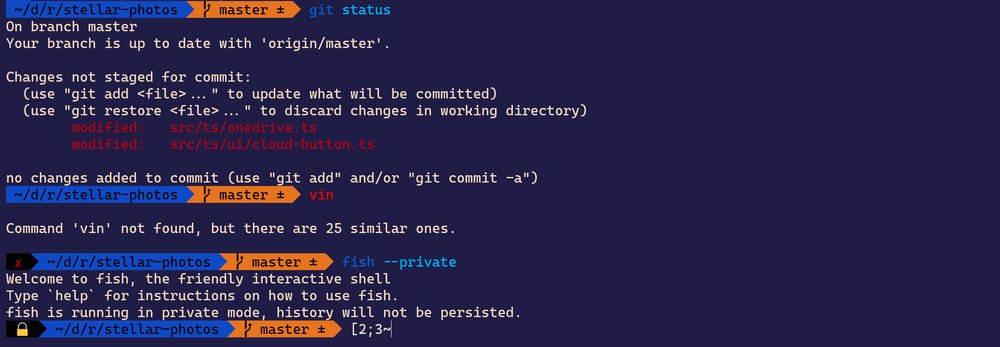
This Fish prompt is styled using Powerline
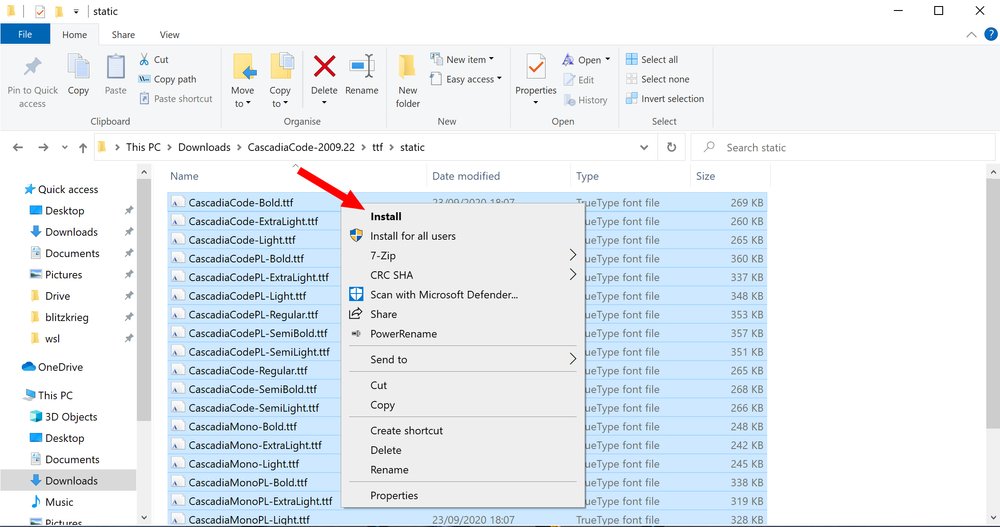
You need to install a powerline font first to prevent a broken prompt. You can check out the Nerd fonts website for a patched version of your favourite font, or download the patched version of the default Windows terminal font (Cascadia Code) on the GitHub releases page. Download the zip file on the latest release, extract it and install the Cascadia Code PL font files.
Next, change the fontFace property in your profile settings to Cascadia Code PL.
{
    "fontFace": "Cascadia Code PL"
}
Set up Powerline in Powershell
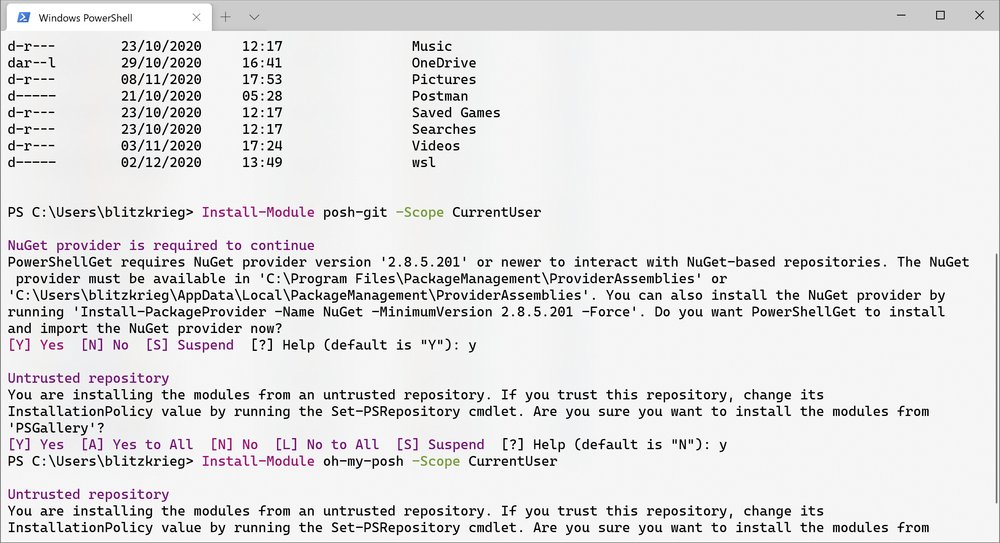
Make sure you have Git for Windows installed. Next, install Posh-Git and Oh-My-Posh using Powershell through the commands below. The former adds Git status information to your prompt as well as tab-completion for Git commands, parameters, remotes, and branch names while the latter provides theme capabilities for your PowerShell prompt.
Install-Module posh-git -Scope CurrentUser
Install-Module oh-my-posh -Scope CurrentUser
You will be prompted to install NuGet if you don’t have it already. You may
also need to approve ‘PSGallery’, an untrusted source. Enter Y in
both cases.
Once the installation is completed, open your PowerShell profile script in your
text editor with code $PROFILE. It is a script that is executed each time
PowerShell starts. Place the following commands at the end of the file:
Import-Module posh-git
Import-Module oh-my-posh
Set-Theme Agnoster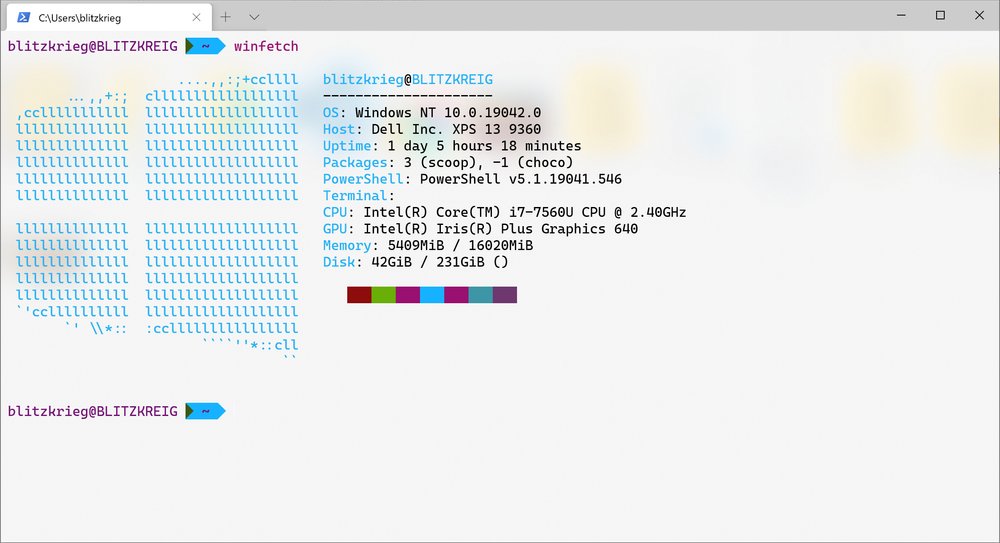
Command line system information powered by Winfetch
Set up Powerline in WSL Ubuntu
Install powerline-go and follow the instructions on the project’s GitHub page to set it up on your preferred shell.
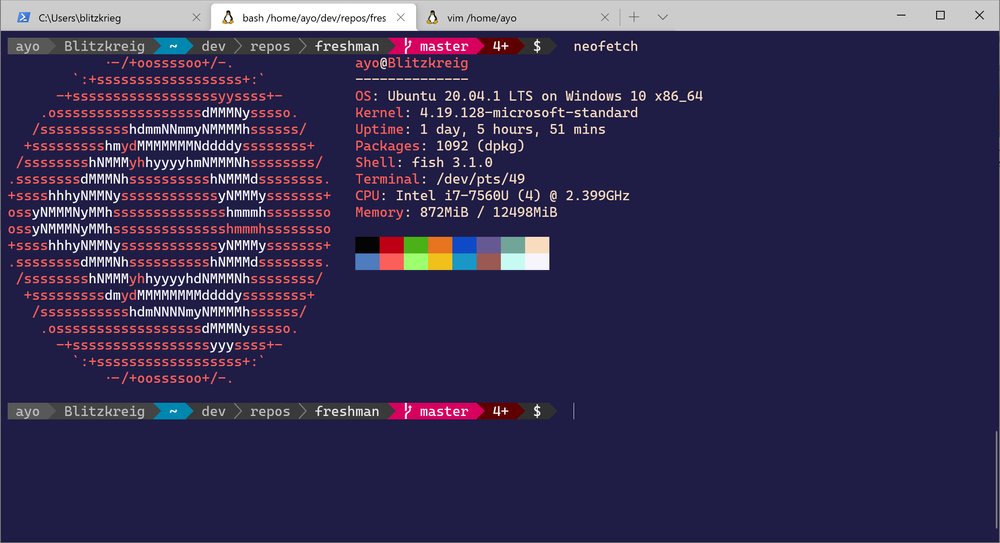
Command line system information powered by Neofetch
Split panes for multiple shells at once

PowerShell top, Ubuntu bottom
The Windows terminal supports splitting a tab into multiple panes. This makes it easy to multitask without having to switch tabs. I use tmux for this purpose in WSL so it’s not something I rely on often, but it’s handy to have especially if you need to work out of multiple shells.
The default shortcuts to split a pane horizontally and vertically are Alt + Shift + - and Alt + Shift + = respectively. You can also split a pane using the command palette which can be accessed with Ctrl + Shift + p:

If you hold down the Alt key and press the new tab button on one of the profiles in the dropdown, it would also auto split the active window or pane.
To switch focus between panes, hold down Alt and use your arrow keys or click on the desired pane. Resizing the focused pane is done by holding down Alt + Shift and one of the arrow keys. Closing a pane can be done with Ctrl + Shift + W.
Customise the hotkeys
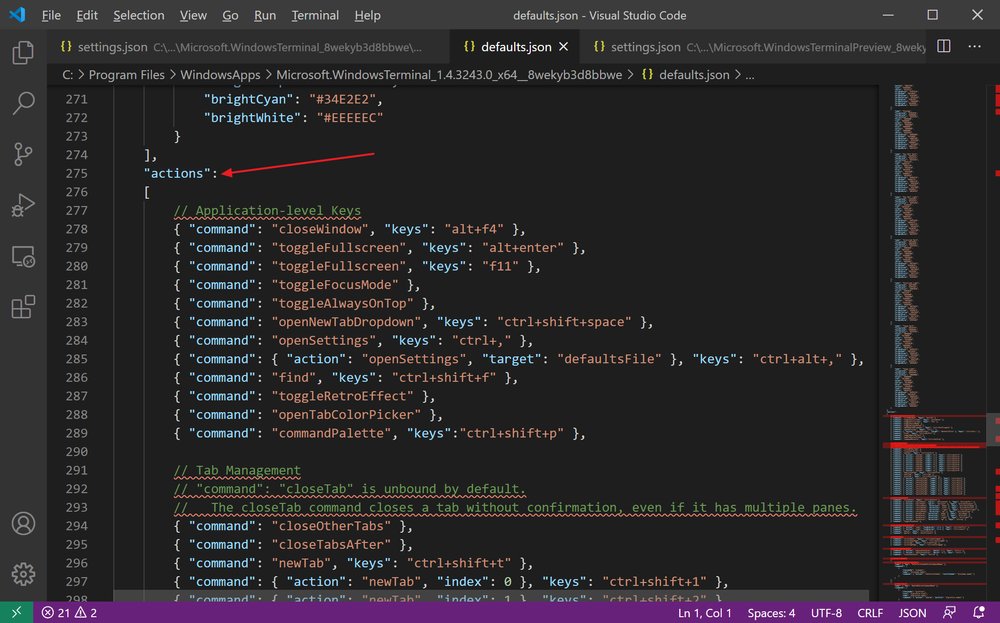
All the hotkeys for Windows Terminal commands can be customised through the
actions property (formerly keybindings) in the settings.json file. If you
inspect the defaults.json file for your terminal (by holding the Alt
key while clicking the Settings menu), you’ll see all the default key bindings
organised in several categories in the root level actions array.
You can add a new hotkey for an action by copying the relevant binding object
from the defaults.json file to the settings.json file, and changing the
keys property in the object. If you modify the defaults.json file directly,
your changes will be lost when the program updates. For example, the bindings
for splitting panes can be customised as shown below:
{
    "actions": [
        { "command": { "action": "splitPane", "split": "vertical" }, "keys": "alt+v" },
        { "command": { "action": "splitPane", "split": "horizontal" }, "keys": "alt+h" }
    ]
}
The above lines add new bindings for the splitPane action, but the original
bindings will remain active. To remove a default key binding, assign the key to
the unbound command as shown below:
{
    "actions": [
        { "command": { "action": "splitPane", "split": "vertical" }, "keys": "alt+v" },
        { "command": { "action": "splitPane", "split": "horizontal" }, "keys": "alt+h" },
        { "command": "unbound", "keys": "alt+shift+-" },
        { "command": "unbound", "keys": "alt+shift+=" }
    ]
}
Windows terminal also gives you the ability to send input commands to your shell with a key stroke. This is handy for commonly used commands. Here’s an example that binds Alt + G to sending a command that navigates to the root of the working tree in a git repo:
settings.json{
"actions": [
{ "command": {"action": "sendInput", "input": "cd (git rev-parse --show-toplevel)"}, "keys": "alt+g" }
]
}The full list of commands and their options can be found in the Actions documentation.
Set up custom SSH profiles
It can be handy to automatically SSH into remote machines through the Windows Terminal. This can be done by setting up a new custom profile per machine.
settings.json{
"guid": "{4b8d0cfe-e8be-4ae6-a4ad-88efd65b0880}",
"hidden": false,
"name": "Failed Experiments",
"commandline": "wsl ssh user@localhost",
"icon": "🤡"
}
The guid field must be unique amongst the profiles. You can make changes to an
exisiting one or generate it online. Regarding
the icon, you can use an emoji (v1.5 or later) or type the path to a suitable
image. After saving the file, you should see your new entry similar to the
screenshot below.
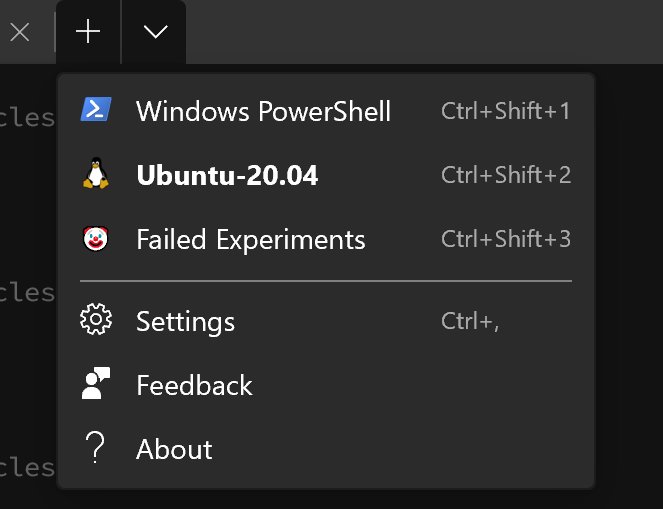
Once you click the entry, it will automatically connect to the remote server in your preferred Linux distribution.
Customise the startup layout
Windows terminal launches with a single tab and a single pane using your default profile, but you can customise this behaviour through command line arguments. Here’s an example that launches the terminal with a custom layout of three split panes in a single tab. The panes are running a WSL profile, a PowerShell profile, and a Command Prompt profile respectively.
wt; split-pane -p "Windows PowerShell" ; split-pane -p "Command Prompt" -H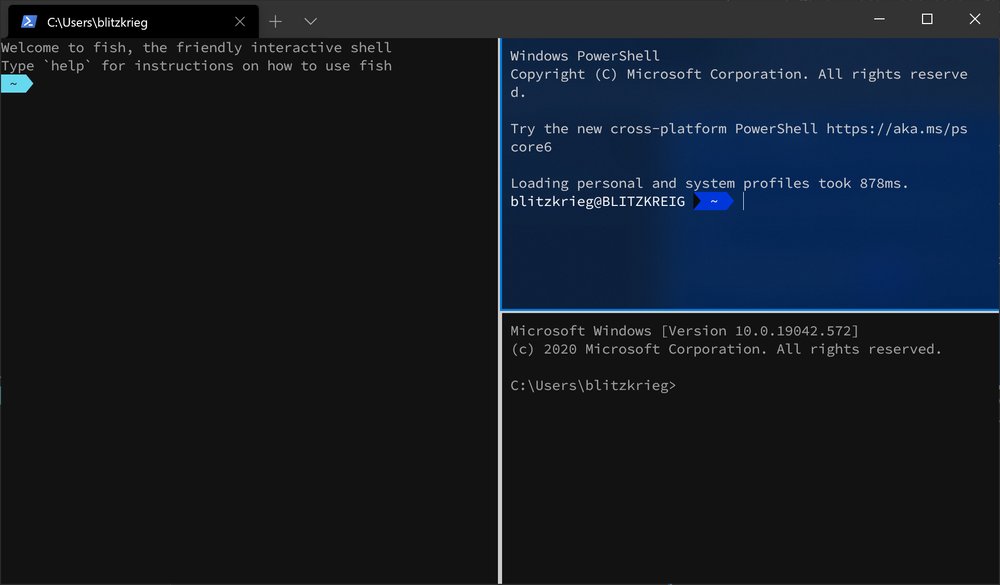
Here’s a breakdown of the above command:
wton its own launches a new window with a single tab and a single pane with the default profile. Each command afterwtmust be separated with a semicolon.split-panesplits the current pane into two defaulting toautoif you don’t specify a direction (-Hor-V). The-pflag allows you to specify the the type of profile you want to open by name orguid.
After you have defined your preferred startup layout, you can bind it to a hotkey using AutoHotkey or create a new Windows shortcut and pin it to your desktop or taskbar.
Conclusion
In this post, we discussed several ways to customise the Windows Terminal. I hope it has helped you improve your workflow and productivity on the command line. If you have any more tips, please share them in the comments section below.
Thanks for reading, and happy coding!
Recommend
About Joyk
Aggregate valuable and interesting links.
Joyk means Joy of geeK