

WebVR with A-Frame & Angular
source link: https://blog.brakmic.com/webvr-with-a-frame-angular/
Go to the source link to view the article. You can view the picture content, updated content and better typesetting reading experience. If the link is broken, please click the button below to view the snapshot at that time.
8 minutes read
The goal of this article is to describe the inner workings of an environment for WebVR components that’s based on A-Frame & Angular 2. As the design and maintenance of components like these are complex and repetitive tasks it’d be of much help to have a mechanism to offload the boilerplate like base structures, build-scripts, polyfills and other ‘usual suspects’ found in almost every web-oriented project. This is the main reason why this project exists. I wanted to have a tool-set that could not only help me create nice WebVR components but also deliver them easily by following best practices and accepted Web Standards.
The sources of this project can be found here.
A quick demonstration is located here.
Project Setup
This project follows the more or less ‘standard’ approach by semantically splitting the sources within the src/app-directory:
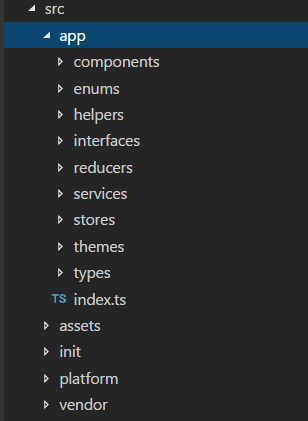
The initial logic is located in src/init-directory and contains main, vendor and polyfill scripts. As a build tool I’m using WebPack together with a few configuration files.
Booting the App
The main script loads the AppModule to boot the app.
export function main(): Promise<any> { return platformBrowserDynamic() .bootstrapModule(AppModule) .then(decorateModuleRef) .catch((err) => console.error(err)); }
But shortly before this happens the browser activates the A-Frame script by putting it before Angular’s Zone.js module.

This is mandatory as Zone.js takes over the document.registerElement function and expects all properties, like detachedCallback, to be set. More info on this issue can be found here.
Module Registration
The next step is registering predefined A-Frame modules that are located in app.loader. We define modules as objects that implement the IVrModule interface.
interface IVrModule { id: string; name: string; type: VrModuleType; markup: string; scripts?: string[]; }
They carry information about their type, like ‘AFrame’, the markup that describes their structure and optional scripts. In fact, one could easily add new frameworks by creating further module enums.
This is an example of a simple module of type ‘AFrame’:
const hello = <IVrModule>{ id: '001', name: 'hello', type: VrModuleType.AFrame, markup: ` <a-scene> <a-sphere position="0 1.25 -1" radius="1.25" color="#EF2D5E"></a-sphere> <a-box position="-1 0.5 1" rotation="0 45 0" width="1" height="1" depth="1" color="#4CC3D9"></a-box> <a-cylinder position="1 0.75 1" radius="0.5" height="1.5" color="#FFC65D"> </a-cylinder> <a-plane rotation="-90 0 0" width="4" height="4" color="#7BC8A4"></a-plane> <a-sky color="#ECECEC"></a-sky> </a-scene> ` };
In a more realistic scenario such modules would be located in a separate storage. One could, for example, query them via REST-services and register on-the-fly. The module registration happens in vr-module.service that can also de-register existing ones. This service also dispatches messages to vr-module reducer.
This is how its registration method looks like:
public registerModule(): Observable<IServiceMessage> { return this.asObservable().map((mod) => { if (!_.isNil(mod) && !_.isNil(mod.id) && !_.isNil(mod.name)) { this.store.dispatch( { type: VR_MODULE_ADDED, payload: mod }); return <IServiceMessage> { id: '0000', content: `Registered vr module '${mod.name}'` }; } return <IServiceMessage>{ id: '000', content: mod ? `Could not register vr module '${mod.id}'` : `Could not register unknown vr module` }; }); }
State Management
The aforementioned reducer is based on @ngrx that will help us manage our application state more easily.
const vrModuleReducer: ActionReducer<IVrModule[]> = (state: IVrModule[] = initialState, action: Action) => { switch (action.type) { case VR_MODULE_REMOVED: return _.filter(state, (mod) => mod.id === action.payload.id); case VR_MODULE_ADDED: return _.concat(state, action.payload); default: return state; } };
In its current state the reducer isn’t much used within the application because of a simple fact that in its original version the app functions only as a ‘show room’ for a few VR modules. Currently, its sole purpose is to keep the availableModules-property up to date which is bound to the modules-property of VrListComponent.
/** * Initialize subscriptions and get app state via @ngrx (Redux implementation for Angular2) */ public ngOnInit() { [....snip...] this.availableModules = <Observable<IVrModule[]>> this.store.select('vrModule'); [....snip...] }
The store from above is being created here by using provideStore function from @ngrx.
const appStore = provideStore( { vrModule: vrModuleReducer }, { vrModule: this.vrModule } );
I’m also not completely following the best practices because I don’t use any Action Creators. Instead, I’m dispatching raw messages. Please, forgive me. 
Module Sidebar
In parallel to module registration the AppComponent builds up a proper view that’ll show us the modules in a sidebar. This part of the task is offloaded to another component, vr-list, that creates a list of module names. Notice that the surrounding bootstrap-structure could be safely replaced by any other styling library. Also take into account that data for [modules]-binding goes through an AsyncPipe that’s one of Angular’s default pipes. Previously we’ve selected an Observable from the vrModule–Store and therefore we have to properly consume those asynchronous data streams. That’s why AsyncPipe is made for. As our modules-property in VrListComponent knows nothing about Observables our data must go through this pipe first.
<div class="container-fluid main-container"> <div class="row stage-area"> <div class="col col-lg-2 col-md-3sidebar-block"> <vr-list [modules]="availableModules | async" (vrModuleSelected)="onVrModuleSelected($event)"></vr-list> </div> <div class="col col-lg-10 col-md-9 three-dee-area"> <router-outlet></router-outlet> </div> </div> </div> <footer class="footer pull-left"> <div class="container"> <p class="text-muted">{{activeVrModule?.name}}</p> </div> </footer>
As shown in the above HTML we simply forward the contents of AppComponent’s availableModules property to VrListComponent’s modules property. If you don’t know the mechanics making this possible simply jump to this article of mine.
Additionally, we combine the EventEmitter from VrListComponent to AppComponent’s handler method onVrModuleSelected. We’re interested in user selections done on the Sidebar because we want to load the appropriate A-Frame module. Again, if you have problems understanding the mechanism you could read one of my previous articles first before going any further.
Module Selection
Now the most interesting part happens when user selections reach the event handler in AppComponent. Here, we’re not only creating a message object that describes the module but also utilizing Angular’s routing mechanism that’ll kick off VR-module instantiation itself.
/** * Click handler for vr module selections (sidebar on the left) * Check app.routes.ts for more info on angular2 routing * * @private * @param {*} event */ private onVrModuleSelected(event: any) { const params = { id: event.module.id }; this.activeVrModule = event.module; this.router.navigate([`modules`, params], { relativeTo: this.route }); }
By itself, our routing paths look very simple, because there’s only one possible target: VrWrapperModule.
export const APP_ROUTES: Routes = [ { path: '', children: [ { path: '', loadChildren: './shared/wrapper#VrWrapperModule' }, { path: ':area', loadChildren: './shared/wrapper#VrWrapperModule' } ] } ];
But, there’s more as VrWrapperModule owns a separate routing definition that helps the framework load appropriate VR modules.
Routing Mechanism
import { Routes } from '@angular/router'; import { VrWrapperComponent } from './wrapper.component';
export const WRAPPER_ROUTES: Routes = [ { path: '', component: VrWrapperComponent } ];
The routing target, VrWrapperComponent, subscribes to route-params Observable and reacts to changes by creating another carrier object called dynamicComponent. In case you need more info regarding Observables and functional/reactive coding in Angular, there’s an older article of mine that might be of some value to you.
// Each time the route changes take the ID and instantiate the appropriate vr element. // If the element contains a script-array load them too. // Check shared/directives/vr-element.directive.ts for more info regarding // dynamic instantiation of vr elements. this.routeSubscription = this.route.params.subscribe((params) => { const id = params['id']; const mod = _.find(this.availableModules, (m) => m.id === id); if (!_.isNil(mod)) { this.dynamicComponent = { html: mod ? mod.markup : undefined, scripts: mod ? mod.scripts : [] }; this.changeDetectorRef.markForCheck(); } });
Module Instantiation
Now, the question is, where does dynamicComponent go? Let’s see the HTML structure of VrWrapperComponent:
<vr-element [dynamicComponent]="dynamicComponent"></vr-element>
Well, we now understand why it’s being called a ‘wrapper’. It’s because it is a wrapper for some other component, VrElement, that depends on our dynamicComponent. But this time the dependent component is not yet another Angular component. It’s a Directive. This directive’s main task is dynamic creation and instantiation of Angular components plus optional injection of external JavaScripts.
const body = document.getElementsByTagName('body')[0]; // if the markup has changed remove the existing vr-module scripts first Promise.resolve(_.each(this.activeScripts, (script, index) => { const oldNode = body.removeChild(document.getElementById(this.vrScriptPrefix + index)); })).then(() => { // clean up the view-container reference... this.activeScripts = []; _.each(cmp.scripts, (script, idx) => { this.appendScript(body, script, Number(idx)) }); }); const metadata = new Component({ selector: 'vr-dynamic-element', template: cmp.html, }); createComponentFactory(this.compiler, metadata).then((factory) => { const injector = ReflectiveInjector.fromResolvedProviders([], this.vcRef.parentInjector); this.cmpRef = this.vcRef.createComponent(factory, 0, injector, []); });
First, it takes care of removing any previous VR-related scripts from the document body. Then, it injects optional scripts that could be provided by the module. Finally, it creates future component’s metadata by copying dynamicComponent’s html-property.
Dynamic Modules
Ultimately, we pass the metadata to a helper function called createComponentFactory that’ll complete our task by injecting a fully functional component into the DOM. The structure of this helper function is as follows:
export function createComponentFactory(compiler: Compiler, metadata: Component): Promise<ComponentFactory<any>> { const cmpClass = class DynamicComponent {}; const decoratedCmp = Component(metadata)(cmpClass);
@NgModule({ imports: [ CommonModule ], declarations: [decoratedCmp], schemas: [ CUSTOM_ELEMENTS_SCHEMA ] }) class DynamicHtmlModule { }
return compiler.compileModuleAndAllComponentsAsync(DynamicHtmlModule) .then((moduleWithComponentFactory: ModuleWithComponentFactories<any>) => { return moduleWithComponentFactory.componentFactories.find ((x) => x.componentType === decoratedCmp); }); }
First, we create a brand new @NgModule and feed it with CUSTOM_ELEMENTS_SCHEMA from Angular’s core library. This constant is very important because A-Frame uses it’s own components whose names begin with an “a-” prefix. Any HTML elements whose tags contain a dash in their name must either be “Angular-known” elements or there has to be a CUSTOM_ELEMENTS_SCHEMA loaded into containing @NgModule. Without this schema constant you’ll receive a ton of error messages complaining that there’s an “unknown element with name XYZ“.
Armored with this knowledge we go a step further an put the component declaration that contains our incoming metadata into @NgModule. As you can see above we’re just using an empty component class type, DnamicComponent, that served us as a wrapper to be combined with our previous metadata. With this new component we complete our @NgModule’s definition and hand it over to Angular Compiler’s method compileModuleAndAllComponentsAsync. As a result we get back a component factory (not a component!) that we’ll soon use to create a new component to be inserted into our view container.
As you can imagine, a Directive can’t have a template, so we have to find some ‘free space’ in the DOM where we can put our new component in. To prepare ourselves for this task we’ve already instantiated our Directive by feeding it a proper ViewContainer Reference via Angular’s Dependency Injection mechanism. Now, I hope, it’s easy to understand why we’re calling ViewContainerRef’s createComponent method and pass it our component factory.
The ViewContainer Reference should have no knowledge on how we create our components. It’s only duty is to provide us ‘some room’ for our new component. The rest is done in the factory itself.
Optional Scripts Injection
And just to make the journey complete, let’s examine the simple mechanism that helps insert optional scripts into the DOM.
private appendScript(host: HTMLElement, data: string, index: number) { this.ngZone.runOutsideAngular(() => { const script = document.createElement('script'); script.type = 'text/javascript'; script.charset = 'utf-8'; script.id = this.vrScriptPrefix + index; script.defer = true; script.async = true; script.text = data; host.appendChild(script); // memorize the script so we can remove it later this.activeScripts.push(script); }); }
We call NgZone’s runOutsideAngular to do some extra stuff in the DOM that should bypass Angular’s mechanism. In this case we’re directly manipulating DOM’s structure and because we don’t want to mess with Angular’s own DOM manipulation logic we do the job ‘outside’ of it.
We create a new <script> Tag and feed it with values that’ll help us recognize it later. This will be of great importance when we have to load another module. We don’t want old scripts lying around so we take care of giving them unique names. Ultimately, we insert them into the DOM and memorize in our internal activeScripts variable.
Conclusion
I hope this article could help you understand my motives to build such an environment. WebVR and related technologies are still brand new and there are many moving parts but all learning starts with a single step. However, I didn’t want my journey to begin with a single learning step and end as a configuration death march. Nothing drains one’s own enthusiasm faster than configuration obstacles. You know it, JavaScript fatigue and JS-fatigue-fatigue. I think we can do it better, because there are many excellent tools, de-facto standards and best-practices.
Have fun! 
Recommend
About Joyk
Aggregate valuable and interesting links.
Joyk means Joy of geeK