

VMware Cloud Director Availability 4.1 – Backup and Restore appliances
source link: https://blogs.vmware.com/cloudprovider/2020/12/vmware-cloud-director-availability-4-1-backup-and-restore-appliances.html
Go to the source link to view the article. You can view the picture content, updated content and better typesetting reading experience. If the link is broken, please click the button below to view the snapshot at that time.
VMware Cloud Director Availability 4.1 – Backup and Restore appliances
Creating appliance backups and restoring them is one of the new features in VMware Cloud Director Availability 4.1. This new feature covers the backup and restore of configuration files, database dump, network configuration, public certificates, keystores, and more. Running a backup will collect this information from all appliances – manager, replicator, cloud, tunnel, and on-premises replicator.
As a mandatory requirement for protection, you need to specify a password for each archive while generating it.
To perform the restore procedure successfully, you will need a freshly installed appliance without any configurations.
Generate a backup
You can generate a new backup for each VMware Cloud Director Availability appliances in their own UI or do it directly from the Manager appliance, where backups for all appliances will be generated.
Follow these steps from the Manager appliance to back up everything:
- Log in to the VMware Cloud Director Availability UI at https://Appliance-IP-Address/ui/admin.
- Navigate to the Backup Archives menu.
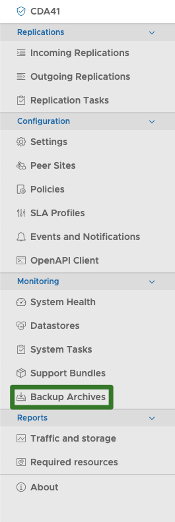
Figure 1 – VMware Cloud Director Availability menu
3 – Click GENERATE NEW.

Figure 2 – Generate a new backup
4 – Enter a password and click the CREATE button.
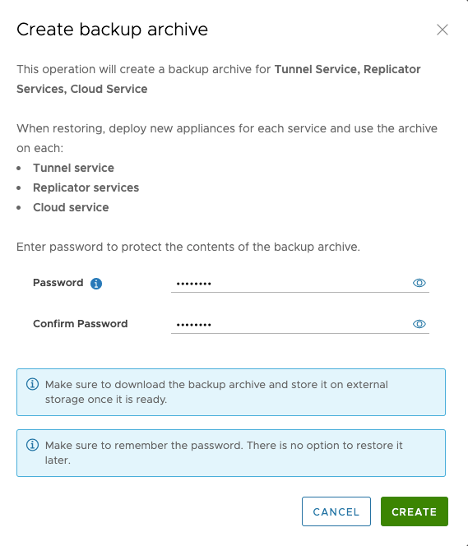
Figure 3 – Backup generation wizard
5 – Shortly, the archive will be ready and can be downloaded by clicking the download button.
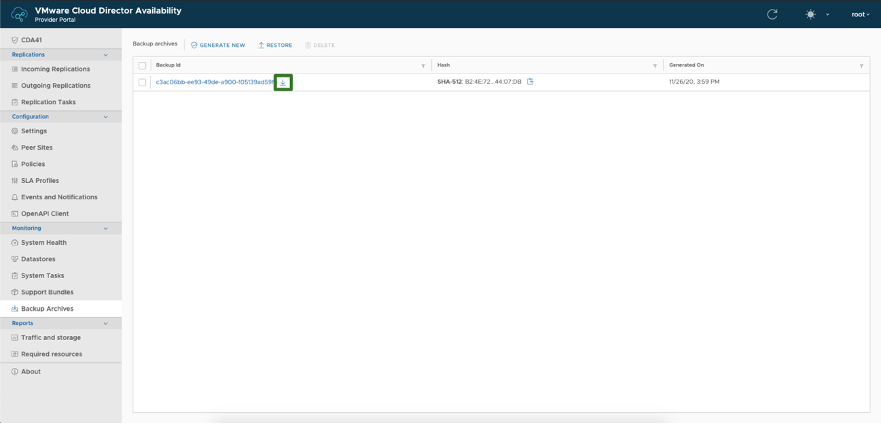
Figure 4 – All available backup archives
Generate a backup through the API
As an addition to the UI backup generation, there is an option for the administrator to generate one directly through the API, which is a convenient option for automating the backup process.
To generate and download the archive for each appliance through the API, you will need to perform the following steps:
- Open a terminal and execute this command:
Please note this is for local user authentication. For more authentication options, please refer to the API programming guide.
- If the command is executed successfully, in the output you will find a parameter called X-VCAV-Auth. For example:
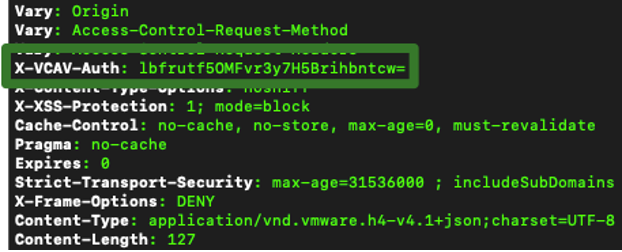
Figure 5 – X-VCAV-Auth token generation
Copy its value as this is the authentication token that will be used in the next steps.
- To generate a new backup, execute the following command:
<<token>> should be the value collected in the previous step and <<password>> is the password that you would like to define for the backup archive.
The expected result is similar to the one shown in Figure 6.

Figure 6 – Successful API backup generation call
- To download the archive, you need to execute:
The <<backup_id>> is the ID parameter (the first one) in the response of the previous step, <<token>> is the value collected in step 1 results and <<destination/file.tar.bz2>> is the destination file.
If you would like to download another backup archive, you can list all available archives with the following:
<<token>> is the value collected in step 1 results.
In case of a problem with the certificates, you can use -k as a curl parameter like this:
curl -k ‘https://Appliance-IP-Address:8046/backups’ …
Restore a backup
To restore a backup, you need to use a fresh installation of VMware Cloud Director Availability. The procedure can only be executed through the UI.
Please follow these steps for each of the appliances:
- Extract the backup archive. As a result, you will have a .enc file for each registered appliance.
- Log in to the VMware Cloud Director Availability UI at https://Appliance-IP-Address/ui/admin.
- Navigate to the Backup Archives menu.

Figure 7 – VMware Cloud Director Availability menu
4. Click RESTORE.

Figure 8 – Restore a backup
5. Select the correct .enc file for the component that is being restored, enter the password, and click RESTORE.

Figure 9 – Restore a backup wizard
Perform these steps for all components in the following order:
- Tunnel service
- Replicator service(s)
- Cloud service
This is everything you need to know to successfully back up and restore your VMware Cloud Director Availability appliances.
To learn more about the other new features of VMware Cloud Director Availability, please check our release blog.
Recommend
About Joyk
Aggregate valuable and interesting links.
Joyk means Joy of geeK