

基于 .NET CORE 3.1 提供的 worker service 来创建 windows 服务
source link: https://blog.zhuliang.ltd/2020/07/backend/worker-service.html
Go to the source link to view the article. You can view the picture content, updated content and better typesetting reading experience. If the link is broken, please click the button below to view the snapshot at that time.

基于 .NET CORE 3.1 提供的 worker service 来创建 windows 服务
create: 2020-07-13 12:15:43 | update: 2020-07-13 22:29:43
本文总阅读量: 66 次
|
文章总字数: 1.2k 字
|
阅读约需: 5 分钟
.NET CORE 3.1 提供了 worker service 这么一个模板,可以方便开发者来创建”windows 服务程序“(同样可发布于 linux)。本篇以 centos 7.6 为发布环境,简要说明如何使用 worker service 来创建服务,并部署发布到 centos 中。
你可以通过以下命令来查看本地安装的 .net core 环境:
dotnet --version # 笔者为 3.1.301
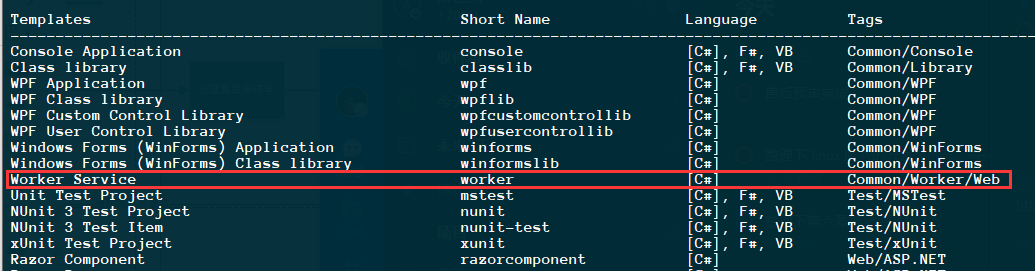
你可以通过以下命令来查看是否含有 worker service 模板:
dotnet new -l
方式1:命令行形式安装
你可以通过如下命令在当前解决方案中安装:
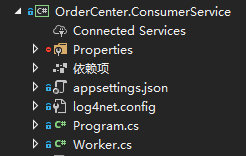
这里以项目:”OrderCenter.ConsumerService“ 为例
cd  解决方案路径

dotnet  new  worker  -o  OrderCenter.ConsumerService

# 之后你可以手动在 解决方案 中添加刚创建的项目,或者通过以下命令来进行引用
dotnet  sln  OrderCenter.sln  add   ./OrderCenter.ConsumerService.csproj
创建的项目如下:
方式2:UI界面
如果你不习惯使用命令行来创建项目,可以直接通过 UI 界面来添加项目:
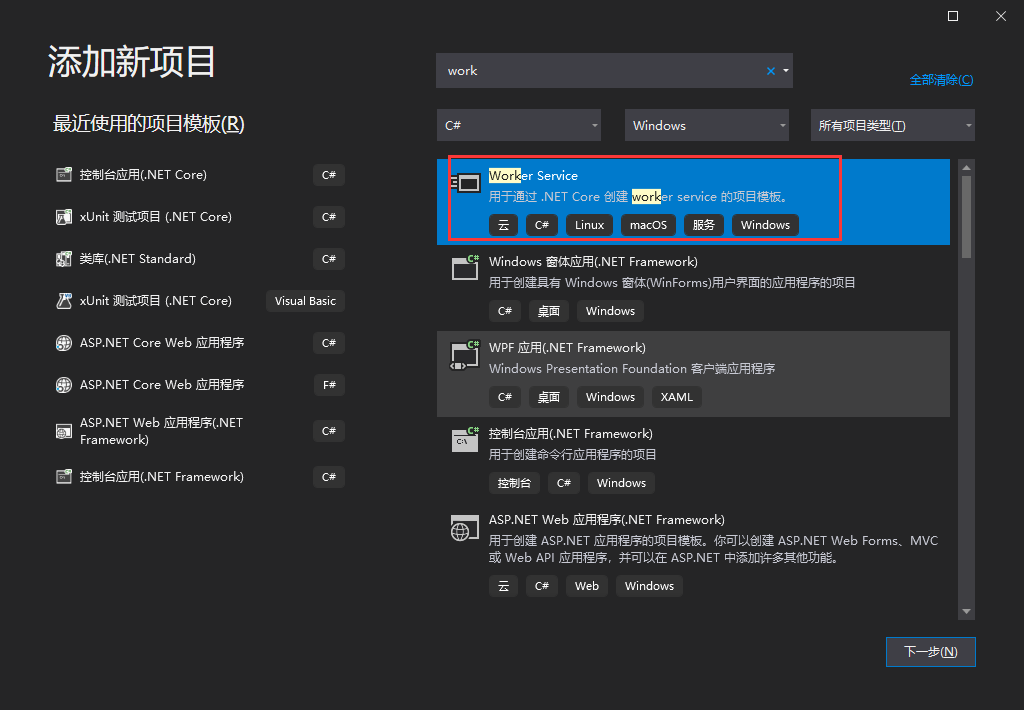
- 注:笔者的VS版本为 Visual Studio 2019 - v16.6.2
worker service 默认支持 IOC,你可以直接使用,同时你也可以直接配置日志等信息,示例如下:
本博文涉及的引用包及版本如下:

你可以在 Program.cs 中进行配置,代码如下:
public static IHostBuilder CreateHostBuilder(string[] args) =>
   Host.CreateDefaultBuilder(args)
       .UseContentRoot(Directory.GetCurrentDirectory())
       .ConfigureAppConfiguration((hostingContext, config) =>
           {
               config
                   .AddJsonFile("appsettings.json", true, true)
                   .AddJsonFile($"appsettings.{Environment.GetEnvironmentVariable("DOTNET_ENVIRONMENT")}.json", true, true)
                   .AddCommandLine(args);
           })
       .ConfigureLogging(config =>
       {
           config.SetMinimumLevel(LogLevel.Trace);
           if (Environment.OSVersion.Platform == PlatformID.Unix)
           {
               config.AddLog4Net("log4net.linux.config");
           }
           else
           {
               config.AddLog4Net();
           }
       })
       .ConfigureServices((hostContext, services) =>
       {
           #region >> 服务发现
          // 你的业务代码,若有
           #endregion

           #region >> 初始化数据库
           // 你的业务代码,若有
           #endregion

           #region >> IOC
           services.AddApplicationService();
           services.AddDomainService();
           services.AddRepository();
           #endregion

           services.AddHostedService<Worker>();
       }).UseSystemd(); //需引用 Microsoft.Extensions.Hosting.Systemd.dll
你可以在 Worker.cs 中编写业务代码,示例如下:
本文以 MQ 消费者为例:
public class Worker : BackgroundService
{
    private readonly IRabbitMqDomainService _mqClient;

    public Worker(IRabbitMqDomainService mqClient) //支持 IoC
    {
        _mqClient = mqClient;
        _mqClient.Initialize();
    }

    protected override async Task ExecuteAsync(CancellationToken stoppingToken)
    {
        _mqClient.SubscribeAutoAuditOrder();
        _mqClient.SubscribeGenerateDeliverSheet();
        while (!stoppingToken.IsCancellationRequested)
        {
            LogHelper<Worker>.LogInformation("服务还活着。", "ExecuteAsync");
           //对于 定时任务,如果要求不高,可直接使用 worker service 自带的特性来进行。
           await Task.Delay(600000, stoppingToken);
        }
    }

    public override Task StopAsync(CancellationToken cancellationToken)
    {
        LogHelper<Worker>.LogInformation("服务停止。", "StopAsync");
        return base.StopAsync(cancellationToken);
    }
}
生成发布文件
- 以下为 发布到 CentOS 为例,对应的 RID 为 linux-x64
- 更多 RID 你可以查询:https://docs.microsoft.com/zh-cn/dotnet/core/rid-catalog#windows-rids
通过命令生成
通过以下命令可以生成发布文件,
cd 发布项目路径
# 生成发布到 linux 环境的发布包
dotnet  publish  -c  release  -r  linux-x64  -f  netcoreapp3.1

# 生成发布到  windows 环境的发布包
dotnet  publish  -c  release  -r  win81-x64  -f  netcoreapp3.1
通过 UI 生成

发布到 linux 中
将对应的发布文件上传到服务器中
假设上传到的目录为:
/usr/bp/myservice/
假设服务的运行程序为:/usr/bp/myservice/OrderCenter.ConsumerService.dll
自启动设置
这里介绍 3 种让服务开机自启动的方式,当然你也可以用 PM2 之类的进程守护程序来进行。
1.通过 crontab 来设置开机运行
crontab  -e

#在编辑器中添加如下代码:
@reboot  /usr/bp/myservice/OrderCenter.ConsumerService.dll
2.通过在 rc.local 文件夹设置开机运行
vi   /etc/rc.d/rc.local

# 在该文件中添加如下命令即可
/usr/bp/myservice/OrderCenter.ConsumerService.dll
3.通过 systemd 进行开机启动
创建 service 文件
cd  /etc/systemd/systerm/
vim  myservice.service

# 创建的文件内容如下---请自行根据项修改对应的值
[Unit]
Description=work service demo

[Service]
# Case sensitive.  目录
WorkingDirectory=/usr/bp/myservice
# 具体文件
ExecStart=/bin/dotnet /usr/bp/myservice/OrderCenter.ConsumerService.dll
Restart=always
# Restart service after 10 seconds if the dotnet service crashes:
RestartSec=10
KillSignal=SIGINT
SyslogIdentifier=your-service-name
User=root
Environment=ASPNETCORE_ENVIRONMENT=Development
Environment=DOTNET_PRINT_TELEMETRY_MESSAGE=false

[Install]
WantedBy=multi-user.target
设置自启动
systemctl enable myservice
systemctl start myservice
发布到 windows 环境中
如果要发布到 windows 服务种,则需要安装 Microsoft.Extensions.Hosting.WindowsServices.dll (替换上面的 Microsoft.Extensions.Hosting.Systemd)
同时修改 Program.cs 代码
public static IHostBuilder CreateHostBuilder(string[] args) =>
   Host.CreateDefaultBuilder(args)
       .UseContentRoot(Directory.GetCurrentDirectory())
       .ConfigureAppConfiguration((hostingContext, config) =>
           {
               config
                   .AddJsonFile("appsettings.json", true, true)
                   .AddJsonFile($"appsettings.{Environment.GetEnvironmentVariable("DOTNET_ENVIRONMENT")}.json", true, true)
                   .AddCommandLine(args);
           })
       .ConfigureLogging(config =>
       {
           //other codes
           services.AddHostedService<Worker>();
       }).UseWindowsService(); //替换原 UseSystemd()
通过 sc.exe 命令行工具来创建服务,命令如下:
# 创建服务
# 注意:binPath后面的 "="号后面有一个空格
sc.exe create YOURSERVICENAME binPath= X:\OrderCenter.ConsumerService.exe

# 启动服务
sc.exe  start  YOURSERVICENAME

# 查询服务
sc.exe  query  YOURSERVICENAME

# 停止服务
sc.exe stop YOURSERVICENAME

# 删除服务
sc.exe delete YOURSERVICENAME
Recommend
-
62
前言 事情是这样的,由于后台给的接口是获取源数据的,一开始只是拿来做一些简单图表的展示。但是后来需求越来越复杂,逻辑嵌套深,需要在各个图表之间串联依赖关系,把这一层放在前端来写太蛋疼了,因为业务代码里太多跟...
-
62
-
36
The ServiceWorker.skipWaiting() method is a life saver. It ensures that any new versions of a service worker will take over the page and become activated immediately. To understand why this is so i...
-
50
Service Worker 随着前端快速发展,应用的性能已经变得至关重要,关于这一点大佬做了很多统计。你可以 去看看 。 ...
-
84
作为前端,在消费接口提供的数据时,往往由于数据实际分布在不同地方(如一部分存储在 ODPS ,而另一部分可能更适合在应用初始化时从本地载入内存)而需要对数据进行区分处理。当然,交互的实现可能也会需要很重的计算逻辑,而为了加速计...
-
49
-
39
-
7
基于.Net Core 5.0 Worker Service 的 Quart 服务 看过我之前博客的人应该都知道,我负...
-
5
我一直在负责维护的PaaS平台引入了Kubernetes作为底层支持,可以借助Kubernetes的生态做更多的事情,这篇博客主要介绍如何为普通用户提供图表监控服务(承接上一篇提供Dashboard支持)。默认读者有能力自己...
-
7
V2EX › 分享创造 基于 SSH 的内网穿透服务免费提供支持
About Joyk
Aggregate valuable and interesting links.
Joyk means Joy of geeK