
17

一套基于 React-ANTD、SignalR、.NET CORE 的消息推送解决方案
source link: https://blog.zhuliang.ltd/2020/07/frontend/message-pushing-using-react-dotnetcore-signalr.html
Go to the source link to view the article. You can view the picture content, updated content and better typesetting reading experience. If the link is broken, please click the button below to view the snapshot at that time.
一套基于 React-ANTD、SignalR、.NET CORE 的消息推送解决方案
create: 2020-07-23 12:20:43 | update: 2020-07-23 20:29:01
本文总阅读量: 43 次
|
文章总字数: 865 字
|
阅读约需: 4 分钟
本文对应的环境:React + ANTD + .NET CORE WEB API + SignalR
- 本文示例部分分为
前端和后端两部分
效果图:
用到的包和版本如下:
前端组件代码如下:
import React from 'react';
import { notification, Typography } from 'antd';
import { ExclamationCircleFilled } from '@ant-design/icons';
import * as signalR from '@microsoft/signalr';
import styles from './style.less';
import config from '../../config';
import urlParam from '../../utils/UrlParamHelper';
const { Paragraph, Link } = Typography;
class Notification extends React.Component {
  constructor (props) {
    super(props);
  }
  render () {
    return null;
  }
  componentDidMount () {
    const protocol = new signalR.JsonHubProtocol();
    const transport = signalR.HttpTransportType.WebSockets;
    const options = {
      transport;
    }
    this.connection = new signalR.HubConnectionBuilder()
      .withUrl(`${config.baseURL}api/TaskNotification?token=${urlParam.token}`, options)
      .withHubProtocol(protocol)
      .withAutomaticReconnect()
      .build();
    this.connection.on('TaskNotifiy', this.onNotifReceived);
    this.connection.start()
      .then(() => console.info('SignalR Connected'))
      .catch(err => console.error('SignalR Connection Error: ', err));
  }
  componentWillUnmount () {
    this.connection.stop();
  }
  onNotifReceived (taskNo, taskTitle) {
    notification.info({
      message: '任务提醒:',
      description: {taskTitle},
      placement: 'bottomRight',
      duration: null,
      icon: <ExclamationCircleFilled className={styles.icon} />
    })
  }
};
export default Notification;
后端代码:
.NET CORE 版本为 2.2
后端项目结构:
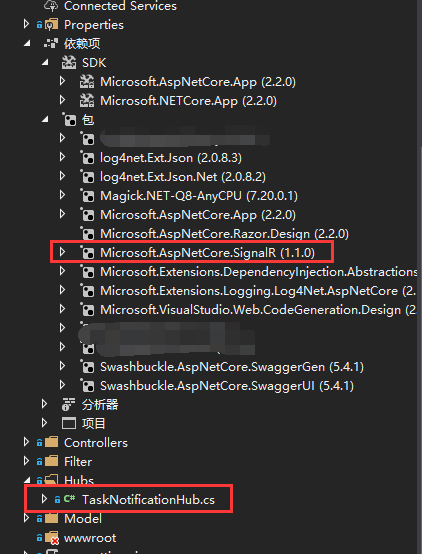
- ∵ SingalR 客户端在连接的时候只有 ConnectionId,所以后端代码会将用户和ConnectionId 进行绑定(这里我使用的是 Redis,你可以按你自己情况来)
TaskNotificationHub.cs
- 需在 Startup 中注册该类后
- 需集成 Hub 类,并根据自身业务情况重写 OnConnectedAsync 和 OnDisconnectedAsync。
- 这里我通过这 2 个方法来进行用户和 ConnectionId 的绑定和解绑。
- 每次有新用户连接和老连接断开都会调用这 2 个方法。
    public class TaskNotificationHub : Hub
    {
        private static IServiceProvider _serviceProvider;

        public static void Init(IServiceProvider serviceProvider)
        {
            _serviceProvider = serviceProvider;
        }

        /// <summary>
        ///
        /// </summary>
        /// <returns></returns>
        public async override Task OnConnectedAsync()
        {
            var token = Context.GetHttpContext().Request.Query["token"].ToString();

            if (!string.IsNullOrEmpty(token))
            {
                /*根据令牌获取用户的信息*/
                {
                    await RedisClient.Instance.SetAsync("缓存key-用户标识", this.Context.ConnectionId);
                }
            }
            await base.OnConnectedAsync();
        }

        public async override Task OnDisconnectedAsync(Exception exception)
        {
            var token = Context.GetHttpContext().Request.Query["token"].ToString();
            if (!string.IsNullOrEmpty(token))
            {
                /*根据令牌获取用户的信息*/

                //清除缓存
                await RedisClient.Instance.RemoveAsync("缓存key-用户标识");
                }
            }
            await base.OnDisconnectedAsync(exception);
        }
    }
Startup.cs
public void ConfigureServices(IServiceCollection services)
{
    /*其他代码*/

    services.AddCors(
        options => options.AddPolicy(
            DefaultCorsPolicyName,
             builder => builder.WithOrigins("http://localhost:3000")
                .AllowAnyHeader()
                .AllowAnyMethod()
                .AllowCredentials()
                )
            );

    services.AddSignalR();  //注册 SignalR
    services.AddMvc().SetCompatibilityVersion(CompatibilityVersion.Version_2_1);
}

public void Configure(IApplicationBuilder app, IHostingEnvironment env, ILoggerFactory loggerFactor)
{
    /*其他代码*/
    app.UseCors(DefaultCorsPolicyName);

    var webSocketOptions = new WebSocketOptions()
    { // 这块选项设置最好跟客户端保持一致(若使用 nginx 等,亦需做下对应。)
        KeepAliveInterval = TimeSpan.FromSeconds(120),
        ReceiveBufferSize = 4 * 1024
    };
    webSocketOptions.AllowedOrigins.Add("http://localhost:3000");
    app.UseWebSockets(webSocketOptions);
    app.UseSignalR(routes =>
    {
        routes.MapHub<TaskNotificationHub>("/api/TaskNotification"); //注册 SignalR 并指定路由
    });

    app.UseMvc();
}
- 需要注意的是项目是
前后端分离的,在 UI 建立长连接的时候可能存在跨域的问题,需要显式设定下CORS。 - 这里显式声明了使用 websocket。
- 跨域站点你也可以放到 appsettings中进行。
Controller
这里直接通过 Controller 来说明如何发送消息到客户端
TaskController.cs
private readonly IHubContext<TaskNotificationHub> _hubContext;

public TaskController(
    IHubContext<TaskNotificationHub> hubContext)
{
    _hubContext = hubContext;
}

[HttpPost]
public async Task<ResultInfo> NotifyAsync(string args)
{
    var connectionId = await RedisClient.Instance.GetAsync<string>("缓存key");

   /*你的其他业务代码*/

   //推送消息
    await _hubContext.Clients.Client(connectionId).SendAsync("TaskNotifiy", content1, content2,...contentN);

    return ResultInfo.Success();
}
- 这里通过使用
IHubContext<TaskNotificationHub>来进行 DI,不然每次调用 Hub 类都是一个新的实例,无法推送,通过IHubContext可以让你复用上下文。
nginx
如果你使用了 nginx,则需要进行下如下配置:
location {你的路径}  {
      proxy_connect_timeout   120;
      proxy_read_timeout      120;
      proxy_send_timeout      120;
      proxy_pass {你的站点};
      proxy_http_version 1.1;
      proxy_set_header Upgrade $http_upgrade;
      proxy_set_header Connection "upgrade";
      proxy_set_header Host $host;
      proxy_cache_bypass $http_upgrade;
    }
Recommend
About Joyk
Aggregate valuable and interesting links.
Joyk means Joy of geeK