
Hacking on Chromium for Android from Eclipse (part 1)
source link: https://eocanha.org/blog/2014/10/11/hacking-on-chromium-for-android-from-eclipse-part-1/
Go to the source link to view the article. You can view the picture content, updated content and better typesetting reading experience. If the link is broken, please click the button below to view the snapshot at that time.
Hacking on Chromium for Android from Eclipse (part 1)
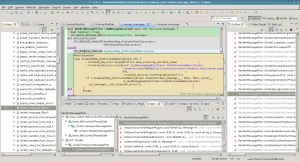
In the Chromium Developers website has some excellent resources on how to setup an environment to build Chromium for Linux desktop and for Android. There’s also a detailed guide on how to setup Eclipse as your development environment, enabling you to take advantage of code indexing and enjoy features such as type hierarchy, call hierarchy, macro expansion, references and a lot of tools much better than the poor man’s trick of grepping the code.
Unfortunately, there are some integration aspects not covered by those guides, so joining all the dots is not a smooth task. In this series of posts, I’m going to explain the missing parts to setup a working environment to code and debug Chromium for Android from Eclipse, both C++ and Java code. All the steps and commands from this series of posts have been tested in an Ubuntu Saucy chroot. See my previous post on how to setup a chroot if you want to know how to do this.
Get the source code
See the get-the-code guide. Don’t try to reconvert a normal Desktop build into an Android build. It just doesn’t work. The detailed steps to get the code from scratch and prepare the dependencies are the following:
 cd ANDROID # Or the directory you want
 fetch --nohooks android --nosvn=True
 cd src
 git checkout master
 build/install-build-deps.sh
 build/install-build-deps-android.sh
 gclient sync --nohooks
Configure and generate the project (see AndroidBuildInstructions), from src:
 # Make sure that ANDROID/.gclient has this line:
 # target_os = [u'android']
 # And ANDROID/chromium.gyp_env has this line:
 # { 'GYP_DEFINES': 'OS=android', }
 gclient runhooks
Build Chrome shell, from src:
 # This builds
 ninja -C out/Release chrome_shell_apk
 # This installs in the device
 # Remember the usual stuff to use a new device with adb:
 # http://developer.android.com/tools/device.html
 # http://developer.android.com/tools/help/adb.html#Enabling
 # Ensure that you can adb shell into the device
 build/android/adb_install_apk.py --apk ChromeShell.apk --release
If you ever need to update the source code, follow this recipe and use Release or Debug at your convenience:
 git pull origin master
 gclient sync
 # ninja -C out/Release chrome_shell_apk
 ninja -C out/Debug chrome_shell_apk
 # build/android/adb_install_apk.py --apk ChromeShell.apk --release
 build/android/adb_install_apk.py --apk ChromeShell.apk --debug
As a curiosity, it’s worth to mention that adb is installed on third_party/android_tools/sdk/platform-tools/adb.
Configure Eclipse
To configure Eclipse, follow the instructions in LinuxEclipseDev. They work nice with Eclipse Kepler.
In order to open and debug the Java code properly, it’s also interesting to install the ADT plugin in Eclipse too. Don’t try to reuse the Android SDK in “third_party/android_tools/sdk”. It seems to lack some things. Download a fresh standalone SDK from the official page instead and tell the ADT plugin to use it.
In the next post, I will explain how to debug C++ code running in the device, both from the command line and from Eclipse.
Recommend
About Joyk
Aggregate valuable and interesting links.
Joyk means Joy of geeK
