

SpringCloud Gateway 动态路由【篇1简单版】基于 Nacos 实现
source link: http://www.eknown.cn/index.php/spring-boot/spring-cloud-gateway-nacos-route.html
Go to the source link to view the article. You can view the picture content, updated content and better typesetting reading experience. If the link is broken, please click the button below to view the snapshot at that time.
本节开始介绍 SpringCloud Gateway 中动态路由的实现方法,包括:
- Nacos 集成动态路由配置,更新配置文件即自动更新路由
- MySQL + 二级缓存实现,主要基于 Gateway 的一些特性进行重写,实现路由信息的自动更新
这篇文章主要介绍第一种方式:将配置文件放到 Nacos 进行托管,网关服务通过引入 Nacos 而自动更新路由配置信息。实现较为简单。
本节代码在:https://github.com/laolunsi/spring-boot-examples,参考例 23 即可。
下面进入正题。
1. 创建网关服务
创建一个 springboot gateway 网关服务,默认是从 yaml 文件中读取 route 的配置。如果想要从 nacos 中读取配置,就要引入 nacos-config 的依赖,并设置配置文件的地址。
首先创建一个空 maven 项目 spring-cloud-gateway-nacos-routes ,声明 springboot 和 springcloud 的版本,并引入 nacos。
    <parent>
        <groupId>org.springframework.boot</groupId>
        <artifactId>spring-boot-starter-parent</artifactId>
        <version>2.3.1.RELEASE</version>
        <relativePath/> <!-- lookup parent from repository -->
    </parent>

    <groupId>com.eknown</groupId>
    <artifactId>spring-cloud-gateway-nacos-routes</artifactId>
    <description>SpringCloud Gateway Nacos 动态路由示例</description>
    <version>1.0-SNAPSHOT</version>

    <properties>
        <java.version>1.8</java.version>
        <spring-cloud.version>Hoxton.SR6</spring-cloud.version>
    </properties>

    <dependencies>
        <dependency>
            <groupId>org.springframework.boot</groupId>
            <artifactId>spring-boot-starter</artifactId>
        </dependency>

        <dependency>
            <groupId>org.springframework.cloud</groupId>
            <artifactId>spring-cloud-starter-alibaba-nacos-discovery</artifactId>
            <version>0.9.0.RELEASE</version>
        </dependency>

    </dependencies>

    <dependencyManagement>
        <dependencies>
            <dependency>
                <groupId>org.springframework.cloud</groupId>
                <artifactId>spring-cloud-dependencies</artifactId>
                <version>${spring-cloud.version}</version>
                <type>pom</type>
                <scope>import</scope>
            </dependency>
        </dependencies>
    </dependencyManagement>
然后创建一个 springboot 项目,命名为:gateway-demo ,引入 gateway/nacos-config 等依赖:
<parent>
        <groupId>com.eknown</groupId>
        <artifactId>spring-cloud-gateway-nacos-routes</artifactId>
        <version>1.0-SNAPSHOT</version>
        <relativePath/> <!-- lookup parent from repository -->
    </parent>

    <artifactId>gateway-demo</artifactId>
    <version>0.0.1-SNAPSHOT</version>
    <name>gateway-demo</name>
    <description>Demo project for Spring Boot</description>

    <dependencies>
        <dependency>
            <groupId>org.springframework.cloud</groupId>
            <artifactId>spring-cloud-starter-gateway</artifactId>
        </dependency>

        <!-- https://mvnrepository.com/artifact/cn.hutool/hutool-core -->
        <dependency>
            <groupId>cn.hutool</groupId>
            <artifactId>hutool-core</artifactId>
            <version>5.3.9</version>
        </dependency>

        <dependency>
            <groupId>org.springframework.cloud</groupId>
            <artifactId>spring-cloud-alibaba-nacos-config</artifactId>
            <version>0.9.0.RELEASE</version>
        </dependency>

        <dependency>
            <groupId>org.springframework.boot</groupId>
            <artifactId>spring-boot-starter-data-redis-reactive</artifactId>
        </dependency>

    </dependencies>
我们知道 SpringBoot 加载配置文件的顺序是:bootstrap.yml -> application.yml 这里需要将 nacos-config 的配置项放到 bootstrap.yml 中,这样项目启动时才能优先从 nacos 中加载配置信息。主要配置如下:
server:
  port: 8501

spring:
  application:
    name: gateway-demo
  cloud:
    nacos:
      discovery:
        server-addr: 127.0.0.1:8848
      config:
        group: ${gateway.dynamicRoute.group}
        file-extension: json
        server-addr: 127.0.0.1:8848
    gateway:
      discovery:
        locator:
          enabled: true
  redis:
    host: localhost
    password:
    port: 6379
    database: 10

# 自定义的配置项,用于设置路由信息所载的配置文件,比如这里是 group + dataId
gateway:
  dynamicRoute:
    enabled:  true
    dataType: nacos
    dataId: 'yq_routes'
    group: 'YQ_GATEWAY'
将自定义配置项加载到 Java 中:
@Configuration
public class GatewayConfig {

    public static String NACOS_DATA_ID;
    public static String NACOS_GROUP_ID;

    @Value("${gateway.dynamicRoute.dataId}")
    public void setNacosDataId(String dataId) {
        NACOS_DATA_ID = dataId;
    }

    @Value("${gateway.dynamicRoute.group}")
    public void setNacosGroupId(String group) {
        NACOS_GROUP_ID = group;
    }
}
下面我们重写一下 RouteDefinitionRepository 接口,将其改造成使用 Nacos 引入路由配置信息就可以了!
public class NacosRouteDefinitionRepository implements RouteDefinitionRepository {

    private static final Logger log = LoggerFactory.getLogger(NacosRouteDefinitionRepository.class);

    // 更新路由信息需要的
    private ApplicationEventPublisher publisher;

    // nacos 的配置信息
    private NacosConfigProperties nacosConfigProperties;

    // 构造器
    public NacosRouteDefinitionRepository(ApplicationEventPublisher publisher, NacosConfigProperties nacosConfigProperties) {
        this.publisher = publisher;
        this.nacosConfigProperties = nacosConfigProperties;
        System.out.println(GatewayConfig.NACOS_DATA_ID + ", " + GatewayConfig.NACOS_GROUP_ID);
        addListener();
    }

    @Override
    public Flux<RouteDefinition> getRouteDefinitions() {
        try {
            String content = nacosConfigProperties.configServiceInstance()
                    .getConfig(GatewayConfig.NACOS_DATA_ID, GatewayConfig.NACOS_GROUP_ID,5000);
            List<RouteDefinition> routeDefinitions = getListByStr(content);
            return Flux.fromIterable(routeDefinitions);
        } catch (NacosException e) {
            log.error("getRouteDefinitions by nacos error", e);
        }
        return Flux.fromIterable(CollUtil.newArrayList());
    }

    /**
     * 添加Nacos监听
     */
    private void addListener() {
        try {
            nacosConfigProperties.configServiceInstance().addListener(GatewayConfig.NACOS_DATA_ID, GatewayConfig.NACOS_GROUP_ID, new Listener() {
                @Override
                public Executor getExecutor() {
                    return null;
                }

                @Override
                public void receiveConfigInfo(String configInfo) {
                    log.info("自动更新配置...\r\n" + configInfo);
                    publisher.publishEvent(new RefreshRoutesEvent(this));
                }
            });
        } catch (NacosException e) {
            log.error("nacos-addListener-error", e);
        }
    }

    @Override
    public Mono<Void> save(Mono<RouteDefinition> route) {
        return null;
    }

    @Override
    public Mono<Void> delete(Mono<String> routeId) {
        return null;
    }

    // 从 json 中解析出路由配置信息 —— 所以配置文件的格式一定要写对!
    private List<RouteDefinition> getListByStr(String content) {
        if (StrUtil.isNotEmpty(content)) {
            return JSONObject.parseArray(content, RouteDefinition.class);
        }
        return new ArrayList<>(0);
    }
}
最简单的方法是直接将这个 NacosRouteDefinitionRepository 类声明为 Bean。这里为了方便配置的切换写的复杂一点,通过 DynamicRouteConfig 来确认是否需要引入 nacos 的配置:
/**
 * 动态路由配置
 */
@Configuration
@ConditionalOnProperty(prefix = "gateway.dynamicRoute", name = "enabled", havingValue = "true")
public class DynamicRouteConfig {
    @Autowired
    private ApplicationEventPublisher publisher;

    /**
     * Nacos实现方式
     */
    @Configuration
    @ConditionalOnProperty(prefix = "gateway.dynamicRoute", name = "dataType", havingValue = "nacos", matchIfMissing = true)
    public class NacosDynRoute {
        @Autowired
        private NacosConfigProperties nacosConfigProperties;

        @Bean
        public NacosRouteDefinitionRepository nacosRouteDefinitionRepository() {
            return new NacosRouteDefinitionRepository(publisher, nacosConfigProperties);
        }
    }
}
到这一步我们其实已经基本完成了 gateway + nacos 动态网关的实现了。下面我们测试一下。
创建一个简单的 springboot web 项目,引入 nacos 作为注册中心,并实现一个接口,比如:
server:
  port: 8502

spring:
  application:
    name: demo
  cloud:
    nacos:
      discovery:
        server-addr: 127.0.0.1:8848
@RestController
@RequestMapping(value = "test")
public class TestAction {
@GetMapping(value = "hello")
public String hello(String name) {
System.out.println("hello, " + name);
return "hello, " + name;
}
}启动 nacos,添加配置文件,需要设置配置文件的 group 和 dataId 与上面的 gateway.dynamicRoute 中的配置相同。
内容示例:
[
{
"id": "demo",
"uri": "lb://demo",
"predicates": [
{
"name": "Path",
"args": {
"pattern": "/api/demo/**"
}
}
],
"filters": [
{
"name": "StripPrefix",
"args": {
"parts": "2"
}
}
]
}
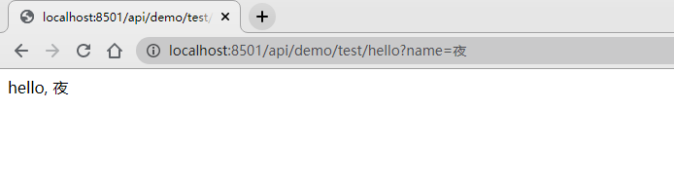
]启动 gateway-demo 以及 demo 项目,访问 gateway-demo 项目对应的路由地址,比如这里的:http://localhost:8501/api/demo/test/hello,如果运行正常,请求将被转发到 demo 项目的 /test/hello 接口,并返回对应的数据。
今天的分享就到这里啦!本来打算写一篇前文所说的第二种实现方法的文章的,不过由于二级缓存那边是用了组里封装的框架所以不便公布,后面有空我会自己实现一个基本的 demo,并同步到 Git 上!
水平有限,如有纰漏还请见谅。如果对文章内容有什么疑问,可以留言或直接联系我!thanks for your reading !
参考资料:
Recommend
About Joyk
Aggregate valuable and interesting links.
Joyk means Joy of geeK