

Short Unity tip: apply changes made in the scene to a prefab
source link: https://localjoost.github.io/Short-Unity-tip-apply-changes-made-in-the-scene-to-a-prefab/
Go to the source link to view the article. You can view the picture content, updated content and better typesetting reading experience. If the link is broken, please click the button below to view the snapshot at that time.

Joost van Schaik
Senior Mixed Reality Software Architect. Windows Development MVP. Mixed Reality, HoloLens, Unity, .NET, Azure
Short Unity tip: apply changes made in the scene to a prefab
1 minute read
Common problem: you have created a prefab which you want to modify. Of course you can open the prefab and edit that, but when you want to edit a prefab in the context of a scene you can be in for a cumbersome process switching between scene and prefab editing. There are some simple options to make that easier.
ContextPermalink
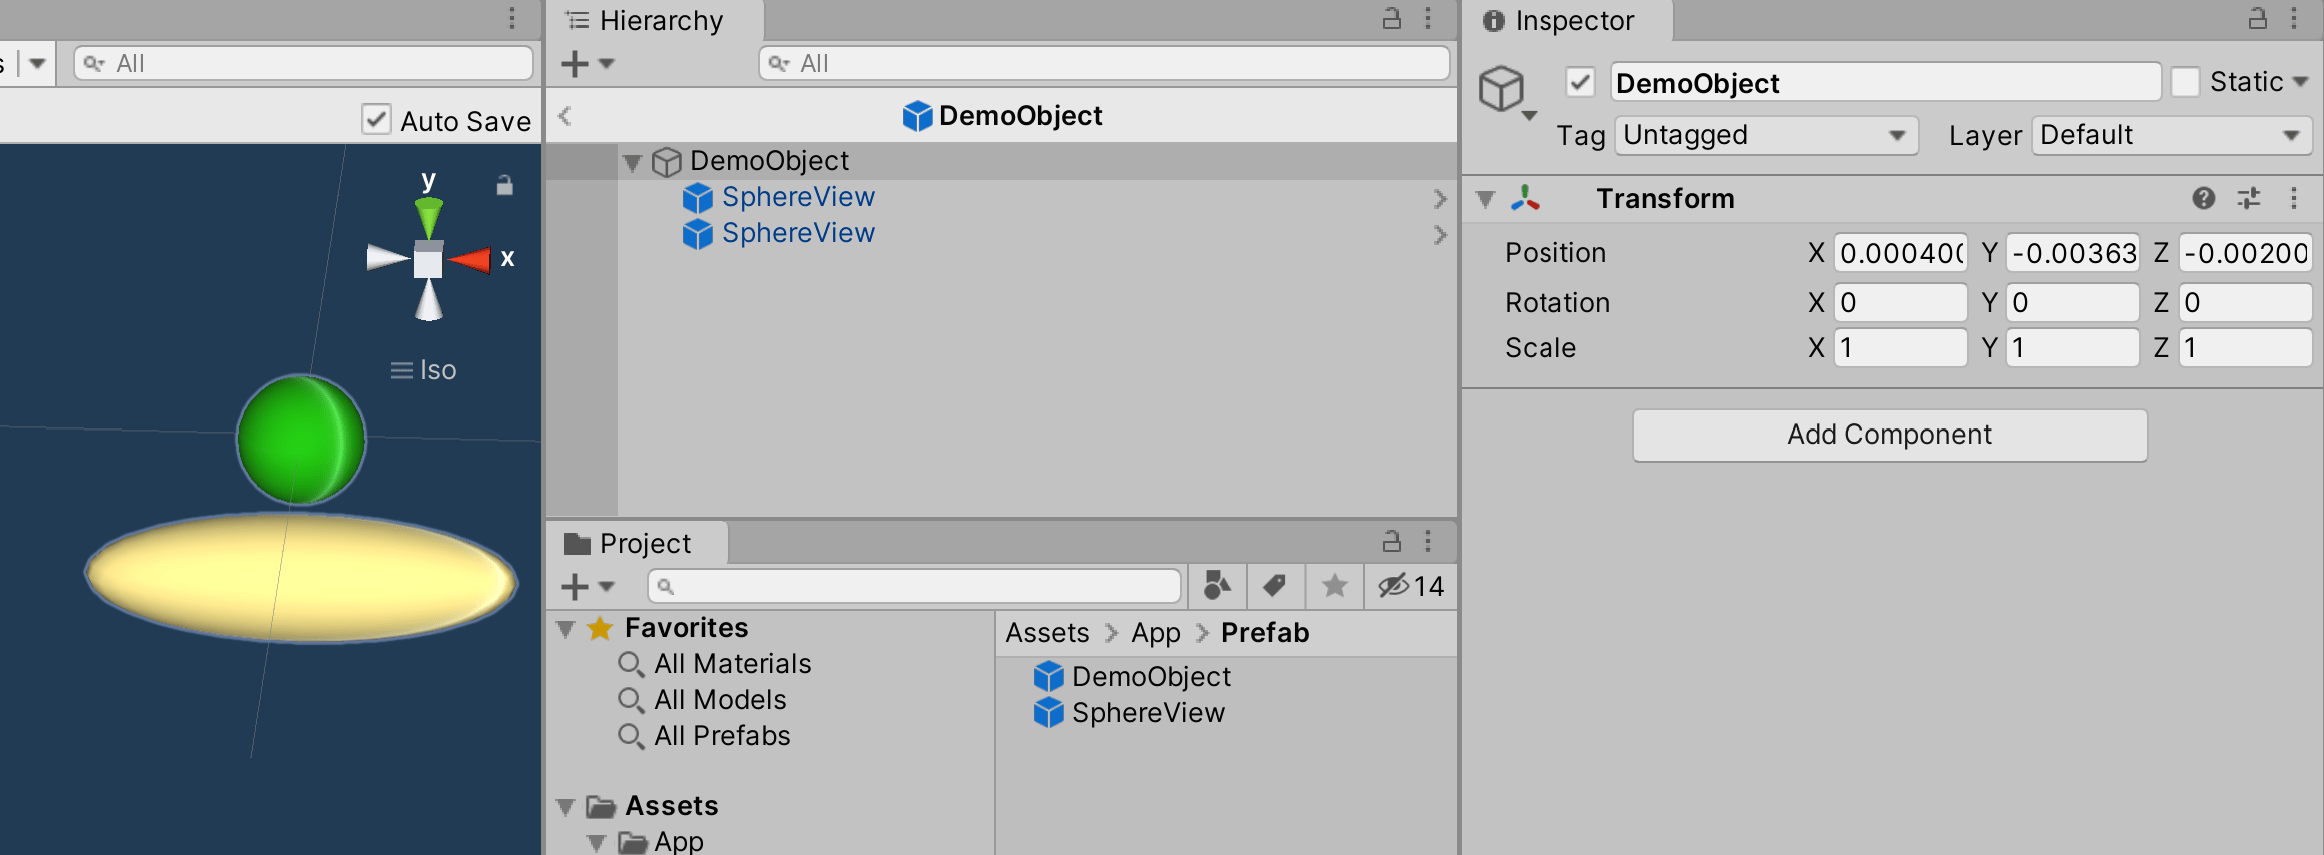
So assume we have a prefab “DemoObject” that has two instances of another prefab, “SphereView”.

Changing a few thingsPermalink
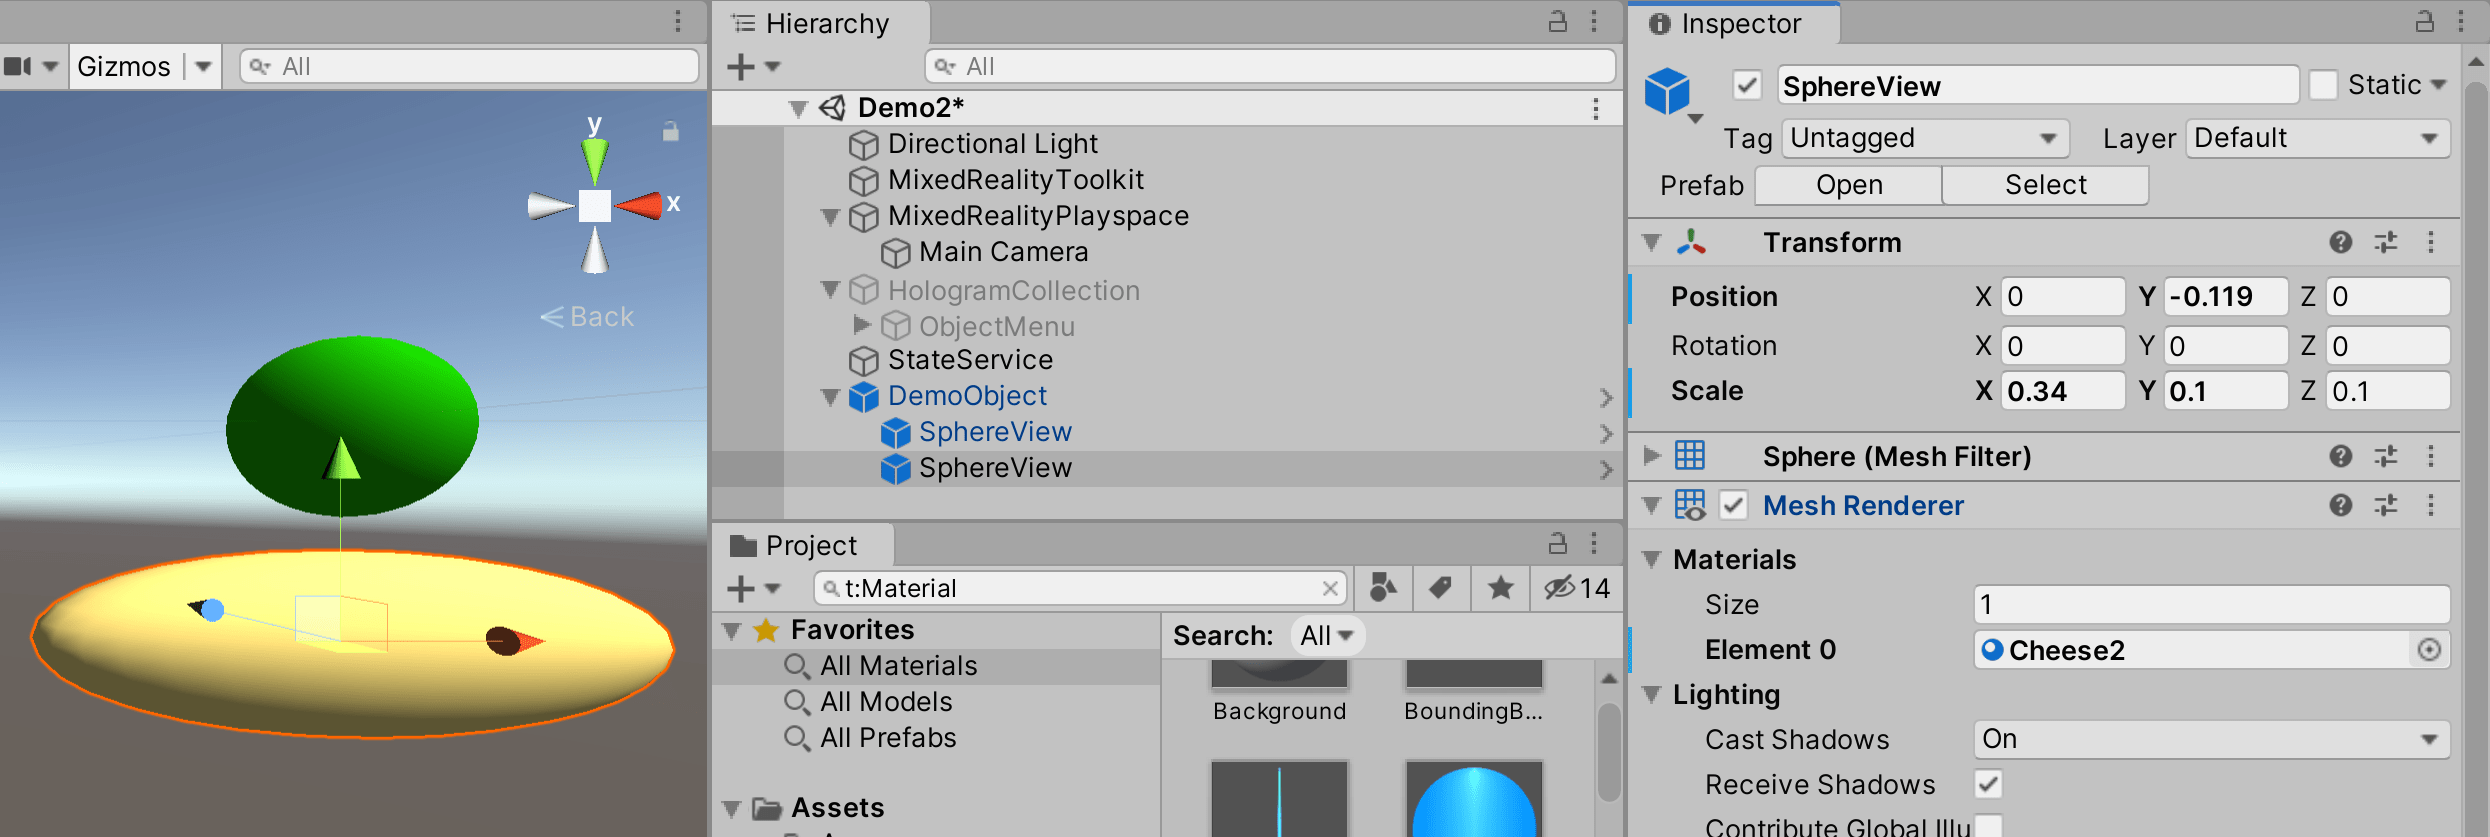
So I kind of horribly mangled the second sphere. I moved it a little downward - so far so good, but I also changed the color to cheese yellow and changed the X scale so it becomes a very elongated egg.
Applying changes to the prefab - method 1Permalink
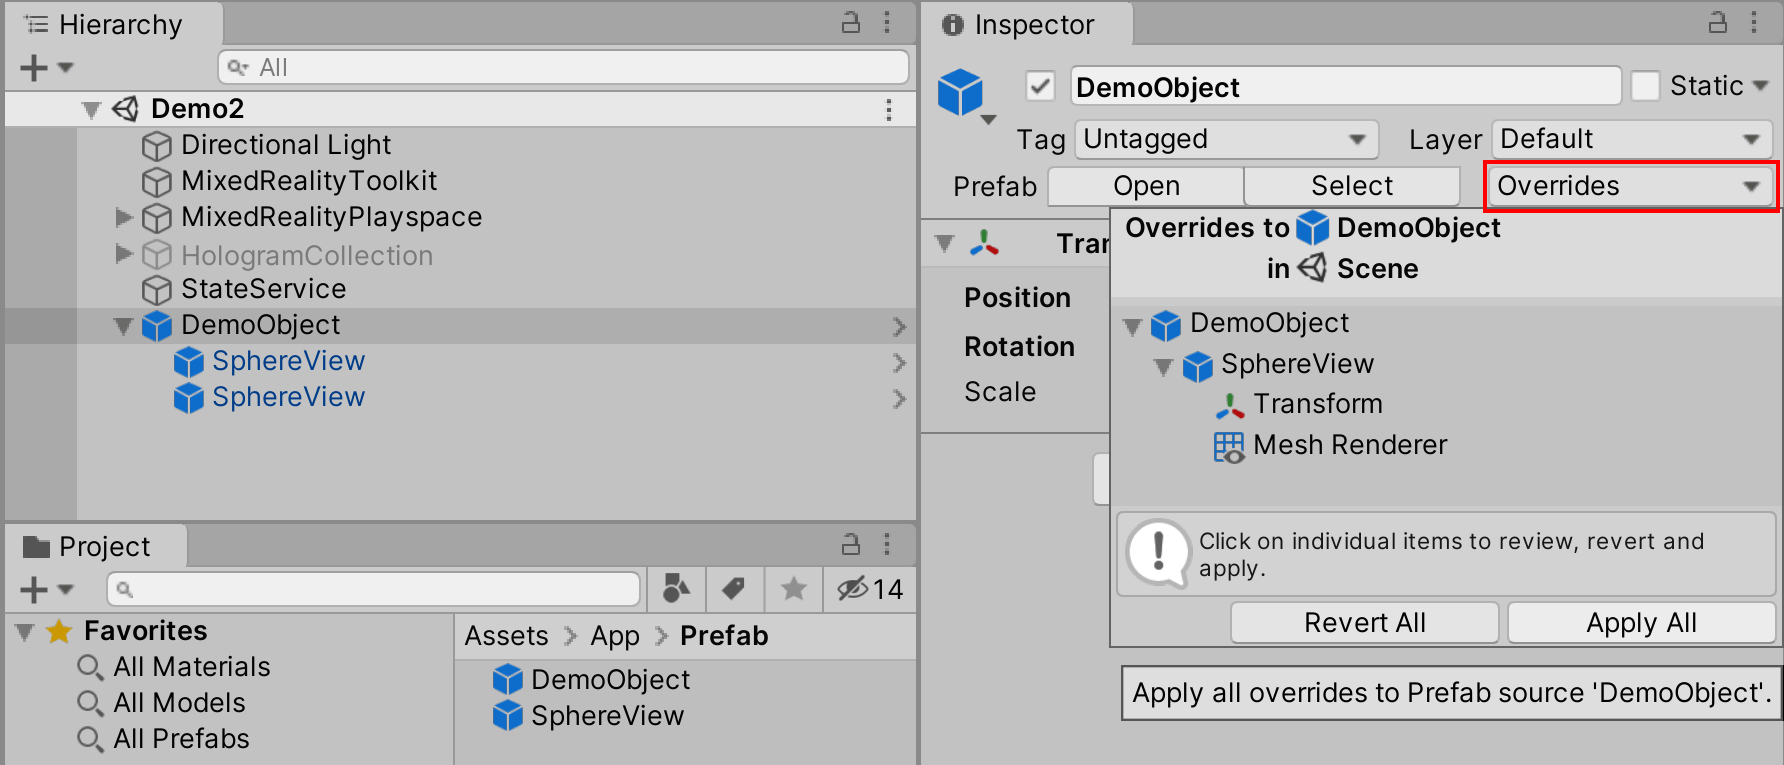
Now if you select the top prefab in the scene, you will see a button “Overrides”. If you click that, you will see a kind of pull down that shows you exactly what has changed where
You can even drill down into the exact changes:
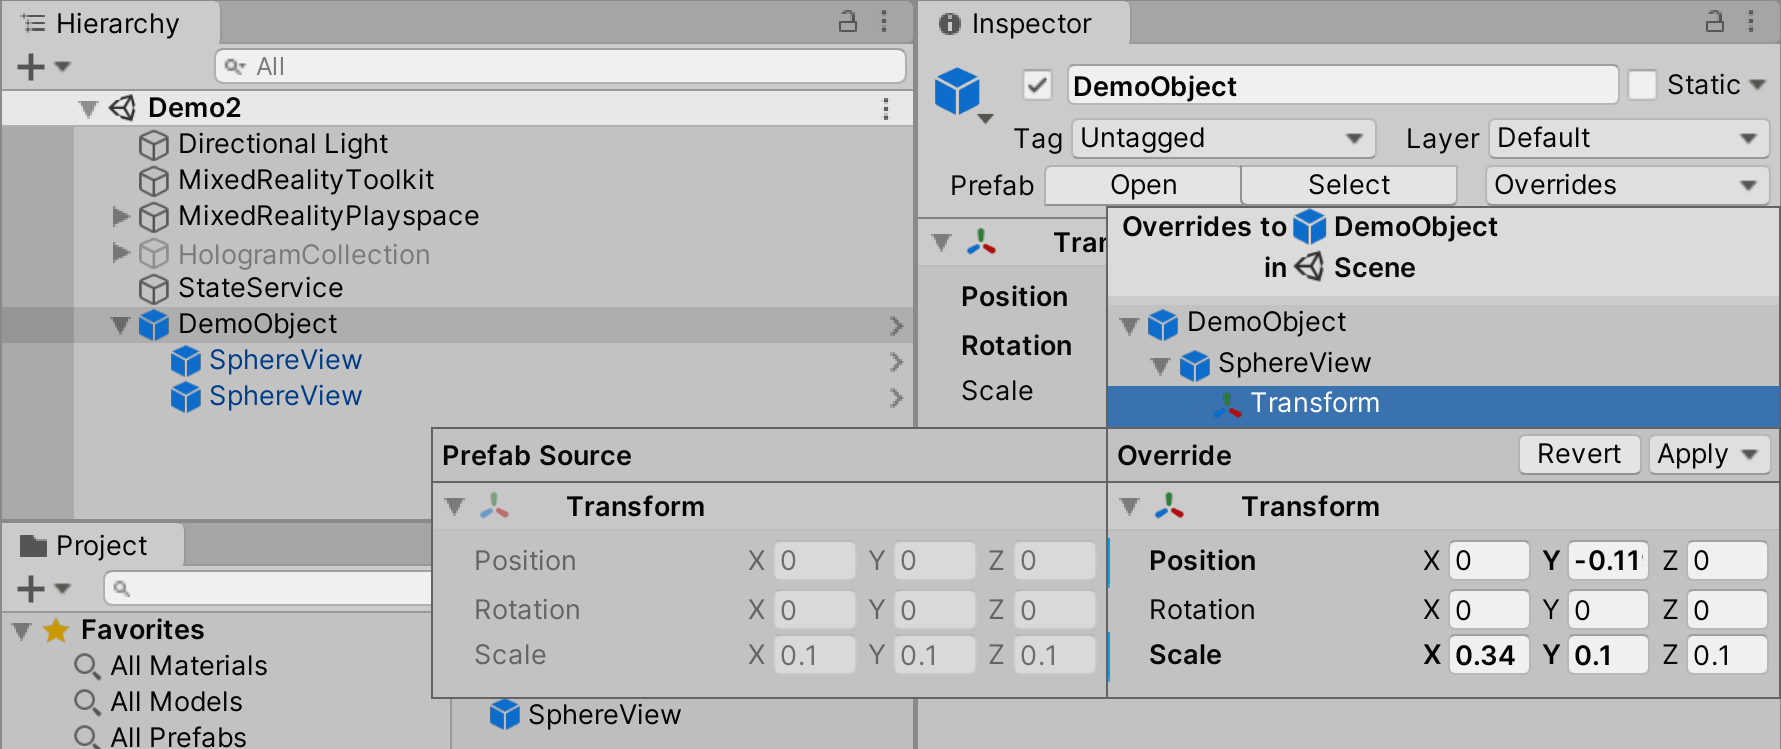
And if you hit “Apply All” it will push down all changes to the prefab
Applying changes to the prefab - method 2Permalink
The previous method was top-down from the prefab down to components, this is the other way round. If you click the three-dots-menu to the changed component whose properties you want to push to the prefab, you can select “Modified Component”, which will give you the options displayed in the image below:
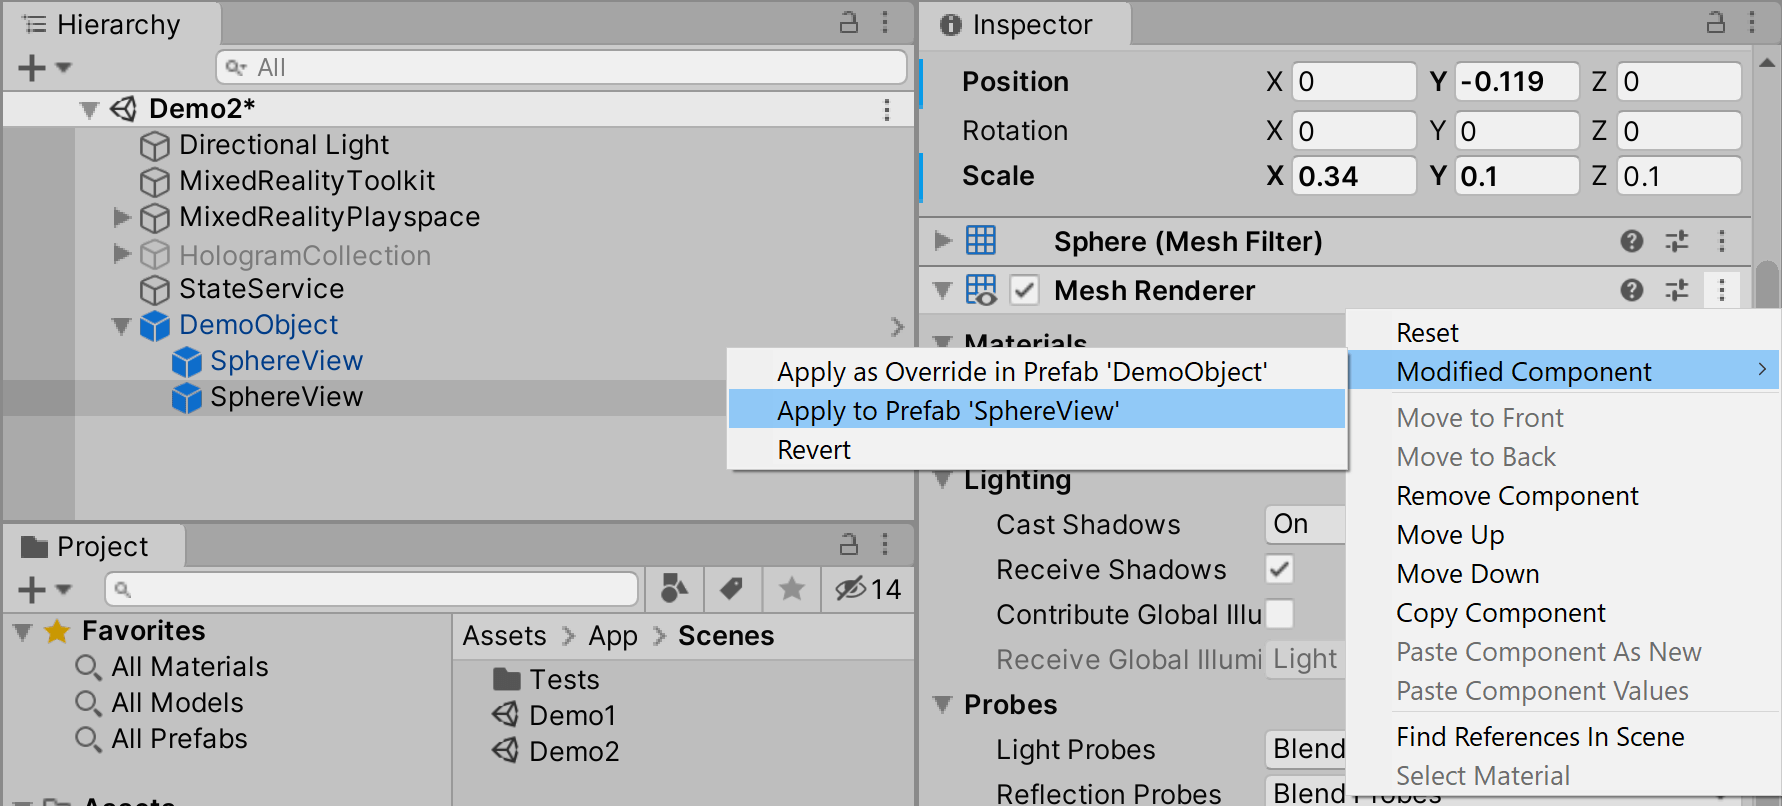
In the image I have selected the Mesh Renderer, whose material (and thus color) I have changed. Important is now to understand the difference between both Apply options:
- Apply to Prefab ‘SphereView’ will make all SphereViews yellow
- Apply to Override in Prefab ‘DemoObject’ will only make the bottom SphereView yellow - in the DemoObject prefab
ConclusionPermalink
I hope these little tips will make your work as an MR developer coming from an enterprise background like myself.
The second method I found myself, but I have to have extend sincere thanks to my colleague Timmy Kokke aka @sorskoot for the first method. I really didn’t know this. He is not so much a blogger, so I decide to blog this.
I recommend you watch his Twitch stream, especially if you are into WebXR.
Tags: HoloLens2 Unity3d Windows Mixed Reality
Updated: December 12, 2020
Comments
You can view the comments on GitHub.
You May Also Enjoy
Recommend
About Joyk
Aggregate valuable and interesting links.
Joyk means Joy of geeK