

UITableViewHeaderFooterView - NSHipster
source link: https://nshipster.com/uitableviewheaderfooterview/
Go to the source link to view the article. You can view the picture content, updated content and better typesetting reading experience. If the link is broken, please click the button below to view the snapshot at that time.
UITableView is the bread and butter of iOS apps.
This is as true today as it was with the first iPhone over a decade ago.
Back in those early days, developers worked hard to achieve smooth scroll performance — often resorting to extreme measures. For example, to achieve 60FPS on a table view with custom cells on an iPhone 3G you’d often have to draw text directly to a cell’s Core Graphics context, because compositing subviews was too slow. (Interface Builder? Auto Layout? Phooey! Back in my day, we calculated all of our view frames by hand — up hill, both ways, in the snow)
At the time, the highest praise a developer could receive for their efforts was to have someone describe theirs as “buttery”: smooth, responsive, without any jitter. And we milked that hardware for all it was worth to make that happen.
In honor of all the skeuomorphic sweat spilled
to transmute code into that most golden of dairy products,
and in the interest of maximizing the performance of our apps today,
we’ll turn our attention to a class that —
for many of us —
has been hiding in plain sight:
UITableViewHeaderFooterView.
Introduced in iOS 6,
UITableViewHeaderFooterView
takes the reuse functionality of table view cells
and makes it available to section headers and footers.
You can either use it directly
or create a subclass to customize its appearance.
Now,
table views are responsible for a great deal of functionality,
and one can easily lose track of how all of its responsibilities are delegated.
So let’s start with a quick run-down of UITableView
before going into more detail about UITableViewHeaderFooterView:
UITableView Review
A UITableView consists of sections,
each of which containing a number of rows.
For each row,
the table view’s dataSource is responsible for returning a UITableViewCell
to represent each section / row index path
with the tableView(_:cellForRowAt:) delegate method.
The table view’s dataSource may also provide
a title to be displayed in the header or footer of a section
by implementing the optional
tableView(_:titleForHeaderInSection:) and
tableView(_:titleForFooterInSection:) delegate methods.
To customize the appearance of section headers or footers,
the table view’s delegate can implement the optional delegate methods
tableView(_:viewForHeaderInSection:) and
tableView(_:viewForFooterInSection:).
To keep scroll performance snappy,
table views recycle their cells as they scroll out of view.
This process is known as cell reuse.
You can take advantage of reuse for section headers and footers,
by returning an instance of UITableViewHeaderFooterView (or a subclass).
Perhaps the main reason why
so few developers know about UITableViewHeaderFooterView
is that even after its introduction in iOS 6,
tableView(_:viewForHeaderInSection:) and
tableView(_:viewForFooterInSection:)
continue to return an optional UIView.
Why?
It’s all to do with the iOS platform team’s commitment to API compatibility.
An app written against the iPhone OS 2 SDK should (theoretically)
still build and run on iOS 12!
What better way to demonstrate this obscure technique for buttery performance than to create an app to display per-capita dairy product consumption statistics from the USDA? (That was a hypothetical question.)
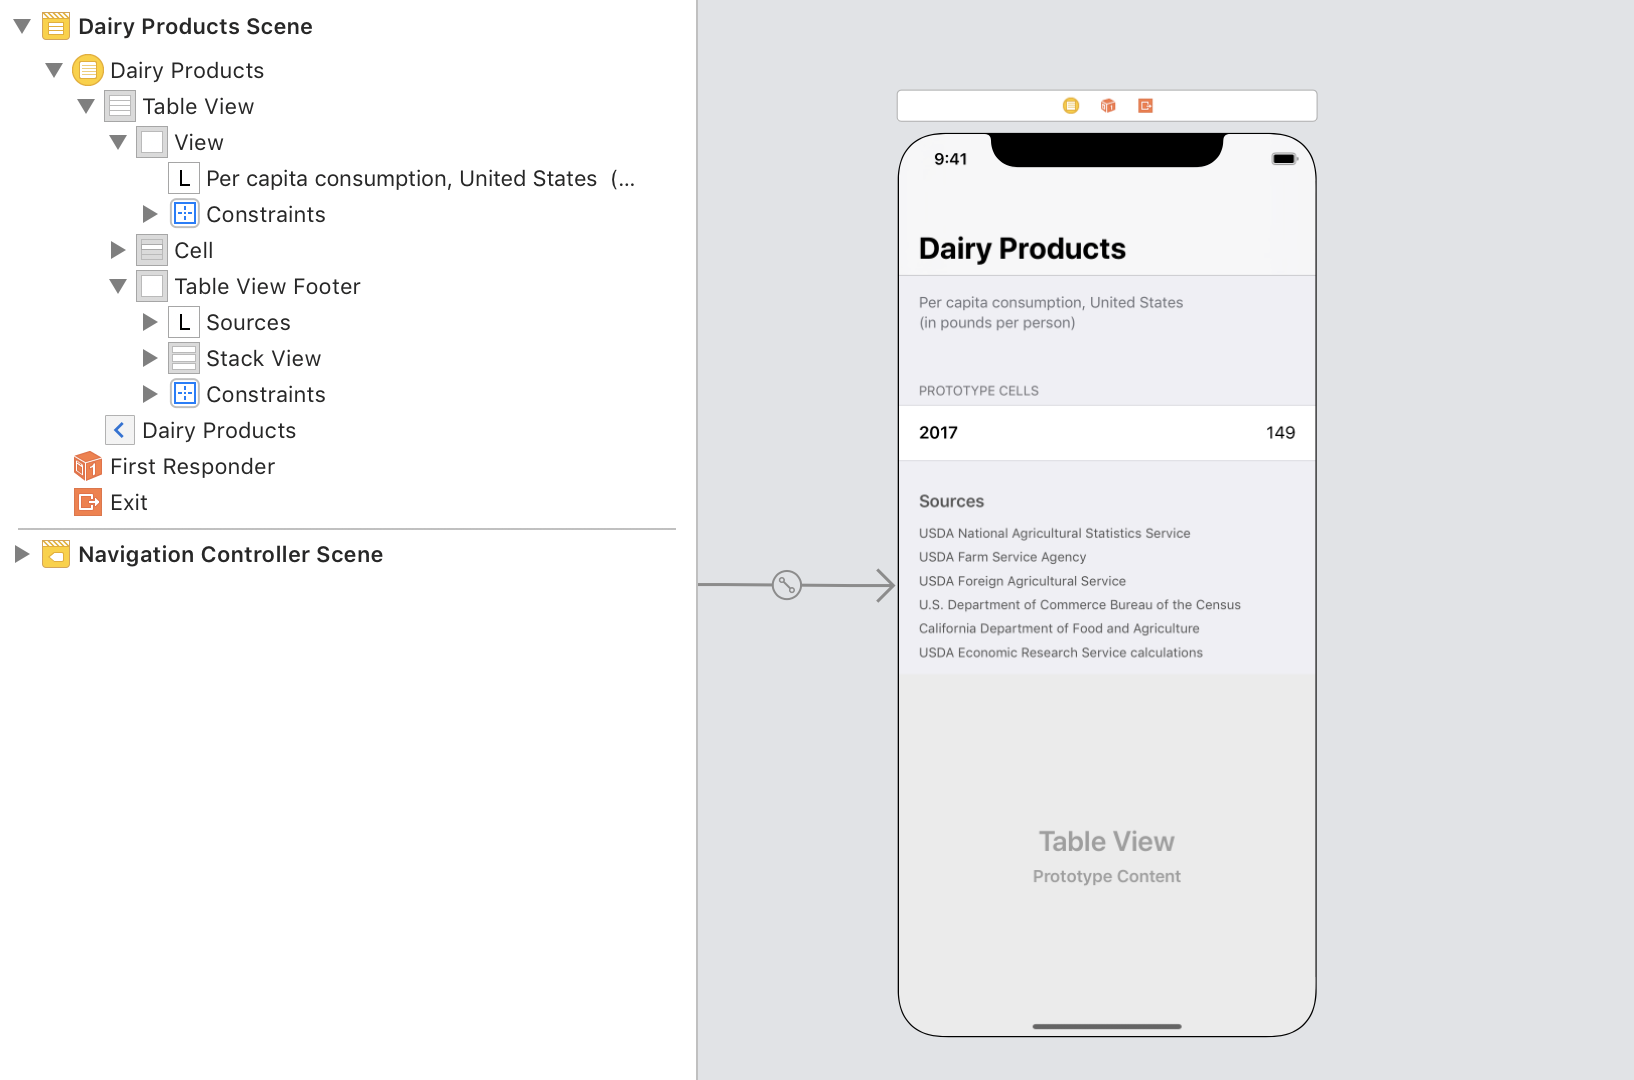
For our example, we’ll keep our model nice and simple, with a nearly 1:1 mapping with the API we’ll use to display this information on a table view:
struct Section {
    let title: String
    let image: UIImage
    let rows: [(year: Int, amount: Decimal)]
    let notes: String?
}

let butter = Section(title: "Butter",
                     image: #imageLiteral(resourceName: "Butter"),
                     rows: [ … ],
                     notes: nil)

// etc.

let sections: [Section] = [
    milk, yogurt, butter, cheese,
    cottageCheese, condensedMilk, iceCream, whey
]
In the view controller itself,
the implementation for UITableViewDataSource delegate methods
is cool and refreshing:
import UIKit

final class ViewController: UIViewController {
    @IBOutlet var tableView: UITableView!
}

// MARK: - UITableViewDataSource

extension ViewController: UITableViewDataSource {
    func numberOfSections(in tableView: UITableView) -> Int {
        return sections.count
    }

    func tableView(_ tableView: UITableView,
                   numberOfRowsInSection section: Int) -> Int {
        return sections[section].rows.count
    }

    func tableView(_ tableView: UITableView,
                   cellForRowAt indexPath: IndexPath) -> UITableViewCell {
        let cell = tableView.dequeueReusableCell(withIdentifier: "Cell",
                                                 for: indexPath)

        let section = sections[indexPath.section]
        let row = section.rows[indexPath.row]

        cell.textLabel?.text = "\(row.year)"
        cell.detailTextLabel?.text = "\(row.amount)"

        return cell
    }
}
Alright, let’s cut the cheese
and talk about the right wheyway
to use UITableViewHeaderFooterView.
Creating a Section Header View
In this example,
we’ll offer two different approaches to
working with UITableViewHeaderFooterView.
In the first, we’ll do everything in code; in the second, we’ll design things visually in Interface Builder. Feel free to adopt whichever one you prefer.
Option 1: Constructing the View Programmatically
Similar to UITableViewCell
each UITableViewHeaderFooterView comes with
textLabel and detailTextLabel properties
that are lazily created and positioned within a contentView.
As with cells,
you have the option to take or leave these built-in subviews
for your custom subclass.
For our example,
let’s use the existing textLabel
and add an imageView along the trailing margin of the contentView.
We do all of this in the designated initializer,
init(reuseIdentifier:):
import UIKit

final class SectionHeaderView: UITableViewHeaderFooterView {
    static let reuseIdentifier: String = String(describing: self)

    var imageView: UIImageView

    override init(reuseIdentifier: String?) {
        super.init(reuseIdentifier: reuseIdentifier)

        imageView = UIImageView()
        contentView.addSubview(imageView)

        imageView.translatesAutoresizingMaskIntoConstraints = false

        imageView.widthAnchor.constraint(equalToConstant: 24.0).isActive = true
        imageView.heightAnchor.constraint(equalToConstant: 24.0).isActive = true
        imageView.trailingAnchor.constraint(equalTo: contentView.layoutMarginsGuide.trailingAnchor).isActive = true
        imageView.bottomAnchor.constraint(equalTo: contentView.layoutMarginsGuide.bottomAnchor).isActive = true
    }

    required init?(coder aDecoder: NSCoder) {
        super.init(coder: aDecoder)
    }
}
In our view controller,
we register the custom section header in viewDidLoad()
by calling the register(_:forHeaderFooterViewReuseIdentifier:) method
on tableView:
import UIKit

final class ViewController: UIViewController {
    @IBOutlet var tableView: UITableView!

    // MARK: UIViewController

    override func viewDidLoad() {
        super.viewDidLoad()

        self.tableView.register(
            SectionHeaderView.self,
            forHeaderFooterViewReuseIdentifier:
                SectionHeaderView.reuseIdentifier
        )
    }
}
Option 2: Designing the View in Interface Builder
Dynamic table view cells can be designed directly from a Storyboard, which can be quite convenient for prototyping interfaces. Unfortunately, at the time of writing, there is no documented way to design prototype section header / footer views as you can with table view cells.
However, we can still use Interface Builder to design our section header and footer views — all it takes a few extra steps.
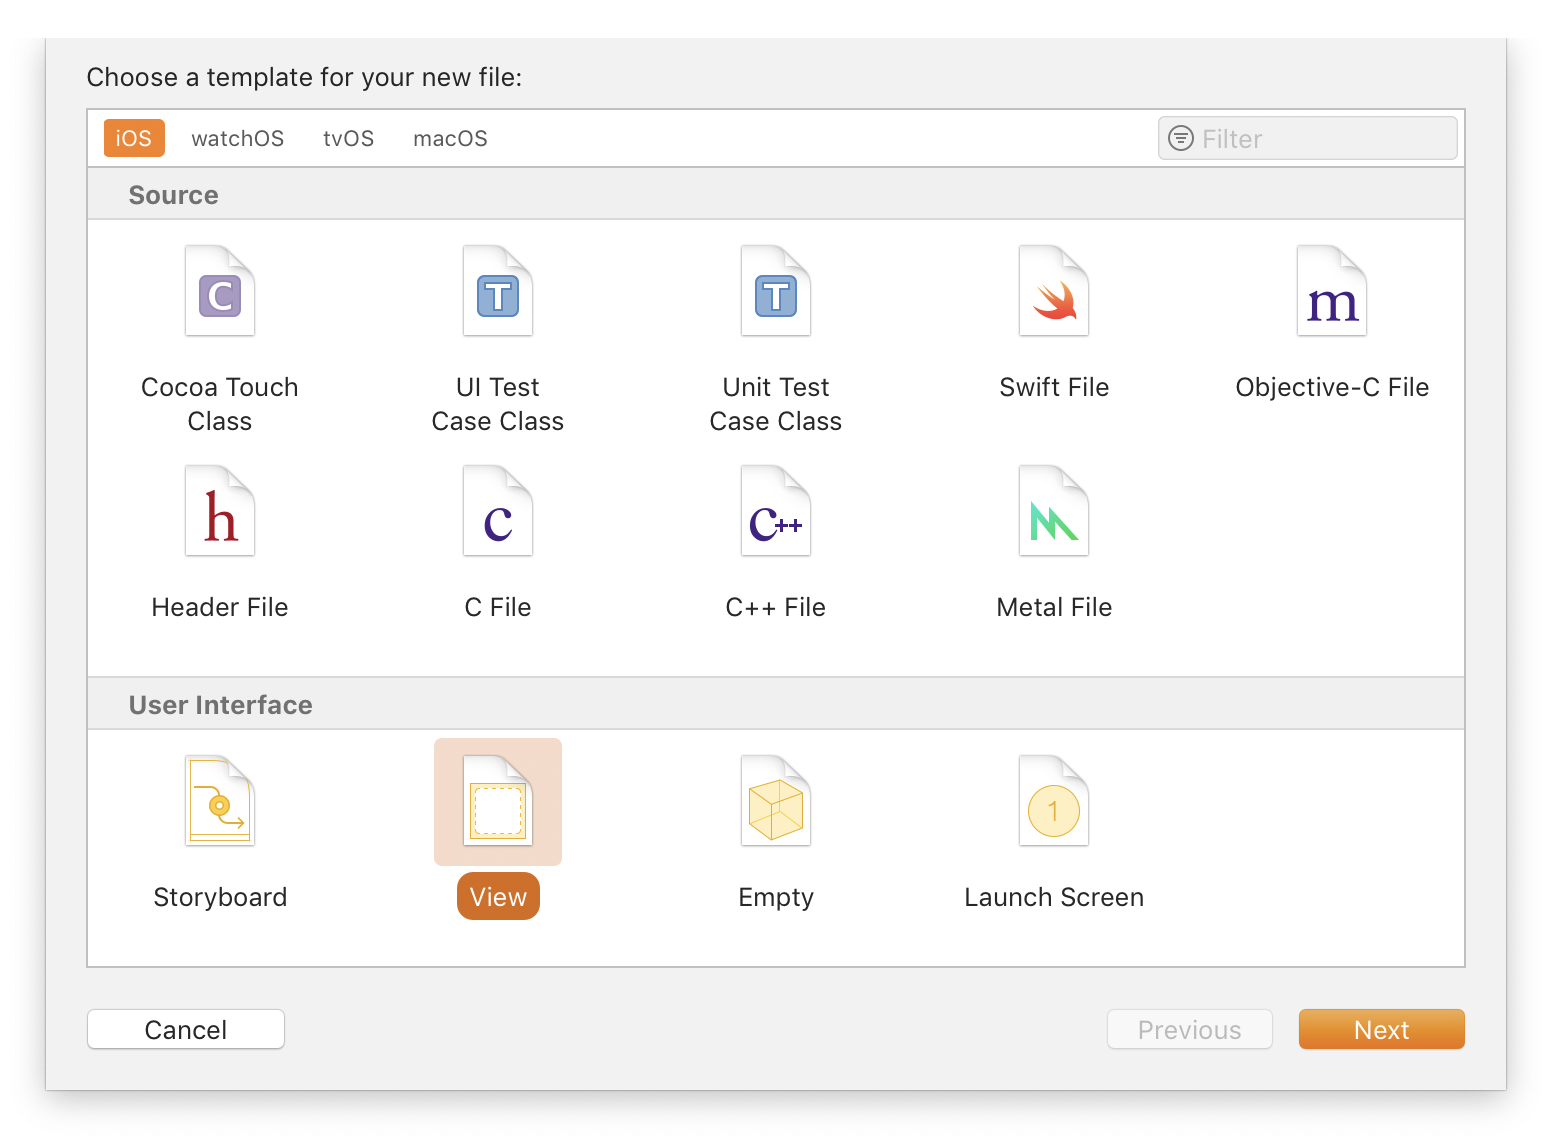
First, create a new Swift file
that declares your UITableViewHeaderFooterView subclass.
Next, create a new XIB file for your custom view:
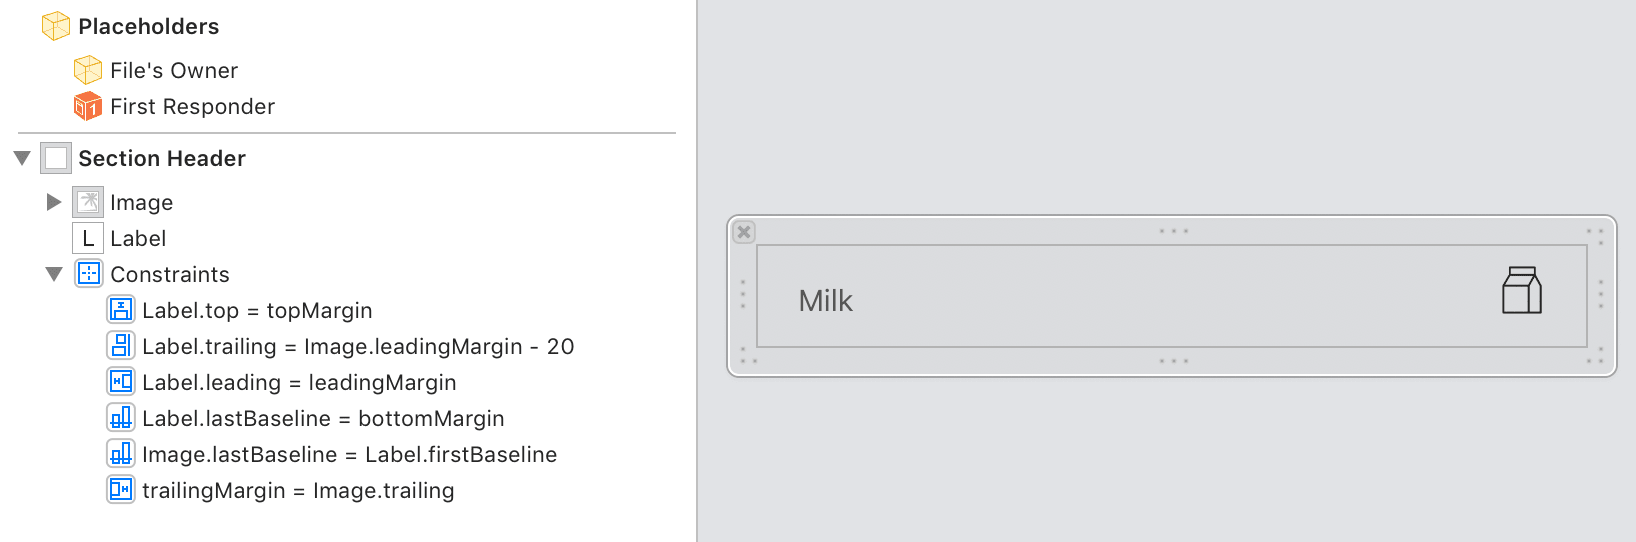
In Interface Builder, navigate to the Identity Inspector in the Inspectors panel on the right-hand side, and set your subclass as the “Custom Class” for both File’s Owner and the top-level view.
Back in your subclass implementation,
declare an imageView property
and an override to the existing textLabel property —
both with @IBOutlet annotations —
and connect them to their counterparts in Interface Builder.
import UIKit

final class SectionHeaderView: UITableViewHeaderFooterView {
    static let reuseIdentifier: String = String(describing: self)

    static var nib: UINib {
        return UINib(nibName: String(describing: self), bundle: nil)
    }

    // Override `textLabel` to add `@IBOutlet` annotation
    @IBOutlet override var textLabel: UILabel? {
        get { return _textLabel }
        set { _textLabel = newValue }
    }
    private var _textLabel: UILabel?

    @IBOutlet var imageView: UIImageView!
}
This step isn’t required for using
UITableViewHeaderFooterView with Interface Builder.
As an alternative to overriding textLabel,
you can declare a new label property to use instead.
Now, when you register your subclass for reuse with the table view controller,
pass a UINib (provided here in a type property)
instead of SectionHeaderView.self.
import UIKit

final class ViewController: UIViewController {
    @IBOutlet var tableView: UITableView!

    // MARK: UIViewController

    override func viewDidLoad() {
        super.viewDidLoad()

        self.tableView.register(
            SectionHeaderView.nib,
            forHeaderFooterViewReuseIdentifier:
                SectionHeaderView.reuseIdentifier
        )
    }
}
Implementing UITableViewDelegate Methods
From here,
it’s smooth scrolling sailing.
Enjoy your victory lap as you implement the requisite
UITableViewDelegate methods:
import UIKit

// MARK: - UITableViewDelegate

extension ViewController: UITableViewDelegate {
    func tableView(_ tableView: UITableView,
                   titleForHeaderInSection section: Int) -> String? {
        return sections[section].title
    }

    func tableView(_ tableView: UITableView,
                   titleForFooterInSection section: Int) -> String? {
        return sections[section].notes
    }

    func tableView(_ tableView: UITableView,
                   viewForHeaderInSection section: Int) -> UIView? {
        guard let view = tableView.dequeueReusableHeaderFooterView(
                            withIdentifier: SectionHeaderView.reuseIdentifier)
                            as? SectionHeaderView
        else {
            return nil
        }

        view.textLabel?.text = sections[section].title
        view.imageView?.image = sections[section].image

        return view
    }

    …
}
Self-Sizing Header and Footer Views
Using Auto Layout constraints to layout your reusable section views? If so, you can take advantage of the same self-sizing behavior of table view cells to accommodate trait variations and text spanning multiple lines in your headers and footers. The trick is to specify an automatic height and provide an estimate. This can be done in a Storyboard or in the code for your table view delegate:
extension ViewController: UITableViewDelegate {
    …

    func tableView(_ tableView: UITableView,
                   heightForHeaderInSection section: Int) -> CGFloat {
        return UITableView.automaticDimension
    }

    func tableView(_ tableView: UITableView,
                   estimatedHeightForHeaderInSection section: Int) -> CGFloat {
        return 50.0
    }
}
If you find that your self-sizing section header or footer views
are bleeding into their adjacent cells,
make sure to provide an estimated row height as well,
either in your Storyboard
or by implementing the tableView(_:estimatedHeightForRowAt:) delegate method.
With today’s comparatively over-powered iOS hardware, such proactive measures may well be unnecessary for achieving buttery smooth interactions.
But for those of your with demanding performance requirements,
for anyone yearning to be in the 2%,
to achieve the crème de la crème of responsive interfaces,
UITableViewHeaderFooterView can be a great way to skim some fat off your code.
If nothing else,
its restrained, familiar API allows UITableViewHeaderFooterView
to be added to most codebases without introducing much churn.
Recommend
About Joyk
Aggregate valuable and interesting links.
Joyk means Joy of geeK