

How to Create an AWS Continuous Deployment Pipeline Cont’d
source link: https://mydeveloperplanet.com/2020/12/02/how-to-create-an-aws-continuous-deployment-pipeline-contd/
Go to the source link to view the article. You can view the picture content, updated content and better typesetting reading experience. If the link is broken, please click the button below to view the snapshot at that time.
In our previous post, we showed how to create an AWS Continuous Deployment Pipeline. This post will continue where we left off. We will enhance the pipeline with a Review stage, a more efficient use of the Maven cache and add notifications to the pipeline.
1. Introduction
In our previous blog, we created step by step a continuous deployment pipeline using AWS services. It is advised to read that blog first before continuing with this one. We will enhance the pipeline with a Manual Review stage. This will allow us to have an extra confirmation step before deploying a new version to Elastic Beanstalk. This is only necessary when you need this extra confirmation. When you are confident enough about the preceding steps in your pipeline, it is easier and faster to deploy automatically without any manual intervention needed.
We will also take a closer look at the build time. The AWS builds run inside a Docker container. This means that with every build, all the Maven dependencies will be downloaded. This can cause a significant amount of time when your application grows. We will take a look how we can make use of Maven cache via a S3 bucket.
Finally, we will create notifications at certain stages during the build. This is a nice feature which allows us to be notified of certain events without the need to continuously monitor the status of the pipeline ourselves.
The source code used in this blog can be found at GitHub.
2. Add Review Stage
In this section, we are going to add a Manual Review step to the pipeline before deploying a new version of the application to Elastic Beanstalk. In our previous post, we have already created a MyAWSCDPlanet pipeline which checks out the source code from the GitHub repository, build the application with CodeBuild and deploy the application automatically to Elastic Beanstalk.
Navigate to the CodePipeline service and select the MyAWSCDPlanet pipeline. Click the Edit button at the right top corner.
Click the Add stage button between the Build and Deploy stages.

Give the stage a meaningful name, we choose Manual_Review and click the Add stage button. Note that the stage name may not contain spaces.

The stage has been added. Click the button Add action group in the newly created Manual_Review stage.

Fill in the Action name and the Action provider. A large list of action providers are available, choose Manual approval and click the Done button.

In order to finalize everything, click the Done button in the Manual_Review stage and the orange Save button at the top right corner. A confirmation window is shown where we need to confirm the changes to the pipeline once again.
Let’s see how this works! Change the text in the HelloController.
String message = "Hello AWS Continuous Delivery with Review Stage!";Also change the corresponding test.
String patternString = "(Hello AWS Continuous Delivery with Review Stage! From host: ).*\\/\\d+.\\d+.\\d+.\\d+";Verify whether our change can be built successfully.
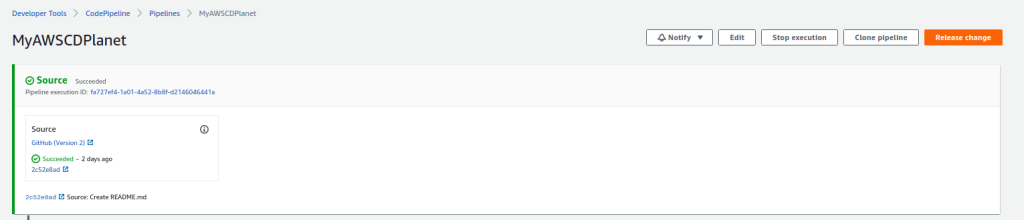
$ mvn clean installIf the build is successful, commit and push the changes to GitHub. The pipeline starts running but this time it will not automatically deploy the changes to Elastic Beanstalk. Instead, the pipeline halts at the review stage.

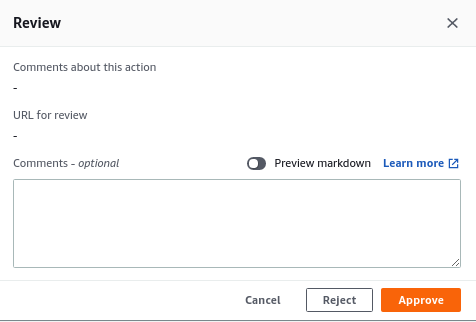
Clicking the Review button shows a review approval screen. Click the Approve button and the pipeline will continue and deploy the change to Elastic Beanstalk.
3. Maven Cache
During the setup of the pipeline, we noticed that the Maven dependencies are downloaded with every build. This is not strange because the build runs in a Docker container and has no notice of previous builds. In this section, we will take a close look at this and also provide a solution for it.
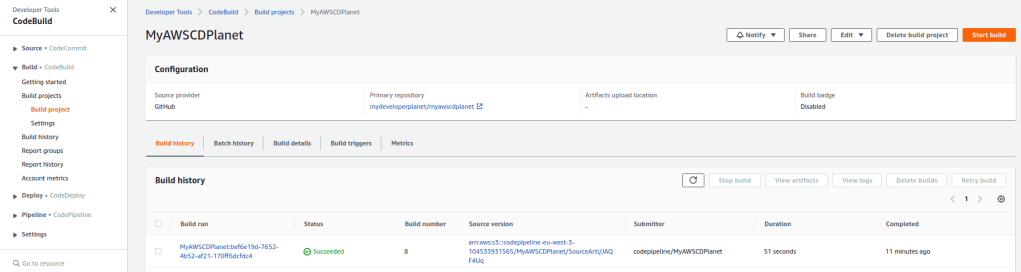
Let’s take a closer look at the build logs. Navigate to CodeBuild and click the latest successful Build run.
In the Build logs section, click the View entire log link.
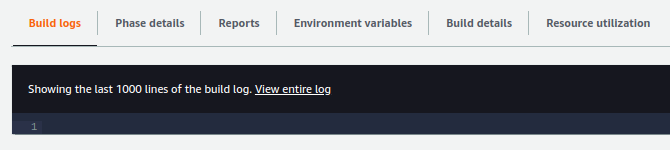
A new browser window opens which navigates to CloudWatch where we can search and show the log events. Click the Load more link.

When we take a closer look at the logs, we notice that the Maven dependencies are downloaded at each build. This takes up unnecessary build time. It has little effect for the small application we are using, but when using a real life application, this can consume a large amount of time.

In order to speed up things a little bit, we will configure the build in order that it will make use of a Maven cache, just like on our local development machines.
Navigate to the build project again and click the Edit button at the top right corner and choose Buildspec.
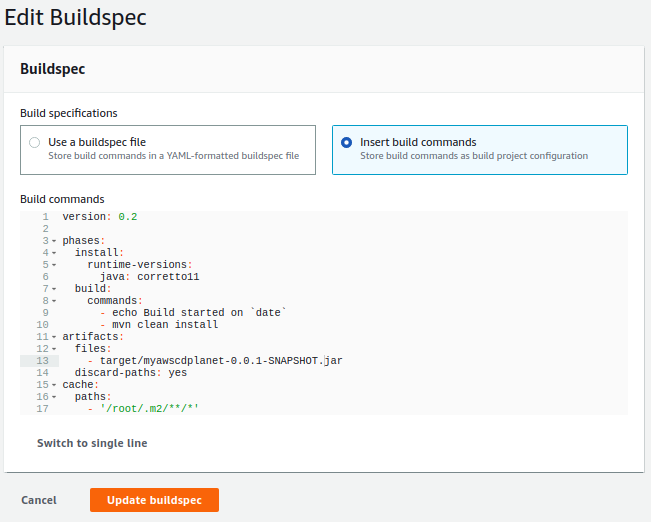
Add a cache section to the configure Buildspec.
version: 0.2phases:install:runtime-versions:java: corretto11build:commands:- echo Build started on `date`- mvn clean install artifacts:files:- target/myawscdplanet-0.0.1-SNAPSHOT.jardiscard-paths: yescache:paths:- '/root/.m2/**/*'Finally, click the Update buildspec button.
First, we will need to create a S3 bucket if you do not have it already. Navigate to the S3 service and click the Create bucket button at the top right corner. We just enter a name, we choose mydeveloperplanet-maven-cache and click the Create bucket button at the bottom of the page.

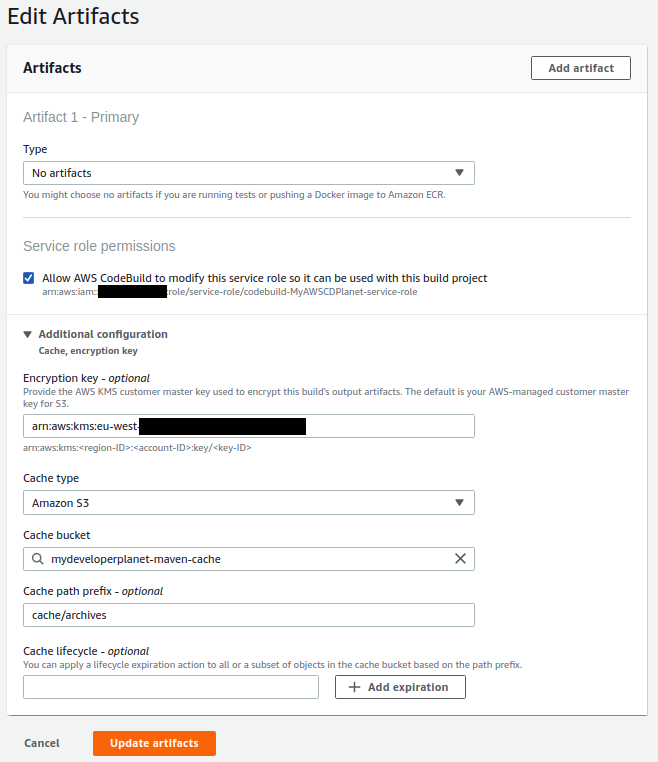
Navigate to the build project again and click the Edit button at the top right corner and choose Artifacts. Choose Amazon S3 as Cache type, choose the codepipeline S3 bucket as Cache bucket, set the Cache path prefix to /cache/archives/ and click Update artifacts button.
We encountered the error Invalid cache: location must be a valid S3 bucket, followed by slash and the prefix when executing this in one step. We solved this by first editing the artifact by leaving the Cache path prefix empty and in a second step only editing the Cache path prefix.
Click the Start build button. The first time, the artifacts will be downloaded once again, but this time into the S3 bucket. Run it a second time and this time the build makes use of the configured Maven cache.
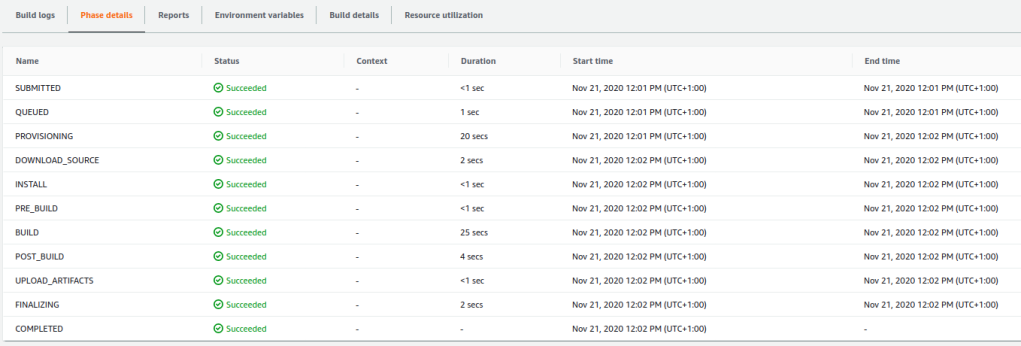
Let’s compare the build phases. The build phases for the initial build.
The build phases for the build making use of the Maven cache.
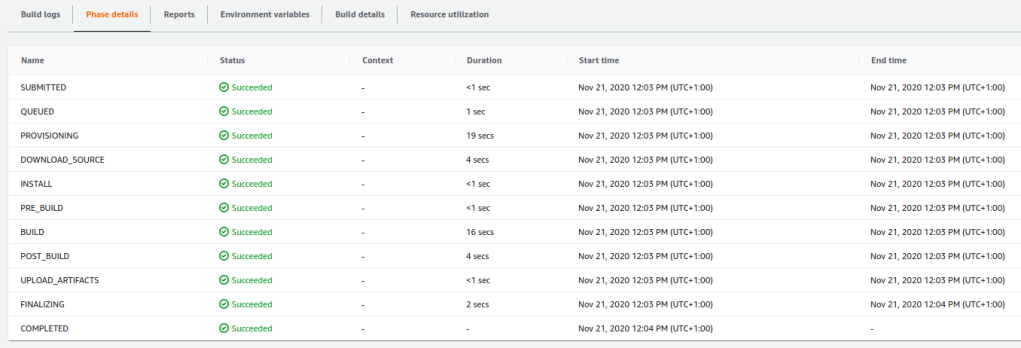
We notice that the DOWNLOAD_SOURCE step has increased a little bit and that the BUILD step has decreased quite a lot for the small application we are using. In total, we have gained 10 seconds in build time for our small application.
4. Add Notifications
The pipeline we created builds automatically when someone pushes to the master branch, after manual approval the application is deployed to Elastic Beanstalk. We need to monitor the pipeline ourselves in order to notice that the pipeline is waiting for an approval or whether the pipeline has failed. In order to solve this problem, we can add notifications to the pipeline.
Navigate to the pipeline, click the Notify button at the top right corner and select Create notification rule.

Give the rule a name, we choose MyAWSCDPlanet-pipeline-rule, choose Basic as Detail type (this will provide minimal information in the notification and is to be considered more secure than Full), select the triggers you want to receive notifications for. We choose Failed pipeline, Succeeded pipeline and whenManual Approval is Needed.

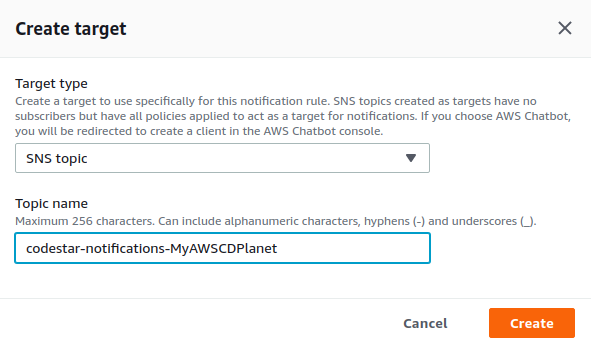
Next, we need to create a target to send the notifications to. Click the Create target button. We choose SNS topic as Target type because we want to send mails as notification and give the topic a name. Click the Create button.
The target is automatically filled in and after clicking the Submit button in the Create notification rule form, the notification rule is created and active.

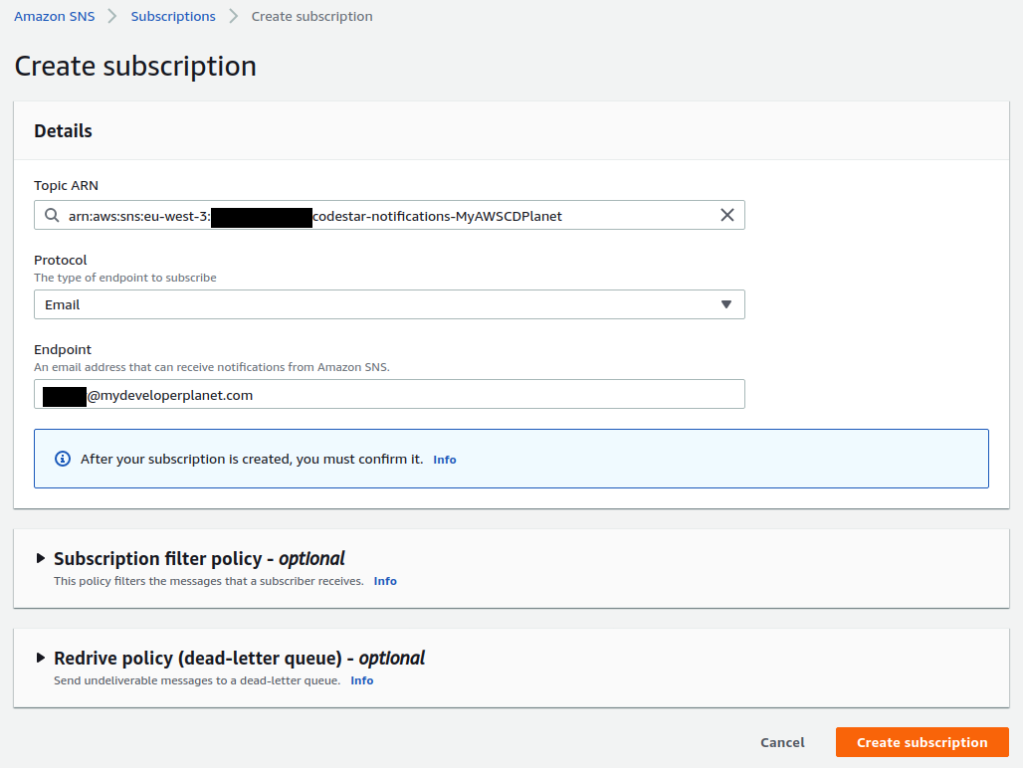
In order to receive mail notifications, we need to subscribe to the topic we created. We need to navigate to the home page of the Simple Notification Service. In the navigation bar, we can navigate to the Topics where we can find the topic we just created. However, we navigate to the Subscriptions part instead, because we need to create a subscription by clicking the Create subscription button.

Choose the Topic we created earlier as Topic ARN. Choose the protocol. There are several protocols available, but we will use the Email protocol. Last, fill in the Endpoint with the mail address where you want to receive the notifications. Click the Create subscription button in order to finalize the subscription creation.
By now, you will have received a mail at the configured mail address where you will need to confirm the subscription to the topic.
Let’s see how this works. We change again the hello message in the HelloController.
String message = "Hello AWS Continuous Delivery with Notifications!";Do not forget to change the corresponding test also.
String patternString = "(Hello AWS Continuous Delivery with Notifications! From host: ).*\\/\\d+.\\d+.\\d+.\\d+";Check the local build with mvn clean install and after successful build, commit and push the changes to GitHub. The pipeline starts building and at the Review Stage, we receive a mail containing a JSON message with the message that the pipeline is waiting for a review. We navigate to the pipeline and approve the review. After the Deploy Stage, again we receive a mail containing a JSON message with the message that the pipeline ended successfully.
Instead of making a change in order to verify the pipeline changes, it is also possible to click the Release change button at the top right corner of the pipeline. This will re-run the pipeline with the new configured changes.
6. Conclusion
We made some enhancements to the pipeline we created earlier in order to explore some extra features of the used AWS services. There are many possibilities and it is a good habit to explore these and to experiment with them. Some of them might be useful to you and can be applied immediately to your pipeline.
Recommend
About Joyk
Aggregate valuable and interesting links.
Joyk means Joy of geeK