

Disable IPv6 on a Windows 10 Computer
source link: https://answers.uillinois.edu/uis/page.php?id=99981
Go to the source link to view the article. You can view the picture content, updated content and better typesetting reading experience. If the link is broken, please click the button below to view the snapshot at that time.
Disable IPv6 on a Windows 10 Computer
This document will walk through the process of disabling IPv6 in Windows 10.
Step 1: Get Started
Right-click on the “Network  / Wi-Fi
  ” icon on the bottom-right hand side of your screen to open up the menu shown below.
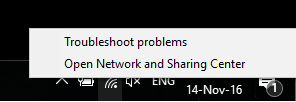
Next, click on Open Network and Sharing Center.
Step 2: Change Adapter Settings
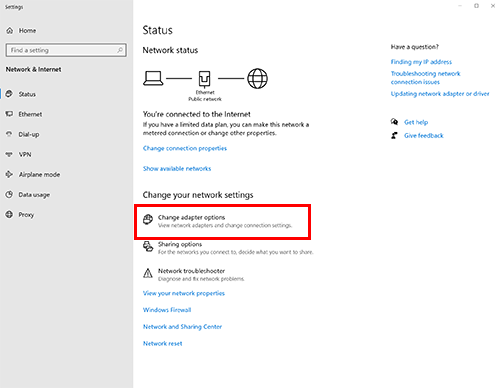
In the Network and Sharing Center window, click on Change adapter options as shown in the screen shot below
You will then see a list of network adapters available on your computer. (Please refer to the screenshot below for an example of how the list will look like)

Right click on your active network adapter (Ethernetor Wi-Fi) and select Properties.
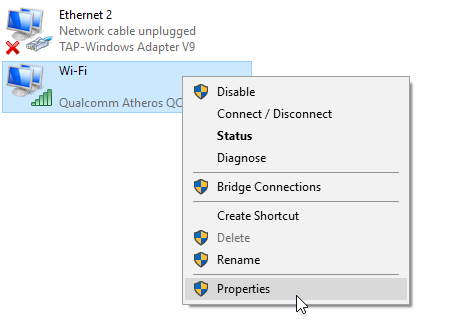
Note: If you’re connected to the internet wirelessly, the corresponding adapter should be “Wi-Fi“. However, if you’re connected to the internet via a LAN cable instead, the corresponding adapter should be “Ethernet“.
Step 3: Disabling IPv6
In the Properties window, scroll down until you see Internet Protocol Version 6 (TCP/IPv6).

Un-check the Internet Protocol Version 6 (TCP/IPv6) checkbox and click on OK to save the changes.
Step 4: Restart Computer
Now that IPv6 has been disabled on your computer, restart your computer for the setting to take effect.| Keywords: | ipv6, windows 7, network, internet Suggest keywords | Doc ID: | 99981 |
|---|---|---|---|
| Owner: | Jeff S. | Group: | University of Illinois at Springfield |
| Created: | 2020-04-02 14:04 CDT | Updated: | 2020-04-02 14:08 CDT |
| Sites: | University of Illinois at Springfield | ||
| Feedback: | 4 1 Comment Suggest a new document Subscribe to changes |
Recommend
About Joyk
Aggregate valuable and interesting links.
Joyk means Joy of geeK