

Jenkins是如何与外围系统集成的呢?-devops
source link: https://blog.51cto.com/11064706/2510700
Go to the source link to view the article. You can view the picture content, updated content and better typesetting reading experience. If the link is broken, please click the button below to view the snapshot at that time.
Jenkins是如何与外围系统集成的呢?
当我们通过Jenkins完成了持续交付流水线的实施后,我们可能需要在流水线中去与其他系统交互。例如代码管理系统、代码质量平台、需求管理平台等外围系统交互。我们如何来实现呢?
简单的说下docker的组件分为docker-cli、docker-api、docker-daemon。docker-cli是我们经常在shell命令行中使用的docker命令,类似于docker run、docker images等等。docker-api是用于接收docker-cli的请求,可以用来与守护程序进行通信并指示其操作的接口。docker-daemon长期运行的程序,创建和管理Docker对象,例如image,container,network和volume。

我们可以总结为docker-cli通过脚本或CLI命令来控制docker-api与docker-daemon进行交互。我们知道了docker引擎的组成和交互方式。我们可以按照这个例子来实现流水线中与其他系统间的交互。今天的实例是:在流水线中操作gitlab系统创建一个分支。
1.1 研究GitLAB系统API
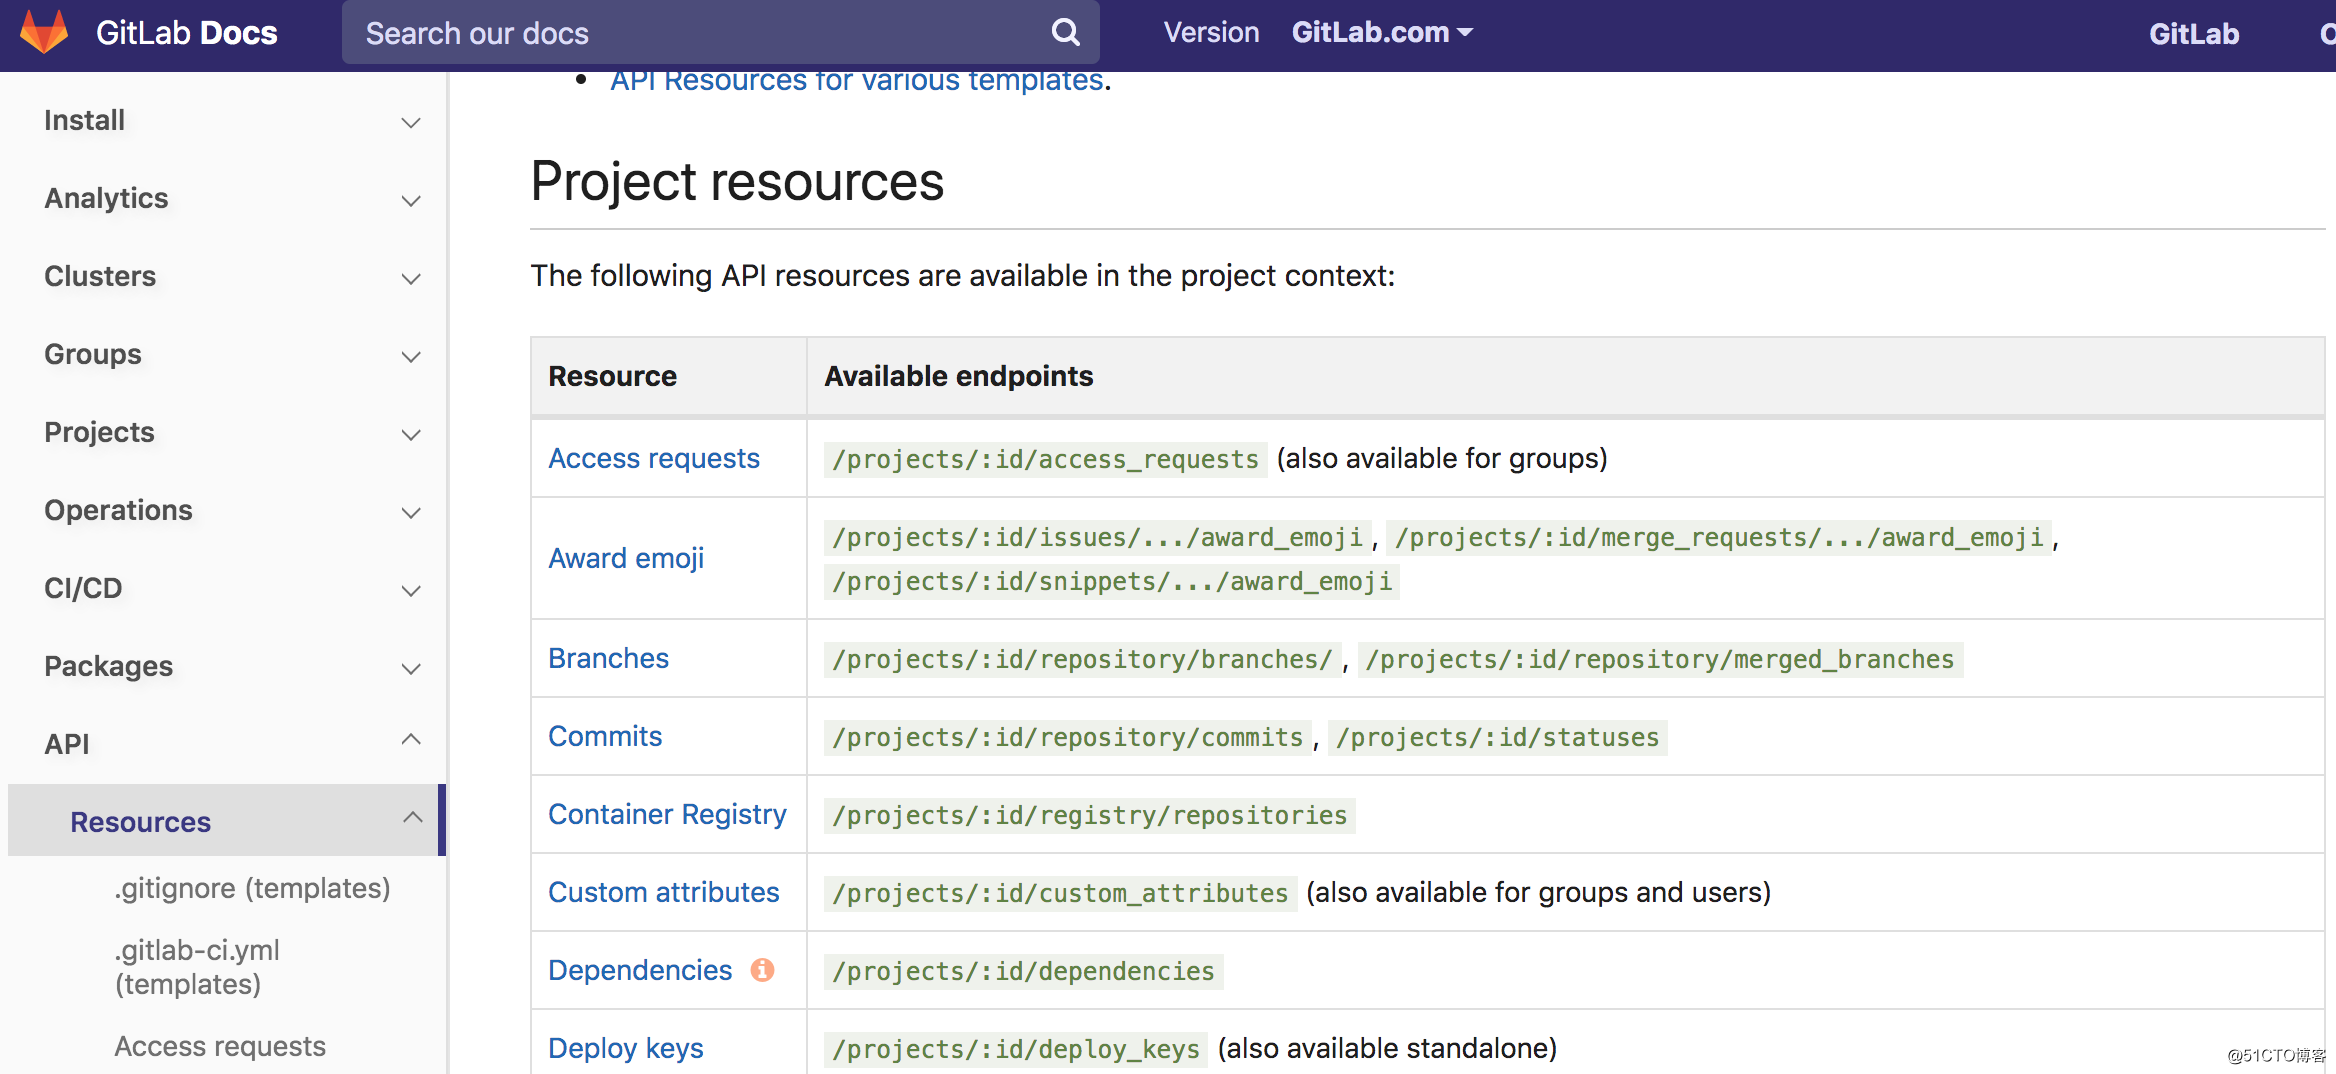
首先我们需要找到gitlab系统的接口文档,打开地址https://docs.gitlab.com/ce/api/README.html。 我们找到左侧菜单Resources 然后找到Branches如下图所示我们找到了接口。
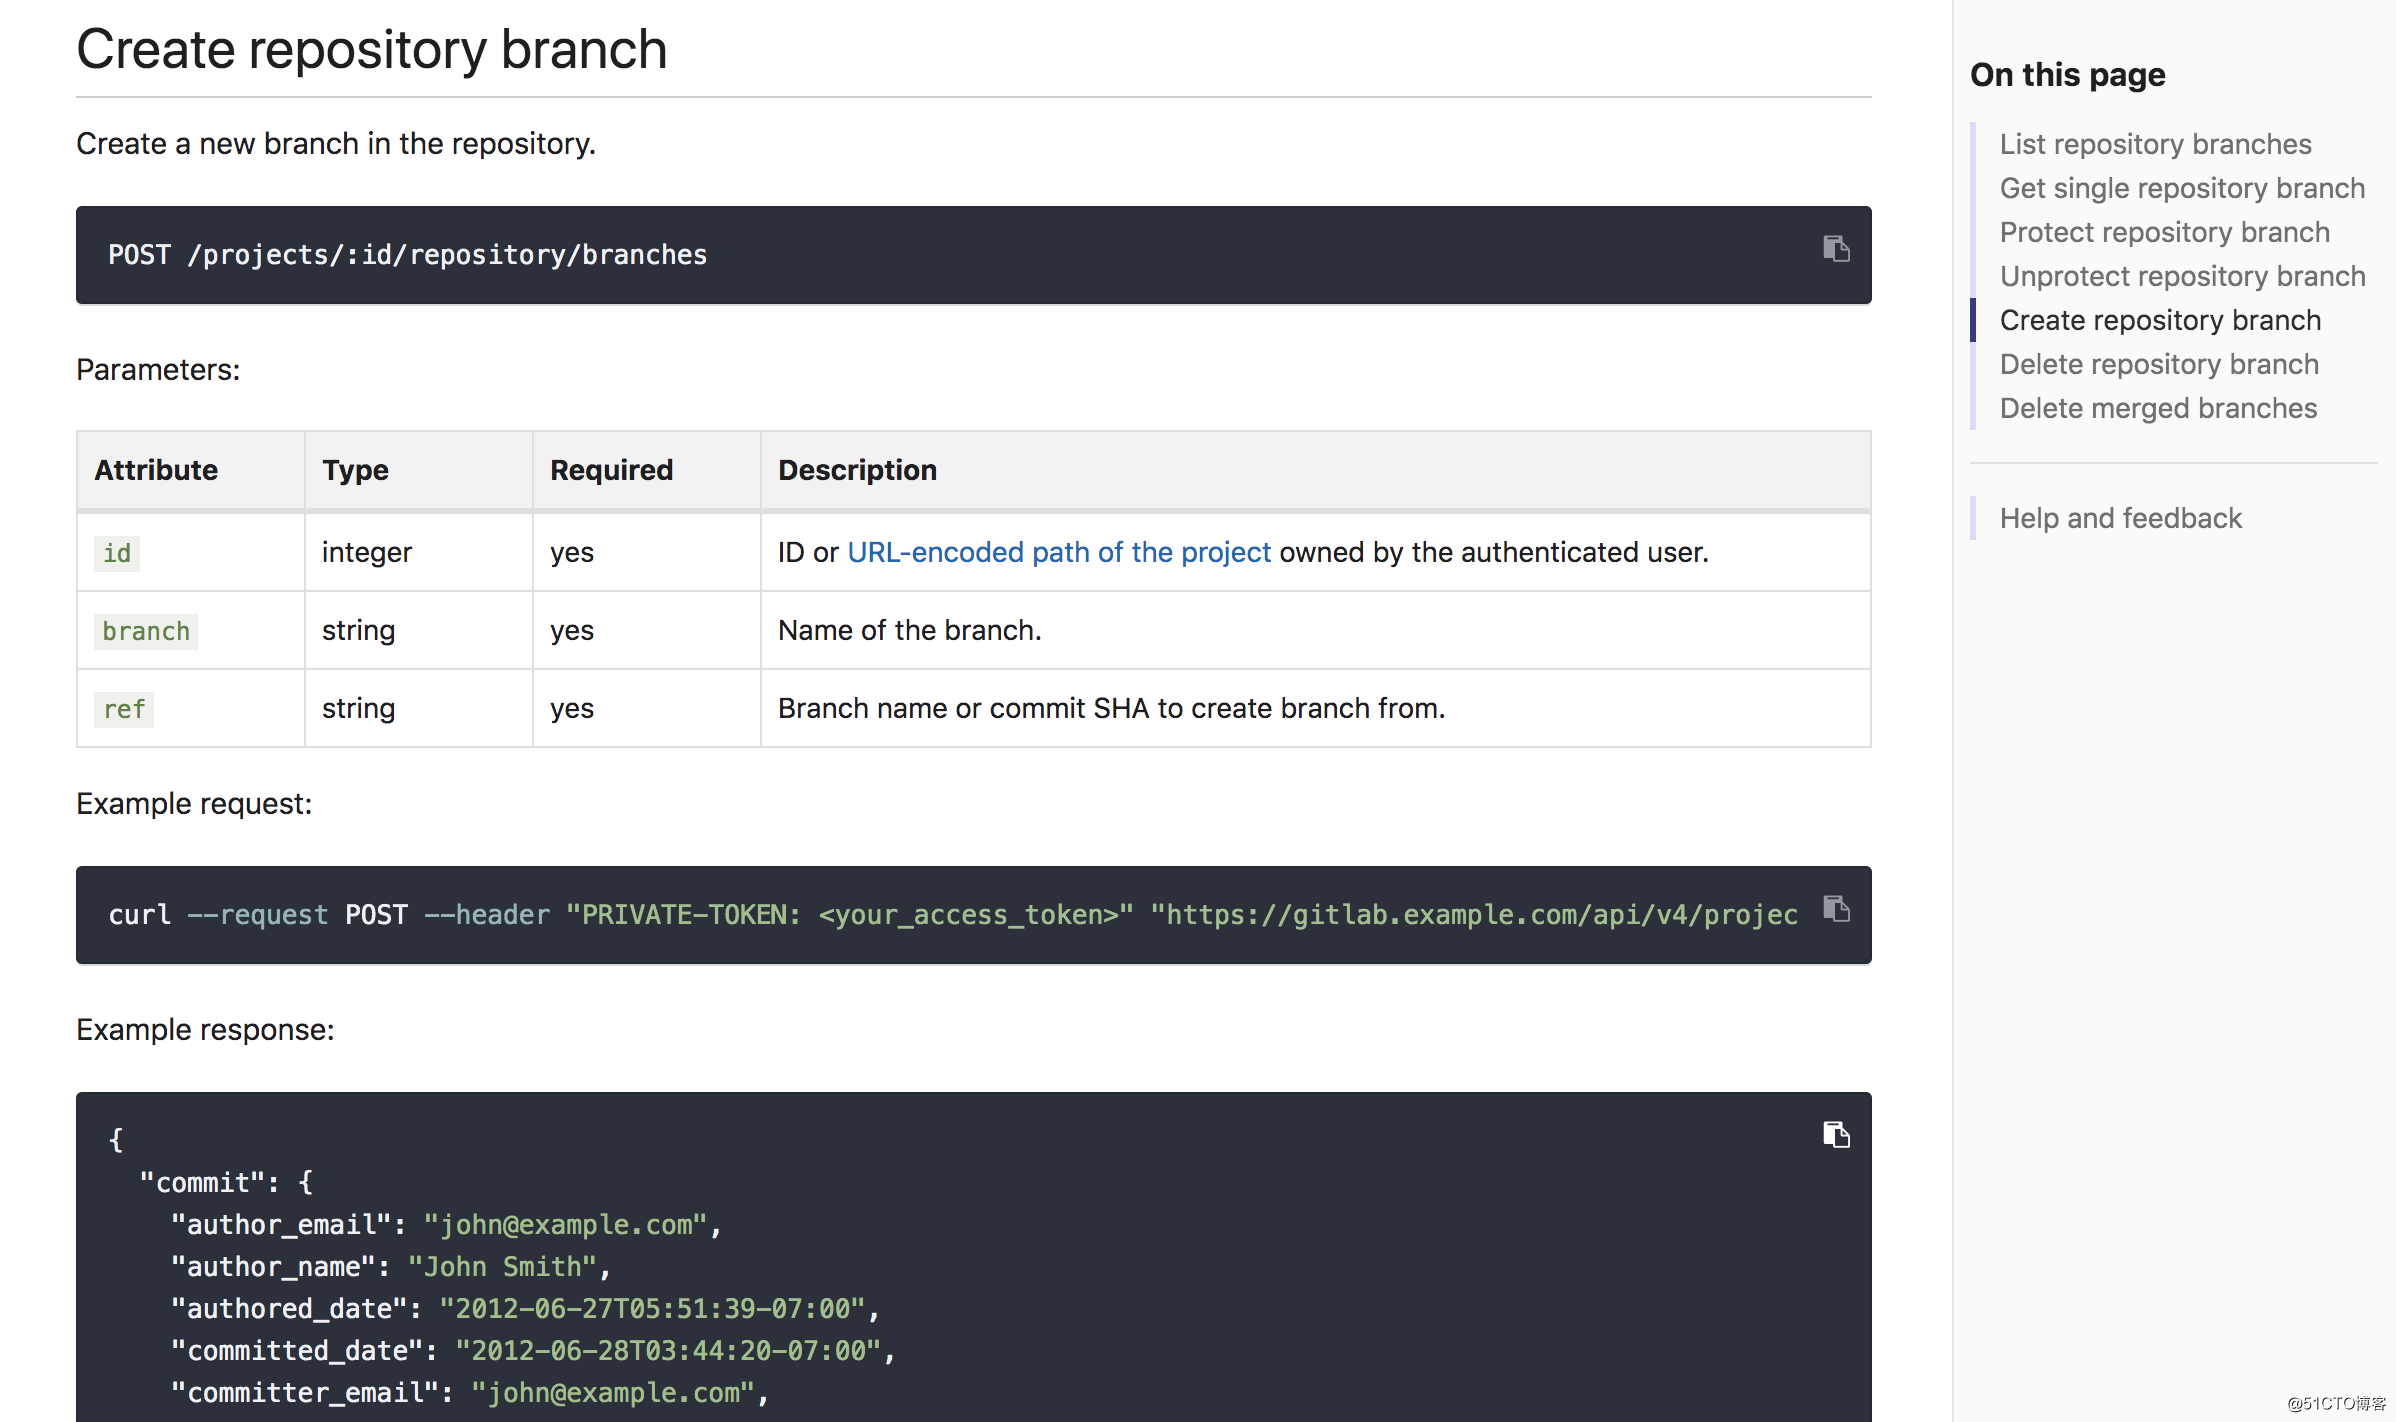
查看右侧导航,找到创建分支的接口。

OK,找到了创建分支的接口了。我们可以看到这个文档非常详细,主要告诉我们几个信息。 接口地址、参数列表、请求模板、响应模板。 接口地址就是我们要发送请求的地址,参数就是我们要发送请求时传递的参数。请求模板和响应模板是官方给的接口使用方法。
1.3 使用HttpRequests封装接口
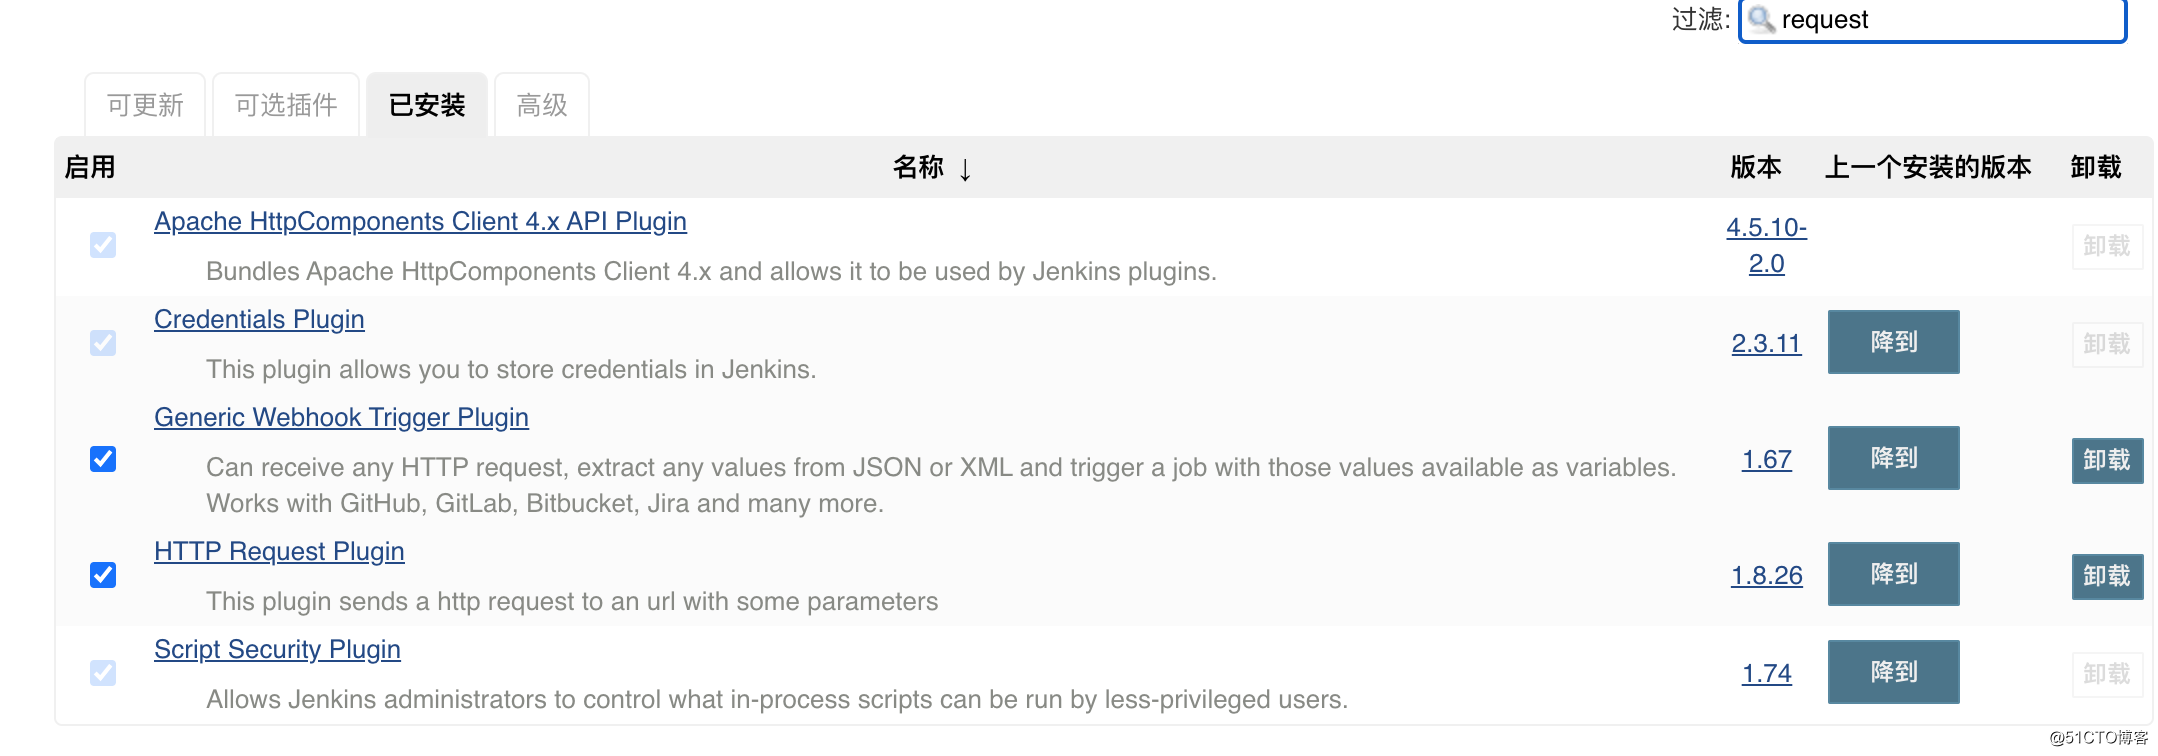
我们通过上面的实例可以看到,使用的是curl命令完成的整个请求。 当然我们也是可以直接使用shell 命令curl完成的。这次我们推荐使用httprequest方法来完成。既然要使用httprequest方法,我们得学习一下使用的方式。 首先我们在jenkins中安装插件Httprequests。(插件中搜索关键字requests)。
我们来分析一下官方给的demo
curl --request POST --header "PRIVATE-TOKEN: <your_access_token>" "https://gitlab.example.com/api/v4/projects/5/repository/branches?branch=newbranch&ref=master"

###
--request指定请求模式
--header 指定请求中的头部信息
后面的url就是api地址
然后我们进入到流水线语法、片段生成器、找到httpRequest方法的使用。需要填写信息:
#API地址:
url :https://gitlab.example.com/api/v4/projects/5/repository/branches?branch=newbranch&ref=master

#请求模式
httpmode: POST

#头部信息
Custom headers: PRIVATE-TOKEN: <your_access_token>"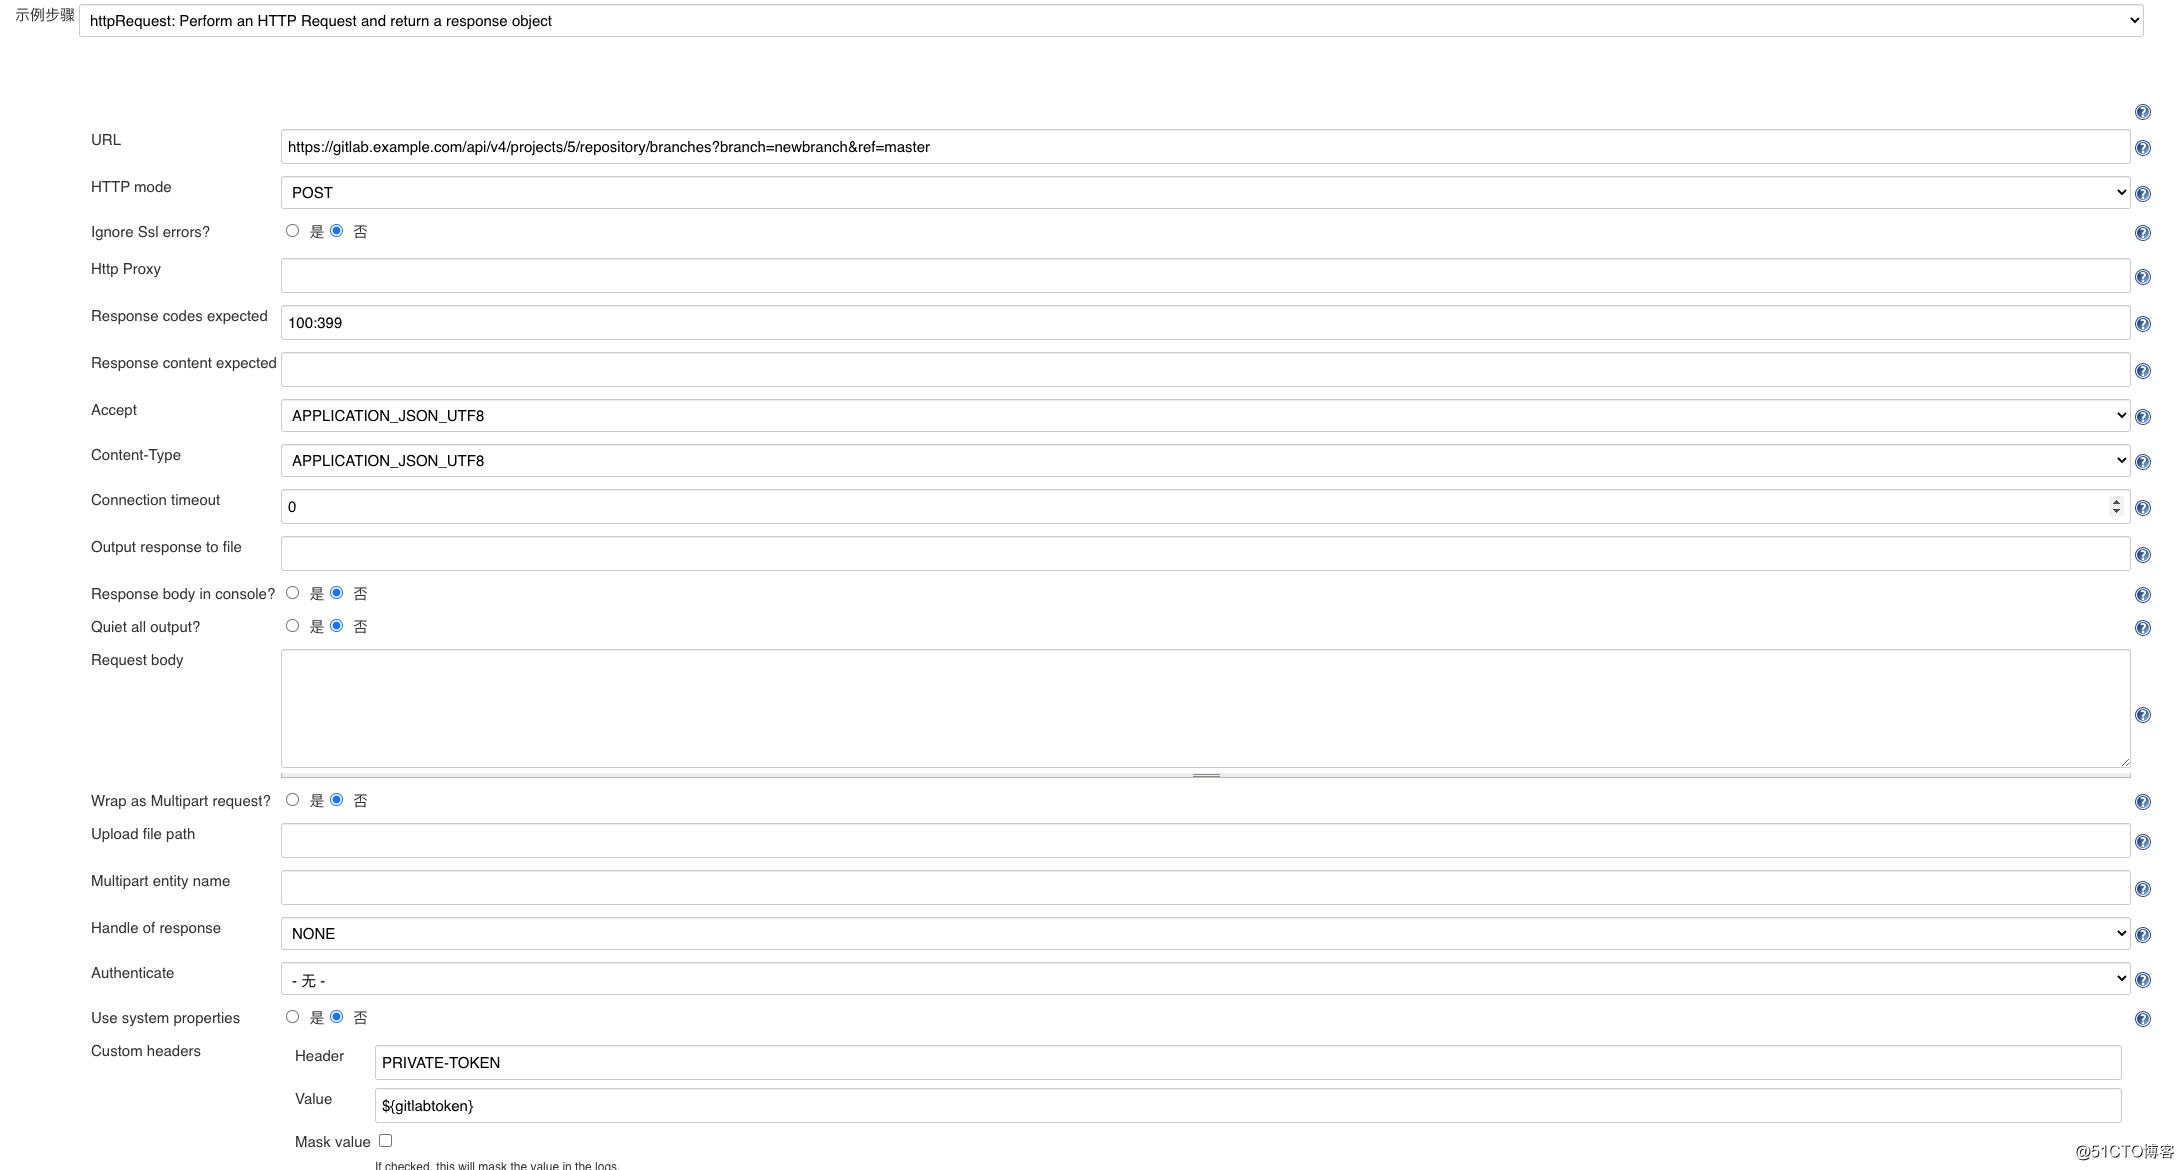
最后生成Jenkinsfile
httpRequest acceptType: 'APPLICATION_JSON_UTF8', contentType: 'APPLICATION_JSON_UTF8', customHeaders: [[maskValue: false, name: 'PRIVATE-TOKEN', value: '${gitlabtoken}']], httpMode: 'POST', responseHandle: 'NONE', url: 'https://gitlab.example.com/api/v4/projects/5/repository/branches?branch=newbranch&ref=master', wrapAsMultipart: false
可以看到图片最后一部分,header我使用的是一个变量${gitalabtoken}。 这里其实存放的是gitlab的token,属于敏感信息所以我们创建一个gitlab用户token,然后保存到jenkins的凭据中。我们使用的是secure text类型的凭据。最后在流水线中读取凭据。
withCredentials([string(credentialsId: '你的tokenid', variable: 'gitlabtoken')]) {
     httpRequest acceptType: 'APPLICATION_JSON_UTF8',
                 contentType: 'APPLICATION_JSON_UTF8',
                 customHeaders: [[maskValue: false,
                                  name: 'PRIVATE-TOKEN',
                                  value: '${gitlabtoken}']],
                 httpMode: 'POST',
                 responseHandle: 'NONE',
                 url: 'https://gitlab.example.com/api/v4/projects/5/repository/branches?branch=newbranch&ref=master',
                 wrapAsMultipart: false

}注意看上面的customHeaders部分,需要将 '${gitlabtoken}'中的单引号替换成双引号,因为单引号无法解析变量。
withCredentials([string(credentialsId: '你的tokenid', variable: 'gitlabtoken')]) {
     httpRequest acceptType: 'APPLICATION_JSON_UTF8',
                 contentType: 'APPLICATION_JSON_UTF8',
                 customHeaders: [[maskValue: false,
                                  name: 'PRIVATE-TOKEN',
                                  value: "${gitlabtoken}"]],
                 httpMode: 'POST',
                 responseHandle: 'NONE',
                 url: 'https://gitlab.example.com/api/v4/projects/5/repository/branches?branch=newbranch&ref=master',
                 wrapAsMultipart: false

}
ok,这样的一个请求就封装 完成了。想一想我们是否会对gitlab更多的操作 呢? 例如创建文件、获取分支、删除分支、获取项目等等。所以我们来优化一下,我们单独的封装一个httpReq方法来完成。
//封装HTTP请求
def HttpReq(reqType,reqUrl,reqBody){
    def gitServer = "http://192.168.1.200:30088/api/v4"
    withCredentials([string(credentialsId: 'gitlab-token', variable: 'gitlabtoken')]) {
      result = httpRequest customHeaders: [[maskValue: true, name: 'PRIVATE-TOKEN', value: "${gitlabtoken}"]],
                httpMode: reqType,
                contentType: "APPLICATION_JSON",
                consoleLogResponseBody: true,
                ignoreSslErrors: true,
                requestBody: reqBody,
                url: "${gitServer}/${reqUrl}"
                //quiet: true
    }
    return result
}

//创建分支
def CreateBranch(projectId,refBranch,newBranch){
    branchApi = "projects/${projectId}/repository/branches?branch=${newBranch}&ref=${refBranch}"
    response = HttpReq("POST",branchApi,'').content
    branchInfo = readJSON text: """${response}"""
}
最后jenkinsfile就变成了这样了。上面我们使用了readJSON工具完成了响应数据的解析。
1.4 总结
回到流水线中,我把交互过程分成了3个步骤:研究外围系统API使用、使用HttpRequest方法封装HTTP请求、使用readJSON方法解析数据。本篇文章讲解是一个思路,后期如有与其他系统例如需求管理平台jira集成,也可以参考此步骤来完成。希望对你有所帮助!
基于Jenkins的DevOps流水线实践教程已上线,感兴趣的同学点击链接获取哦! https://edu.51cto.com/sd/36f6e
Recommend
About Joyk
Aggregate valuable and interesting links.
Joyk means Joy of geeK