
Build a “Résumé Builder” Using Angular Reactive Forms
source link: https://medium.com/@rasha.essam/build-a-r%C3%A9sum%C3%A9-builder-using-angular-reactive-forms-61af6653fa45?source=---------2------------------
Go to the source link to view the article. You can view the picture content, updated content and better typesetting reading experience. If the link is broken, please click the button below to view the snapshot at that time.


Build a “Résumé Builder” Using Angular Reactive Forms
We will see how to add input elements dynamically to a form while building a Résumé Builder form.
It is very common to find web apps which have an input form to be filled by users who want to build their CVs online. Therefore, it is quite important for the user to be able to add as much experience blocks as needed in a dynamic way. And here the power of Angular Reactive Forms appears.
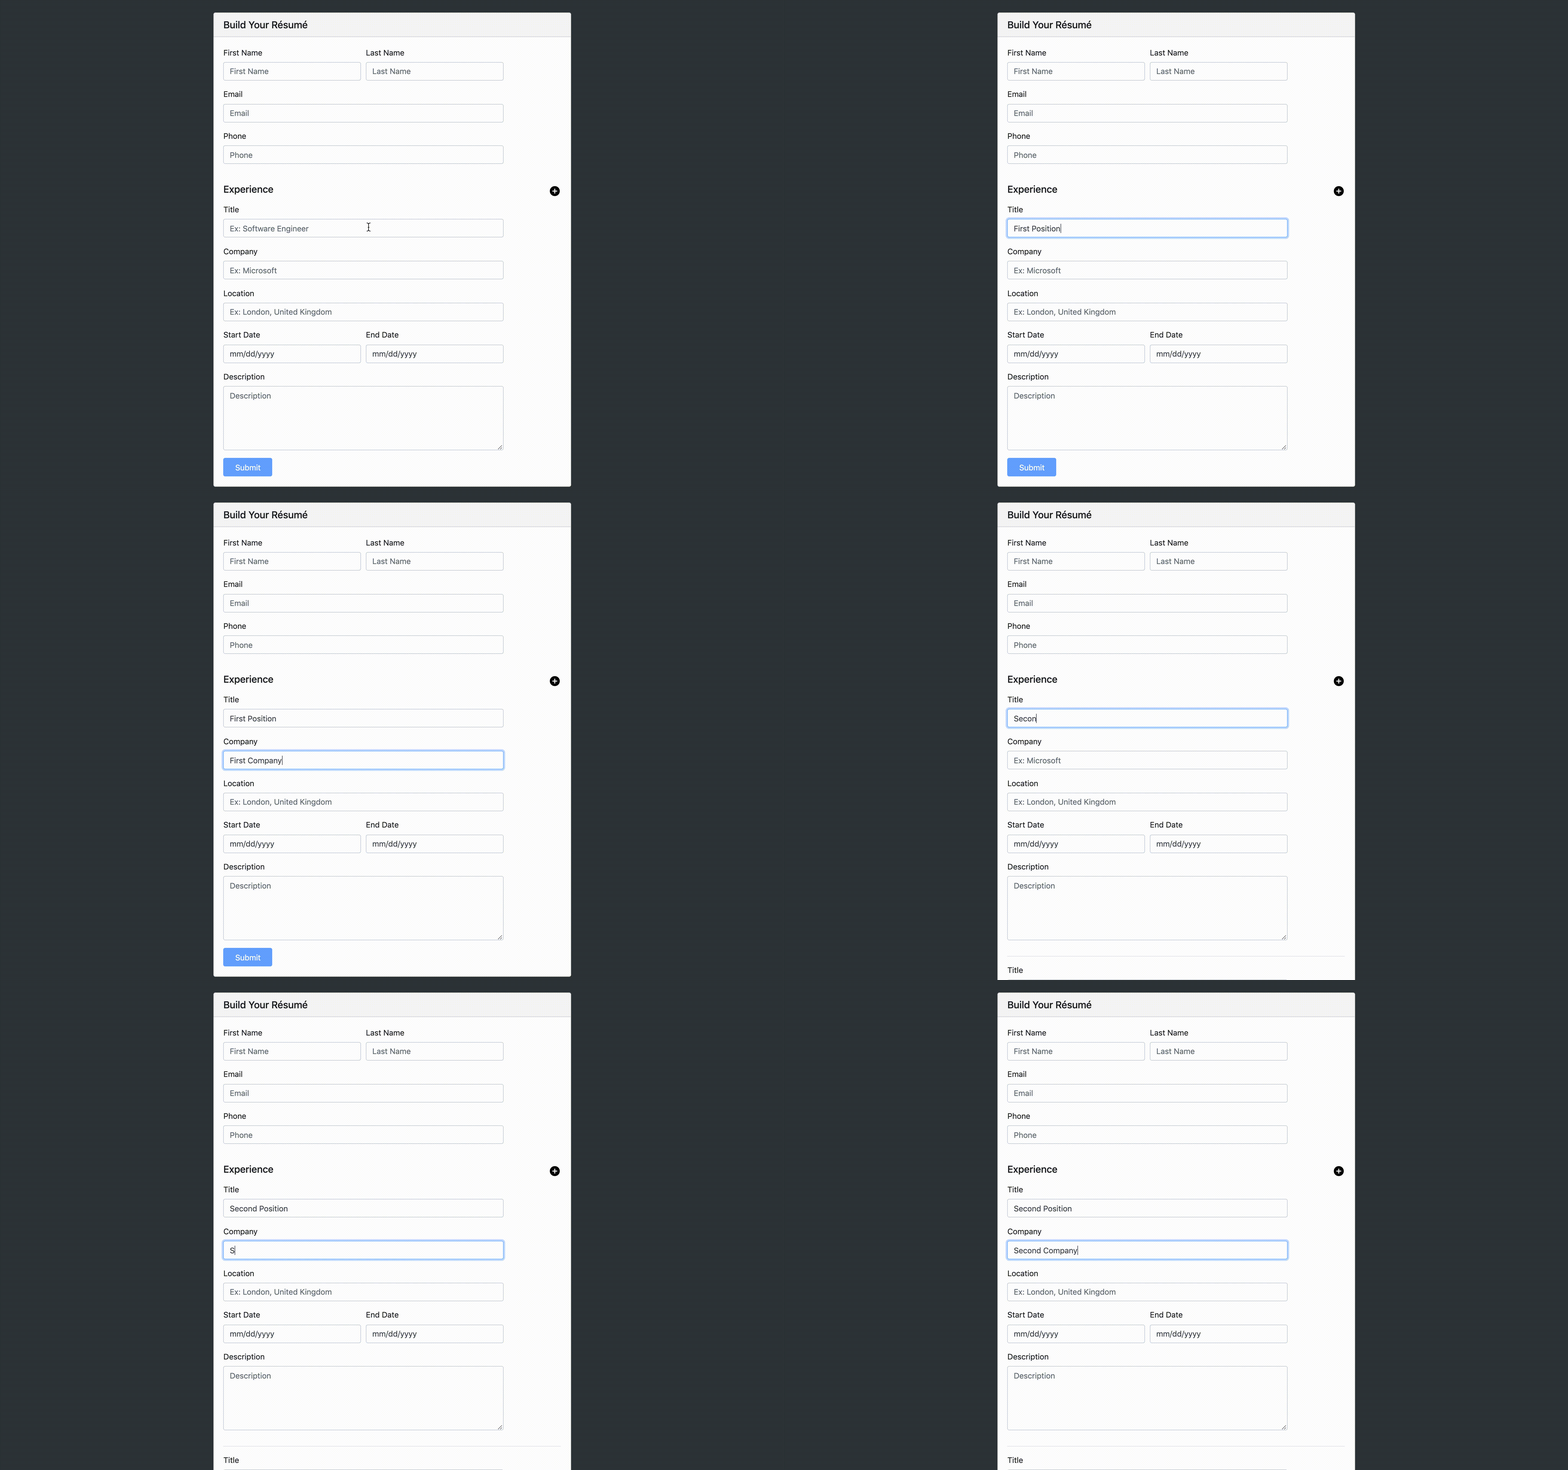
This is how our form will look like:


If you want to check the full code, you can check check this Github repo .
Here are the steps to implement this form:
1- Firstly, we need to import ReactiveFormsModule from @angular/forms and then add it to the imports array in our NgModule. Here our app is simple so we only have one module which is the AppModule.
import { BrowserModule } from '@angular/platform-browser';import { NgModule } from '@angular/core';import { AppComponent } from './app.component';import { ReactiveFormsModule } from '@angular/forms';import { ResumeBuilderComponent } from './resume-builder/resume-builder.component';@NgModule({declarations: [AppComponent, ResumeBuilderComponent],imports: [BrowserModule, ReactiveFormsModule],providers: [],bootstrap: [AppComponent]})export class AppModule {}2- We will implement our form in the “ResumeBuilderComponent”
- Add the required imports from ‘@angular/forms’
- Declare our FormGroup
- We will generate the different form controls using the FormBuilder service because it makes the code simpler. We need to inject it into the constructor first and add the required import.
...import { FormBuilder, FormGroup, Validators, FormArray } from '@angular/forms';@Component({
     ...
})export class ResumeBuilderComponent implements OnInit {resumeBuilderForm: FormGroup;constructor(private formBuilder: FormBuilder) {}ngOnInit(): void {
this.resumeBuilderForm = this.formBuilder.group({
      firstName: ['', [Validators.required]],
      lastName: ['', [Validators.required]],
      email: ['', [Validators.required, Validators.email]],
      phone: '',
      experienceBlocks:this.formBuilder.array(
                       [this.buildExperienceBlock()])
});
}
buildExperienceBlock(): FormGroup {return this.formBuilder.group({
   title: ['', [Validators.required]],
   company: ['', [Validators.required]],
   location: ['', [Validators.required]],
   startDate: ['', [Validators.required]],
   endDate: ['', [Validators.required]],
   description: ['', [Validators.required]]
});
}...- As you can see from the code above, we generated a Form Group in the ngOnInit Life Cycle Hook, it consists of simple child Form Controls ( firstName , lastName, email and phone). But it contains a more complex control at the end which is the “experienceBlocks” Form Array. The children of this Form Array is an array of Form Groups.
- The creation of each inner Form Group is handled to the function buildExperienceBlock(). We called this function once during the initialization phase to initialize the experienceBlocks Form Array with one experience block as a start.
3- We can easily now add a new experience block when the user clicks the add experience button as follows
addExperience() {
 this.experienceBlocks.insert(0, this.buildExperienceBlock());
}
4- Lastly, we should loop through the Form Array in our template using *ngFor directive as follows
<form (ngSubmit)="save()" [formGroup]="resumeBuilderForm">.... <div formArrayName="experienceBlocks" *ngFor="let experience of
  experienceBlocks.controls; let i = index">   <div [formGroupName]="i">     <label attr.for="{{ 'titleId' + i }}">Title</label>
     <input
        id="{{ 'titleId' + i }}"
        type="text"
        placeholder="Ex: Software Engineer"
        formControlName="title"/>        ....   </div>  </div>...
</form>
I hope you found this article useful!
Recommend
-
 11
11
Tutorial Reactive Forms in Angular: Dynamically Creating Form Fields With FormArray Angular ...
-
 9
9
Tutorial How To Create a Custom Validator for Reactive Forms in Angular Angular Introductio...
-
 7
7
Tutorial How To Use Reactive Forms in Angular Angular Introduction Angular provide...
-
 11
11
react-fluid-form Reactive forms for react and react native, using hooks and Mobx@6. Installation: npm install -s react-fluid-form mobx mobx-react yup lodash // or: yarn add react-fluid-form mobx mobx-reac...
-
 7
7
In this article, we’ll learn how to add async validation to your Angular reactive forms. We’ll build an email input field – which shows up validations when the user focuses away from it. We want the email field to show errors when it...
-
 2
2
Angular Template Driven vs. Reactive FormsAlmost all enterprise applications are heavily form-driven. Some apps have massive forms that span multiple steps and dialogs and integrate complex validation logic. If devel...
-
 17
17
-
 7
7
In this article, we will learn how to create strictly typed reactive forms in Angular. We will create a student registration form as an example. The form will have support for built-in form validations. We will also create asynchronous custom vali...
-
 4
4
Using Strictly Typed Reactive Forms in AngularI continue to play with the new features of Angular, and one pending task is to learn about Typed Reactive Forms. The strict forms help us avoid many common issu...
-
 7
7
Hey folks! In a recent post about Angular signals and forms, I mentioned some potential issues when using Angular signals with the Reactive Forms API....
About Joyk
Aggregate valuable and interesting links.
Joyk means Joy of geeK