

Creating REST Web Services with Spring Boot 2 Running on Payara Micro
source link: https://blog.payara.fish/creating-rest-web-services-with-spring-boot-2-running-on-payara-micro
Go to the source link to view the article. You can view the picture content, updated content and better typesetting reading experience. If the link is broken, please click the button below to view the snapshot at that time.
Creating REST Web Services with Spring Boot 2 Running on Payara Micro
Published on 28 Jan 2020
With Spring Boot you can create an executable JAR file or a WAR file that can be run on a server. The latter option can also be used with Payara Micro. This blog shows you the different steps in creating and running such an application.
Spring Boot 2
Spring Boot 2 has several goals like easier dependency management through starters, Auto-configuration (convention over configuration), improving features around monitoring, logging, and metrics and enhanced development experience.
You can develop some REST endpoints using Spring's own RestController or you can use Jersey for this purpose. I'm using the latter option in this blog to show you an integration of Payara Micro with the Spring Boot application.
Create Application
The easiest way to start an application is by using the Spring Initializer website or endpoints. When navigating to https://start.spring.io, you have various options you can choose from. For this example, I chose a Maven project with Java 11, using Spring Boot 2.2.4 and as dependency, Jersey, which will be packaged as a WAR.
Another option is using the endpoint which will return the zipped content of the Maven project. In our case, the following command can be executed:
curl https://start.spring.io/starter.zip -d type=maven-project -d language=java -d packaging=war -d jvmVersion=11 -d dependencies=jersey -o demo.zip
After you have unzipped the file, you can open it in your favorite IDE. So let us adapt this project:
1. You can remove the ServletInitializer.java class, we will use the functionality from within the DemoApplication.java class.
2. Adapt the DemoApplication.java by adding `extends SpringBootServletInitializer` since our application will always be a Web Application.
We are also adding a couple of annotations to pick up the Bean definitions.
@Configuration
@EnableAutoConfiguration
3. Create the REST endpoint as a JAX-RS resource class
@Component
@Path("/hello")
public class Endpoint {

@GET
    public String message() {
        return "Hello";
    }
}
This class defines with the @Path annotation the URL part it will listen to.
By annotating the method message() with the @GET annotation, any GET request which is received by the system on the specified URL will be handled by this method.
In the example, it just returns a fixed text, but by adding the @Produces(MediaType.APPLICATION_JSON) annotation, some JSON can be created from the Java instance returned by the method.
And the class is also annotated with @Component, so that it is under control of Spring and other components can be injected through @Autowired, for example.
For more information, have a look at the Jersey documentation if you want to learn more.
4. Configure Jersey
And the last thing we need to do is configure Jersey. We create a class extending Jersey's ResourceConfig.
@Component
@ApplicationPath("/spring-app")
public class JerseyConfig extends ResourceConfig {

public JerseyConfig() {
        register(Endpoint.class);
    }
}
Important to note here is the usage of the @ApplicationPath so that we define the 'root' URL which will be handled by Jersey and hold our REST endpoints.
We register all the JAX-RS resource with Jersey so that it is aware of the defined endpoints. If you have a lot of them, there exists an alternative where you supply a package name, and the classes will be discovered automatically.
Deploy on Payara Micro
Now we are ready to deploy our little test application to Payara Micro. The first step is to generate the WAR artifact through Maven. You can add the <finalName> item to the pom.xml file so that the generated war file is shorter and easier to manage.
<build>
    <finalName>demo</finalName>
       <plugins>
           <plugin>
.....
The Maven command is:
mvn clean package
If you have not already downloaded Payara Micro, go to our website and download:
The application can be launched by executing the following command:
java -jar payara-micro.jar --noCluster demo.war
The --noCluster parameter is added since our application is standalone and so the Data Grid feature doesn't need to search for other members of the cluster.
When the server is ready to accept requests, you can see the following output in the log:
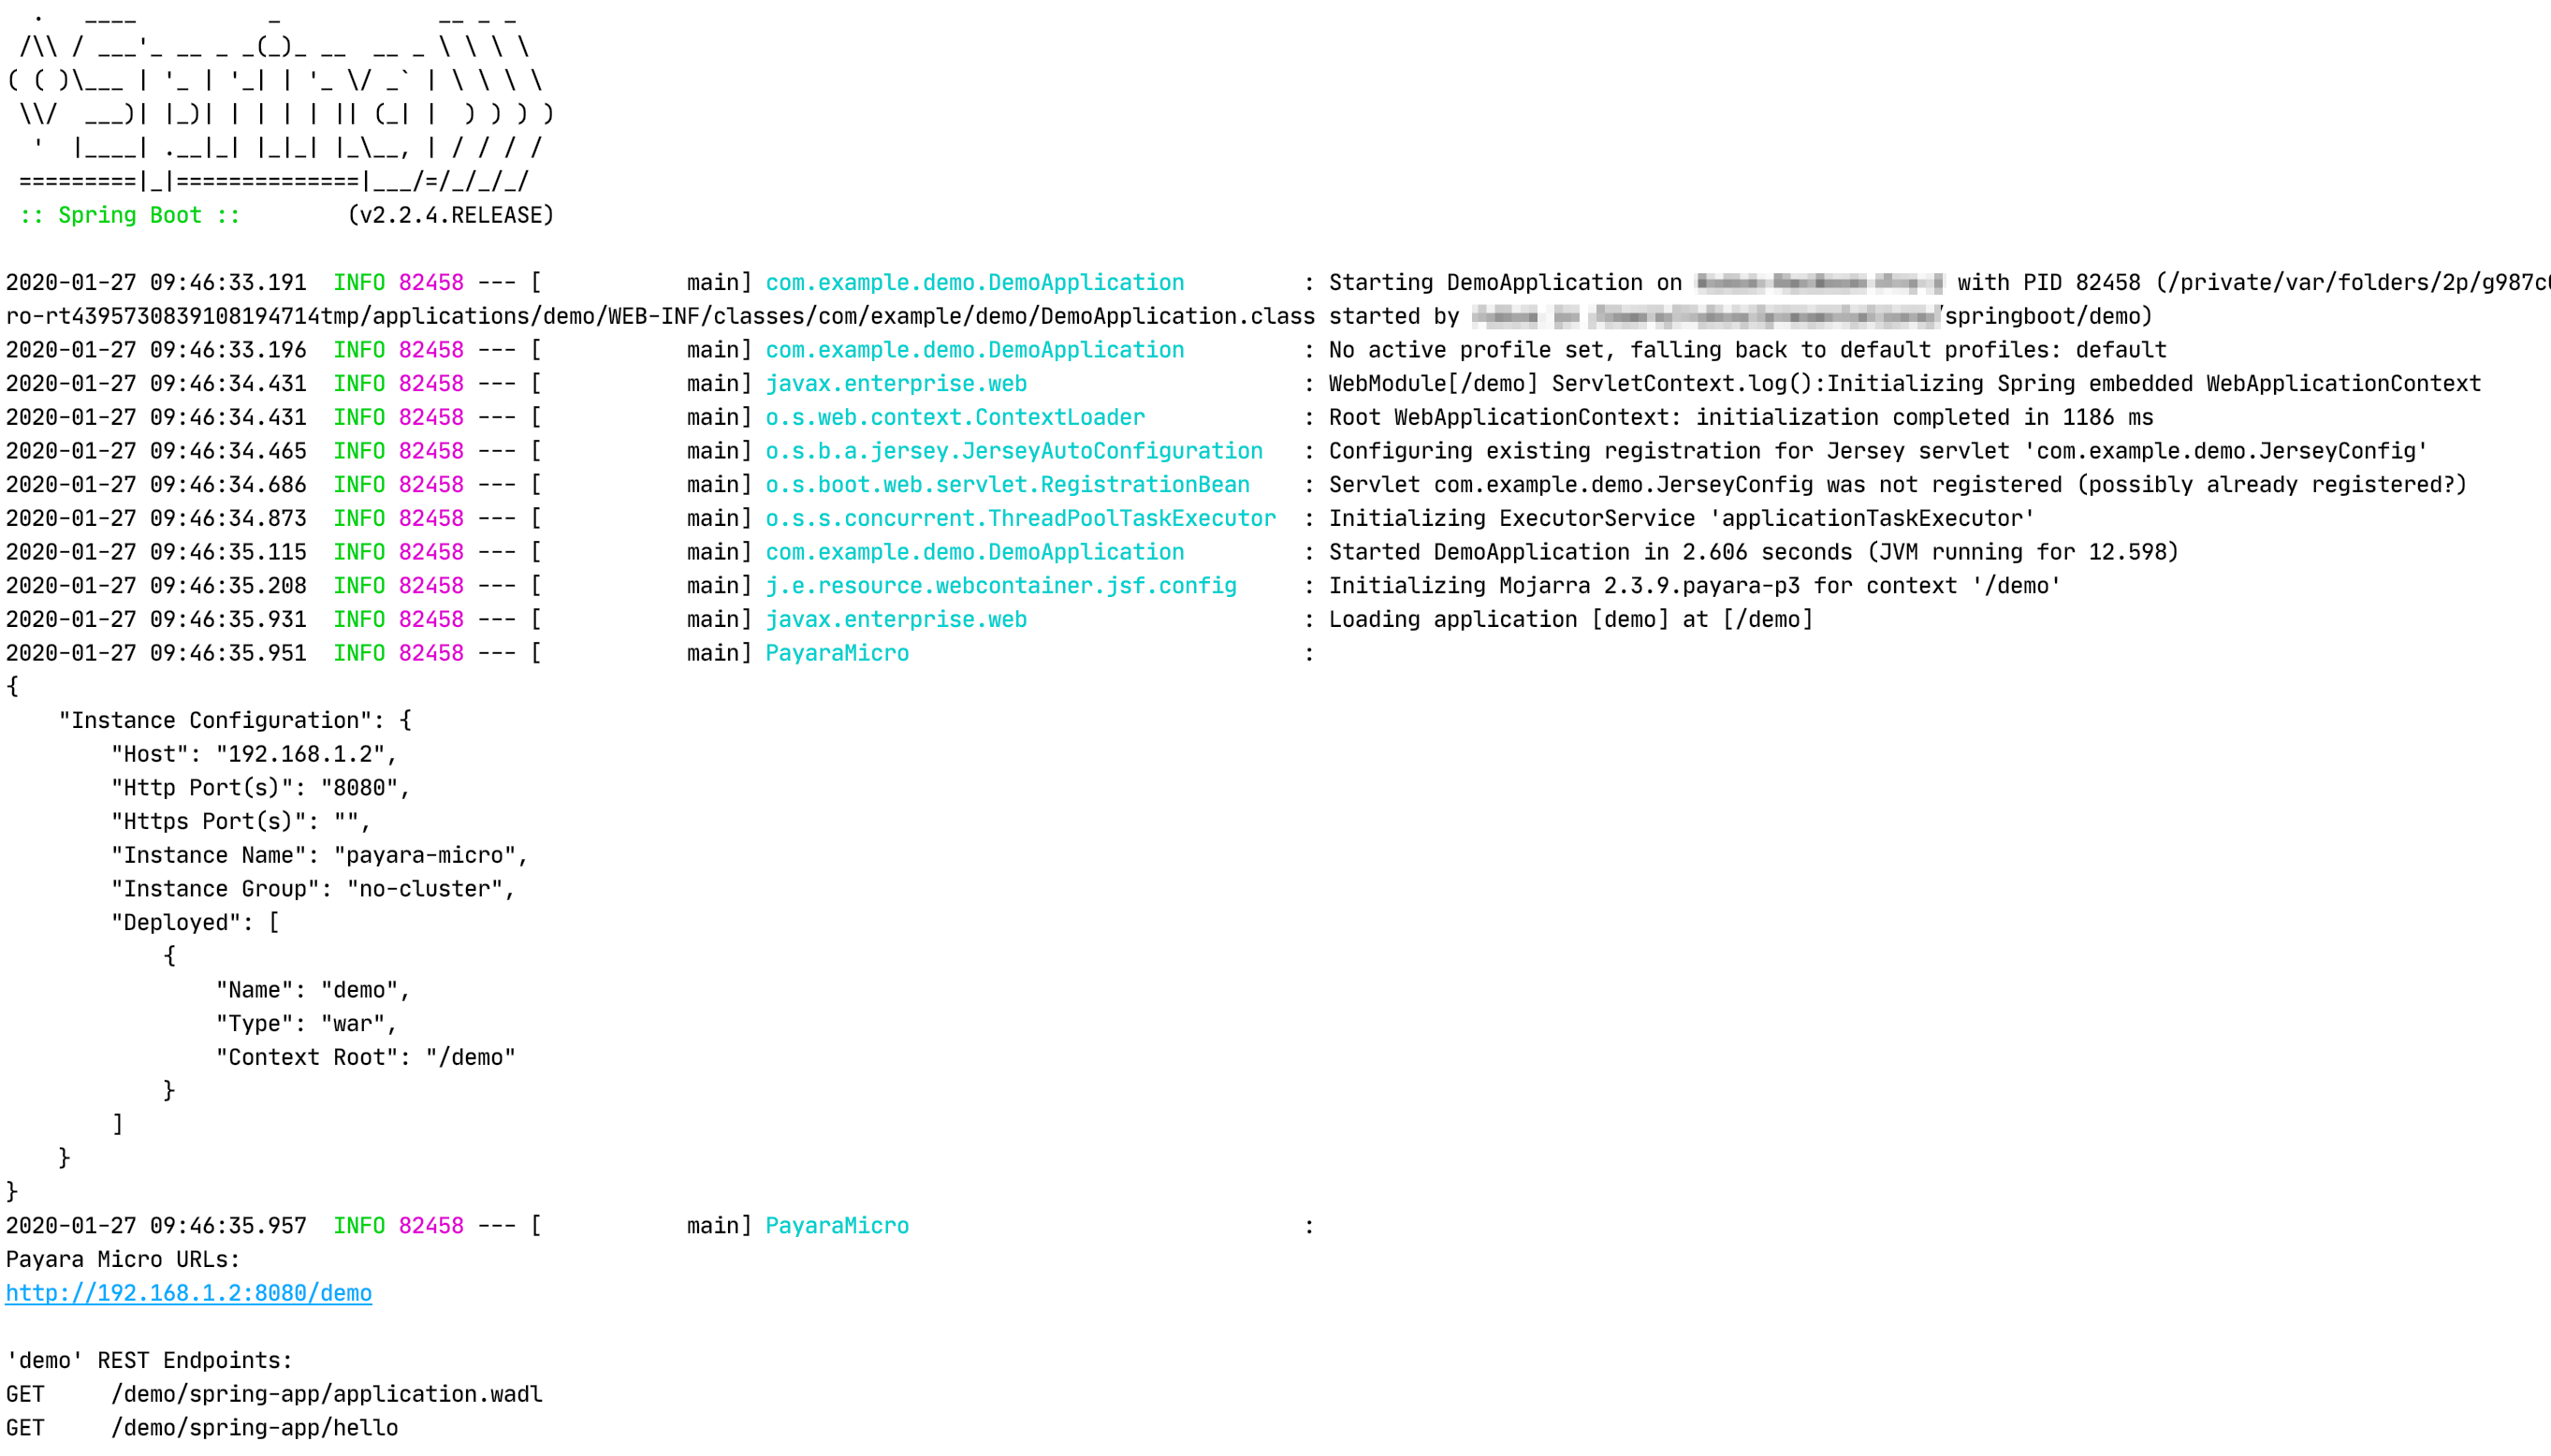
As you can see, you not only see the SpringBoot information, but Payara Micro detects the usage of Jersey and prints out a list of REST endpoints which it has identified.
Our application can be tested, for example, with a simple curl command:
curl http://localhost:8080/demo/spring-app/hello
Integration
When you run the SpringBoot application on Payara Micro, you can also benefit from the features which are available on the runtime. One of them is the generation of the OpenAPI documentation for the REST endpoints. Just browse to the http://localhost:8080/openapi URL and you can have your documentation without the need for any additional configuration or dependencies.
Use Payara Micro to Run SpringBoot Web Applications
Payara Micro can be used to run your SpringBoot web applications and can be used in combination with the features provided by Payara Micro. You can use the DataGrid, the automatic clustering features, or any of the other features like the OpenAPI documentation generation, as we have seen in this little example.
All functionality of SpringBoot or any of the modules is also available so that you can augment your SpringBoot application easily.
Topics: Payara Micro, Spring Boot
Comments
Payara needs the contact information you provide to us to contact you about our products and services. You may unsubscribe from these communications at any time. For information on how to unsubscribe, as well as our privacy practices and commitment to protecting your privacy, please review our Legal & Privacy Policy.
Recommend
About Joyk
Aggregate valuable and interesting links.
Joyk means Joy of geeK