

Angular:Jasmine + Karma 测试实战 - DTeam 团队日志
source link: https://blog.dteam.top/posts/2020-04/angular-jasmine-karma.html?
Go to the source link to view the article. You can view the picture content, updated content and better typesetting reading experience. If the link is broken, please click the button below to view the snapshot at that time.
Angular 提供了Jasmine + Karma 的单元测试,还不了解的同学请看Angular单元测试浅说。 Angular中需要为每个被测试的文件创建以 .spec.ts 结尾的文件作为测试文件,除了引入测试文件本身需要的依赖外,还需要将被测试文件所属的依赖添加到测试文件。 在这里发现了 vscode 插件: shark-extension(yangbo),可以一键生成测试文件。
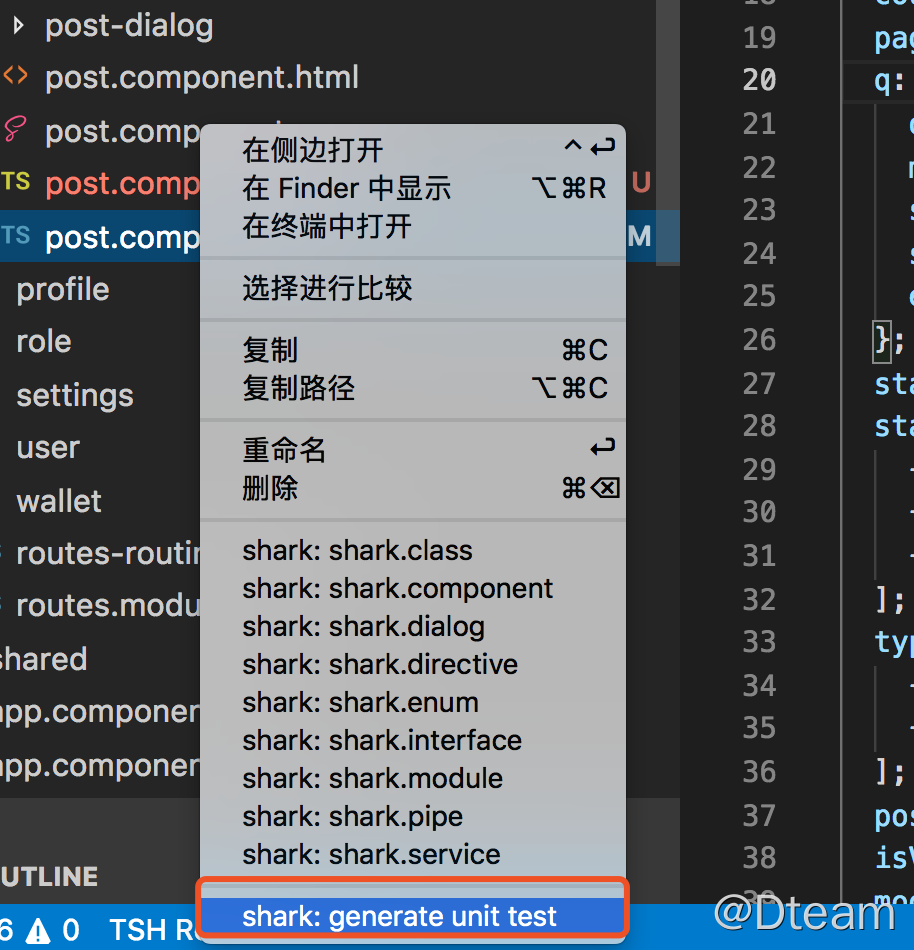
使用shark-extension插件生成测试文件
右键点击被测试的文件(以Component为例),选择 generate unit test,就会自动生成 .spec.ts文件

生成的测试文件会为每个function生成一个用例:

并且会自动添加所需要的依赖,上部分是测试需要的依赖,下部分为Component的依赖:
import { NO_ERRORS_SCHEMA } from '@angular/core';
import { async, ComponentFixture, TestBed } from '@angular/core/testing';
import { RouterTestingModule } from '@angular/router/testing';
import { HttpClientTestingModule } from '@angular/common/http/testing';

import { PostComponent } from './post.component';
import { Component,Directive } from '@angular/core';
import { Router,NzMessageService,PostService,UserService,RegularService,EmitService } from 'date-fns/difference_in_days';
大家会看到最后一条依赖引入错误,查看了Component,发现是因为引入了
import * as differenceInDays from 'date-fns/difference_in_days';
这个时候就需要手动修改:
import { NO_ERRORS_SCHEMA } from '@angular/core';
import { async, ComponentFixture, TestBed } from '@angular/core/testing';
import { RouterTestingModule } from '@angular/router/testing';
import { HttpClientTestingModule } from '@angular/common/http/testing';

import { PostComponent } from './post.component';
import { Component,Directive } from '@angular/core';
import { Router } from '@angular/router';
import { NzMessageService, NzNotificationService } from 'ng-zorro-antd';
import { PostService } from '../../common/services/post.service';
import { UserService } from '../../common/services/user.service';
import { RegularService } from '../../common/services/regular.service';
import { EmitService } from '../../common/services/emit.service';
import * as differenceInDays from 'date-fns/difference_in_days';
依赖解决后,执行测试,看看是否能将测试跑起来(这个时候是空测试,仅仅是为了检查环境是否正确,依赖是否全部引入)
ng-test
发现报错了:


可以看到都是StaticInjectorError,发现是公用的模块没有引用(也有可能是Pipe错误),将SharedModule和DelonModule引入:
...
import { SharedModule } from '@shared/shared.module';
import { DelonModule } from '../../delon.module';

...
imports: [
    ...
    SharedModule,
    DelonModule
],
执行ng-test ,测试通过了。

Jasmine常用 Matchers 和 Setup and Teardown
Matchers是断言匹配操作,在实际值与期望值之间进行比较,并将结果通知Jasmine,最终Jasmine会判断此 Spec 成功还是失败。 Setup 与 Teardown相当于测试之前的准备工作,我们可以将重复的 Setup 与 Teardown 代码,放在与之相对应的 beforeEach 与 afterEach 全局函数里面。 了解常用的Matchers和Setup and Teardown有助于更快捷的编写测试代码。
Matchers
测试时会根据expect的实际传入的值和期望值进行比较,返回true,表示成功;如果为false,则表示失败。下列是经常用到的matchers: 查看更多信息点击这里。
expect(array).toContain(member);
expect(fn).toThrow(string);
expect(fn).toThrowError(string);
expect(instance).toBe(instance);
expect(mixed).toBeDefined();
expect(mixed).toBeFalsy();
expect(mixed).toBeNull();
expect(mixed).toBeTruthy();
expect(mixed).toBeUndefined();
expect(mixed).toEqual(mixed);
expect(mixed).toMatch(pattern);
expect(number).toBeCloseTo(number, decimalPlaces);
expect(number).toBeGreaterThan(number);
expect(number).toBeLessThan(number);
expect(number).toBeNaN();
expect(spy).toHaveBeenCalled();
expect(spy).toHaveBeenCalledTimes(number);
expect(spy).toHaveBeenCalledWith(...arguments);
Setup and Teardown
测试有一些功能时需要一些额外的设置,测试完成后又需要删除,就需要用到下列function
- beforeAll 在执行所有测试之前调用一次(describe function之前)
- afterAll 在执行所有测试之后调用
- beforeEach 在执行每个测试之前调用(it function之前)
- afterEach 在执行每个测试之后调用
测试Component
- 组件的inputs和outputs
在写测试逻辑之前,需要做一些准备工作。
1.声明页面元素:DebugElement DebugElement是Angular的抽象层,可以安全的横跨其支持的所有平台。Angular 不再创建 HTML 元素树,而是创建 DebugElement树,其中包裹着相应运行平台上的原生元素。 下列元素后面会在beforeEach中获取为页面的input或者button等。
import { NO_ERRORS_SCHEMA, DebugElement } from '@angular/core';
...
let submitEl: DebugElement;
let loginEl: DebugElement;
let passwordEl: DebugElement;
let h1: HTMLElement
2.查找元素:By.css()
import  { By }  from  '@angular/platform-browser';
...
// beforeEach中
submitEl = fixture.debugElement.query(By.css('button'));

// 解包
submitEl.nativeElement
-
By.css() 静态方法使用标准 CSS 选择器选择了一些 DebugElement 节点。
-
这次查询返回了
<button>元素的一个 DebugElement。 -
必须解包此结果,以获取这个
<button>元素。
beforeEach整体如下:
beforeEach(() => {
    fixture = TestBed.createComponent(UserLoginComponent);
    component = fixture.debugElement.componentInstance;
    submitEl = fixture.debugElement.query(By.css('button'));
    loginEl = fixture.debugElement.query(By.css('input[type=username]'));
    passwordEl = fixture.debugElement.query(By.css('input[type=password]'));
    h1 = fixture.nativeElement.querySelector('h1');
  });
测试数据绑定
测试页面 title 是否会绑定到页面:
因为绑定是在 Angular 执行变更检测时才发生的,所以需要通过调用 fixture.detectChanges() 来要求 TestBed 执行数据绑定。
it('数据绑定', () => {
    fixture.detectChanges();
    expect(h1.textContent).toContain(component.title);
  });
组件的inputs和outputs
it('将按钮enabled设置为false', () => {
    component.enabled = false;
    fixture.detectChanges();
    expect(submitEl.nativeElement.disabled).toBeTruthy();
});

it('输入用户名密码,点击登录', () => {
    let username = '';
    let pwd = '';

    loginEl.nativeElement.value = "17711111111";
    passwordEl.nativeElement.value = "123456";

    component.loggedIn.subscribe(value => {
        username = value.username;
        pwd = value.pwd;
        expect(username).toBe("17711111111");
        expect(pwd).toBe("123456");
     });
    submitEl.triggerEventHandler('click', null);
});
如果想让组件自动检测更新,使用 ComponentFixtureAutoDetect ,配置 TestBed:
import  { ComponentFixtureAutoDetect }  from  '@angular/core/testing';
...
providers:  [
...
{ provide:  ComponentFixtureAutoDetect,  useValue:  true  }  ]
测试Service
下面是模拟后端返回数据的示例
1.导入HttpClientTestingModule和HttpTestingController
import { HttpClientTestingModule, HttpTestingController } from '@angular/common/http/testing';
...
let httpTestingController: HttpTestingController;
...

imports: [
...
HttpClientTestingModule]
2.获取httpTestingController
beforeEach(() => {
    ...
    httpTestingController = TestBed.get(HttpTestingController);
});
3.在afterEach中调用verify,确保没有未完成的请求
afterEach(() => {
    httpTestingController.verify();
 });
测试http返回List
首先mock一个数组当作后端返回的数据,可以判断数组长度,数据字段等。 如果HttpEventType的类型为Response,则表明响应事件的返回等于模拟HTTP请求的数据。 主要代码:
import { NO_ERRORS_SCHEMA } from '@angular/core';
import { TestBed } from '@angular/core/testing';
import { HttpEvent, HttpEventType } from '@angular/common/http';
import { HttpClientTestingModule, HttpTestingController } from '@angular/common/http/testing';
import { UserService } from './user.service';
import { _HttpClient } from '@delon/theme';
import { URL } from '../url';
describe('UserService', () => {
  let usersService: UserService;
  let httpTestingController: HttpTestingController;
  beforeEach(() => TestBed.configureTestingModule({
    imports: [HttpClientTestingModule],
    providers: [
      UserService,
      _HttpClient
    ],
    schemas: [NO_ERRORS_SCHEMA]
  }));

  afterEach(() => {
    httpTestingController.verify();
  });

  beforeEach(() => {
    usersService = TestBed.get(UserService);
    httpTestingController = TestBed.get(HttpTestingController);
  });

it('should run #getUserList()', () => {
      const mockUsers = [
        { id: 1, username: 'user1'},
        { id: 1, username: 'user2'},
      ];

      usersService.getUserList({}).subscribe((event: HttpEvent<any>) => {
        switch (event.type) {
          case HttpEventType.Response:
            expect(event.body).toEqual(mockUsers);
        }
      });

      const mockReq = httpTestingController.expectOne(URL.USER);
      expect(mockReq.cancelled).toBeFalsy();
      expect(mockReq.request.responseType).toEqual('json');
      mockReq.flush(mockUsers);
  });

  afterEach(() => {
    TestBed.resetTestingModule();
  });
});
测试Directive和Pipe
测试指令: 需要获取元素,调用 triggerEventHandler 改变元素属性:
triggerEventHandler 为 Angular DebugElement实例提供的一种方触发事件。
it('鼠标移动改变颜色', () => {
    inputEl.triggerEventHandler('mouseover', null);
    fixture.detectChanges();
    expect(inputEl.nativeElement.style.backgroundColor).toBe('blue');

    inputEl.triggerEventHandler('mouseout', null);
    fixture.detectChanges();
    expect(inputEl.nativeElement.style.backgroundColor).toBe('inherit');
  });
测试管道: 需要获取元素,调用 transform 判断返回值:
it('数值除以100', () => {
    const result = pipeInstance.transform(300);
    expect(result).toBe(3);
 });
代码覆盖率报告
在 angular.json 中添加可生成测试覆盖率报告:
"test":{
  "options":{
  "codeCoverage": true
  }
}
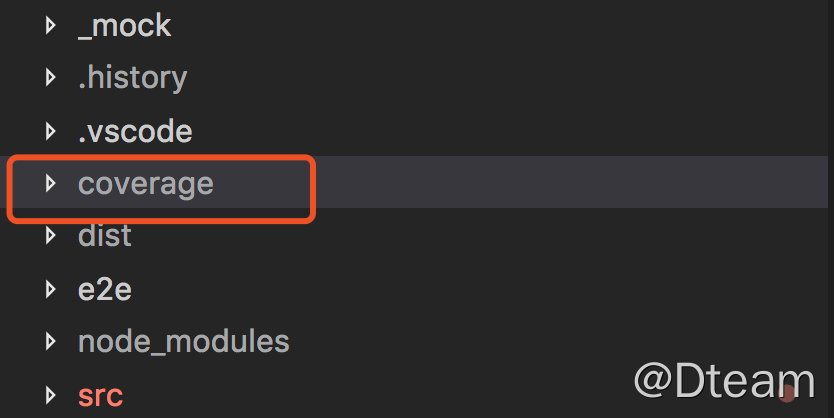
然后执行,会在根目录下生成 coverage 文件夹:
ng test --code-coverage
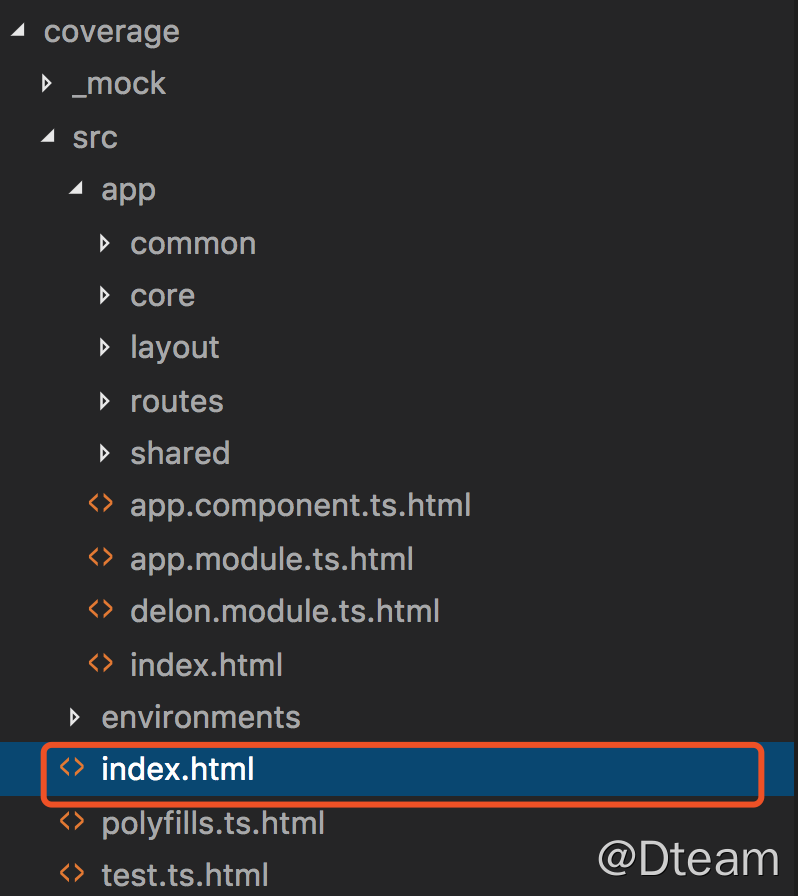
复制 index.html 目录在浏览器中打开,就可以看到测试报告了:
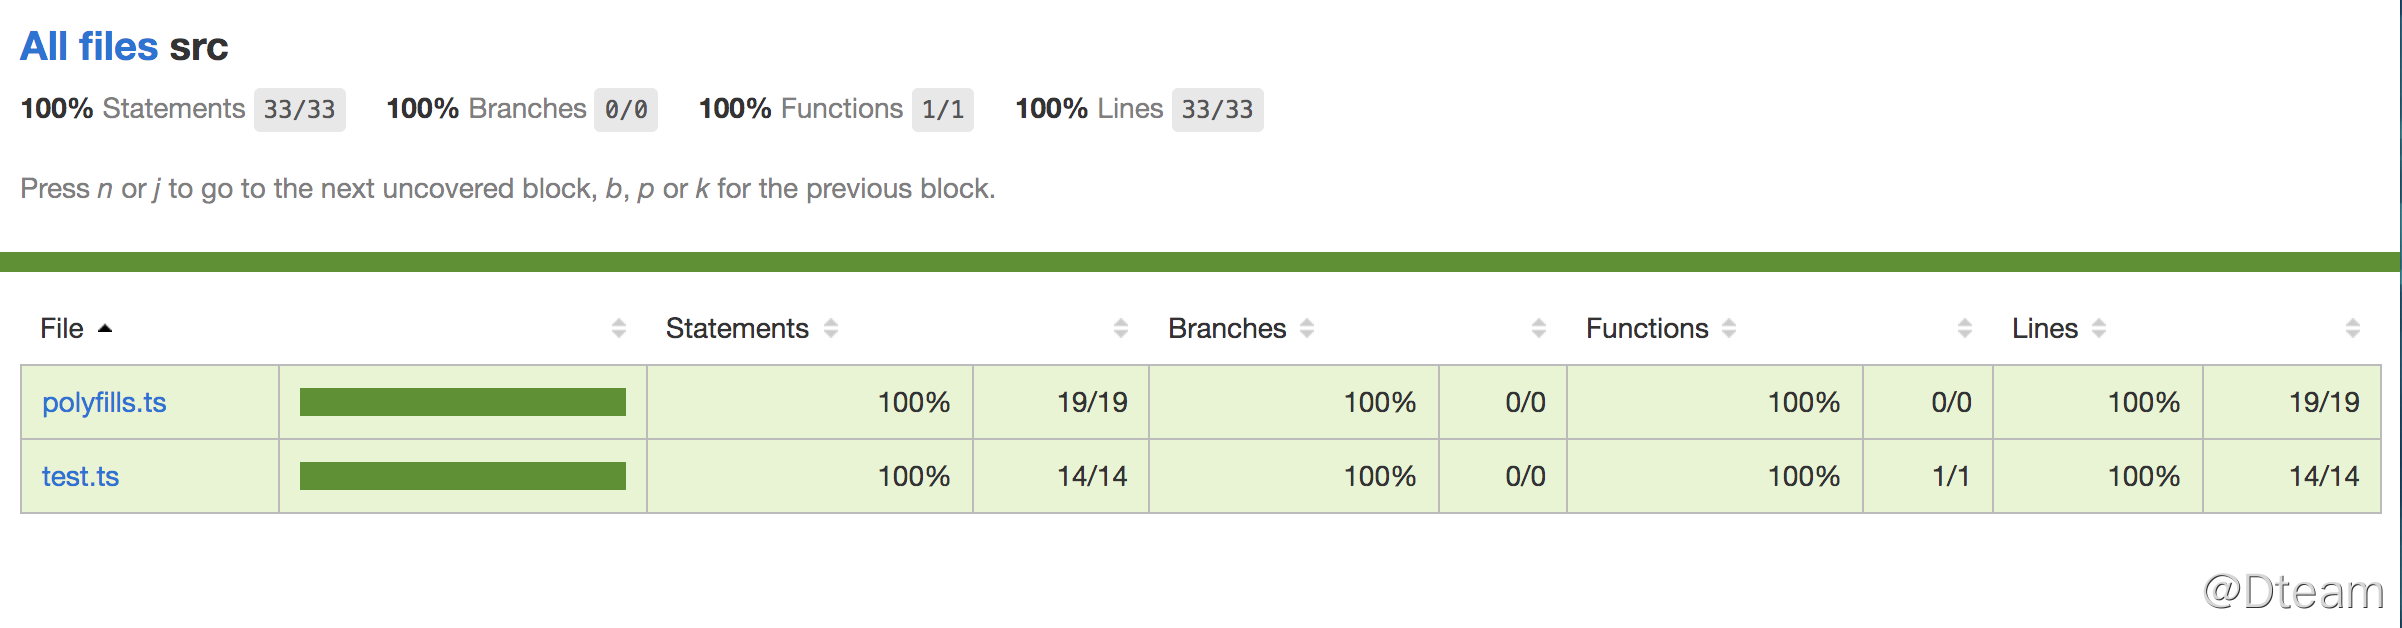
以上就是在Angular测试中经常需要用到的干货,在实际应用中可能需要组合起来测试,想知道更详细的内容,可查看Angular官网测试部分。
Recommend
About Joyk
Aggregate valuable and interesting links.
Joyk means Joy of geeK