

MapKit Tutorial: Getting Started [FREE]
source link: https://www.raywenderlich.com/7738344-mapkit-tutorial-getting-started
Go to the source link to view the article. You can view the picture content, updated content and better typesetting reading experience. If the link is broken, please click the button below to view the snapshot at that time.
Update note : Andrew Tetlaw updated this tutorial for iOS 13. Audrey Tam wrote the original.
MapKit is a powerful API available on iOS devices that makes it easy to display maps, mark locations, enhance with custom data and even draw routes or other shapes on top.
In this MapKit tutorial, you’ll make HonoluluArt , an app that zooms into a location in Honolulu and marks public artwork on a map. You’ll implement the marker’s callout detail button to launch the Maps app and open driving directions to the artwork. Then, you’ll parse a GeoJSON file from the Honolulu city data portal to extract the public artwork features and mark them on the map.
In the process, you’ll learn how to:
- Add a MapKit map to your app.
- Zoom to a particular location.
- Parse GeoJSON data to create custom map annotations.
A note from the original author,Audrey Tam : This update uses public artworks data from Honolulu, where I was born and raised. It’s no longer my hometown, but the names and places bring back memories. If you’re not lucky enough to live there, I hope you’ll enjoy imagining yourself being there!
Getting Started
To get started, download the starter project using the Download Materials button at the top or bottom of this tutorial. The project contains a GeoJSON file and some image assets, but no maps yet!
Open Main.storyboard and, from the Object library , drag a Map Kit View into the middle of the scene. Constrain the Map View to the super view (not the Safe Area), setting 0 on all edges, so it stretches throughout the Safe Area of notched devices.
Build and run. You now have a fully zoomable and panable map showing the continent of your current location using Apple Maps!

So far, so good, eh?
But you don’t want to start the map looking at the entire world, unless you’re a super-villain, cue evil laugh… You want to zoom into a particular area. And to do that, you need to get coding!
Open ViewController.swift
and add the following below the import UIKit
statement:
import MapKit
Next, you’ll need an outlet
for the MKMapView
in ViewController.swift
.
Add the following outlet code immediately before viewDidLoad()
:
@IBOutlet private var mapView: MKMapView!
Then, go to Main.storyboard and link the Map View to your new outlet:

Setting the Visible Area
Go back to ViewController.swift
, find viewDidLoad()
and add the following to the end of the method:
// Set initial location in Honolulu
let initialLocation = CLLocation(latitude: 21.282778, longitude: -157.829444)
You’ll use this to set the starting coordinates of the map view to a point in Honolulu.
When telling the map what to display, giving latitude and longitude is enough to center the map. But, you must also specify the rectangular region to display to get a correct zoom level.
Add the following private extension at the end of ViewController.swift :
private extension MKMapView {
  func centerToLocation(
    _ location: CLLocation,
    regionRadius: CLLocationDistance = 1000
  ) {
    let coordinateRegion = MKCoordinateRegion(
      center: location.coordinate,
      latitudinalMeters: regionRadius,
      longitudinalMeters: regionRadius)
    setRegion(coordinateRegion, animated: true)
  }
}
The location
argument is the center point. The region will have north-south and east-west spans based on a distance of regionRadius
, which has a default of 1000 meters, a little more than half a mile, which works well for plotting the public artwork data in the GeoJSON file.
setRegion(_:animated:)
tells MKMapView
to display the region represented by MKCoordinateRegion
. The map view automatically transitions the current view to the desired region with a neat zoom animation, with no extra code required!
Back in viewDidLoad()
, add the following line to the end of the method:
mapView.centerToLocation(initialLocation)
This calls the helper method to zoom into initialLocation
on startup.
Build and run. You’ll find yourself in the heart of Waikiki. Aloha! :]

Constraining the Camera
So far, you’ve been able to go anywhere you want on the map, but we’re only interested in the island of Oahu. You’ve also been able to pinch in to zoom the map so far that the island is only a few pixels! MapKit is capable of constraining the user to pan and zoom the map over a specified area.
Note : To zoom in the Simulator, hold Option and drag in the map view.
Once again in viewDidLoad()
, add the following lines to the end of the method:
let oahuCenter = CLLocation(latitude: 21.4765, longitude: -157.9647)
    let region = MKCoordinateRegion(
      center: oahuCenter.coordinate,
      latitudinalMeters: 50000,
      longitudinalMeters: 60000)
    mapView.setCameraBoundary(
      MKMapView.CameraBoundary(coordinateRegion: region),
      animated: true)

    let zoomRange = MKMapView.CameraZoomRange(maxCenterCoordinateDistance: 200000)
    mapView.setCameraZoomRange(zoomRange, animated: true)
Build and run. Now when you zoom out, you can’t make Oahu as small as before. You can only pan the map view to see the northern, southern, eastern and westernmost edges of the island.
MapKit uses an internal camera to determine where the point of view for the map is, how expansive the field of view is and to animate view movement. When you specify a camera boundary with a center and a region rectangle, the camera center always stays within this region.
If the user tries to pan further out of the region, the view doesn’t scroll any further. It keeps them focused on the area you want them to see. A region size of 60,000 meters wide by 50,000 meters high keeps Oahu nicely constrained within the map view.
The MapKit view camera keeps track of its distance from the view center when zooming in and out. Setting the camera zoom range maximum center distance constraint limits how far the view zooms out and how tiny the island of Oahu becomes. This is even more helpful when adding points of interest to the map, which is the next step!
Obtaining Public Art Data
The next step is to plot interesting data around the current location. But where in the world can you get such stuff?
Well, it depends on your current location. Honolulu, like many cities, has an Open Data Portal to improve public access to government data.
One convenient feature of Honolulu’s data portal is the ability to export the data set in GeoJSON format — a flavor of JSON that’s used to represent geospatial features along with their metadata. One of MapKit’s recent features makes it super-easy to use GeoJSON data in your app, as you’ll soon see.
Note : After you finish this tutorial, look around to see if a nearby city has another dataset in GeoJSON format you can use. Once you see how easy it is, you may find it interesting plotting different datasets together on the same map.
For this tutorial, you’ll use the Honolulu Public Art dataset. To keep things simple, I’ve already exported this data from the portal and included it in the starter project, nicely formatted for readability, of course. It’s the least I could do.
To get a feeling for the items in this dataset, open PublicArt.geojson in the Xcode editor. At the top level you’ll see:
{
  "type": "FeatureCollection",
  "features": [ ... ]
}
The value for the key features
is an array of GeoJSON objects of the type Feature
. Each one of these objects contains some standard keys, but also a properties
dictionary with some custom fields created by the data portal. The geometry
key is where you’ll find the coordinates of the feature.
Have a look at the first one:
{
  "type":"Feature",
  "properties":{
    "location":"Lester McCoy Pavilion",
    "latitude":"21.290824",
    "description":"...",
    "thumb":null,
    "credit":"Funded by the Works Progress Administration",
    "objectid":"1930.01.01",
    "creator":"Robert Lee Eskridge",
    "longitude":"-157.85131",
    "imagefile":"http://....JPG",
    "date":"1935",
    "discipline":"Mural",
    "title":"The Makahiki Festival - The Makai Mural",
    "access":"Limited"
  },
  "geometry":{
    "type":"Point",
    "coordinates":[-157.85131,21.290824]
  }
}
GeoJSON Properties
Try not to get too worried about the GeoJSON data format. As you’ll soon see, importing it is mostly automatic! The essential parts are the properties dictionary and the coordinates.
For this tutorial, you’ll only use a few properties: The artwork’s location name, discipline, title, latitude and longitude:
- Location name : Lester McCoy Pavilion.
- Discipline : Mural.
- Title : The Makahiki Festival – The Makai Mural.
- Latitude : 21.290824.
- Longitude : -157.85131.
It’s a widely supported format for all things geospatial. Some useful tools include geojson.io , a useful site for testing and editing GeoJSON data, and GitHub , which will automatically render any .geojson file in a repository on a map.
Later in this tutorial, you’ll use the whole dataset. But first, to jump straight into the MapKit fun, you’ll plot one of the artworks on the map.
Showing Artwork on the Map
In PublicArt.geojson , press Command-L and jump to line 1354 . It’s a bronze statue of King David Kalakaua in Waikiki Gateway Park.
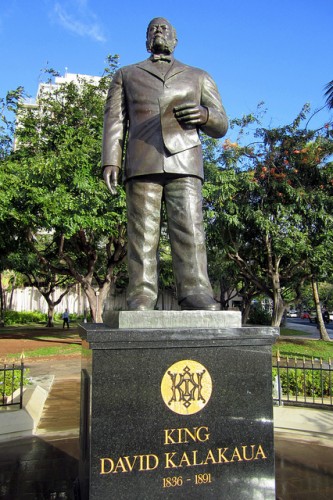
Photo of King David Kalakaua statue, by Wally Gobetz
The properties for this item are:
- Location name : Waikiki Gateway Park
- Discipline : Sculpture
- Title : King David Kalakaua
- Latitude : 21.283921
- Longitude : -157.831661
To show this on the map view, you must create a map annotation . Map annotations are small pieces of information tied to a particular location. Apple’s Maps app usually represents them as little pins.
To create your annotations, you create a class that conforms to MKAnnotation
, add the annotation to the map and tell the map how the annotation should be displayed.
The Artwork Class
First, right-click the HonoluluArt folder in the Project navigator and pick New File… . Choose Swift File and name your new file Artwork.swift .
Open Artwork.swift
in the editor and add the following below import Foundation
:
import MapKit

class Artwork: NSObject, MKAnnotation {
  let title: String?
  let locationName: String?
  let discipline: String?
  let coordinate: CLLocationCoordinate2D

  init(
    title: String?,
    locationName: String?,
    discipline: String?,
    coordinate: CLLocationCoordinate2D
  ) {
    self.title = title
    self.locationName = locationName
    self.discipline = discipline
    self.coordinate = coordinate

    super.init()
  }

  var subtitle: String? {
    return locationName
  }
}
To conform to MKAnnotation
, Artwork
must subclass NSObject
, because MKAnnotation
is an NSObjectProtocol
.
MKAnnotation
requires the coordinate
property. If you want your annotation view to display a title and subtitle when the user taps a marker, your class also needs properties named title
and subtitle
.
It’s perfectly sensible for the Artwork
class to have stored properties named title
and coordinate
, but none of the PublicArt.geojson
properties naturally map to the idea of subtitle
. To conform to MKAnnotation
, you make subtitle
a computed property that returns locationName
.
The MKAnnotation
protocol properties title
and subtitle
are defined as optional strings, but you may wonder why you’ve used String?
as the type for the locationName
and discipline
properties. Since these properties are set from an external data source, the PublicArt.geojson
file, you can’t guarantee they’ll always exist. Better to be safe.
OK, so you’ll use the title
, locationName
and coordinate
properties for the MKAnnotation
object, but what’s the discipline
property for? You’ll find out later in this tutorial! ;]
Adding an Annotation
Next, you’ll add an Artwork
object to the map view for every artwork you want to plot. For now, you’re adding only one artwork, so switch to ViewController.swift
and add the following lines to the end of viewDidLoad()
:
// Show artwork on map
let artwork = Artwork(
  title: "King David Kalakaua",
  locationName: "Waikiki Gateway Park",
  discipline: "Sculpture",
  coordinate: CLLocationCoordinate2D(latitude: 21.283921, longitude: -157.831661))
mapView.addAnnotation(artwork)
Here, you create a new Artwork
object and add it as an annotation to the map view. MKMapView
also provides addAnnotations(_:)
, which you’ll use later in this tutorial when you have an array of annotations to add to the map view.
Build and run. Now you can see that King David Kalakaua’s statue is at the gateway to Waikiki!

The default annotation marker view shows the location with the title below the marker. Select the marker. It grows and now shows the subtitle, as well:

Well, that’s OK, but you’ve seen that tapping a marker in other apps shows a callout: a little, square speech bubble. For that, you must configure the annotation view.
Configuring the Annotation View
One way to configure the annotation view is to implement the map view’s mapView(_:viewFor:)
delegate method. Your job in this delegate method is to return an instance of MKAnnotationView
to present as a visual indicator of the annotation.
In this case, ViewController
is the delegate for the map view. To avoid clutter and improve readability, you’ll create an extension of ViewController
.
Add the following at the bottom of ViewController.swift :
extension ViewController: MKMapViewDelegate {
  // 1
  func mapView(
    _ mapView: MKMapView,
    viewFor annotation: MKAnnotation
  ) -> MKAnnotationView? {
    // 2
    guard let annotation = annotation as? Artwork else {
      return nil
    }
    // 3
    let identifier = "artwork"
    var view: MKMarkerAnnotationView
    // 4
    if let dequeuedView = mapView.dequeueReusableAnnotationView(
      withIdentifier: identifier) as? MKMarkerAnnotationView {
      dequeuedView.annotation = annotation
      view = dequeuedView
    } else {
      // 5
      view = MKMarkerAnnotationView(
        annotation: annotation,
        reuseIdentifier: identifier)
      view.canShowCallout = true
      view.calloutOffset = CGPoint(x: -5, y: 5)
      view.rightCalloutAccessoryView = UIButton(type: .detailDisclosure)
    }
    return view
  }
}
Here’s what you’re doing:
-
mapView(_:viewFor:)gets called for every annotation you add to the map — liketableView(_:cellForRowAt:)when working with table views — to return the view for each annotation. -
Your app might use other annotations, like user location, so check that this annotation is an
Artworkobject. If it isn’t, returnnilto let the map view use its default annotation view. -
You create each view as an
MKMarkerAnnotationView. Later in this tutorial, you’ll createMKAnnotationViewobjects to display images instead of markers. -
Also similarly to
tableView(_:cellForRowAt:), a map view reuses annotation views that are no longer visible. So you check to see if a reusable annotation view is available before creating a new one. When you dequeue a reusable annotation, you give it an identifier.If you have multiple styles of annotations, be sure to have a unique identifier for each one. Again, it’s the same idea behind a cell identifier in
tableView(_:cellForRowAt:). -
Here you create a new
MKMarkerAnnotationViewobject if an annotation view could not be dequeued. It uses the title and subtitle properties of yourArtworkclass to determine what to show in the callout.
The Map View Delegate
All that’s left is setting ViewController
as the delegate of the map view. You can do this in Main.storyboard
, but it’s more visible if you do it in code. In ViewController.swift
, add this line to viewDidLoad()
, before the statement that creates artwork
:
mapView.delegate = self
And that’s it! Build and run. Tap the marker to pop up the callout bubble:

mapView(_:viewFor:)
configures the callout to include a detail disclosure
info button on the right side, but tapping that button doesn’t do anything yet. You could implement it to show an alert with more info or to open a detail view controller.
Here’s a neat third option. When the user taps the info button, your app launches the Maps app, complete with driving, walking and transit directions to get from the simulated user location to the artwork!
Launching the Maps App
To provide this great user experience, open Artwork.swift
and add this import
statement, below the other two:
import Contacts
This adds the Contacts
framework, which contains dictionary key constants such as CNPostalAddressStreetKey
, for when you need to set the address, city or state fields of a location.
To tell the Maps app where to go, you must pass it an MKMapItem
. This class describes a point of interest on the map. To create one, you must first create an MKPlacemark
to describe the point.
Next, add the following property to the class:
var mapItem: MKMapItem? {
  guard let location = locationName else {
    return nil
  }

  let addressDict = [CNPostalAddressStreetKey: location]
  let placemark = MKPlacemark(
    coordinate: coordinate,
    addressDictionary: addressDict)
  let mapItem = MKMapItem(placemark: placemark)
  mapItem.name = title
  return mapItem
}
You use your existing location information as the address to create an MKPlacemark
. You then create and configure the MKMapItem
you need for communicating with Maps.
Handling the Callout
Next, you have to tell MapKit what to do when the user taps the callout button. Open ViewController.swift
, and add this method to the MKMapViewDelegate
extension:
func mapView(
  _ mapView: MKMapView,
  annotationView view: MKAnnotationView,
  calloutAccessoryControlTapped control: UIControl
) {
  guard let artwork = view.annotation as? Artwork else {
    return
  }

  let launchOptions = [
    MKLaunchOptionsDirectionsModeKey: MKLaunchOptionsDirectionsModeDriving
  ]
  artwork.mapItem?.openInMaps(launchOptions: launchOptions)
}
When the user taps a map annotation marker, the callout shows an info button. If the user taps this info button, iOS calls mapView(_:annotationView:calloutAccessoryControlTapped:)
.
In this method, you grab the Artwork
object this tap refers to, then launch Maps by creating an associated MKMapItem
and calling openInMaps(launchOptions:)
on the map item.
Notice you’re passing a dictionary to this method. This allows you to specify a few different options. Here, the DirectionsModeKey
is set to Driving
.
This causes Maps to show driving directions from the user’s current location to this location. Neat!
Note
: Explore the
MKMapItem
documentation
to see other launch option dictionary keys, and the openMaps(with:launchOptions:)
method that lets you pass an array of MKMapItem
objects.
Setting Your Simulated Location
Before you build and run, you should move to Honolulu. Well, just set your simulated location to Honolulu.:]
In Xcode, go to Product ► Scheme ► Edit Scheme… , select Run from the left menu, then select the Options tab. Check Allow Location Simulation and select Honolulu, HI, USA as the Default Location . Then click the Close button:

Build and run. You’ll see the map zoom in on Waikiki, as before. Tap the marker, then tap the info button in the callout and watch it launch Maps to show the statue’s location and driving directions to it:

This calls for a celebration with your favorite tropical drink!
Note : The first time you open Maps, it prompts you to allow Maps to access your location — tap Allow While Using App — and displays a Safety Warning.
Decoding GeoJSON with MKGeoJSONDecoder
Now that you know how to show one artwork on the map and how to launch Maps from the marker’s callout info button, it’s time to parse the dataset into an array of Artwork
objects. Then you’ll add them as annotations to the map view to display all artworks located in the current map region.
MapKit has MKGeoJSONDecoder
, a super-useful feature. It can decode GeoJSON data and return an array of objects that implement the MKGeoJSONObject
protocol. MapKit also provides one concrete class that implements this protocol: MKGeoJSONFeature
, which is all you’ll need for this tutorial.
Add this failable initializer to Artwork.swift , below the initializer:
init?(feature: MKGeoJSONFeature) {
  // 1
  guard
    let point = feature.geometry.first as? MKPointAnnotation,
    let propertiesData = feature.properties,
    let json = try? JSONSerialization.jsonObject(with: propertiesData),
    let properties = json as? [String: Any]
    else {
      return nil
  }

  // 3
  title = properties["title"] as? String
  locationName = properties["location"] as? String
  discipline = properties["discipline"] as? String
  coordinate = point.coordinate
  super.init()
}
Here’s what you’re doing:
-
MKGeoJSONFeaturehas ageometryproperty representing one or more shapes associated with the feature. All the features in PublicArt.geojson are point locations and MapKit helpfully creates aMKPointAnnotationfor you. This is where you’ll find the coordinate as aCLLocationCoordinate2D. -
Next, you read the feature’s
properties, which is of typeData?and contains a serialized JSON dictionary. You useJSONSerializationto decode the data into a Swift dictionary. -
Now that the properties are decoded, you can set the appropriate
Artworkproperties from the dictionary values.
Making Annotations
To use this initializer, open ViewController.swift
and add the following property, an array to hold the Artwork
objects from the GeoJSON file, to the class:
private var artworks: [Artwork] = []
Next, add the following helper method to the class:
private func loadInitialData() {
  // 1
  guard
    let fileName = Bundle.main.url(forResource: "PublicArt", withExtension: "geojson"),
    let artworkData = try? Data(contentsOf: fileName)
    else {
      return
  }

  do {
    // 2
    let features = try MKGeoJSONDecoder()
      .decode(artworkData)
      .compactMap { $0 as? MKGeoJSONFeature }
    // 3
    let validWorks = features.compactMap(Artwork.init)
    // 4
    artworks.append(contentsOf: validWorks)
  } catch {
    // 5
    print("Unexpected error: \(error).")
  }
}
Here’s what you’re doing in this code:
-
To begin, you read PublicArt.geojson
into a
Dataobject. -
You use
MKGeoJSONDecoderto obtain an array of GeoJSON objects but only keep instances ofMKGeoJSONFeatureusingcompactMap. -
You transform the
MKGeoJSONFeatureobjects intoArtworkobjects using its failable initializer you added andcompactMapagain. -
You append the resulting
validWorksto theartworksarray. -
Because
MKGeoJSONDecoder‘sdecode(_ :)method canthrowan error, you catch it and print the error to the Xcode console.
Plotting the Artwork
You now have an array of all the public artwork in the dataset, which you’ll add to the map.
Still in ViewController.swift
, add the following code at the end of viewDidLoad()
:
loadInitialData()
mapView.addAnnotations(artworks)
Note
: Be sure to use the plural
addAnnotations
, not the singular addAnnotation
!
Delete the lines that create the single King David Kalakaua
map annotation. You don’t need them now that loadInitialData()
creates the artworks
array.
Build and run. Check out all the markers!

Move the map around to see other markers appear. Tap a marker to open its callout bubble, then tap its info button to launch the Maps. Yes, everything you did with the King Kalakaua statue works with all the new artwork as well!
If you’re worried about adding annotations to the map when they’re not visible, don’t be! Apple recommends adding all the annotations right away , whether or not they’re visible in the map region. When you move the map, it automatically displays the visible annotations.
And that’s it! You’ve built an app that parses a GeoJSON file into an array of artworks, then displays them as annotation markers, with a callout info button that launches Maps. Celebrate with a hula dance around your desk! :]
But wait, there are still a few bits of bling to add.
Customizing Annotations
Remember the discipline
property in the Artwork
class? Its values are things like Sculpture
and Mural
. In fact, the most numerous disciplines are Sculpture, Plaque, Mural and Monument.
It’s easy to color-code the markers, so the most numerous disciplines each have their own colored marker, and all the other disciples have green markers.
Markers with Color-Coding and Text
In Artwork.swift , add this property:
var markerTintColor: UIColor  {
  switch discipline {
  case "Monument":
    return .red
  case "Mural":
    return .cyan
  case "Plaque":
    return .blue
  case "Sculpture":
    return .purple
  default:
    return .green
  }
}
Now, you could
keep adding code to mapView(_:viewFor:)
, but that would clutter the view controller. There’s a more elegant way, similar to what you can do for table view cells. Create a new Swift file named ArtworkViews.swift
and add this code, below the import
statement:
import MapKit

class ArtworkMarkerView: MKMarkerAnnotationView {
  override var annotation: MKAnnotation? {
    willSet {
      // 1
      guard let artwork = newValue as? Artwork else {
        return
      }
      canShowCallout = true
      calloutOffset = CGPoint(x: -5, y: 5)
      rightCalloutAccessoryView = UIButton(type: .detailDisclosure)

      // 2
      markerTintColor = artwork.markerTintColor
      if let letter = artwork.discipline?.first {
        glyphText = String(letter)
      }
    }
  }
}
Soon, you’ll register this class as a reusable annotation view for Artwork
annotations. The system passes it an annotation as newValue
, so here’s what you’re doing:
mapView(_:viewFor:)
Color My World
Now switch to ViewController.swift
, and add this line to viewDidLoad()
, before calling loadInitialData()
:
mapView.register(
  ArtworkMarkerView.self,
  forAnnotationViewWithReuseIdentifier:
    MKMapViewDefaultAnnotationViewReuseIdentifier)
Here, you register your new class with the map view’s default reuse identifier. For an app with more annotation types, you would register classes with custom identifiers.
Scroll down to the extension and delete mapView(_:viewFor:)
.
Build and run. Then move the map around to see the different colored and labeled markers:

In this section of the map, there’s much more art than the map view shows. It reduces clutter by clustering markers that are too close together. In the next section, you’ll see all the annotations.
But first, set the glyph’s image instead of its text. Add the following property to Artwork.swift :
var image: UIImage {
  guard let name = discipline else {
    return #imageLiteral(resourceName: "Flag")
  }

  switch name {
  case "Monument":
    return #imageLiteral(resourceName: "Monument")
  case "Sculpture":
    return #imageLiteral(resourceName: "Sculpture")
  case "Plaque":
    return #imageLiteral(resourceName: "Plaque")
  case "Mural":
    return #imageLiteral(resourceName: "Mural")
  default:
    return #imageLiteral(resourceName: "Flag")
  }
}
These images from icons8.com are already in Assets.xcassets .
Then, in ArtworkMarkerView.swift
, replace the glyphText
lines with:
glyphImage = artwork.image
Build and run to see different colored markers with images:

And that’s a segue to another customization option and your next task: Replace the markers with images!
Annotations with Images
In ArtworkViews.swift , add the following class:
class ArtworkView: MKAnnotationView {
  override var annotation: MKAnnotation? {
    willSet {
      guard let artwork = newValue as? Artwork else {
        return
      }

      canShowCallout = true
      calloutOffset = CGPoint(x: -5, y: 5)
      rightCalloutAccessoryView = UIButton(type: .detailDisclosure)

      image = artwork.image
    }
  }
}
Now, you’re using a plain old MKAnnotationView
instead of an MKMarkerAnnotationView
, and the view has an image
property.
Back in ViewController.swift
, in viewDidLoad()
, register this new class, instead of ArtworkMarkerView
:
mapView.register(
  ArtworkView.self,
  forAnnotationViewWithReuseIdentifier:
    MKMapViewDefaultAnnotationViewReuseIdentifier)
Build and run to see all the icons:

Custom Callout Accessory Views
The right callout accessory is an info button, but tapping it opens Maps. So, now you’ll change the button to show the Maps icon.
Find this line in ArtworkView
:
rightCalloutAccessoryView = UIButton(type: .detailDisclosure)
Replace this line with the following code:
let mapsButton = UIButton(frame: CGRect(
  origin: CGPoint.zero,
  size: CGSize(width: 48, height: 48)))
mapsButton.setBackgroundImage(#imageLiteral(resourceName: "Map"), for: .normal)
rightCalloutAccessoryView = mapsButton
Here, you create a UIButton
, set its background image to a map icon, also from icons8.com
in Assets.xcassets
, then set the view’s right callout accessory to this button.
Build and run. Then tap a view to see the new Maps button:

The final customization is the detail callout accessory. It’s a single line, which is enough for short location text, but some of the longer location values are truncated like this one:

Now you need a multi-line label. Add the following code to ArtworkView
‘s willSet
:
let detailLabel = UILabel()
detailLabel.numberOfLines = 0
detailLabel.font = detailLabel.font.withSize(12)
detailLabel.text = artwork.subtitle
detailCalloutAccessoryView = detailLabel
Build and run. Then tap a view to see the long location text in full.
Where To Go From Here?
You can download the completed version of the project using the Download Materials button at the top or bottom of this tutorial.
Now you know the basics of using MapKit , but there’s more you can add: map display customizations, geocoding, geofencing, custom map overlays, and more. Apple’s MapKit documentation and Location and Maps Programming Guide are great places to find more information.
Also look at WWDC 2019 Session 236: What’s New in MapKit and MapKit JS , to find more cool features added in iOS 13.
There’s also have a terrific video course, MapKit and Core Location , that covers many awesome topics.
Core Location Tutorial for iOS: Tracking Visited Locations explains how to track your location and display it using MapKit.
If you have any questions as you use MapKit in your apps, or tips for other MapKit users, please join in the forum discussion below!
Recommend
About Joyk
Aggregate valuable and interesting links.
Joyk means Joy of geeK