

Kotlin Coroutines Tutorial for Android : Advanced [FREE]
source link: https://www.tuicool.com/articles/jInI3uU
Go to the source link to view the article. You can view the picture content, updated content and better typesetting reading experience. If the link is broken, please click the button below to view the snapshot at that time.
In this Advanced Kotlin Coroutines Tutorial for Android, you’ll gain a deeper understanding of Kotlin Coroutines by replacing common asynchronous programming methods, such as creating new Thread
s and using callbacks, in an Android app.
You’ll work on a modified version of the starter project RWDC2018 from the Android Background Processing video course developed by Joe Howard. For more in depth coverage of Kotlin Coroutines see Kotlin Coroutines by Tutorials by Filip Babić and Nishant Srivastava.
Note : This tutorial assumes you have experience with Android and Kotlin. But if that’s not the case, check out the Beginning Android Development with Kotlin series and other Kotlin and Android tutorials RayWenderlich.com has to offer.
What Are Coroutines?
By now, you’ve read a few articles and blog posts on Kotlin Coroutines. You’re thinking, “not another definition of coroutines!” Well, even though this isn’t a Getting Started post, it’s still best to understand the history of a topic before deciding on a definition.
Besides, you might learn something new. :]
Note : If you’re already familiar with coroutines in general and have read the official documentation, you might find this explanation redundant. If that’s the case, skip this section and jump over to code immediately.
The Origins
Coroutines are not a new concept. In fact, Melvin Conway, a mathematician, physicist, and computer scientist coined the term coroutines in his paper, “Design of a Separable Transition-Diagram Compiler” in 1958. His paper proposed to “organize a compiler as a set of coroutines, which gives the possibility of using separate passes in debugging and then running a single pass compiler in production.”
Coroutines were first implemented as methods in assembly language. They were then implemented in high-level languages like C, C++, C#, Clojure, Java, JavaScript, Python, Ruby, Perl, Scala and, of course, Kotlin.
So, what are coroutines?
Nowadays
The Kotlin Evolution and Enhancement Process, or KEEP, GitHub repository provides a more complete definition. It states that a coroutine is an “instance of suspendable computation.” This is conceptually similar to a thread because it uses a block of code to run and has a similar lifecycle.
The KEEP further states that a coroutine is “created and started, but it is not bound to any particular thread. It may suspend its execution in one thread and resume in another one. Moreover, like a future or a promise , it may complete with some result (which is either a value or an exception).”
In other words, coroutines mitigate the complications of working with asynchronous programming. The code you write is sequential. That makes it easier to understand than callbacks and various observable constructs.
Threads are expensive to create and require resources to maintain. That means there are only so many threads you can create in a system. Opposite of that, coroutines manage their own thread pools. Some dispatchers even share pools. A suspended coroutine doesn’t block any thread. It waits for the next available thread to resume it.
By decoupling work and threads, it’s possible to create and execute thousands of coroutines. This is within a finite thread pool and without any overhead.
In short, a coroutine is a code component with a lifecycle that is not bound to a single thread. Any thread in the pool can execute, suspend and resume the coroutine.
Getting Started
This tutorial is a bit unconventional when it comes to the code you’ll be working on. First, you’ll experiment with a few concepts and key components of coroutines in Kotlin Playground . Then you’ll switch to an Android app project where you’ll add a lot of advanced coroutine usage.
Key Components
These are the most commonly used Kotlin Coroutine components when implementing coroutines in an Andriod app.
Suspendable Functions
Coroutines work on the principle of suspendable functions . As you already learned, coroutines can pause and resume at any time between any number of threads. This process is called code suspension .
It allows coroutines to be lightweight and fast because they don’t really allocate any overhead, such as threads. Instead, they use predefined resources and smart resource management.
The system uses continuations to know when and where to resume a function.
Continuations
When a function suspends there is information, or state, of the suspended coroutine. Every time a coroutine suspends, it stores its state in a continuation. When the coroutine resumes, the continuation contains enough information to continue the rest of the coroutine’s execution seamlessly.
The Continuation
interface consists of a CoroutineContext
and a completion callback used to report the success or failure of the coroutine. In the snippet below, an existing asynchronous API service that uses callbacks is wrapped into a suspendable function, and it propagates the result or error using a Continuation
. It’s just an example function, but the idea is there.
suspend fun <Data, Result> suspendAsyncApi(data: Data): Result =
  suspendCancellableCoroutine { continuation ->
    apiService.doAsyncStuff<Data, Result>(data,
        { result -> continuation.resume(result) }, // resume with a result
        { error -> continuation.resumeWithException(error) } // resume with an error
    )
  }
You can see how, by abstracting the function return value, with a coroutine and Continuation
, you can return a value, without actually returning it immediately. You wrap the asynchronous API, which works with callbacks, into a suspendable function which, when called, will seem like sequential code. If you called this function from within another coroutine, it would look similar to this:
val username = suspendAsyncApi<String, String>("userId") // get the username for a given user id
This is not a real API, but you could essentially write your own API, which works similar to this. The important part is how coroutines and continuations bridge asynchronous and synchronous worlds while keeping the syntax clear.
Coroutine Context
Coroutine context is a persistent set of data about the coroutine. It’s contained within the Continuation
, making it an immutable collection of thread-local variables
and program state associated with the coroutine.
Since coroutines are lightweight, it’s not a limitation that the coroutine context is immutable. If the coroutine context needs to change, you can simply launch a new coroutine, with a mutated context.
Coroutine Builders
To start and run new coroutines, you have to use a Coroutine Builder . They take some code and wrap it in a coroutine, passing it to the system for execution. This makes them the bread and butter of coroutines.
The main builder for coroutines is launch()
. It creates a new coroutine and launches it instantly by default. It builds and launches a coroutine in the context of some CoroutineScope
:
GlobalScope.launch { // CoroutineScope
  // coroutine body
}
Once you get ahold of a CoroutineScope
, you can use launch()
on it, to start a coroutine. You can use coroutine builders in a normal non-suspending function, or other suspendable functions, starting nested coroutines.
Concurrent Execution
Another coroutine builder is async()
. It’s special because you can use it to return a value from a coroutine, allowing for that allows concurrent execution. You would use async()
from any coroutine, like so:
GlobalScope.launch { // CoroutineScope
  val someValue = async { getValue() } // value computed in a coroutine
}
However, you can’t use the value just yet. async()
returns a Deferred
which is a non-blocking cancellable future. To obtain the result you have to call await()
. Once you start awaiting, you suspend the wrapping coroutine, until you get the computed value.
Blocking Builder
There’s another builder you can use for coroutines, which is a bit unconventional. runBlocking()
forces coroutines to be blocking calls.
Note : runBlocking is a builder that blocks the thread until the execution completes to avoid JVM shutdown in special situations like main functions or tests. You should avoid using it in regular Kotlin coroutine code.
To explain how to start and execute Kotlin coroutines, it’s best to take a look at some live snippets of code:
import kotlinx.coroutines.*
import java.lang.Thread

fun main() {
    GlobalScope.launch {  // launch new coroutine in background and continue
        delay(1000L) // non-blocking delay for 1 second (default time unit is ms)
        println("World!") // print after delay
        val sum1 = async { // non blocking sum1
       	    delay(100L)
            2 + 2
        }
        val sum2 = async { // non blocking sum2
            delay(500L)
            3 + 3
        }
        println("waiting concurrent sums")
        val total = sum1.await() + sum2.await() // execution stops until both sums are calculated
        println("Total is: $total")
    }
    println("Hello,")     // main thread continues while coroutine executes
    Thread.sleep(2000L)   // block main thread for 2 seconds to keep JVM alive
}
Run the Coroutine Builder Example in a Kotlin Playground.
The snippet above launches a Kotlin coroutine which uses delay()
to suspend the function for one second. Since Kotlin coroutines don’t block any threads, the code proceeds to the second println()
statement and prints Hello,
.
Next, the code sleeps the main
thread so the program doesn’t finish before the coroutine completes its execution. The coroutine runs its second line and prints World!
.
It then concurrently builds and starts two async coroutines. Finally, when both concurrent operations are complete, it prints the total.
This is a simple but effective way to learn about Kotlin coroutines and the idea behind them.
Take a look at the return type of launch()
. It returns a Job
which represents the piece of computation that you wrapped in a coroutine. You can nest jobs and create a child-parent hierarchy.
You’ll see how to use this to cancel coroutines in a later snippet.
One of the things you used above is the GlobalScope
instance for the coroutine scope. Let’s see what scopes are and how you should approach them.
CoroutineScope
CoroutineScope
s confine new coroutines by providing a lifecycle-bound component that binds to a coroutine. Every coroutine builder is an extension function defined on the CoroutineScope
type. launch()
is an example of a coroutine builder.
You already used GlobalScope
. It’s useful for top-level coroutines that operate on the entire app lifetime and aren’t bound to any lifecycle. Typically, you’d use CoroutineScope
over GlobalScope
in an Android app to control when lifecycle events occur.
In an Android app, you implement CoroutineScope
s on components with well-defined lifecycles. These components include Activity
, Fragment
and ViewModel
.
Calling launch()
on CoroutineScope
s provides a Job
that encapsulates a block of code. Once the scope cancels, all the Kotlin coroutines within clear up their resources and cancel, as well.
Take the following snippet of code:
import kotlinx.coroutines.*

fun main() = runBlocking { // this: CoroutineScope
    launch {
        delay(200L)
        println("Task from runBlocking")
    }

    coroutineScope { // Creates a new coroutine scope
        val job = launch {
            println("Task from nested launch, this is printed")
            delay(500L)
            println("Task from nested launch, this won't be printed")
        }

        delay(100L)
        println("Task from first coroutine scope") // Printed before initial launch
        job.cancel() // This cancels nested launch's execution
    }

    println("Coroutine scope is over") // This is not printed until nested launch completes/is cancelled
}
Run CoroutineScope Example in a Kotlin Playground. . Examining the snippet above, you’ll see a few things.
First, you force the coroutines to be blocking, so you don’t have to sleep the program as you did before. Then you launch a new coroutine which has an initial delay. After that, you use coroutineScope()
to create a new scope. You then launch a coroutine within it saving the returned Job
.
Because you delay the initial launch()
, it doesn’t run, until the coroutineScope()
executes fully. However, within the coroutineScope()
, you store and delay the Job
and the nested coroutine. Since you cancel it after it delays, it will only print the first statement, ultimately cancelling before the second print statement. And as the coroutineScope()
finishes, the initial launch()
finishes its delay, and it can proceed with execution.
Finally, once the scope finishes, the runBlocking()
can finish as well. This ends the program. It’s important to understand this flow of execution, to build stable coroutines, without race conditions, or hanging resources.
Job
In the previous section you saw how to cancel the execution of a coroutine. You should understand that a Job is a cancellable component with a lifecycle.
Jobs are typically created by calling launch()
. You can also create them using a constructor – Job()
. They can live within the hierarchy of other jobs either as the parent or a child. If you cancel a parent Job
then you also cancel all its children.
If a child Job
fails, or cancels, then its parent and parent hierarchy will cancel, as well. The exception the hierarchy receives is, of course, a CancellationException
.
Note
: There is a special type of a Job
which doesn’t cancel if one of its children fail – the SupervisorJob
. You can check it out at the official documentation
.
So, the failure of a child will, by default, cancel its parent and any other children in the hierarchy. Sometimes you need to wait until a coroutine execution is effectively canceled. In that case, you can call job.cancelAndJoin()
instead of job.cancel()
.
import kotlinx.coroutines.*

fun main() = runBlocking {
    val startTime = System.currentTimeMillis()
    val job = launch(Dispatchers.Default) {
        var nextPrintTime = startTime
        var i = 0
        while (isActive) { // cancelable computation loop
            // print a message twice a second
            if (System.currentTimeMillis() >= nextPrintTime) {
                println("I'm sleeping ${i++} ...")
                nextPrintTime += 500L
            }
        }
    }
    delay(1300L) // delay a bit
    println("main: I'm tired of waiting!")
    job.cancelAndJoin() // cancels the job and waits for its completion
    println("main: Now I can quit.")
}
Run the Cancelable CoroutineScope Example in a Kotlin Playground.
The output for the program will be a few prints from the while
loop, following with the cancel and finally the main()
finishing.
There are benefits to being able to cancel a coroutine in an Android app. For example, say an app goes into the background and an Activity
stops. In that case, you should cancel any long-running API calls, to clean up resources. This will help you avoid possible memory leaks or unwanted behavior.
You can cancel a Job, along with any children, from an Activity
event like onStop()
. And it’s even easier if you do it through the use of CoroutineScope
, but you’ll do that later.
CoroutineDispatchers
Dispatchers determine what thread or thread pool the coroutine uses for execution. The dispatcher can confine a coroutine to a specific thread. It can also dispatch it to a thread pool. Less commonly, it can allow a coroutine to run unconfined, without a specific threading rule, which can be unpredictable.
Here are some common dispatchers:
Dispatchers.Main : This dispatcher confines coroutines to the main thread for UI-driven programs, like Swing, JavaFX, or Android apps. It’s important to note that this dispatcher doesn’t work without adding an environment-specific Main dispatcher dependency in Gradle or Maven.
Use Dispatchers.Main.immediate for optimum UI performance on updates.
Dispatchers.Default : This is the default dispatcher used by standard builders. It’s backed by a shared pool of JVM threads. Use this dispatcher for CPU intensive computations.
Dispatchers.IO : Use this dispatcher for I/O-intensive blocking tasks that uses a shared pool of threads.
Dispatchers.Unconfined
: This dispatcher doesn’t confine coroutines to any specific thread. The couroutine starts the execution in the inherited CoroutineDispatcher
that called it. But after a suspension ends, it may resume in any other thread.
This lack of confinement may lead to a coroutine destined for background execution to run on the main thread, so use it sparingly.
import kotlinx.coroutines.*

fun main() = runBlocking<Unit> {
    launch { //context of the parent, main runBlocking coroutine
        println("main runBlocking: I'm working in thread ${Thread.currentThread().name}")
    }
    launch(Dispatchers.Unconfined) { //not confined -- will inmediatly run in main thread but not after suspension
        println("Unconfined: I'm working in thread ${Thread.currentThread().name}")
        delay(100L) // delays (suspends) execution 100 ms
        println("Unconfined: I'm working in thread ${Thread.currentThread().name}")
    }
    launch(Dispatchers.Default) { //will get dispatched to DefaultDispatcher
        println("Default: I'm working in thread ${Thread.currentThread().name}")
    }
    launch(newSingleThreadContext("MyOwnThread")) {// will get its own new thread
        println("newSingleThreadContext: I'm working in thread ${Thread.currentThread().name}")
    }
}
Run the CoroutineDispatcher Example in a Kotlin Playground. The print order changes per execution in the playground.
You’ll see how each of the dispatchers prints its own context – its own thread. Furthermore, you can see how you can create your own single-threaded contexts if you need a specific thread for some coroutine.
Exception Handling
On the JVM, threads are at the core of the Kotlin coroutines machinery. The JVM has a well-defined way of dealing with terminating threads and uncaught exceptions.
If an uncaught exception occurs in a thread, the JVM will query the thread for an UncaughtExceptionHandler
. The JVM then pass it the terminating thread and the uncaught exception. This is important because coroutines and Java concurrency deal with the same exception behavior.
Coroutine builders fall into two exception categories. The first propagate automatically, like the launch()
, so if bad things happen, you’ll know soon enough. The second expose exceptions for the user to handle, such as async()
. They won’t propagate until you call await()
to get the value.
In Android, builders that propagate exceptions also rely on Thread.UncaughtExceptionHandler
. It installs as a global coroutine exception handler. However, coroutine builders allow the user to provide a CoroutineExceptionHandler
to have more control over how you deal with exceptions.
import kotlinx.coroutines.*

fun main() = runBlocking<Unit> {
    // propagating exception to the default Thread.UncaughtExceptionHandler
    val job = GlobalScope.launch {
        throw AssertionError()
    }

    // blocks thread execution until coroutine completes
    job.join()

    // launches async coroutine but exception is not propagated until await is called
    val deferred = GlobalScope.async(Dispatchers.Default) {
        throw AssertionError()
    }

    //defines a specific handler
    val handler = CoroutineExceptionHandler { _, exception ->
            println("We caught $exception")
    }

    // propagating exception using a custom CoroutineExceptionHandler
    GlobalScope.launch(handler) {
        throw AssertionError()
    }

    // This exception is finally propagated calling await and should be handled by user eg. with try {} catch {}
    deferred.await()
}
Run the Propagating exception handling example in a Kotlin Playground.
You should see an error being caught immediately. After that, comment out the first throw
clause. You should once again see an exception thrown, but this time from async()
. If you comment out the await()
CoroutineExceptionHandler catches the exception, and prints out which exception happened.
Knowing this, there are three ways to handle exceptions. First is using try/catch
within a launch()
, when you don’t have a custom exception handler. The second is by wrapping await()
calls in a try/catch
block. And the last is one is to use an exception handler, to provide one place to catch exceptions.
Time to Code
You’re going to work on a modified version of the RWDC2018 app from the Android Background Processing video course developed by Joe Howard. The modified app only displays photos taken at RWDevCon 2018 .
The app retrieves these photos by using background threads. You’re going to replace the background threads implementation with Kotlin Coroutines.
Downloading the Project
Download the starter and final projects by clicking the Download Materials button at the top or bottom of this tutorial. Then, import the starter project in Android Studio. Take a moment to familiarize yourself with the structure of the project.
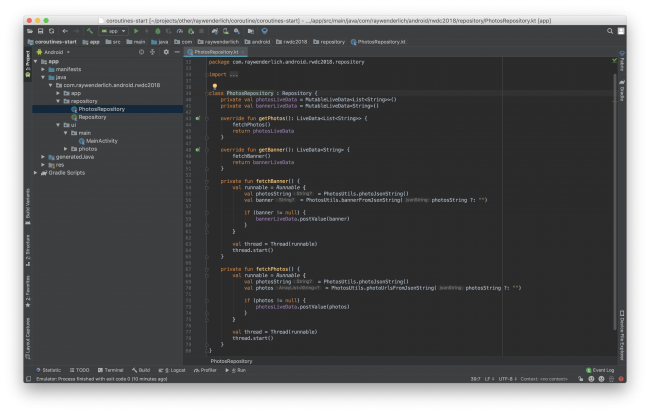
Next, navigate to the PhotosRepository.kt
in Android Studio. This class contains the thread code to download the banner and photos for the RecyclerView
.
The photos download in a background thread. You then store the results in LiveData
using postValue()
. postValue()
updates the data on the main thread.
Adding Dependencies
You need to add the Kotlin Coroutine dependencies to the app module. First, open build.gradle in the app module and add the following dependencies:
- ‘org.jetbrains.kotlinx:kotlinx-coroutines-core:1.2.1’ : Core primitives to work with coroutines, such as builders, dispatchers and suspends functions.
- ‘org.jetbrains.kotlinx:kotlinx-coroutines-android:1.2.1’ : Provides Dispatchers.Main context for Android applications.
To help you with that, copy and paste the following snippet into the Gradle script:
implementation 'org.jetbrains.kotlinx:kotlinx-coroutines-core:1.2.1'
implementation 'org.jetbrains.kotlinx:kotlinx-coroutines-android:1.2.1'
Sync the project to download the dependencies.
Life-cycle Awareness
Now that you have the dependency for Kotlin coroutines in your project, you can start implementing them. You’ll begin with the end in mind. It sounds kind of apocalyptic, but it’s not! :]
You need to prepare your code to clean up active coroutines before you start implementing them. You’ll provide a way to cancel any active coroutines if the user decides to rotate or background the app, triggering Fragment
and Activity
life-cycle.
You’re going to extend these Android life-cycle events to Kotlin classes which will handle coroutines internally.
Updating the Repository
First, open Repository.kt
and have it extend LifecycleObserver
. Then add a new function which will provide the ability to hook in the life-cycle from the PhotosFragment
. Add the function like below:
interface Repository : LifecycleObserver {
    fun getPhotos(): LiveData<List<String>>
    fun getBanner(): LiveData<String>

    fun registerLifecycle(lifecycle: Lifecycle)
}
Updating Injection Singleton
Next, open Injection.kt
. Change the method signature on provideViewModelFactory()
to include a Lifecycle
parameter. Then register the Lifecycle
in the Repository
.
package com.raywenderlich.android.rwdc2018.app

import android.arch.lifecycle.Lifecycle
import com.raywenderlich.android.rwdc2018.repository.PhotosRepository
import com.raywenderlich.android.rwdc2018.repository.Repository
import com.raywenderlich.android.rwdc2018.ui.photos.PhotosViewModelFactory


object Injection {

    private fun provideRepository(): Repository {
        return PhotosRepository()
    }

    fun provideViewModelFactory(lifecycle: Lifecycle): PhotosViewModelFactory {
        val repository = provideRepository()
        repository.registerLifecycle(lifecycle)
        return PhotosViewModelFactory(repository)
    }
}
Updating the PhotosFragment
Now, open PhotosFragment.kt
. Provide the lifecylce
as an argument in provideViewModelFactory()
in onAttach
.
override fun onAttach(context: Context?) {
    super.onAttach(context)

    val viewModelFactory = Injection.provideViewModelFactory(lifecycle)
    viewModel = ViewModelProviders.of(this, viewModelFactory).get(PhotosViewModel::class.java)
}
Registering the Lifecycle
Next, open PhotosRepository.kt again, and implement the new function.
override fun registerLifecycle(lifecycle: Lifecycle) {
    lifecycle.addObserver(this)
}
Main-Safe Design
Google encourages main-safety when writing coroutines. The concept is similar to how the Android system creates a main thread when an app launches.
The main thread is in charge of dispatching events to the appropriate user interface widgets. You should delegate I/O and CPU intensive operations to a background thread to avoid jank in the app.
Main-safety is a design pattern for Kotlin coroutines. It lets coroutines use the Dispatchers.Main, or main
thread, as a default threading context. They then favor delegating to Dispatchers.IO
for heavy I/O operations or Dispatchers.Default
for CPU heavy operations.
A CoroutineScope
interface is available to classes which require scoped coroutines. However, you must define a CoroutineContext
instance which will the scope will use for all the coroutines. Let’s do that.
Defining CoroutineScope
First, open the PhotosRepository
. Next, implement CoroutineScope
. Then define a Job
and CoroutineScope
.
class PhotosRepository : Repository, CoroutineScope {
  private val TAG = PhotosRepository::class.java.simpleName
  private val job: Job = Job()
  override val coroutineContext: CoroutineContext
    get() = Dispatchers.Main + job

  //...omitted code...

}
The Job
will determine if the coroutine is active and you will then use to cancel it. Per the main-safe design pattern, the Dispatchers.Main
defines the CoroutineScope
.
Hooking Into the Life-cycle
Now, add the following code to the PhotosRepository
. This cancels any active coroutines when Android calls the PhotosFragment
Lifecycle.Event.ON_STOP
.
@OnLifecycleEvent(Lifecycle.Event.ON_STOP)
private fun cancelJob() {
  Log.d(TAG, "cancelJob()")
  if (job.isActive) {
      Log.d(TAG, "Job active, canceling")
      job.cancel()
  }
}
A typical implementation is to include a Job
instance plus a Dispatcher
as context for the scope. Implementing the interface will let you call launch()
at any place and handle cancellation with the Job
you provided. The suspend functions can then call withContext(Dispatchers.IO)
or withContext(Dispatchers.Default)
to delegate work to background threads if necessary. Keeping the initial threading tied to the main
thread.
Introducing Coroutines
Both the fetchBanner()
and fetchPhotos()
use a Runnable
and execute with a new Thread
. First, you have to change the method implementation to use Kotlin coroutines. Then, you’ll run the project, to see if everything works as before.
The banner and images will download in the background. They’ll display like before with the separate background thread implementation.
// Dispatchers.Main
private suspend fun fetchBanner() {
  val banner = withContext(Dispatchers.IO) {
    // Dispatchers.IO
    val photosString = PhotosUtils.photoJsonString()
    // Dispatchers.IO
    PhotosUtils.bannerFromJsonString(photosString ?: "")
  }
 // Dispatchers.Main
 if (banner != null) {
    // Dispatchers.Main
    bannerLiveData.value = banner
  }
}

// Dispatchers.Main
private suspend fun fetchPhotos() {
  val photos = withContext(Dispatchers.IO) {
    // Dispatchers.IO
    val photosString = PhotosUtils.photoJsonString()
    // Dispatchers.IO
    PhotosUtils.photoUrlsFromJsonString(photosString ?: "")
  }
  // Dispatchers.Main
  if (photos != null) {
    // Dispatchers.Main
    photosLiveData.value = photos
  }
}
The functions above are annotated with comments. They show what thread or thread pool executes each line of code. Because they are now marked with suspend
, you have to change these function declarations, to avoid compiler errors:
override fun getPhotos(): LiveData<List<String>> {
  launch { fetchPhotos() }
  return photosLiveData
}

override fun getBanner(): LiveData<String> {
  launch { fetchBanner() }
  return bannerLiveData
}
In this case, the thread is Dispatchers.Main
and the thread pool is Dispatchers.IO
. This helps visualize the main-safety design.
Now build and deploy the app to the emulator. Filter logcat
with PhotosFragment
and then background the app. In the log prints you’ll see a PhotsFragment
Lifecycle.Event.ON_STOP
triggering an active coroutine Job
to cancel.
2019-05-21 22:35:06.937 29522-29522/com.raywenderlich.android.rwdc2018 D/PhotosRepository: cancelJob() 2019-05-21 22:35:06.937 29522-29522/com.raywenderlich.android.rwdc2018 D/PhotosRepository: Job active, canceling
Congratulations! You’ve successfully converted asynchronous code to Kotlin coroutines. And everything still works, but looks nicer! :]
Where to Go From Here?
You can download the completed project by clicking on the Download Materials button at the top or bottom of the tutorial. Continue building your understanding of Kotlin Coroutines and how you can use them in Android app development. Resources like Kotlin Coroutines by Tutorials , kotlinx.coroutines and Coroutines Guide are great references. If you have any questions or comments, please join the forum below.
Recommend
About Joyk
Aggregate valuable and interesting links.
Joyk means Joy of geeK