

Let Mavo Shine in Building Interactive Web Applications
source link: https://www.tuicool.com/articles/7v2eIjN
Go to the source link to view the article. You can view the picture content, updated content and better typesetting reading experience. If the link is broken, please click the button below to view the snapshot at that time.
As you could guess from the title, this tutorial is dedicated to Mavo: a new, approachable way to create complex, reactive, persistent web applications just by writing HTML and CSS, without a single line of JavaScript and no server backend.
The app we will build together is a flashcard study app for foreign language learners. It is a fully-fledged CRUD application that lets you:
- Create, delete, update flashcards and re-arrange them via drag and drop.
- Import and export flashcards.
- Evaluate how well you’ve learned the word on a flashcard.
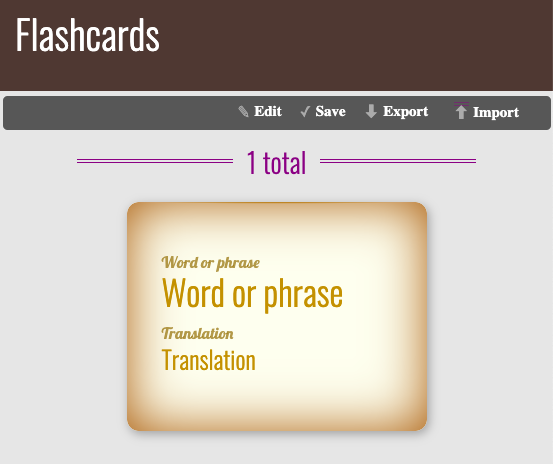
Here is what our finished application looks like:
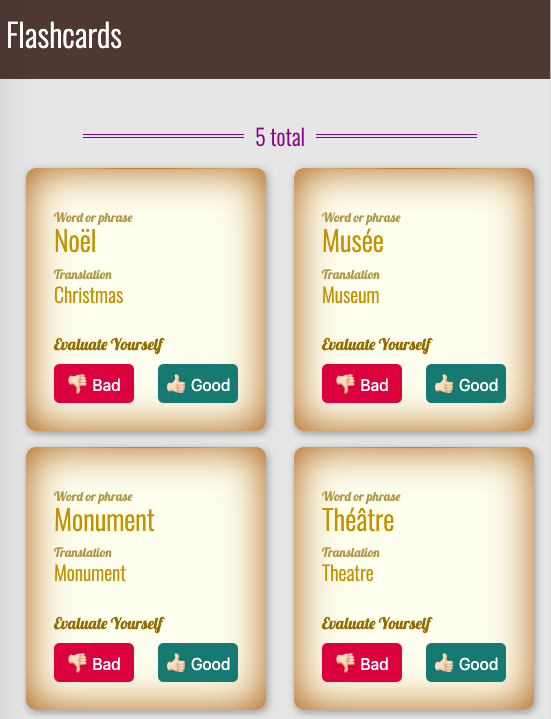
In the tutorial, I will guide you through the entire process of building the app.
At the end of some steps, I provide suggestions for you to experiment with Mavo—to learn a bit more—and to make some enhancements to the application we are building.
Are you ready? Let’s get started! :grinning:
Static template
See the Pen
01. Static template by Dmitry Sharabin (@dsharabin)
on CodePen.
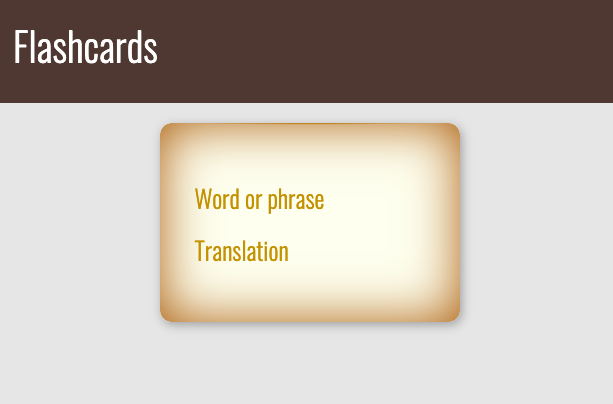
In order to illustrate how Mavo enhances standard HTML, we will first create a purely static HTML page and then use Mavo to turn this static HTML into a fully-functional web application.
Assume we have the following HTML code inside <body>
:
<header>
  <h1>Flashcards</h1>
</header>

<main>
<article>
  <p>Word or phrase</div>
  <p>Translation</div>
</article>
</main>
In that code, the <article>
element represents a single flashcard
.
Let’s add some styling in order to make our HTML look more like an actual flashcards app. You can take a look at the source code and play with it here.
Getting started with Mavo
Right now, all we have is a static template. It’s time to add functionality, so it can actually work like a flashcard application. Here comes Mavo!
In order to use Mavo, we first need to include its JavaScript and CSS files in our page’s <head>
section:
<head>
  ...
  <script src="https://get.mavo.io/mavo.min.js"></script>
  <link rel="stylesheet" href="https://get.mavo.io/mavo.css">
  ...
</head>
Defining a Mavo app
To enable Mavo functionality on an HTML structure, we must use the mv-app
attribute on the element that contains our Mavo app (which may even be the <body>
or <html>
element, that’s fine!). Its value is an ID for our app that should be unique in the page.
:rabbit2: Follow the white rabbit!
If we usemv-app
without a value and there is no id
or name
attribute on the same element, a name such as mavo1
, mavo2
, etc. will be automatically generated.
However, it is strongly recommended to name your Mavo apps, because the name is used in a number of places.
Considering that the <main>
element is representing our Mavo app, let’s add the mv-app
attribute to it and give our app the ID “flashcards”:
<main mv-app="flashcards">
  ...
</main>
The property attribute
See the Pen
02. The property attribute by Dmitry Sharabin (@dsharabin)
on CodePen.
It’s time to tell Mavo what elements of our app are important , i.e., which elements we want to be editable and be saved.
Now we have two such elements, and they are the <p>
elements. Let’s add the property
attribute to those elements to tell Mavo they contain data. Elements with the property
attribute are called properties
.
:rabbit2: Follow the white rabbit!
We can put theproperty
attribute on any
HTML5 element, and Mavo knows how to make it editable. For example, for a <span>
you edit its contents, but a <time>
lets you edit its date/time via an appropriate date/time picker.
You can also expand this set of rules and make elements editable in new ways (e.g., rich text), via plugins.
Keep in mind that the value of the property
attribute should describe the element, similarly to an id
or class
attribute:
...

  <p property="source">Word or phrase</div>
  <p property="translation">Translation</div>

...
:rabbit2: Follow the white rabbit!
If you already have a class
, id
, or itemprop
attribute that describes the element sufficiently well, you can use property
without a value, e.g., <p property class="source">
.
Notice any changes in our app? The Mavo toolbar with an Edit button appeared at the top of the page. The Edit button lets the user switch between read and edit modes. Now our app is in read mode. That means we can’t edit the data on the page.
:rabbit2: Follow the white rabbit!
The Mavo toolbar is fully customizable , as is almost all of the UIgenerated by Mavo: you can change its placement, remove its default styling, add custom button elements, or use your own HTML elements for it, among other things.
We will see one example of such customization later on in this tutorial.
Visit this section of the Mavo website to learn more.
Now lets us switch to edit mode by clicking the Edit button. What has changed? The text of the Edit button becomes Editing to indicate that we are in edit mode. If you hover over the paragraphs, Mavo communicates that you can click to edit them by highlighting them in yellow. Go ahead! Click the text and edit it. Wow! We can change the content of the page right in place!
:computer: Let’s get our hands dirty!
Assume that in addition to the word and its translation, the flashcard should have an example of the word’s usage in a sentence. Enhance the app by adding the appropriate elements to the flashcard.
The mv-multiple attribute
See the Pen
03. The mv-multiple attribute by Dmitry Sharabin (@dsharabin)
on CodePen.
At this point, we have only one flashcard in our app. That’s not very useful! For a working flashcard application, we need the ability to add, delete, and rearrange flashcards. How can we do that? We could
create more flashcards by adding more <article>
elements to our code, but then how does an end user create and delete flashcards?
Fortunately, Mavo has something to offer that makes this a breeze: the mv-multiple
attribute, which tells Mavo that certain elements can be multiplied
. It converts the element it’s used on to an editable collection
of items and generates (customizable) UI for adding, deleting, and rearranging items.
:rabbit2: Follow the white rabbit!
If mv-multiple
is used on an element without a property
attribute, Mavo automatically adds property="collection"
to it (or collection2
, collection3
, etc. so that the name is unique). However, it’s recommended
to also use a property
attribute, to name your collection and make sure its data is preserved if the HTML changes.
Let’s use the mv-multiple
attribute in our app to convert our lonely flashcard into a collection of flashcards:
<article property="flashcard" mv-multiple>
  ...
</article>
:rabbit2: Follow the white rabbit!
It is also possible to specify the property name as a value ofmv-multiple
, like so: <article mv-multiple="flashcard">
.
The mv-multiple
attribute goes on the element that will be multiplied, not
the container of the collection. It’s a common mistake for people to do <ul mv-multiple>
instead of <li mv-multiple>
and can often go undetected for a while until the element is inspected or the styling makes it obvious.
Now switch the app to edit mode. Note that below the flashcard, there is now an Add flashcard button. Let’s give it a try: create a few flashcards with the help of that button. Now we can dynamically add new elements right in the app, even though there are no corresponding elements in the HTML. But that is not all!
:rabbit2: Follow the white rabbit!
Note that the property
attribute on <article>
does not actually make the entire <article>
element editable, but instead acts as a grouping element
. This happens when you use the property
attribute on elements that contain other properties.
Try hovering over a flashcard and notice the three buttons that appear near its top right corner for adding , deleting and rearranging elements via a drag and drop handle. And by hovering over any item bar button, we can understand which flashcard they correspond: Mavo highlights it. Isn’t that amazing?
:rabbit2: Follow the white rabbit!
You can customize any UI element generated by Mavo, e.g., you can create your own drag handle by using an mv-drag-handle
class.
The buttons added by Mavo to every item in a collection are also keyboard accessible . Even reordering: you can focus on the drag handle and use the arrow keys to move the item.
The mv-storage attribute
See the Pen
04. The mv-storage attribute by Dmitry Sharabin (@dsharabin)
on CodePen.
Now that we have the basic UI in place, let’s try the following:
- Switch to edit mode (if you haven’t already done so).
- Edit the first flashcard’s source word and translation. Add a couple more flashcards too.
- Switch the app back to read mode.
- And finally… refresh the page.
What?! Where did our data go? Wasn’t Mavo supposed to save it? What happened?
Actually, we never told Mavo if or where to store our data!
To do so, we need to use the mv-storage
attribute. What options do we have? Well, Mavo opens great possibilities for us, and Mavo plugins open up even more!
In our application, we are going to store the data in the browser’s localStorage
, which is one of the simplest options available, so it’s good for our first Mavo app. We just need to add the attribute mv-storage
with the value local
to the element with the mv-app
attribute (also called the Mavo root
).
<main mv-app="flashcards" mv-storage="local">
  ...
</main>
Have a look at the Mavo toolbar. Notice something? Another button appeared—the Save button.
Try to edit the app data one more time. Note that the Save button is now highlighted . Hover over the Save button, and Mavo will highlight the properties with the unsaved data . Isn’t that cool?
Click the Save button and refresh the page (there is no need to switch to read mode before refreshing the page). Is your data still there? Great! We are one step closer to our goal—a fully-fledged flashcard application.
The mv-autosave attribute
Now we have to click the Save
button every time we need our data to be saved? That may be safer, to prevent destroying valuable data, but it can often be inconvenient. Can we just save the data automatically? Sure! To save the data automatically every time it is changed, we can use the mv-autosave
attribute on our Mavo root. Its value is the number of seconds to throttle saving by. Let’s add mv-autosave="3"
to the root element of our app:
<main mv-app="flashcard" mv-storage="local" mv-autosave="3">
  ...
</main>
:rabbit2: Follow the white rabbit!
Ifmv-autosave="3"
, Mavo can only save at most once every three seconds. This can be especially useful for backends which keep a change history (e.g., GitHub
, Dropbox
) to prevent flooding which would render that history useless.
To disable throttling and save immediately, we can use mv-autosave="0"
or just mv-autosave
, which will also remove the Save
button from the UI (since it serves no purpose in that case).
Change the data one more time and have a look at the Save button. See? In the beginning, it was highlighted but after 3 seconds–it is not. All our data is now saved automatically!
So, now the main part of our app would look like that:
<main mv-app="flashcards" mv-storage="local" mv-autosave="3">
  <article property="flashcard" mv-multiple>
    <p property="source">Word or phrase</div>
    <p property="translation">Translation</div>
  </article>
</main>
:computer: Let’s get our hands dirty!
We are almost done with the alpha version of our app. Now it’s your turn to make the app even better. No worries, you have all the knowledge you need.
Enhance the app so as flashcards could be organized by end users in different groups related to various topics, e.g., the users could gather all the flashcards corresponding to clothing in one group, all the flashcards associated with kitchen utensils in the other one, etc.
:bulb: Hints!
There are many ways to achieve that goal, and it’s up to you to decide what to follow. However, I’d like you to think about some questions before proceeding:
- What HTML element would you use as a grouping element ? It would be convenient for the users if they could see the name of the group of flashcards (topic name) and could collapse the group up to the title.
- What Mavo attribute(s) are you going to add to that element, if any? Will the element be a property or a collection ?
- Will end users be able to add new topics, delete and rearrange them, change the title of a topic and move flashcards between different topics?
What if you decide not to organize flashcards in groups, but instead just label them with tags that correspond to various topics? Well, that is perfectly fine. The solution with tags is also appropriate. For the sake of practice, try to accomplish that approach too.
The mv-bar attribute
See the Pen
05. The mv-bar attribute by Dmitry Sharabin (@dsharabin)
on CodePen.
As our app stores the data locally, by default, the users of the app won’t be able to share their cards with other users. Wouldn’t it be great if we would let them export their flashcards and import somebody else’s flashcards? Thankfully, these features are already implemented in Mavo, and we can very easily add them to our app!
The mv-bar
attribute controls which buttons are going to appear in the toolbar, if any. It’s typically specified on the Mavo root (an element with the mv-app
attribute). Buttons are represented by their ids (which are very logical): edit
, import
, export
, etc.
As we only want to add a few buttons to the default set, we can use the so-called relative syntax
, which allows us to add and remove buttons from the default set without having to explicitly list everything out. All we need is to start the mv-bar
attribute’s value with the with
keyword.
By doing that, we would get the following:
<main mv-app="flashcards"
      mv-storage="local"
      mv-autosave="3"
      mv-bar="with import export">
      ...
</main>
:computer: Let’s get our hands dirty!
Give those features a try: add some flashcards, try to export them in a file. Then delete existing flashcards and import the flashcards from the previously exported file.
Expressions and MavoScript
See the Pen
06. Expressions and MavoScript by Dmitry Sharabin (@dsharabin)
on CodePen.
Let’s now add some statistics to our app, such as the number of flashcards! Sounds interesting? I hoped so. :grinning:
To do that, we need to learn something new about Mavo.
We can dynamically refer to the value of any property we have defined, anywhere in our Mavo app
(including in HTML attributes), by putting its name inside brackets, like this: [propertyName]
. This is an example of a simple expression
, which allows us to dynamically calculate things, reactively as they change.
:rabbit2: Follow the white rabbit!
Mavo’s expression syntax is called MavoScript . It is similar to spreadsheet formulas and lets us perform computations and other operations (with numbers, texts, lists, etc.), but is designed to be more readable and to accommodate nested relations. You can learn more about Mavo expressions and MavoScript in the documentation.
Now let’s experiment and add a [source]
expression inside
the flashcard
property, e.g., between two properties: the source
and the translation
.
...
  <p property="source">Word or phrase</div>
  [source]
  <p property="translation">Translation</div>
...
What has changed in our app? The value of the flashcard source
property is now shown on the page twice.
Switch to edit mode and try to change the value of the source
property. Can you see that? The page content updates while you are changing the property value! That’s why I said earlier that Mavo lets us develop reactive web applications.
That’s indeed cool, but unfortunately, in our case, it’s not really helpful: we can’t use this expression to count the number of flashcards—we would always have only one value .
What if we put the [source]
expression outside
the flashcard
property? We will have something like that:
...
  [source]
  <article property="flashcard" mv-multiple>
    ...
  </article>
...
How does this differ from the previous case? To see the difference add some flashcards if you haven’t done so yet. Now instead of one value
we have a list of comma separated values
: the source
property of all flashcards
. That’s exactly we were looking for: the number of items in the list corresponds the number of flashcards in the app.
Makes sense? Well, yes, but it wouldn’t it be more logical if we would count the number of flashcards
, not the number of values of its source
property? After all, a flashcard added exists even before we fill in its source or translation. I suggest you do the following: let’s substitute the [source]
expression with [flashcard]
:
...
  [flashcard]
  <article property="flashcard" mv-multiple>
    ...
  </article>
...
Noticed the difference? We still have a list, but its values are not simple values but objects , i.e., complex values containing all data that pertains to each flashcard. The good news is that the number of these objects is equal to the number of flashcards, since there is one for each flashcard, even when it’s completely empty. So, right now we have an object for each flashcard, but how do we count them and display the total count?
Now let’s get familiar with the MavoScript functions and find the one that would let us count the number of flashcards. Remember, we have a list
of flashcards, so we need to find a function that would let us count the number of items in a list
. And here it is—the count()
function does exactly that!
But how can we use functions in expressions? Are there any rules we need to be aware of? Well, yes, there is a couple:
- Expressions are denoted by brackets.
- Do not nest brackets.
Let’s try using the count()
function to count the number of flashcards:
...
[count(flashcard)]
<article property="flashcard" mv-multiple>
  ...
</article>
...
And that’s exactly what we were aiming for—now we have some statistics in our app! Isn’t that cool?
:computer: Let’s get our hands dirty!
I hope you’ve already warmed up and ready to continue experimenting with Mavo.
Improve the application so that the statistics are displayed not only for the total number of flashcards in the app but also for the number of flashcards in each topic separately if there are any topics.
:bulb:Hint!
Want to filter a list based on some criteria? The where
operator will help.
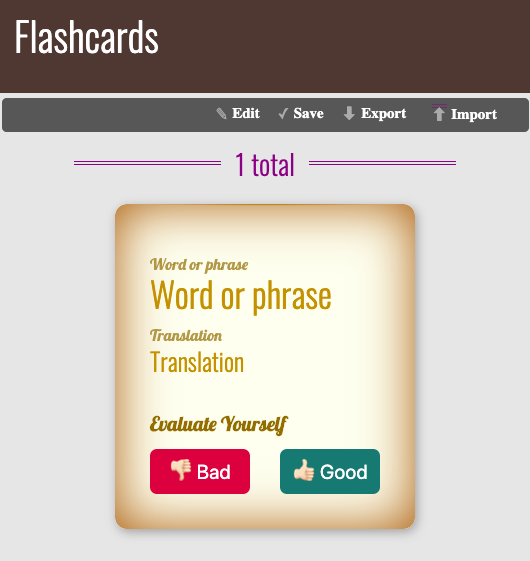
The self-evaluation feature
We already have an application that lets us create, edit and store multiple flashcards. But how do we keep track of which ones we have already learned and which ones we need to practice more? Any respectable flashcards application needs a self-evaluation feature. Let’s investigate how we can add that!
Suppose in our app we have two buttons for the self-evaluation: the Bad
and the Good
. What exactly do we want to happen every time an end user clicks the buttons? Well, the idea is rather simple:
Bad
Good
“Are you sure we can do that without JavaScript?” you may ask. Yep! Mavo is extremely powerful and is able to equip us with all the tools we need!
Now when we know what we are going to implement, let’s set the UI in place first and then move on to the next step. Our markup would look something like this:
...
<article property="flashcard" mv-multiple>
  ...
  <section>
    <h2>Evaluate Yourself</h2>
    <button>Bad</button>
    <button>Good</button>
  </section>
</article>
...
The mv-action attribute
See the Pen
07. The mv-action attribute by Dmitry Sharabin (@dsharabin)
on CodePen.
Mavo actions allow us to create our very own controls that modify data in custom ways when the user interacts with them. Sounds promising right?
To define a custom action we need to use the mv-action
attribute on an appropriate element inside our Mavo app. The action is performed every time the element is clicked
. That’s exactly what we were looking for.
:rabbit2: Follow the white rabbit!
For <form>
elements a custom action is performed when the form is submitted
.
The value of the mv-action
attribute is an expression. We can use any of the expression functions and syntax that MavoScript provides to us, as well as a few more to facilitate data manipulation, such as add()
, set()
, move()
, or delete()
. It is important to note that unlike normal expressions which are evaluated reactively, these expressions are only evaluated each time the action is triggered.
:rabbit2: Follow the white rabbit!
Mavo expects the value of the mv-action
attribute would be an expression, so there is no need to enclose it in brackets
: mv-action="expression"
. Moreover, if we include them, they will be considered part of the expression.
So, we need to move flashcards inside the collection, and Mavo has an appropriate function that lets us do that—the move()
function. Its first argument refers to the item
we are moving, and the second is its position
in the collection. Bear in mind that elements of the collection are numbered starting from 0
.
:rabbit2: Follow the white rabbit!
Want to learn more about the move
function (and its variants), and about custom actions in general, see the documentation.
Let’s implement the first point of the outline we discussed earlier: while self-evaluating, an end user clicks the Bad
button and the corresponding flashcard moves to the beginning of the collection, i.e., it becomes the first one. So in the code, we have:
...
<article property="flashcard" mv-multiple>
  ...
  <button mv-action="move(flashcard, 0)">Bad</button>
  ...
</article>
...
Pay attention that in the mv-action
attribute we refer to the flashcard
property inside
the property itself, since we want to deal with the current flashcard
.
If we try to implement the second point of the outline, we will face a problem. Can you suggest what problem exactly will it be?
Let’s remember that if an end user clicks the Good
button the corresponding flashcard moves to the end of the collection, i.e., it becomes the last one. To make a flashcard last in the collection we need to know the number of items in it.
Thankfully, a bit earlier we’ve already solved that task and implemented the corresponding feature. But could we use that solution to solve our current problem? Unfortunately, we can’t: as we already know, we can refer to the collection
of flashcards by its name (and evaluate its size) only outside
the flashcard property. But in our case, we need to do that inside
it: the Good
button for which we need to write an expression is inside the flashcard
property.
What should we do then? I’m glad you ask. Mavo has the solution.
Using the meta element to hold intermediate values
See the Pen
08. The <meta> element by Dmitry Sharabin (@dsharabin)
on CodePen.
So, on the one hand, we know that the [count(flashcards)]
expression gives us the number of flashcards if
it is evaluated outside
the flashcard property. On the other hand, we need to use that value inside
the flashcard
property.
To solve that dilemma, we need to evaluate the number of flashcards outside the flashcard
property and somehow hold the result to be able to use it elsewhere in the app, precisely inside the flashcard
property. For cases like that, in Mavo, there are so-called computed properties
.
To hold an intermediate result so we can refer to it, we need an HTML element in our code. It is recommended to use the <meta>
element for that purpose, like so: <meta property="propertyName" content="[expression]">
. The advantage of using this element is that it is hidden outside edit mode
, both semantically and visually.
:rabbit2: Follow the white rabbit!
Bear in mind that computed properties are not saved by default.
Now let’s add the flashcardCount
computed property in our app. Remember, we must place it outside
the flashcard
property, but then we can refer to it from anywhere:
...
<meta property="flashcardCount" content="[count(flashcard)]">
<article property="flashcard" mv-multiple>
    ...
</article>
...
Only one step left to finish the implementation of the self-evaluation feature: if an end user clicks the Good
button the corresponding flashcard moves to the end of the collection, i.e., it becomes the last one. Let’s add the relevant action in the code of our app:
...
<meta property="flashcardCount" content="[count(flashcard)]">
<article property="flashcard" mv-multiple>
  ...
  <button mv-action="move(flashcard, flashcardCount)">Good</button>
</article>
...
We are done! Congratulations! :grinning:
:computer: Let’s get our hands dirty!
There is another way to solve that task: with the help of the$all
special property
. The $all
property represents a collection itself if it is placed inside
the collection. So there is no need to use any computed property in this case. Try to implement that solution on your own.
There is only one more tiny thing left that we need to fix. Remember the part where we added some stats to our app? Remember the expression we built to evaluate the number of flashcards in the app: [count(flashcard)]
? Instead, we can (and should) now use the computed property we defined. Make the appropriate changes in the app.
Takeaways
So what have we learned so far? Let’s recap. In order to turn any static HTML page into a Mavo app we need to:
-
Include the Mavo JavaScript and CSS files in the page’s
<head>section. -
Add the
mv-appattribute to the Mavo root element. -
Tell Mavo what elements of our app are important
by adding the
propertyattribute to them. -
Place the
mv-multipleattribute on the element that will be multiplied and converted into a collection. -
Tell Mavo where to store our data by adding
mv-storageattribute to the Mavo root. -
Decide whether Mavo should save our data automatically or not. If yes, add the
mv-autosaveattribute to the Mavo root.
We also know that: -
The Mavo toolbar is fully-customizable. The
mv-barattribute controls which buttons are going to appear there. - Expressions let us present the current value of properties in other elements and perform computations. An expression value (and type) vary depending on the place the expression takes in the code. Mavo’s expression syntax is called MavoScript.
-
Custom actions allow creating controls that modify data in custom ways. To define a custom action set the
mv-actionattribute on an appropriate element inside a Mavo app -
Properties whose values are expressions are called computed properties. To hold an intermediate result to be able to refer to it elsewhere in the app, it is recommended to use the
<meta>element.
Instead of an epilogue
So we built our app. Is it already perfect? Of course not, nothing is! There are so many things that can be improved, and so many features that can be added (with the help of Mavo, we can even make our app multilingual!). Go ahead, enhance it more, don’t hesitate to try something new!
What we’ve learned so far about Mavo is just the tip of the iceberg, and there is so much more. I encourage you to give it a closer look, by reading the documentation, by examining examples (on the Mavo site, or on CodePen: made by Lea Verou and a few made by myself), and by creating new stuff! Good luck! :wink:
Acknowledgments
I want to thank two great people. First of all, my huge thanks go to Lea Verou, who not only inspired me to write this tutorial (and helped me make it happen) but also inspires me all the time by the way she makes the world of web development a better place. I’ve never met such a gifted human being, and I am happy having an opportunity to make some stuff with her!
I also thank James Moore. The examples he uses in his course “Functional Programming for Beginners with JavaScript” on Udemy pushed me to make my very own version of a flashcard study app. He is a wonderful teacher!
Recommend
About Joyk
Aggregate valuable and interesting links.
Joyk means Joy of geeK