

Go组件学习——cron定时器 - JackieZheng - 博客园
source link: https://www.cnblogs.com/bigdataZJ/p/go-opensource-cron.html
Go to the source link to view the article. You can view the picture content, updated content and better typesetting reading experience. If the link is broken, please click the button below to view the snapshot at that time.
转到Go已经将近三个月,写业务代码又找到了属于Go的条件反射了。
后置声明和多参数返回这些Go风格代码写起来也不会那么蹩脚,甚至还有点小适应~
反而,前几天在写Java的时候,发现Java怎么启动这么慢,Java怎么能够容忍这些用不到的代码还理直气壮的躺在那……等等,这些话在哪听过类似的???
“Go为什么要后置声明,多别扭啊”
“Go里面为啥要定义这么多的struct,看的头晕”
其实,没有最好的语言,只有最适合的。
前面《Go语言学习》系列主要介绍了一些Go的基础知识和相较于Java的一些新特性。后续如果有相关的体会和新的还会继续更新。
从这篇开始,开始学习Go的一些工具类库和开源组件,希望在学习这些优秀的开源项目过程中,更深入的了解Go,发现Go的威力。
2 cron简介
robfig/cron是一个第三方开源的任务调度库,也就是我们平时说的定时任务。
Github:https://github.com/robfig/cron
官方文档:https://godoc.org/github.com/robfig/cron
3 cron如何使用
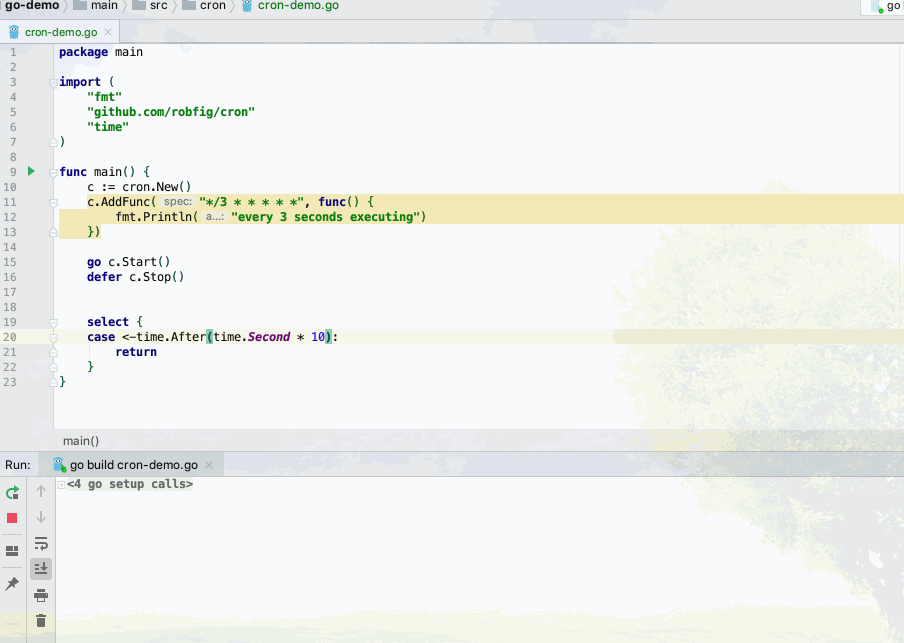
1、新建文件cron-demo.go
package mainimport ("fmt""github.com/robfig/cron""time")func main() {c := cron.New()c.AddFunc("*/3 * * * * *", func() {fmt.Println("every 3 seconds executing")})go c.Start()defer c.Stop()select {case <-time.After(time.Second * 10):return}} |
-
cron.New创建一个定时器管理器
-
c.AddFunc添加一个定时任务,第一个参数是cron时间表达式,第二个参数是要触发执行的函数
-
go c.Start()新启一个协程,运行定时任务
-
c.Stop是等待停止信号结束任务
2、在cron-demo.go文件下执行go build
本项目采用go mod进行包管理,所以执行go build命令后,会在go.mod文件中生成对应的依赖版本如图所示
3、运行cron-demo.go
可以看出每3秒执行一次,直到10秒后过期退出进程,任务结束。
代码参见项目:go-demo项目(https://github.com/DMinerJackie/go-demo/tree/master/main/src/cron)
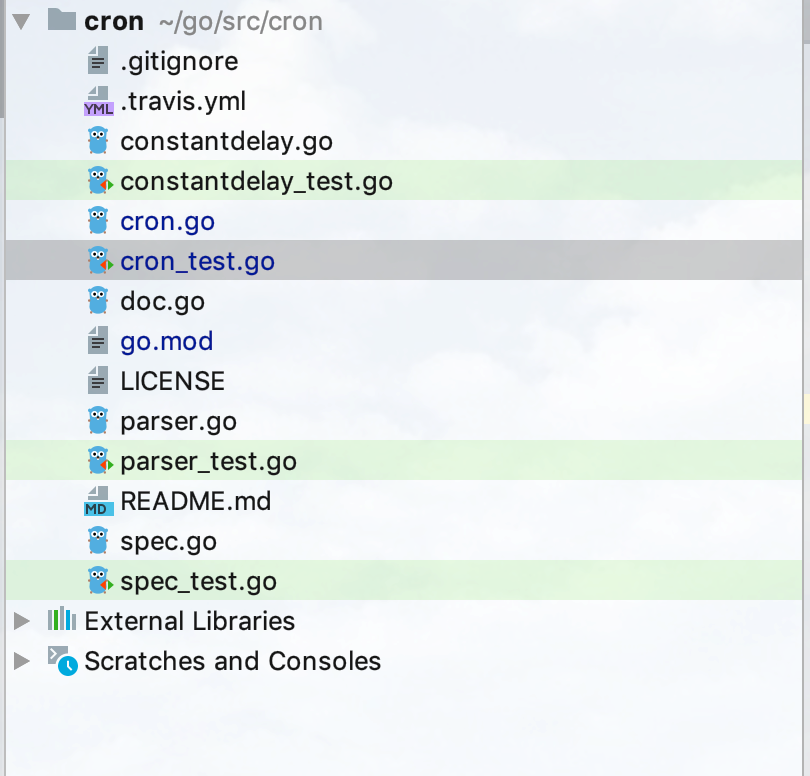
看上去这个任务调度还是蛮好用的,那么具体是如何实现的呢,看了下源码,也是非常的短小精悍,目录结构如下。
下面通过几个问题一起看下cron是如何实现任务调度。
4 cron如何解析任务表达式
上例我们看到添加“*/3 * * * * *”这样的表达式,就能实现每3秒执行一次。
显然,这个表达式只是对人友好的一种约定表达形式,要真正在指定时间执行任务,cron肯定是要读取并解析这个c表达式,转化为具体的时间再执行。
那我们来看看,这个具体是如何执行的。
进入AddFunc函数实现
// AddFunc adds a func to the Cron to be run on the given schedule.func (c *Cron) AddFunc(spec string, cmd func()) error {return c.AddJob(spec, FuncJob(cmd))} |
这只是套了个壳,具体还要进入AddJob函数
// AddJob adds a Job to the Cron to be run on the given schedule.func (c *Cron) AddJob(spec string, cmd Job) error {schedule, err := Parse(spec)if err != nil {return err}c.Schedule(schedule, cmd)return nil} |
该函数第一行就是解析cron表达式,顺藤摸瓜,我们看到具体实现如下
// Parse returns a new crontab schedule representing the given spec.// It returns a descriptive error if the spec is not valid.// It accepts crontab specs and features configured by NewParser.func (p Parser) Parse(spec string) (Schedule, error) {if len(spec) == 0 {return nil, fmt.Errorf("Empty spec string")}if spec[0] == '@' && p.options&Descriptor > 0 {return parseDescriptor(spec)}// Figure out how many fields we needmax := 0for _, place := range places {if p.options&place > 0 {max++}}min := max - p.optionals// Split fields on whitespacefields := strings.Fields(spec) // 使用空白符拆分cron表达式// Validate number of fieldsif count := len(fields); count < min || count > max {if min == max {return nil, fmt.Errorf("Expected exactly %d fields, found %d: %s", min, count, spec)}return nil, fmt.Errorf("Expected %d to %d fields, found %d: %s", min, max, count, spec)}// Fill in missing fieldsfields = expandFields(fields, p.options)var err errorfield := func(field string, r bounds) uint64 { // 抽象出filed函数,方便下面调用if err != nil {return 0}var bits uint64bits, err = getField(field, r)return bits}var (second = field(fields[0], seconds)minute = field(fields[1], minutes)hour = field(fields[2], hours)dayofmonth = field(fields[3], dom)month = field(fields[4], months)dayofweek = field(fields[5], dow))if err != nil {return nil, err}return &SpecSchedule{Second: second,Minute: minute,Hour: hour,Dom: dayofmonth,Month: month,Dow: dayofweek,}, nil} |
该函数主要是将cron表达式映射为“Second, Minute, Hour, Dom, Month, Dow”6个时间维度的结构体SpecSchedule。
SpecSchedule是实现了方法“Next(time.Time) time.Time”的结构体,而“Next(time.Time) time.Time”是定义在Schedule接口中的
// The Schedule describes a job's duty cycle.type Schedule interface {// Return the next activation time, later than the given time.// Next is invoked initially, and then each time the job is run.Next(time.Time) time.Time} |
所以,最终可以理解是将cron解析后转换为下一次要执行的时刻,等待执行。
5 cron如何执行任务
我们知道通过parser.go可以将人很好理解的表达式转换为cron可以读懂的要执行的时间。
有了要执行的时间点,那么cron具体是如何执行这些任务的呢?
我们看下Start函数的具体实现
// Start the cron scheduler in its own go-routine, or no-op if already started.func (c *Cron) Start() {if c.running {return}c.running = truego c.run()} |
这里会通过判定Cron的running字段是否在运行来巨额听是否要启动任务。
显然这里running是false,因为在调用c.New初始化的时候running被设置为false。
所以,这里新启一个协程用于执行定时任务,再次顺藤摸瓜,我们看到run函数的实现
// Run the scheduler. this is private just due to the need to synchronize// access to the 'running' state variable.func (c *Cron) run() {// Figure out the next activation times for each entry.now := c.now()for _, entry := range c.entries {entry.Next = entry.Schedule.Next(now)}for {// Determine the next entry to run.sort.Sort(byTime(c.entries))var timer *time.Timerif len(c.entries) == 0 || c.entries[0].Next.IsZero() { // 如果没有要执行的任务或者第一个任务的待执行时间为空,则睡眠// If there are no entries yet, just sleep - it still handles new entries// and stop requests.timer = time.NewTimer(100000 * time.Hour)} else {timer = time.NewTimer(c.entries[0].Next.Sub(now)) // 否则新建一个距离现在到下一个要触发执行的Timer}for {select {case now = <-timer.C: // 触发时间到,执行任务now = now.In(c.location)// Run every entry whose next time was less than nowfor _, e := range c.entries {if e.Next.After(now) || e.Next.IsZero() {break}go c.runWithRecovery(e.Job)e.Prev = e.Nexte.Next = e.Schedule.Next(now)}case newEntry := <-c.add: // 添加任务timer.Stop()now = c.now()newEntry.Next = newEntry.Schedule.Next(now)c.entries = append(c.entries, newEntry)case <-c.snapshot: // 调用c.Entries()返回一个现有任务列表的snapshotc.snapshot <- c.entrySnapshot()continuecase <-c.stop: // 任务结束,退出timer.Stop()return}break}}} |
-
进入该函数,首先遍历所以任务,找到所有任务下一个要执行的时间。
-
然后进入外层for循环,对于各个任务按照执行时间进行排序,保证离当前时间最近的先执行。
-
再对任务列表进行判定,是否有任务如果没有,则休眠,否则初始化一个timer。
里层的for循环才是重头戏,下面主要分析这个for循环里面的任务加入和执行。
在此之前,需要了解下go标准库的timer
timer用于指定在某个时间间隔后,调用函数或者表达式。
使用NewTimer就可以创建一个Timer,在指定时间间隔到达后,可以通过<-timer.C接收值。
package mainimport ("fmt""time")func main() {timer1 := time.NewTimer(2 * time.Second)<-timer1.Cfmt.Println("Timer 1 expired")timer2 := time.NewTimer(time.Second)go func() {<-timer2.Cfmt.Println("Timer 2 expired")}()stop2 := timer2.Stop()if stop2 {fmt.Println("Timer 2 stopped")}} |
执行结果为
Timer 1 expiredTimer 2 stopped |
timer1表示2秒后到期,在此之前都是阻塞状态,2秒后<-timer1.C接收到信号,执行下面的打印语句。
timer2表示1秒后到期,但是中途被Stop掉了,相当于清除了定时功能。
有了这个背景之后,我们再来看run函数的里层for循环。
接收到c.add信道
case newEntry := <-c.add: // 添加任务timer.Stop()now = c.now()newEntry.Next = newEntry.Schedule.Next(now)c.entries = append(c.entries, newEntry) |
将timer停掉,清除设置的定时功能,并以当前时间点为起点,设置添加任务的下一次执行时间,并添加到entries任务队列中。
接收到timer.C信道
case now = <-timer.C: // 触发时间到,执行任务now = now.In(c.location)// Run every entry whose next time was less than nowfor _, e := range c.entries {if e.Next.After(now) || e.Next.IsZero() {break}go c.runWithRecovery(e.Job)e.Prev = e.Nexte.Next = e.Schedule.Next(now)} |
当定任务到点后,time.C就会接收到值,并新开协程执行真正需要执行的Job,之后再更新下一个要执行的任务列表。
我们进入runWithRecovery函数,该函数从函数名就可以看出,即使出现panic也可以重新recovery,保证其他任务不受影响。
func (c *Cron) runWithRecovery(j Job) {defer func() {if r := recover(); r != nil {const size = 64 << 10buf := make([]byte, size)buf = buf[:runtime.Stack(buf, false)]c.logf("cron: panic running job: %v\n%s", r, buf)}}()j.Run()} |
追根溯源,我们发现真正执行Job的是j.Run()的执行。进入这个Run函数的实现,我们看到
func (f FuncJob) Run() { f() } |
没错,我们要执行的任务一直从AddFunc一直往下传递,直到这里,我们通过调用Run函数,将包装的FuncJob类型的函数通过f()的形式进行执行。
这里说的可能比较模糊,举个例子,Go里面的闭包定义
func () {fmt.Println("test")}() |
如果这里定义后面没有"()"该函数就不会执行,所以结合这个看上面的定时任务是如何执行就更容易理解了。
6 代码阅读体会
1、channel的奥妙
通过channel可以让感知变得轻而易举,比如timer.C就像是时间到了,自然会有人来敲门告诉你。而不需要我们自己主动去获取是否到期了。
2、常用类库的使用
比如在parser里面我们看到了"fields := strings.Fields(spec)",在日常开发中,我们可以灵活使用这些API,避免自己造轮子的情况。
3、多思考
之前做Java的时候,更多的是沉浸在各种工具和框架的使用,对于这些工具和框架的实现关注的不多。比如从Quartz到Spring Job,我们需要更新的是越来越好用的定时任务工具,而底层的实现升级Spring都帮我们考虑好了。这种对业务对项目有友好的,可以快速的实现业务功能开发,但是对于开发者并不友好,友好的设计麻痹了开发者对于底层原理的深究的欲望。
Recommend
About Joyk
Aggregate valuable and interesting links.
Joyk means Joy of geeK