

Create a Cool 3D Sidebar Menu Animation [FREE]
source link: https://www.tuicool.com/articles/umq6vyr
Go to the source link to view the article. You can view the picture content, updated content and better typesetting reading experience. If the link is broken, please click the button below to view the snapshot at that time.
Update note : Warren Burton updated this tutorial for iOS 12 and Swift 5. Audrey Tam wrote the original.
Many iOS apps need a menu to navigate between views or to let the user make choices. One commonly used design is a side menu.
You can easily make a side menu using a simple form, but how can you introduce a little delight into your UI? You want to put a smile on your users’ faces and bring them back to your app time and time again. One way to do this this is by creating a 3D sidebar animation.
In this tutorial, you’ll learn how to animate some UIView
elements by manipulating CALayer
properties to create a 3D sidebar animation. This animation was inspired by a To-Do app called Taasky
.
Throughout this tutorial, you’ll work with the following elements:
- Storyboards
- Auto Layout constraints
- UIScrollView
- View controller containment
- Core Animation
If these elements sound unfamiliar, then you should start with some of our other iOS tutorials before returning to this one.
Getting Started
Before you begin, download the starter project, called TaskChooser , by using the Download Materials button at the top or bottom of this page.
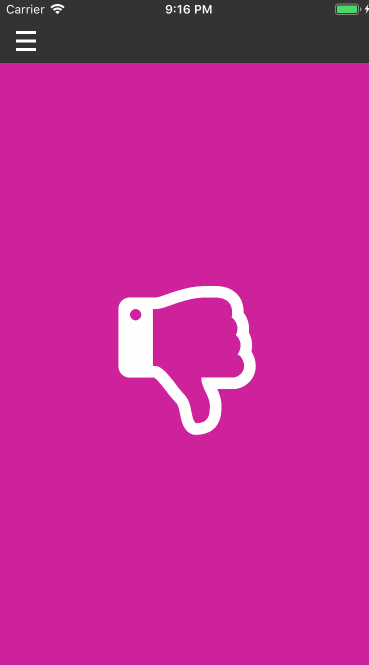
Imagine you are creating a basic app for negotiating events with your colleagues or friends. Thumbs-up if you’re in, thumbs-down if you can’t make it. You can even decline due to inclement weather.
Take a moment to look at the project. You’ll see it’s a standard Xcode Master-Detail template app that displays a table of images.
-
MenuViewController
: A
UITableViewControllerthat uses a custom table view cell,MenuItemCell, to set the background color of each cell. It also has an image. -
MenuDataSource
: An object that implements
UITableViewDataSourceto provide the table data fromMenuItems.json. This data could come from a server in a production situation. - DetailViewController : Displays a large image using the same background color as a cell that you’ve selected.
Build and run the app. You should see the starter project load with 7 rows of color and icons:

Use the menu to display which option you’ve selected:

This is functional, but the look and feel is rather ordinary. You want your app to both amaze and delight!
In this tutorial, you’ll refactor the Master-Detail app into a horizontal scroll view. You’ll embed the master and detail views inside container views.
Next, you’ll add a button to show or hide the menu. You’ll then add a neat 3D folding effect on the menu.
As a final touch for this 3D animation sidebar, you’ll rotate the menu button in sync with showing or hiding the menu.
Your first task is to convert MenuViewController
and DetailViewController
to a slide-out sidebar, where a scroll view contains the menu and detail views side-by-side.
Restructuring Your Storyboard
Before you can rebuild your menu, you need to do a little demolition. Time to pull out the sledgehammer and the safety glasses. :]
Open Main.storyboard
in the Views
folder of the Project navigator. You can see UINavigationController
, MenuViewController
and DetailViewController
connected by segues:

Deleting the Old Structure
The Navigation Controller Scene
does not spark joy. Select that scene and delete it. Next, select the segue between MenuViewController
and DetailViewController
and delete that, too.
With that done, brush the dust off and get to work. :]

Adding a New Root Container
Since UINavigationController
is gone, you no longer have a top-level container for the view controllers in the project. You’ll add one now.
Select the Views folder in the Project navigator. Add a new file to the project by pressing Command-N . Then:
- Select iOS ▸ Cocoa Touch Class . Click Next .
- Name the class RootViewController .
- Ensure that RootViewController is a subclass of UIViewController .


Open Main.storyboard again.
Open the Object Library with the key shortcut Command-Shift-L and drag an instance of UIViewController to the storyboard.

Select View Controller Scene from the Object hierarchy, then open the Identity inspector. Set the Class field to RootViewController .

Next, open the Attributes inspector and check the Is Initial View Controller box.

Adding Identifiers to View Controllers
Since MenuViewController
and DetailViewController
are no longer connected by segues, you need a way of accessing them from your code. So, your next step is to provide some identifiers to do this.
Select Menu View Controller Scene from the Object hierarchy. Open the Identity inspector and set Storyboard ID to MenuViewController .
This string can be any sensible value, but an easy-to-remember technique is to use the name of the class.

Next, select Detail View Controller Scene from the Object hierarchy and do the same thing. Set Storyboard ID to DetailViewController .

That’s all you need to do in Main.storyboard . The rest of this tutorial will be in code.
Creating Contained View Controllers
In this section, you’ll create a UIScrollView
and add two containers to that scroll view. The containers will hold MenuViewController
and DetailViewController
.
Creating a Scroll View
Your first step is to create a UIScrollView
.
Open RootViewController.swift
in the Project navigator. Delete everything that Xcode supplied from the inside of RootViewController
.
Add this extension above RootViewController
:
extension UIView {
  func embedInsideSafeArea(_ subview: UIView) {
    addSubview(subview)
    subview.translatesAutoresizingMaskIntoConstraints = false
    subview.leadingAnchor.constraint(equalTo: safeAreaLayoutGuide.leadingAnchor)
      .isActive = true
    subview.trailingAnchor.constraint(equalTo: safeAreaLayoutGuide.trailingAnchor)
      .isActive = true
    subview.topAnchor.constraint(equalTo: safeAreaLayoutGuide.topAnchor)
      .isActive = true
    subview.bottomAnchor.constraint(equalTo: safeAreaLayoutGuide.bottomAnchor)
      .isActive = true
  }
}
This is a helper that you’ll use a few times in this tutorial. The code adds the passed-in view as a subview, then adds four constraints to glue the subview inside itself.
Next add this extension at the end of the file:
extension RootViewController: UIScrollViewDelegate {
}
You’ll want to watch UIScrollView
for changes. That action comes later in the tutorial, so this extension is empty for now.
Finally, insert the following code inside
of RootViewController
:
// 1
lazy var scroller: UIScrollView = {
  let scroller = UIScrollView(frame: .zero)
  scroller.isPagingEnabled = true
  scroller.delaysContentTouches = false
  scroller.bounces = false
  scroller.showsHorizontalScrollIndicator = false
  scroller.delegate = self
  return scroller
}()
// 2
override func viewDidLoad() {
  super.viewDidLoad()
  view.backgroundColor = UIColor(named: "rw-dark")
  view.embedInsideSafeArea(scroller)
}
// 3
override var preferredStatusBarStyle: UIStatusBarStyle {
  return .lightContent
}
Here’s what you’re doing in this code:
-
First, you create a
UIScrollView. You want to enable paging so that the content moves in atomic units inside the scroll view. You’ve disableddelaysContentTouchesso that the inner controllers will react quickly to user touches.bouncesis set to false so you don’t get a stretchy feel from the scroller. You then setRootViewControlleras the delegate of the scroll view. -
In
viewDidLoad(), you set the background color and embed the scroll view inside the root view using the helper you added before. -
An override to
preferredStatusBarStyleallows the status bar to appear light on the dark background.
Build and run your app to show that it launches properly after this refactor:

Since you haven’t added the buttons and content to the new RootViewController
, you should only see the dark background you have set. Don’t worry, you’ll add them back in the next section.
Creating Containers
Now, you’re going to create UIView
instances that will act as containers for MenuViewController
and DetailViewController
. You’ll then add them to the scroll view.
Add these properties at the top of RootViewController
:
let menuWidth: CGFloat = 80.0

var menuContainer = UIView(frame: .zero)
var detailContainer = UIView(frame: .zero)
Next, add this method to RootViewController
:
func installMenuContainer() {
  // 1
  scroller.addSubview(menuContainer)
  menuContainer.translatesAutoresizingMaskIntoConstraints = false
  menuContainer.backgroundColor = .orange

  // 2
  menuContainer.leadingAnchor.constraint(equalTo: scroller.leadingAnchor)
    .isActive = true
  menuContainer.topAnchor.constraint(equalTo: scroller.topAnchor)
    .isActive = true
  menuContainer.bottomAnchor.constraint(equalTo: scroller.bottomAnchor)
    .isActive = true

  // 3
  menuContainer.widthAnchor.constraint(equalToConstant: menuWidth)
    .isActive = true
  menuContainer.heightAnchor.constraint(equalTo: scroller.heightAnchor)
    .isActive = true
}
Here’s what you’re doing with this code:
-
Add
menuContaineras a subview ofscrollerand give it a temporary color. Using off-brand colors while developing is a good way to see how your work is going during development. :] -
Next, pin the top and bottom of
menuContainerto the same edges of the scroll view. - Finally, set the width to a constant value of 80.0, and pin the height of the container to the height of the scroll view.
Next, add the following method to RootViewController
:
func installDetailContainer() {
  //1
  scroller.addSubview(detailContainer)
  detailContainer.translatesAutoresizingMaskIntoConstraints = false
  detailContainer.backgroundColor = .red

  //2
  detailContainer.trailingAnchor.constraint(equalTo: scroller.trailingAnchor)
    .isActive = true
  detailContainer.topAnchor.constraint(equalTo: scroller.topAnchor)
    .isActive = true
  detailContainer.bottomAnchor.constraint(equalTo: scroller.bottomAnchor)
    .isActive = true

  //3
  detailContainer.leadingAnchor
    .constraint(equalTo: menuContainer.trailingAnchor)
    .isActive = true
  detailContainer.widthAnchor.constraint(equalTo: scroller.widthAnchor)
    .isActive = true
}
-
Similar to
installMenuContainer, you adddetailContaineras a subview to the scroll view. -
The top, bottom and right edges pin to their respective scroll view edges. The leading edge of
detailContainerjoins tomenuContainer. - Finally, the width of the container is always the same as the width of the scroll view.
For UIScrollView
to scroll its content, it needs to know how big that content is. You can do that either by using the contentSize
property of UIScrollView
or by defining the size of the content implicitly.
In this case, the content size is implicitly defined by five things:
- The menu container height == the scroll view height
- The detail container’s trailing edge pins to the menu container’s leading edge
- The menu container’s width == 80
- The detail container’s width == the scroll view’s width
- The external detail and menu container’s edges anchor to the scroller’s edges

The last thing to do is to use these two methods. Add these lines at the end of viewDidLoad()
:
installMenuContainer()
installDetailContainer()
Build and run your app to see some candy colored wonder. You can drag the content to hide the orange menu container. Already, you can see the finished product starting to form.

Adding Contained View Controllers
You’re building up the stack of views you’ll need to create your interface. The next step is to install MenuViewController
and DetailViewController
in the containers you’ve created.
You’ll still want to have a navigation bar, because you want a place to put a menu reveal button. Add this extension to the end of RootViewController.swift :
extension RootViewController {
  func installInNavigationController(_ rootController: UIViewController)
    -> UINavigationController {
      let nav = UINavigationController(rootViewController: rootController)

      //1
      nav.navigationBar.barTintColor = UIColor(named: "rw-dark")
      nav.navigationBar.tintColor = UIColor(named: "rw-light")
      nav.navigationBar.isTranslucent = false
      nav.navigationBar.clipsToBounds = true

      //2
      addChild(nav)

      return nav
  }
}
Here’s what’s going on in this code:
-
This method takes a view controller, installs it in a
UINavigationControllerthen sets the visual style of the navigation bar. -
The most important part of view controller containment is
addChild(nav). This installs theUINavigationControlleras a child view controller ofRootViewController. This means that events like a trait change as a result of rotation or split view on iPad can propagate down the hierarchy to the children.
Next, add this method to the same extension after installInNavigationController(_:)
to help install MenuViewController
and DetailViewController
:
func installFromStoryboard(_ identifier: String,
                           into container: UIView)
  -> UIViewController {
    guard let viewController = storyboard?
      .instantiateViewController(withIdentifier: identifier) else {
        fatalError("broken storyboard expected \(identifier) to be available")
    }
    let nav = installInNavigationController(viewController)
    container.embedInsideSafeArea(nav.view)
    return viewController
}
This method instantiates a view controller from the storyboard, warning the developer of a break in the storyboard.
The code then places the view controller inside a UINavigationController
and embeds that navigation controller inside the container.
Next, add these properties in the main class to keep track of MenuViewController
and DetailViewController
:
var menuViewController: MenuViewController?
var detailViewController: DetailViewController?
Then insert these lines at the end of viewDidLoad()
:
menuViewController =
  installFromStoryboard("MenuViewController",
                        into: menuContainer) as? MenuViewController

detailViewController =
  installFromStoryboard("DetailViewController",
                        into: detailContainer) as? DetailViewController
In this fragment, you instantiate MenuViewController
and DetailViewController
and keep a reference to them because you’ll need them later.
Build and run the app and you’ll see that the menu is visible, although a little skinnier than before.

The buttons don’t cause DetailViewController
to update because that segue no longer exists. You’ll fix that in the next section.
You’ve finished the view containment section of the tutorial. Now you can move onto the really fun stuff. :]
Reconnect Menu and Detail Views
Before you went on your demolition rampage, selecting a table cell in MenuViewController
triggered a segue that passed the selected MenuItem
to DetailViewController
.
It was cheap and it got the job done, but there’s a small problem. The pattern requires MenuViewController
to know about DetailViewController
.
That means that MenuViewController
has a tight binding to DetailViewController
. What happens if you no longer want to use DetailViewController
to show the results of your menu choice?
As good developers, you should seek to reduce the amount of tight binding in your system. You’ll set up a new pattern now.
Creating a Delegate Protocol
The first thing to do is to create a delegate protocol in MenuViewController
, which will allow you to communicate menu selection changes.
Locate MenuViewController.swift in the Project navigator and open the file.
Since you are no longer using a segue, you can go ahead and delete prepare(for:sender:)
.
Next, add this protocol definition above the MenuViewController
class declaration:
protocol MenuDelegate: class {
  func didSelectMenuItem(_ item: MenuItem)
}
Next, insert the following code inside the body of MenuViewController
:
//1
weak var delegate: MenuDelegate?

override func tableView(_ tableView: UITableView,
                        didSelectRowAt indexPath: IndexPath) {
  //2
  let item = datasource.menuItems[indexPath.row]
  delegate?.didSelectMenuItem(item)

  //3
  DispatchQueue.main.async {
    tableView.deselectRow(at: indexPath, animated: true)
  }
}
Here’s what this code does:
-
In the first code fragment, you declared a protocol that interested parties can adopt. Inside
MenuViewController, you declare aweakdelegateproperty. Usingweakin protocol references helps avoid creating a retain cycle . -
Next, you implement the
UITableViewDelegatemethodtableView(_:didSelectRowAt:)to pass the selectedMenuItemto thedelegate. - The last statement is a cosmetic action to deselect the cell and remove its highlight.
Implementing the MenuDelegate Protocol
You can now implement the protocol you created to send the selection change to DetailViewController
.
Open RootViewController.swift and add this extension to the end of the file:
extension RootViewController: MenuDelegate {
  func didSelectMenuItem(_ item: MenuItem) {
    detailViewController?.menuItem = item
  }
}
This code declares that RootViewController
adopts MenuDelegate
. When you select a menu item, RootViewController
tells DetailViewController
about that change by passing the selected MenuItem
to the instance.
Finally, insert this line at end of viewDidLoad()
:
menuViewController?.delegate = self
That tells MenuViewController
that RootViewController
is the delegate.
Build and run the app. Your menu selections will now change the contents of DetailViewController
. Signal thumbs up. :]

Controlling the Scroll View
So far so good. Your menu works and the app looks a lot nicer.
However, you’ll also notice that manually scrolling the menu away doesn’t last very long. The menu always bounces back into view.
The scroll view property isPagingEnabled
causes that effect because you have set it to true
. You’ll fix that now.
Still working inside RootViewController
, add this line below let menuWidth: CGFloat = 80.0
:
lazy var threshold = menuWidth/2.0
Here, you pick an arbitrary point where the menu will choose to hide or show itself. You use lazy
because you’re calculating a value relative to menuWidth
.
Locate extension RootViewController: UIScrollViewDelegate
in RootViewController
and insert this code inside the extension:
//1
func scrollViewDidScroll(_ scrollView: UIScrollView) {
  let offset = scrollView.contentOffset
  scrollView.isPagingEnabled = offset.x < threshold
}
//2
func scrollViewDidEndDragging(_ scrollView: UIScrollView,
                              willDecelerate decelerate: Bool) {
  let offset = scrollView.contentOffset
  if offset.x > threshold {
    hideMenu()
  }
}
//3
func moveMenu(nextPosition: CGFloat) {
  let nextOffset = CGPoint(x: nextPosition, y: 0)
  scroller.setContentOffset(nextOffset, animated: true)
}
func hideMenu() {
  moveMenu(nextPosition: menuWidth)
}
func showMenu() {
  moveMenu(nextPosition: 0)
}
func toggleMenu() {
  let menuIsHidden = scroller.contentOffset.x > threshold
  if menuIsHidden {
    showMenu()
  } else {
    hideMenu()
  }
}
Take a look at what this code does:
-
The first
UIScrollViewDelegatemethod,scrollViewDidScroll(_:), is super useful. It always tells you when something has changed thecontentOffsetof the scroll view. You setisPagingEnabledbased on whether the horizontal offset is above the threshold value. -
Next, you implement
scrollViewDidEndDragging(_:willDecelerate:)to detect a raised touch on the scroll view. As long as the content offset is greater than the threshold, you hide the menu; otherwise the paging effect takes hold and reveals the menu. - The last methods are helpers to animate the menu into position: show, hide and toggle.
Build and run your app. Now, try dragging the scroll view and see what happens. When you cross the threshold, the menu springs open or closed:

Looks like it’s time for burgers. :]
Adding a Menu Button
In this section, you’re going to add a burger button to the navigation bar so your users don’t have to drag to show and hide the menu.
Because you want to animate this button later, this needs to be a UIView
rather than an image-based UIBarButton
.
Creating a Hamburger View
Select the Views folder in the Project navigator, then add a new Swift file.
- Select iOS ▸ Cocoa Touch Class . Click Next .
- Name the class HamburgerView .
-
Ensure that
HamburgerViewis a subclass of UIView . - The language should be Swift .
Open HamburgerView.swift
and replace everything inside the class HamburgerView
with this code:
//1
let imageView: UIImageView = {
  let view = UIImageView(image: UIImage(imageLiteralResourceName: "Hamburger"))
  view.contentMode = .center
  return view
}()
//2
required override init(frame: CGRect) {
  super.init(frame: frame)
  configure()
}
required init?(coder aDecoder: NSCoder) {
  super.init(coder: aDecoder)
  configure()
}
private func configure() {
  addSubview(imageView)
}
Here’s what you’re doing here:
UIImageView
init
Installing the Hamburger View
Now you have a view, you can install it in the navigation bar that belongs to DetailViewController
.
Open RootViewController.swift
again and insert this property at the top of the main RootViewController
class:
var hamburgerView: HamburgerView?
Next append this extension to the end of the file:
extension RootViewController {
  func installBurger(in viewController: UIViewController) {
    let action = #selector(burgerTapped(_:))
    let tapGestureRecognizer = UITapGestureRecognizer(target: self,
                                                      action: action)
    let burger = HamburgerView(frame: CGRect(x: 0, y: 0, width: 20, height: 20))
    burger.addGestureRecognizer(tapGestureRecognizer)
    viewController.navigationItem.leftBarButtonItem
      = UIBarButtonItem(customView: burger)
    hamburgerView = burger
  }
  @objc func burgerTapped(_ sender: Any) {
    toggleMenu()
  }
}
Finally add this statement into the bottom of the viewDidLoad()
:
if let detailViewController = detailViewController {
  installBurger(in: detailViewController)
}
This set of code provides an instance variable for the burger button, since you’ll want to animate it soon. You then create a method to install the burger in the navigation bar of any view controller.
The method installBurger(in:)
creates a tap gesture in the view that calls out to the method burgerTapped(_:)
.
Note that you must annotate burgerTapped(_:)
with @objc
because you are using the Objective-C runtime here. This method toggles the menu in or out depending on the current state.
You then use this method to install the button in the UINavigationBar
that belongs to DetailViewController
. From an architecture perspective, DetailViewController
doesn’t know about this button and doesn’t need to deal with any menu state operations. You maintain separation of responsibilities.
That’s it. The steps left to bring your 3D sidebar animation to life are getting fewer as you build up the stack of objects.
Build and run your app. You’ll see that you now have a burger button that toggles the menu in and out.

Adding Perspective to the Menu
To review what you’ve done so far, you’ve refactored a Master-Detail app into a viable side menu-type app, where the user can either drag or use a button to reveal and hide the menu.
Now, for your next step: The animated version of your menu should look like a panel opening and closing. The menu button will rotate smoothly clockwise as the menu opens and counter-clockwise as the menu closes.
To do this, you’ll calculate the fraction of the menu view that’s visible, then use this to calculate the menu’s angle of rotation.
Manipulating the Menu Layer
Still within RootViewController.swift , add this extension to the file:
extension RootViewController {
  func transformForFraction(_ fraction: CGFloat, ofWidth width: CGFloat)
    -> CATransform3D {
      //1
      var identity = CATransform3DIdentity
      identity.m34 = -1.0 / 1000.0

      //2
      let angle = -fraction * .pi/2.0
      let xOffset = width/2.0 + width * fraction/4.0

      //3
      let rotateTransform = CATransform3DRotate(identity, angle, 0.0, 1.0, 0.0)
      let translateTransform = CATransform3DMakeTranslation(xOffset, 0.0, 0.0)
      return CATransform3DConcat(rotateTransform, translateTransform)
  }
}
Here’s the play-by-play of transformForFraction(_:ofWidth:)
:
-
CATransform3DIdentityis a 4×4 matrix with ones on the diagonal and zeros everywhere else. Them34property ofCATransform3DIdentityis the value in row 3, column 4, which controls the amount of perspective in the transform. -
The angle and offset are calculated as a function of the input
fraction. The menu will be completely hidden whenfractionis1.0, and completely visible when the it is0.0. -
The final transform is calculated.
CATransform3DRotateusesangleto determine the amount of rotation around the y-axis: -90 degrees renders the menu perpendicular to the back of the view and 0 degrees renders the menu parallel with the x-y plane,CATransform3DMakeTranslationmoves the menu to the right of center, andCATransform3DConcatconcatenatestranslateTransformandrotateTransform, so that the menu appears to slide sideways while rotating.
m34
value is usually calculated as 1 divided by a number that represents the viewer’s position on the z-axis while observing the 2D x-y plane. Negative z-values say that the viewer is in front of the plane, while positive z-values say the viewer is behind the plane.
Drawing lines between this viewer and the edges of objects in the plane produces the effect of 3D perspective. As the viewer moves farther away, the perspective is less pronounced. Try changing 1,000 to 500 or 2,000 to see how the menu’s perspective changes.
Next, add this extension to RootViewController.swift :
extension RootViewController {
  //1
  func calculateMenuDisplayFraction(_ scrollview: UIScrollView) -> CGFloat {
    let fraction = scrollview.contentOffset.x/menuWidth
    let clamped = Swift.min(Swift.max(0, fraction), 1.0)
    return clamped
  }
  //2
  func updateViewVisibility(_ container: UIView, fraction: CGFloat) {
    container.layer.anchorPoint = CGPoint(x: 1.0, y: 0.5)
    container.layer.transform = transformForFraction(fraction,
                                                     ofWidth: menuWidth)
    container.alpha = 1.0 - fraction
  }
}
This code provides a few helpers for opening and closing the menu:
-
calculateMenuDisplayFraction(_:)converts the raw horizontal offset into a fraction of 1.0 relative to the menu width. This value is clamped between 0.0 and 1.0. -
updateViewVisibility(_:fraction:)applies the transform generated by the fraction to a views layer. TheanchorPointis the hinge around which the transform applies, soCGPoint(x: 1.0, y: 0.5)means the right hand edge and vertical center.
By setting the alpha, the view also gets darker as the transform progresses.
Now, locate scrollViewDidScroll(_:)
and insert these lines at the end of the method:
let fraction = calculateMenuDisplayFraction(scrollView)
updateViewVisibility(menuContainer, fraction: fraction)
Build and run the app. The menu will now appear to be folding under the detail view as you drag the detail view left.
You have permission to make swoosh noises as you move it back and forth. :]

Rotating the Burger Button
The last thing you’ll do in this tutorial is to make the burger button appear to roll across the screen as the scroll view moves.
Open HamburgerView.swift and insert this method into the class:
func setFractionOpen(_ fraction: CGFloat) {
  let angle = fraction * .pi/2.0
  imageView.transform = CGAffineTransform(rotationAngle: angle)
}
This code rotates the view as a function of the fraction. When the menu is fully open, the view rotates 90 degrees.
Return to RootViewController.swift
. Locate scrollViewDidScroll(_:)
and append this line to the end of the method:
hamburgerView?.setFractionOpen(1.0 - fraction)
This rotates the burger button as the scroll view moves.
Then, because the menu is open when you start the app, add this line to the end of viewDidLoad()
to put the menu in the correct initial state:
hamburgerView?.setFractionOpen(1.0)
Build and run your app. Swipe and tap the menu to see your 3D sidebar animation in motion and in sync:

You’ve got it. Time for a cocktail. :]
Where to Go From Here?
You can download the final version of the project using the Download Materials button at the top and bottom of this tutorial.
In this tutorial you covered:
- View controller containment.
-
UIScrollViewimplicit content size. - Delegate pattern.
-
Perspective changes with
CATransform3Dandm34.
Experiment with the m34
value to see what effect it has on your transformation. If you’d like to know more about m34
, read this xdPixel blog post
.
Wikipedia’s Perspective page has some good photos explaining the concepts of visual perspective.
Also, think about how you can use this 3D sidebar animation in your own apps to add a little bit of life to user interactions. It’s amazing how a subtle effect on something as simple as a menu can add to the whole user experience.
If you have any questions or comments about this 3D sidebar animation tutorial, please leave them in the comments below, or in the forums!
Recommend
About Joyk
Aggregate valuable and interesting links.
Joyk means Joy of geeK