

JS Monday 13 – Dockerizing Node.js
source link: https://www.tuicool.com/articles/hit/FzUJvmJ
Go to the source link to view the article. You can view the picture content, updated content and better typesetting reading experience. If the link is broken, please click the button below to view the snapshot at that time.

Let’s walk through a Node.js server development process:
- Install the newest Node.js version
- Install a database for your app (Mongo? CouchDB? MySQL?)
- Maybe add ElasticSearch if you want to add some super-fast queries
- Test your app on your machine
- Deploy it
- Watch it fail in production
Well, we all walked this path at least one time, right?
Developing a Node.js app sometimes can be challenging, ’cause you may need a lot of external dependencies (databases, search engines, etc) and sometimes you only test it on your local environment, with different versions of a X database, or the Y service… and then it crashes in production, ’cause the environment is totally different.
Introducing Docker
Docker is a simple but powerful OpenSource project which helps you to develop and deploy any software in any language on a container , which is basically a kind of Virtual Machine.
With Docker, you can run any software/language without even installing it on your machine!
Let’s see an example:
You’ve developed a new incredible chat app with the following stack:
- Database : CouchDB
- Backend : Node.js + Koa
- Search Engine : ElasticSearch
- Frontend : Koa + Next.js
You’re currently hosting it on AWS, but for some reason you want to switch to Google Cloud.
Without Docker, you need to recreate the whole environment on Google Cloud, so you need to get a new server, install every dependency, test your code, then hope that everything works fine.
With Docker, you just deploy your container, which contains all the informations needed to create the production environment.
So, instead of getting a server for each service above, you just need to deploy the same containers you were using on AWS on Google Cloud!
Another great advantage of using Docker, is that you don’t need to reproduce the production environment on your machine: you just install every dependency on a separate container, then orchestrate them (with Minikube or docker-compose ) while developing and you’re done! The exact same dependencies will be deployed in test/production, which means no more “works on my machine” excuse!
Setting Up Docker for Node.js

First of all, you need to create a Dockerfile
.
We’ll write all the configurations about our docker image inside that file:

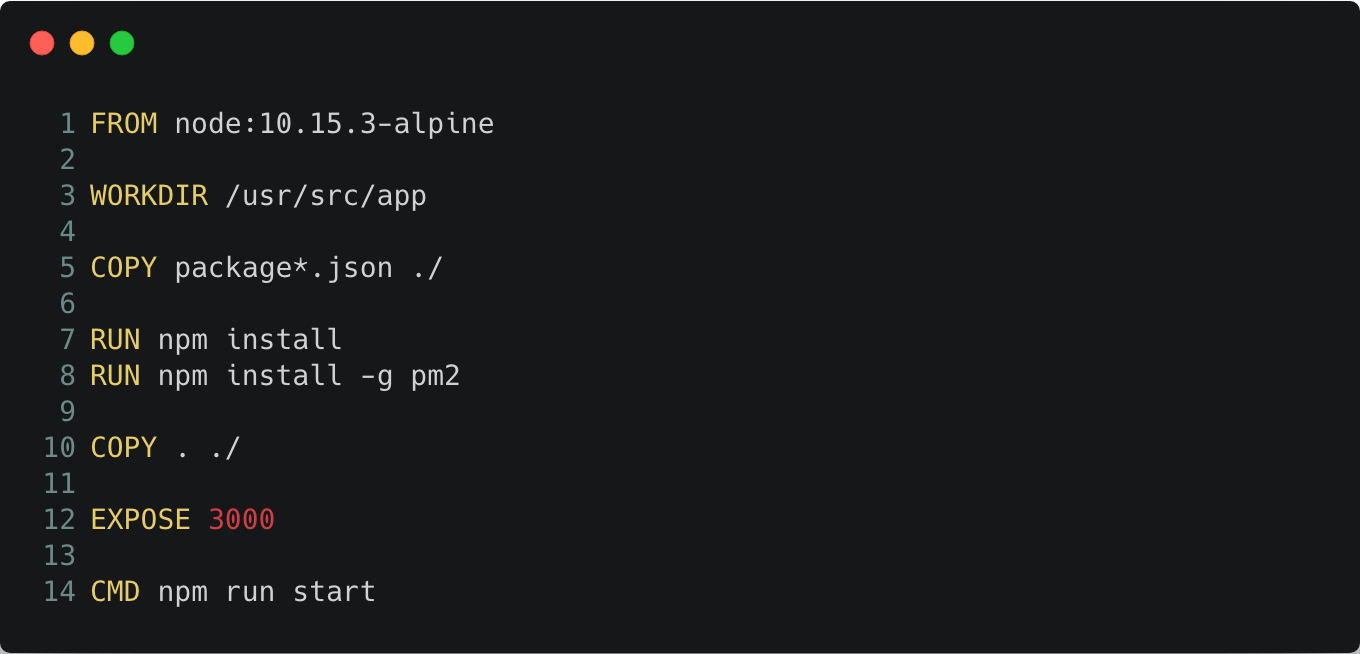
Let’s analyze the file above:
- On line 1 we declare which image we want to use. In that case, we’ll use the official Node 10.15.3 image. You can find more images on DockerHub .
- On line 3, we create the directory which contains our application code (inside the image).
-
On line 5, we copy both
package.jsonandpackage.lock.jsonin our WORKDIR path. -
On line 7, we run
npm installin order to (of course) install all dependencies listed in ourpackage.jsonfile - On line 8, we install the awesome PM2 process manager , which will start our application in a supervised mode.
- On line 10, we copy every file in our current working directory, inside the WORKDIR image path.
-
On line 12, we declare which TCP port to expose. For example, if your Express server works on port
3000, that is the port to expose. -
Last but not least, on line 14 we declare which command will boot up our application. In that case, the command is
npm run start.
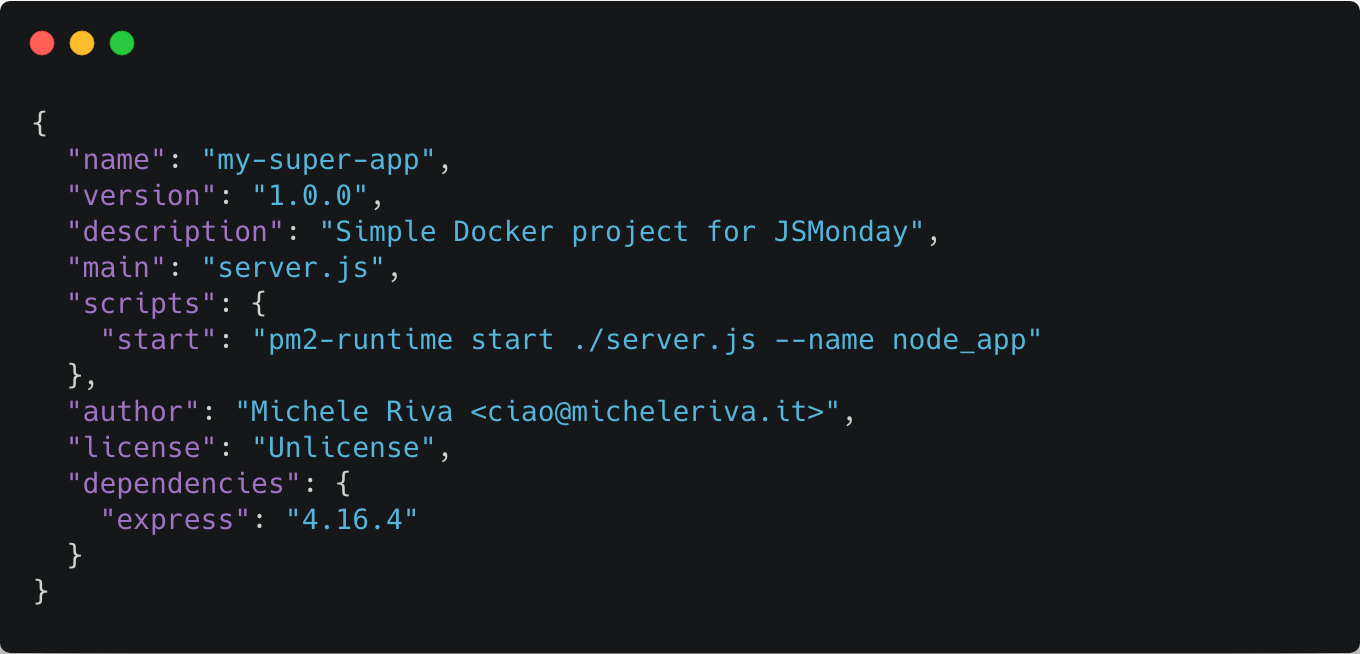
Great! Now, let’s pretend we have a simple Express.js server to be Dockerized:


Our package.json
file should look like this:

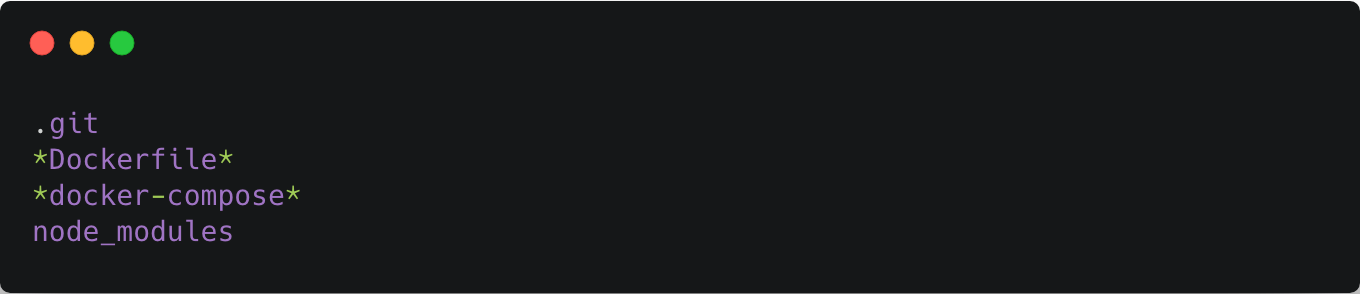
Let’s create another file called .dockerignore
where we’ll list the files to be ignored by docker:

Great! Now we can start our Docker image! Run the following command inside your project folder:


We used the -t
(tag) flag, so when we run the command docker images
, we’ll be able to find our image with the given name:


Now let’s boot up our image:


Let’s go to http://localhost:3000
and see if it works!

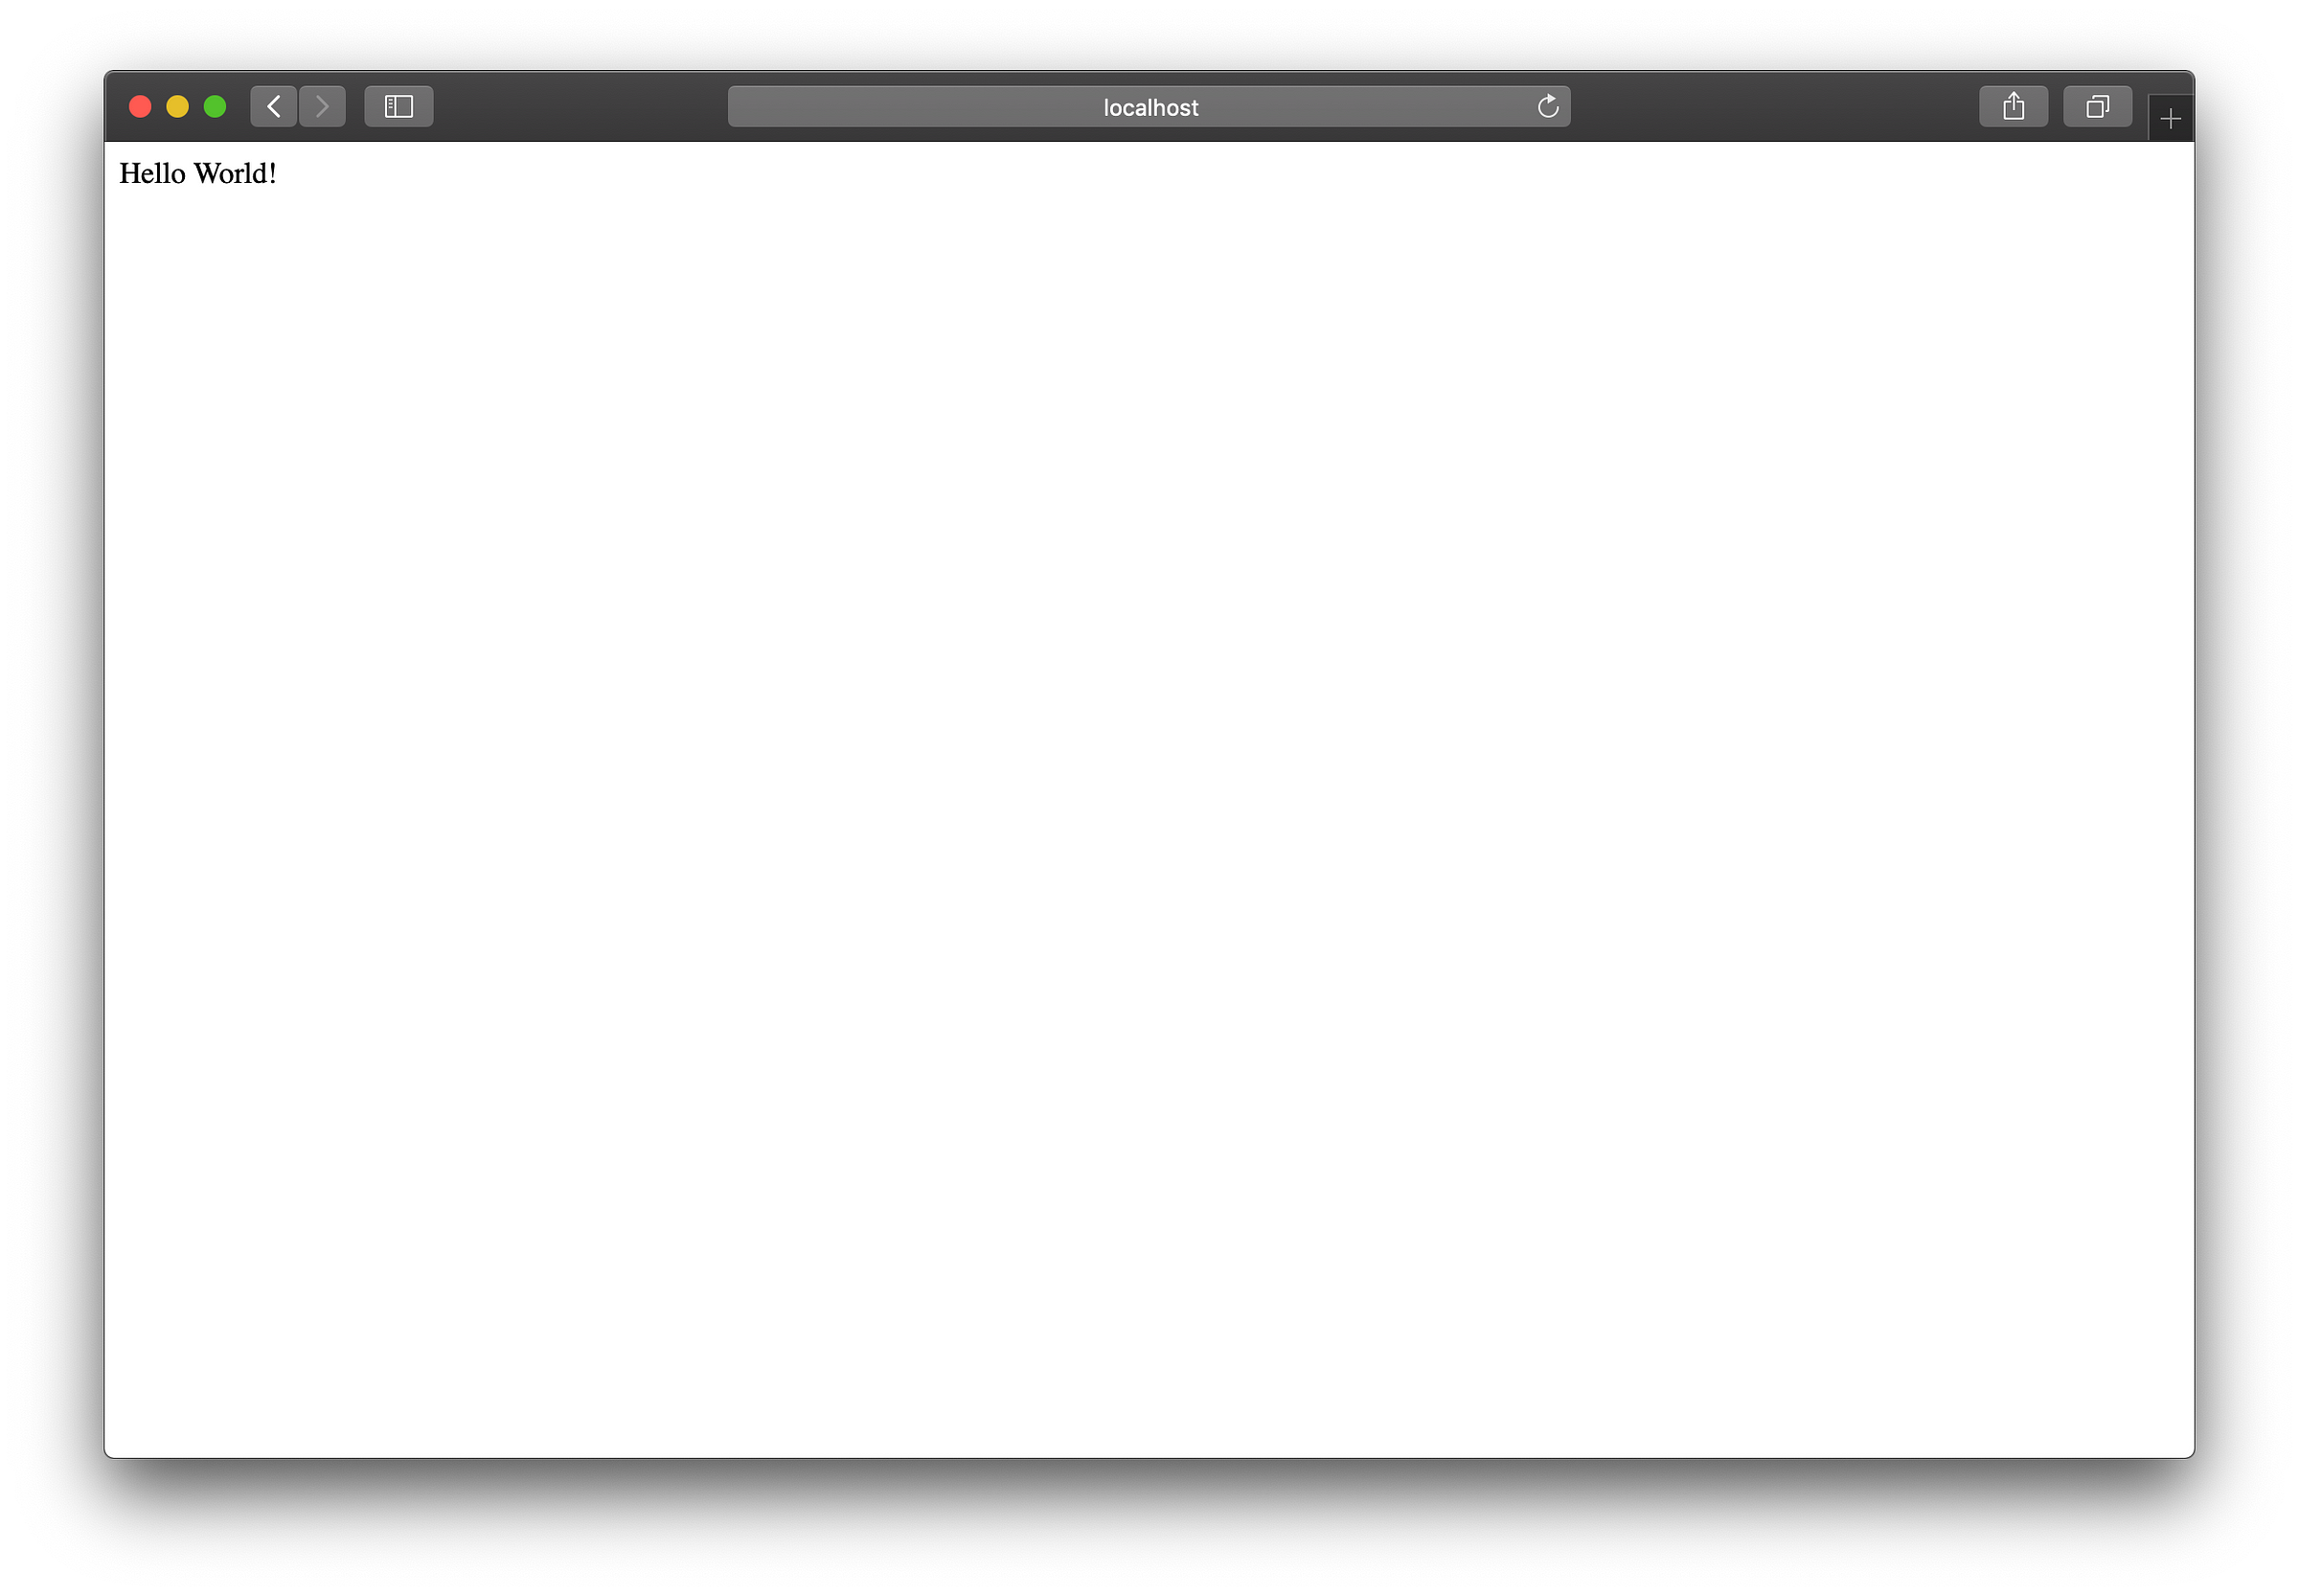
We just Dockerized our first Node.js application! Greatest thing about that? You don’t even need to install Node.js on your machine in order to get that Hello World
page! It’s all managed by Docker
!
Next steps
At this point, you may need to manage your dependencies (Databases, frontends, API servers etc), so you have a bunch of options here.
- Create a Docker image for every dependency. Pretty hard to maintain, not a good solution!
- Use docker-compose in order to build multiple images at once (once for each dependency).
- Use Minikube and Kubernetes for orchestrating multiple containers on both development and production environment.
On the next JS Monday episode, we’ll develop an app powered by ElasticSearch and Node using docker-compose . See you next week!

Recommend
About Joyk
Aggregate valuable and interesting links.
Joyk means Joy of geeK