

Model-View-Controller (MVC) in iOS – A Modern Approach [FREE]
source link: https://www.tuicool.com/articles/hit/QV3MreE
Go to the source link to view the article. You can view the picture content, updated content and better typesetting reading experience. If the link is broken, please click the button below to view the snapshot at that time.
Update note : Felipe Laso-Marsetti updated this tutorial for Swift 4.2, Xcode 10 and iOS 12. Rui Peres wrote the original.
Getting Started
As a new iOS developer, there is a huge amount of information you need to master: a new language, new frameworks and APIs, and Apple’s recommended architectural pattern Model-View-Controller , or MVC for short.
The MVC pattern is commonplace in iOS development. While it’s not a difficult pattern to understand and get familiar with, there are things to consider to avoid common pitfalls.
Getting up to speed with iOS development can be a daunting task and, more often than not, MVC doesn’t get as much attention as the APIs or programming language. This can lead to major architectural problems in your apps down the road.
This tutorial will help you avoid common mistakes that lead to apps that are too difficult to extend. You’ll learn a good approach of what (and what not) to do as you use MVC to build out your app using best practices, learned through the years of iOS development.
In this tutorial you won’t be doing any coding. Instead, you will walk through a project that uses MVC with best practices in mind.
Use the Download Materials button at the top or bottom of this tutorial to download the sample project.
What is MVC
With the project handy, it’s time to start learning about the Model, the View and the Controller. But first, what exactly is MVC?
Note : If you already know the concept of MVC, feel free to skip ahead to the next section, where you’ll start getting into best practices.
MVC is a software development pattern made up of three main objects:
- The Model is where your data resides. Things like persistence, model objects, parsers, managers, and networking code live there.
-
The View
layer is the face of your app. Its classes are often reusable as they don’t contain any domain-specific logic. For example, a
UILabelis a view that presents text on the screen, and it’s reusable and extensible. -
The Controller
mediates between the view and the model via the delegation pattern. In an ideal scenario, the controller entity won’t know the concrete view it’s dealing with. Instead, it will communicate with an abstraction via a protocol. A classic example is the way a
UITableViewcommunicates with its data source via theUITableViewDataSourceprotocol.
When you put everything together, it looks like this:

Each one of these objects is meant to be separate from the other, and each fulfills a specific role. When building an app that uses a specific pattern, in this case MVC, the goal is to adhere to the pattern when building all layers of your app.
Apple’s MVC documentation explains these layers in detail and can give you a good theoretical understanding. From a practical perspective, though, it falls a little short.
In this tutorial, you’ll learn to treat MVC as a pattern and not as a strict rule that you must never break. As is the case with many things in software development, nothing is perfect and neither is MVC. There are gray areas that you’ll run into, but no decision you make is the wrong decision. As long as you don’t have files that are too big, or code that is difficult to expand upon, then you’re likely doing a good job. Use MVC — and other patterns for that matter — as architectural guidelines and foundations for your app.
Having said that, it’s time to look at each layer in more detail.

The Model (M)
The model layer encompasses your app’s data. No surprise there, but there are usually other classes and objects in your projects that you can include in this layer:
- Network code : You preferably only use a single class for network communication across your entire app. It makes it easy to abstract concepts common to all networking requests like HTTP headers, response and error-handling and more.
- Persistence code : You use this when persisting data to a database, Core Data or storing data on a device.
- Parsing code : You should include objects that parse network responses in the model layer. For example, in Swift model objects, you can use JSON encoding/decoding to handle parsing. This way, everything is self-contained and your network layer doesn’t have to know the details of all your model objects in order to parse them. Business and parsing logic is all self-contained within the models.
- Managers and abstraction layers/classes : Everyone uses them, everyone needs them, nobody knows what to call them or where they belong. It’s normal to have the typical “manager” objects that often act as the glue between other classes. These can also be wrappers around lower-level, more robust API: a keychain wrapper on iOS, a class to help with notifications or a model to help you work with HealthKit.
- Data sources and delegates : Something that may be less common is developers relying on model objects to be the data source or delegate of other components such as table or collection views. It’s common to see these implemented in the controller layer even when there’s a lot of custom logic that’s best kept compartmentalized.
- Constants : It’s good practice to have a file with constants. Consider putting these within a structure of structures or variables. That way, you can reuse storyboard names, date formatters, colors, etc.
- Helpers and extensions : In your projects, you will often add methods to extend the capabilities of strings, collections, etc. These too can be considered part of the model.
There are more classes and objects you could include, but these seem to be the most common. Again the goal is not to focus too much on the semantics of what is or isn’t a model. Rather, it is to have a solid foundation upon which to get your work done.
From a testing perspective, the model is an excellent candidate. You can confirm business logic, mock some of your networking or persistence methods or add tests around sensitive pieces of your model layer.
The View (V)
When users interacts with your app, they are interacting with the view layer. It should not contain any business logic. In code terms, you’ll normally see:
-
UIViewsubclasses: These range from a basicUIViewto complex custom UI controls. - Classes that are part of UIKit/AppKit.
- Core Animation.
- Core Graphics.
Typical code smells found in this layer manifest in different ways but boil down to include anything unrelated to UI in your view layer. This can include network calls, business logic, manipulating models and so on.
Use the following as a checklist when inspecting your view layer:
- Does it interact with the model layer?
- Does it contain any business logic?
- Does it try to do anything not related to UI?
If you answer “yes” to any of these questions, you have an opportunity to clean up and refactor.
Of course, these rules aren’t written in stone and sometimes you’ll need to bend them. Nonetheless, it’s important to keep them in mind.
Well-written view components are often reusable, but don’t focus on that from the start. It’s easy to get caught up in the thought of taking a cool button you built and making it compatible for a dozen different scenarios that your app may never need.
Consider making components reusable only when you actually need to. When you have multiple use cases, that’s the time to make a component more generic.
From a testing perspective, UI testing in iOS allows you to test things like transitions, UI elements having specific attributes or UI interactions working as intended.
The Controller (C)
The controller layer is the least reusable part of your app as it often involves your domain-specific rules. It should be no surprise that what makes sense in your app won’t always make sense in someone else’s. The controller will then use all the elements in your model layer to define the flow of information in your app.
Usually, you’ll see classes from this layer deciding things like:
- What should I access first: the persistence or the network?
- How often should I refresh the app?
- What should the next screen be and in which circumstances?
- If the app goes to the background, what should I tidy up?
- The user tapped on a cell; what should I do next?
Think of the controller layer as the brain, or engine, of the app; it decides what happens next.
You likely won’t do much testing in the controller layer as, for the most part, it’s meant to kick things off, trigger data loads, handle UI interactions, mediate between UI and model, etc.
Putting it all Together
Now that you have a better understanding of the layers involved in the MVC pattern, it’s time to see it in action with this tutorial’s sample app.
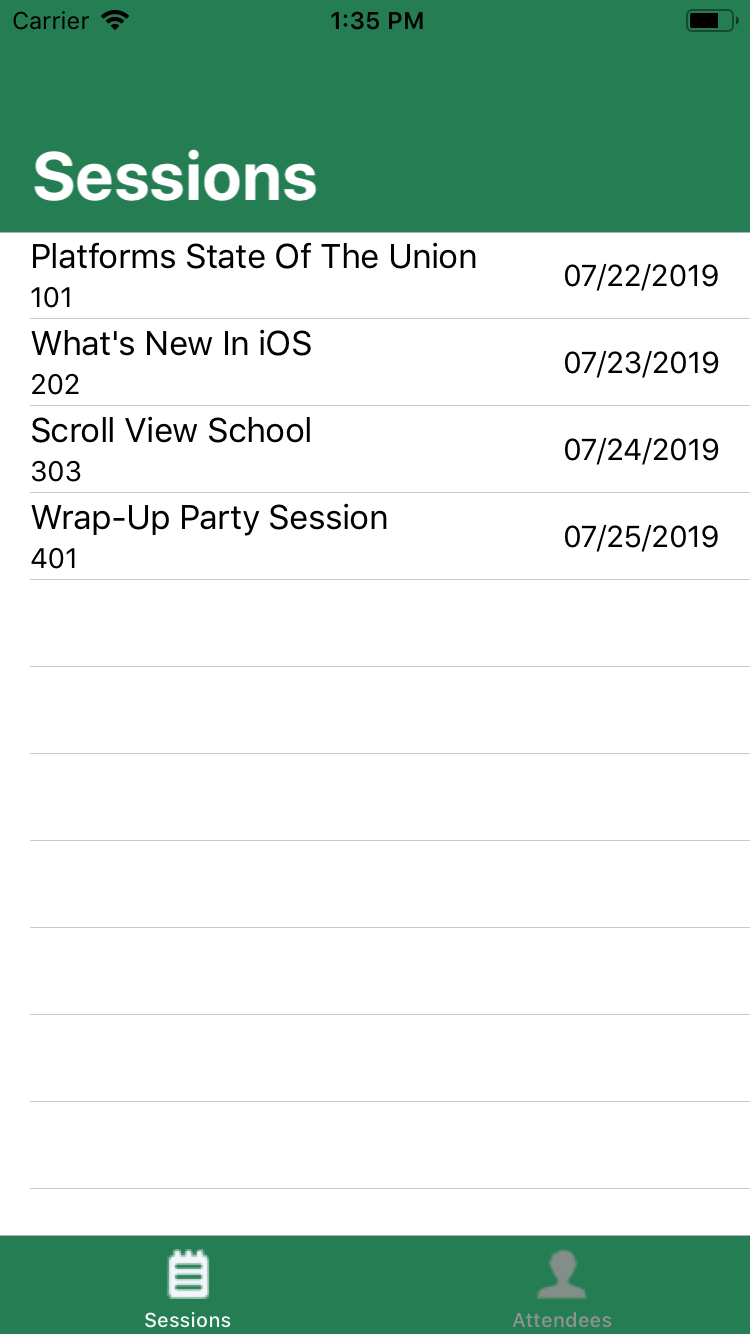
Open the tutorial’s sample project and run the app. This app is a WWDC-like app that shows sessions and attendees for the event. The app loads data from JSON files in the app bundle on launch. Loading the data triggers the controllers to update the view and begin waiting for user interaction.
To start, expand the Model
folder. The three “pure” model classes are Event
, Attendee
and Session
. Note how these conform to Decodable
so parsing from a JSON response is simple.
From there, you have other model files that are part of your network calls. This tutorial’s project loads a file from the app’s bundle, but you can add a remote URL to load a file or call a web service. The main classes are:
-
Network
: A wrapper around
URLSession - NetworkError : To handle different errors during the request/response process
- WebService : To add a helper method for loading both attendees and sessions
Of note is Network.swift
, which has a method that uses generics to request JSON from a URL and parse it into an object type you specify in the method call. It handles HTTP responses and codes, errors, parsing, concurrency and making the URLSession
call for you.
These files are small, straightforward, contain their own logic and you can test them with, at most, some mock methods.
Moving on to the view, it’s mostly contained in your storyboard files. This is a good thing as it’s not only more visual, but reducing the lines of code you write means reducing the amount of possible bugs you can introduce.
You may also have view logic in files, as is the case with SessionCell.swift , particularly when you do custom animations or UI elements. Your views should not know about business logic, interact with or know about model objects or do anything that doesn’t pertain to the view itself.
Testing components in the view layer, from a pure unit test perspective, is not so simple or useful, especially when dealing with XIBs or storyboards. This is because programmatically creating views or controllers will not trigger all methods in the view lifecycle or set up non-programmatic constraints. You can do UI testing and ensure that your tests also cover the view layer.
Finally, you get to the controller layer, this is where things get interesting as they act as the glue between view and model. AttendeeViewController
and SessionViewController
have the same concept. These display a list of items that you can select to view details. When you present the details for a selected item, you use the DetailViewController
Some things to note are:
AppDelegate
It’s all very lean, clean and easy to understand. You could even, for more robust projects, create separate classes or objects to act as data sources or delegates, further simplifying your controllers.
There is no heavy reliance on completion blocks, delegation (outside of what the table view needs) or mixing up business logic in views or controllers. You also don’t have the dreaded “MVC: massive view controllers.” This occurs when too much of your business logic lives inside of the controller.
Some tips to help you notice when an item in a layer may be overstepping its boundaries are:
- The controller is doing network requests, parsing or persistence.
- The controller (or any file) has hundreds or thousands of lines of code.
- Views accept model objects to “configure” themselves or set up UI elements for display.
- Controllers are doing a lot of business logic, calculations, data wrangling or manipulation.
Where to go From Here?
MVC is a pattern, a guideline for you to architect your app; it is not a strict set of rules you must adhere to.

As with anything that’s meant to act as a guide, you may disagree with some of the contents or implementations in this tutorial. You can do things in other ways or tweak it to fit your needs. That’s all fine. There are many ways to work with this dough that we call the model-view-controller pattern.
The TL;DR is: If you’ve found changes or tweaks that work for you, your team, your company or your workflow, go for it. As long as your app remains flexible and capable of growing, then you’re good to go.
No architecture, old or new, is a silver bullet and you should always focus on good engineering principles first.
If you have any comments or questions, please join the forum discussion below! I hope you’ve enjoyed this tutorial and learning a little bit more about the MVC pattern.
Recommend
About Joyk
Aggregate valuable and interesting links.
Joyk means Joy of geeK