

Espresso Testing and Screen Robots: Getting Started [FREE]
source link: https://www.tuicool.com/articles/hit/ZVNBniE
Go to the source link to view the article. You can view the picture content, updated content and better typesetting reading experience. If the link is broken, please click the button below to view the snapshot at that time.
Testing your app is immensely important, but often overlooked. Sometimes this is because the developer simply doesn’t know where to start. One place you can start is by testing your UI using Espresso tests.
You can further power your Espresso test writing by using Screen Robots to take care of repetitive testing code.
In this tutorial, you will learn:
- What UI tests are and why they are important.
- How to use Espresso to test your UI.
- What Screen Robots are and how they can be helpful.
Note : This tutorial assumes you have basic knowledge of Android and Kotlin. If you are new to Android Development, check out our Beginning Android Development tutorials. Need to catch up on Kotlin? Take a look at Kotlin For Android: An Introduction .
Using Espresso
Espresso is not only a delicious coffee beverage but also an entire testing framework from Google that allows you to test the UI of your Android app. Manually click-testing all parts of your app is way too slow and tedious. With Espresso, you can write automated tests to make sure everything works as expected and catch regressions before they happen.
You can speed up your test writing even more by creating Screen Robots. These are helper functions that take care of repetition you may have in your tests, such as filling out a form.
Note : UI tests are different from unit tests. Where UI tests test your app by verifying that the state of the UI is consistent after a given set of interactions with the UI. A unit test on the other hand, tend to be smaller tests that verify class method outputs or state based on a set of given input. If you’d like to read more about unit tests, check out Android Unit Testing with Mockito .
Getting Started
To learn about UI testing, you will write tests for an Emoji Tip Calculator app. This app allows you to enter the total from your bill, pick an emoji that represents how you feel about the service and get a tip amount along with the total. You also have the option to round up to the nearest dollar.
Start by downloading the sample project using the Download Materials button at the top or bottom of this tutorial. Open and build the starter project in Android Studio.
Run the app and try it out so that you know the expected behaviors. Try different dollar amounts, pick different emojis and toggle the Round up to nearest dollar switch to see what happens.

You’ll write a whole new test file for this tutorial, but it may be helpful to become familiar with some of the other files. Take a look at MainActivity.kt and activity_main.xml . These define the views and logic for the app.
Adding Dependencies
By default, a generated Android project includes some Espresso dependencies. Every new project should already include the following dependencies in app/build.gradle :
androidTestImplementation 'androidx.test:runner:1.1.1'
androidTestImplementation 'androidx.test.espresso:espresso-core:3.1.1'
And a default test runner:
testInstrumentationRunner "androidx.test.runner.AndroidJUnitRunner"
This should be enough for you to write UI tests, however, you will add more rule and truth assertion libraries provided by Google to reduce the boilerplate code required in tests. Add the following dependencies to app/build.gradle :
androidTestImplementation 'androidx.test:rules:1.1.1'
androidTestImplementation 'androidx.test.ext:truth:1.1.0'
androidTestImplementation 'androidx.test.ext:junit:1.1.0'
Sync your .gradle files after you make that change. You can see a breakdown of what each testing dependancies provides in the Google documentation .
Note : If you don’t want to use the AndroidX helpers in your own project yet, you can still follow along with this tutorial. You’ll find the alterations needed when not using them in future notes. To understand what’s added, take a look at this blog post .
Writing Espresso Tests
First, you need a file in which to write your tests. To see the actual file structure of the project, switch to the Project view by selecting Project from the dropdown at the top of the Project window on the left.

Create a MainActivityTest.kt under app ‣ src ‣ androidTest ‣ java ‣ com ‣ raywenderlich ‣ android ‣ emojicalculator . It’s standard practice to put your test file under the same package structure as the file you’re testing, replacing main with androidTest , or test for non Android tests. This package structure mimics the location of MainActivity.kt , as that’s what you’re testing.
Add the empty class to your file:
class MainActivityTest {

}
MainActivity
, press ⌘ + ⇧ + T
(or Control + Shift + T
on Windows) and select Create New Test…
. A window will pop up to select the location of the test.
Keep the defaults and select OK .

Then, choose the androidTest directory and select OK again.

Finally, before writing your tests, you need to add an annotation to say what to run the tests with. Add this right above your test class declaration.
@RunWith(AndroidJUnit4::class)
Use androidx.test.ext.junit.runners.AndroidJUnit4
when prompted to import AndroidJUnit4
and org.junit.runner.RunWith
to import RunWith
.
This tells JUnit to run the tests inside of AndroidJUnit4
instead of the runner built into JUnit. AndroidJUnit4
is a test runner that runs JUnit style tests on Android devices. When used in Espresso tests, it controls launching the app and running UI tests.
androidTestImplementation 'androidx.test.ext:truth:1.1.0'
In addition to removing that dependency, add this TestRule
inside your MainActivityTest
:
@get:Rule
val activityRule = ActivityTestRule(MainActivity::class.java, false, false)
Launching an Activity
When testing your UI, the first thing you need to make sure you can do is launch it! A launch test is a great first test and makes sure your app, or a specific screen, can start up without crashing. That’s important!
Test names should be clear, easy to read and should focus on telling what they are supposed to do. To achieve that, you should avoid using the word test in your test name.
Write a test that launches the MainActivity
in your test class:
@Test
fun appLaunchesSuccessfully() {
  ActivityScenario.launch(MainActivity::class.java)
}
This uses the ActivityScenario
to launch the MainActivity
. The ActivityScenario
class is a part of AndroidX
and provides APIs to start and drive an Activity’s lifecycle state for testing. Use the androidx.test.core.app.ActivityScenario
package when prompted to import ActivityScenario
and org.junit.Test
to import Test
. The test will automatically fail if the app crashes for some reason.
ActivityScenario.launch()
with the following anytime you need to launch the activity: activityRule.launchActivity(null)
Before you run your test, you should turn off animations on your testing device. Whether it’s an emulator or physical device you’re working with, go to Settings ‣ Developer options and set all the following to off :
- Window animation scale.
- Transition animation scale.
- Animator duration scale.
Build and run your test! You can do this in one of a number of ways:
- Select the green triangle in the gutter of the test file.
- Right-click on the test class declaration or the file name in the navigator and select Run ‘MainActivityTest’ .
-
Running
./gradlew connectedAndroidTestfrom the command line. - Set up a test configuration as described here .

Note
: If you want to see what the test looks when it fails, temporarily add a throw RuntimeException()
some place in onCreate()
of MainActivity
. It’s good to see your test fail: That’s how you know it’s doing its job. Just make sure you remember to fix it!
Verifying an Item on Screen
Now that you know how to launch an Activity in a test, you can start adding verifications for what’s on screen.
There are three classes you need to know about to follow along:
- ViewMatchers contains methods that Espresso uses to find the view on your screen with which it needs to interact.
-
ViewActions
contains methods that tell Espresso how to automate your UI. For example, it contains methods like
click()that you can use to tell Espresso to click on a button. - ViewAssertions contains methods used to check if a view matches a certain set of conditions.
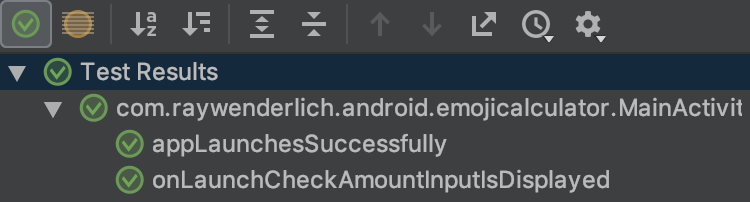
Add the following test to verify that when the screen is opened there is a field for the check amount:
@Test
fun onLaunchCheckAmountInputIsDisplayed() {
  // 1
  ActivityScenario.launch(MainActivity::class.java)

  // 2
  onView(withId(R.id.inputAmount))
      // 3
      .check(matches(isDisplayed()))
}
Here you:
inputAmount
All of these methods are a part of the androidx.test.espresso.*
package, so make sure you add appropriate imports.
This is a pattern you’ll see over and over again in Espresso tests: matching views and performing checks on them.
Build and run your tests.
Note : It is now possible to run your Espresso tests with Robolectric instead of on a device or emulator. While Robolectric is faster, testing on a device gives you access to more features such as sensors and is a more accurate environment. It’s also fun to watch the test runner take over your device to run the tests. Learn more here .
Matching Views Using Text
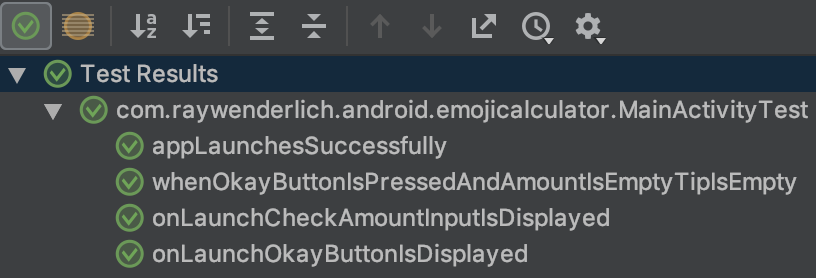
You can match views by many things other than their ID, such as text. Try this out while testing for the Okay button. Add the following test to your test class:
@Test
fun onLaunchOkayButtonIsDisplayed() {
  ActivityScenario.launch(MainActivity::class.java)

  onView(withText(R.string.okay))
      .check(matches(isDisplayed()))
}
The main difference here is that you use withText()
instead of withId()
. You can pass both references to String resources like you did above or String literals to this function.
Build and run your tests.

Note : You might be wondering why emoji is treated here as a text. Emoji is just a graphical representation of one or more Unicode characters and Unicode is a standard that assigns a unique identifier to characters, symbols and icons. You can learn more about Unicode and character sets here .
Deciding Which Matcher to Use
If you typed out the above, you may have noticed many autocomplete options after you typed the “with” of withText()
or withId()
. With so many options, how do you know which to choose?
First, you must watch for accuracy and brittleness . Then, make sure what you’re matching could only match the one view you want to test.
This could tempt you to be very specific, but you also want to make sure your tests aren’t breaking with any little change to the UI. For example, what if you’re matching with the String literal Okay and it’s later changed to OK and then changed again to Got it ? You’d have to update the test every time.
This is why matching using IDs is very common. Once you have an ID set, it’s likely the only view on screen with that ID, unless it’s a collection, and unlikely to frequently change.
Here’s Google’s handy Espresso Cheat Sheet for possible Matchers, Actions and Assertions.
option. Yes, you can use this to automatically create Espresso tests by clicking through your app and entering details into a wizard.
However, the result is brittle, hard-to-read tests. It can be useful for setting up the starting boilerplate or learning how to match something you’re unsure of. Otherwise, stay away from it.
Performing an Action
Your users do more than just open the app. They tap and interact with the items on screen. When they perform an action, they expect the right to happen and you should test to make sure it always does!
In this app, if you select one of the buttons without entering a check total first, the result is empty. Add a test that when you click the :+1: ( Okay ) button the tip result is empty:
@Test
fun whenOkayButtonIsPressedAndAmountIsEmptyTipIsEmpty() {
  ActivityScenario.launch(MainActivity::class.java)

  // 1
  onView(withId(R.id.buttonOkay))
      .perform(click())

  // 2
  onView(allOf(withId(R.id.textTip), withText("")))
      .check(matches(isDisplayed()))
}
There are two new things, here:
-
After matching the button by ID as you learned with the other views, you call
.perform(click())on it. You can combine matchers with.perform()to do a number of different actions on a view. -
There’s an extra layer of nesting in this matcher. You can tell Espresso that it needs to match both the conditions on the view using
allOf().Use the
org.hamcrest.Matchers.allOfpackage when prompted to importallOf(). This says you want the view with the IDtextTipand with an empty string as the text. If all these conditions aren’t met by a view on the screen, the test will fail.
Again, run your tests and see that they pass!
Typing Text
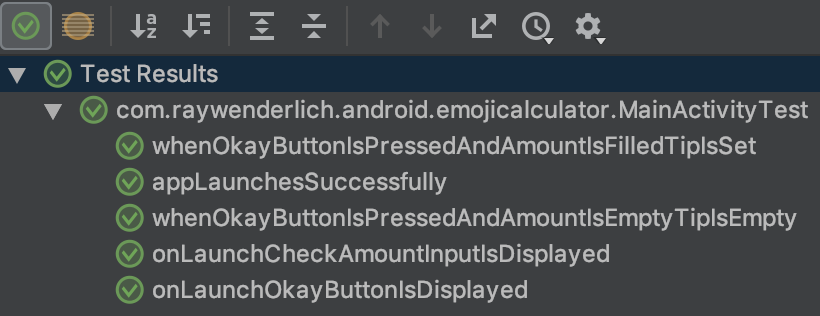
Another action you’re likely to frequently perform is typing in some text. Add a test for when you type in an amount, then press the :+1: ( Okay ) button, the screen displays the correct tip.
@Test
fun whenOkayButtonIsPressedAndAmountIsFilledTipIsSet() {
  ActivityScenario.launch(MainActivity::class.java)

  // 1
  onView(withId(R.id.inputAmount))
      .perform(typeText("11"))

  onView(withId(R.id.buttonOkay))
      .perform(click())

  // 2
  onView(withId(R.id.textTip))
      .check(matches(withText("1.98")))
}
Most of this is similar to other tests. Here’s what’s new:
-
The statement to type in “11” into the input. You use a matcher like you’ve learned, then call
.perform(typeText("11"))to type that text into the field. -
You check that the view with the ID
textTiphas the correct text usingwithText()instead of combiningallOf()andisDisplayed(). This is an alternate way to perform this check.
Run it and add it to your collection of green tests!
Writing Single Responsibility Tests
Each of your tests should only test one thing . You want single responsibility tests so when something goes wrong, you have a clear indication why. This is why you’re not testing for the presence of the input in the same test that you’re filling in content.
To continue having one responsibility for each test, write another one that checks the tip value when you have the Round up to nearest dollar switch turned on:
@Test
fun whenOkayButtonIsPressedAndRoundSwitchIsSelectedAmountIsCorrect() {
  ActivityScenario.launch(MainActivity::class.java)

  onView(withId(R.id.switchRound))
      .perform(click())
  onView(withId(R.id.inputAmount))
      .perform(typeText("11"))
  onView(withId(R.id.buttonOkay))
      .perform(click())

  onView(withId(R.id.textTip))
      .check(matches(withText("2.00")))
}
This is almost exactly the same as your previous test, except for adding the statement to click on the switch to turn it on and verify a different amount.
As always, run those tests again. :]

Writing Screen Robots
As the last two test prove, test writing can be repetitive. You can pull a lot of this duplication out to reuse. One great way to do this is by using Screen Robots .
Screen Robots pull out some of these tasks into helper functions. This makes your tests more expressive, readable and easier to update your if something in the UI changes. For example, if an ID changes, instead of updating it in a bunch of separate tests, you can update it in the one robot.
You can think of a robot as a middle man between your view and a test: It serves the same purpose as a presenter in theMVP architectural pattern. The view itself knows nothing about the test and the test knows nothing about the implementation of the view, it only knows what actions it needs to perform on a view.
By using robots you can easily separate those concerns which gives you the benefit of changing the robot only if your view changes.

Start by creating a class that extends ScreenRobot
. This can be an inner class to your test added to the end of your file outside your test or in a neighboring file. You can make this decision based on if you will want to reuse the robot other places.
As this robot is only used in this test, this project adds it as an inner class to MainActivityTest
:
class CalculatorScreenRobot : ScreenRobot<CalculatorScreenRobot>() {

}
ScreenRobot
, which this class inherits, is another file that’s already defined for you in the app. Take a look at ScreenRobot.kt
if you’re curious. It has some helpful methods you’ll use such as enterTextIntoView()
, clickOkOnView()
and checkViewHasText()
.
Next, write some robots! Start with a simple one to verify the tip amount. Add this to CalculatorScreenRobot
:
fun verifyTipIsCorrect(tip: String): CalculatorScreenRobot {
  return checkViewHasText(R.id.textTip, tip)
}
The interface for a robot returns a robot so you can keep chaining actions and assertions together. Here you only use one of the helpers to check that a view has some specific text, then return the ScreenRobot result, this
. If you look into the method, you’ll see a check very similar to the one you’re replacing with it.
To take advantage of this chaining, add an action to enter a check amount and click the :+1: button. Add this to CalculatorScreenRobot
:
fun inputCheckAmountAndSelectOkayButton(input: String):
    CalculatorScreenRobot {
  return enterTextIntoView(R.id.inputAmount, input)
      .clickOkOnView(R.id.buttonOkay)
}
Here you’re chaining the helper functions together to enter text and click on the button.
Using Screen Robots
Now that you have them written, you can replace some of your test code with robots! Replace the body of whenOkayButtonIsPressedAndAmountIsFilledTipIsSet()
with this:
ActivityScenario.launch(MainActivity::class.java)

withRobot(CalculatorScreenRobot::class.java)
   .inputCheckAmountAndSelectOkayButton("11")
   .verifyTipIsCorrect("1.98")
You initiate using your CalculatorScreenRobot
by using withRobot()
. After that, you can chain your actions and assertions together. See how much more declarative this is! Reading and understanding what is happening is so much easier.
If you run the tests, the result should be the same.
You can use these robots in another place. Replace the body of whenOkayButtonIsPressedAndRoundSwitchIsSelectedAmountIsCorrect()
with the following:
ActivityScenario.launch(MainActivity::class.java)

withRobot(CalculatorScreenRobot::class.java)
    .clickOkOnView(R.id.switchRound)
    .inputCheckAmountAndSelectOkayButton("11")
    .verifyTipIsCorrect("2.00")
Here, you added .clickOkOnView()
from the base class to the chain to turn on that switch. Everything else is the same.
Can you start to see the possibilities in these robots? You can make your robots as simple as clicking a single button or as complex as filling out a complicated form. Use them for whatever makes the most sense in your app to make things reusable and readable.
Where to Go From Here?
Wow! You learned so much in this tutorial. You learned not only how to write Espresso tests, but also how to use Screen Robots to make them shorter and easier to read. You can download the final result using the Download Materials button at the top or bottom of this tutorial.
Itching to practice this more and try out some of the other robot options? As a challenge, you can finish testing this screen. Here are some ideas of what to test next:
- The rest of the views display on launch.
-
The result each of the three buttons: Tip
, Total
and Percentage
, display when:
- The input is empty.
- The input is filled and rounding is off.
- The input is filled and the rounding is on.
Sure, you could extract most of this and move it into Unit Tests, but then what would you practice on? You can find a solution to the challenge using the Download Materials button at the top or bottom of the screen.
Play around with test robots to see if they work well for you. It takes time and practice to develop the intuition to know which robots will be most worthwhile and how to write long lasting, maintainable tests.
You can keep on learning in these places, too:
- The Espresso Guides from Google are helpful in understanding how to test your UI well.
- You can learn how to keep your app tested using Test-Driven Development withour tutorial on the topic.
- Take a deeper look into Screen Robots in Using Screen Robots with Espresso with Annyce Davis.
We hope you found this helpful! If you have any comments or questions, feel free to join us in the forum below.
Recommend
About Joyk
Aggregate valuable and interesting links.
Joyk means Joy of geeK