

GitHub - deepjia/v2net: A network assistant tool for macOS
source link: https://github.com/deepjia/v2net
Go to the source link to view the article. You can view the picture content, updated content and better typesetting reading experience. If the link is broken, please click the button below to view the snapshot at that time.
README.md
V2Net
Introduction
V2Net is a network assistant tool for macOS.
Some popular network tools are integrated, with the ability of adding new extensions without coding:
This is an alpha version.
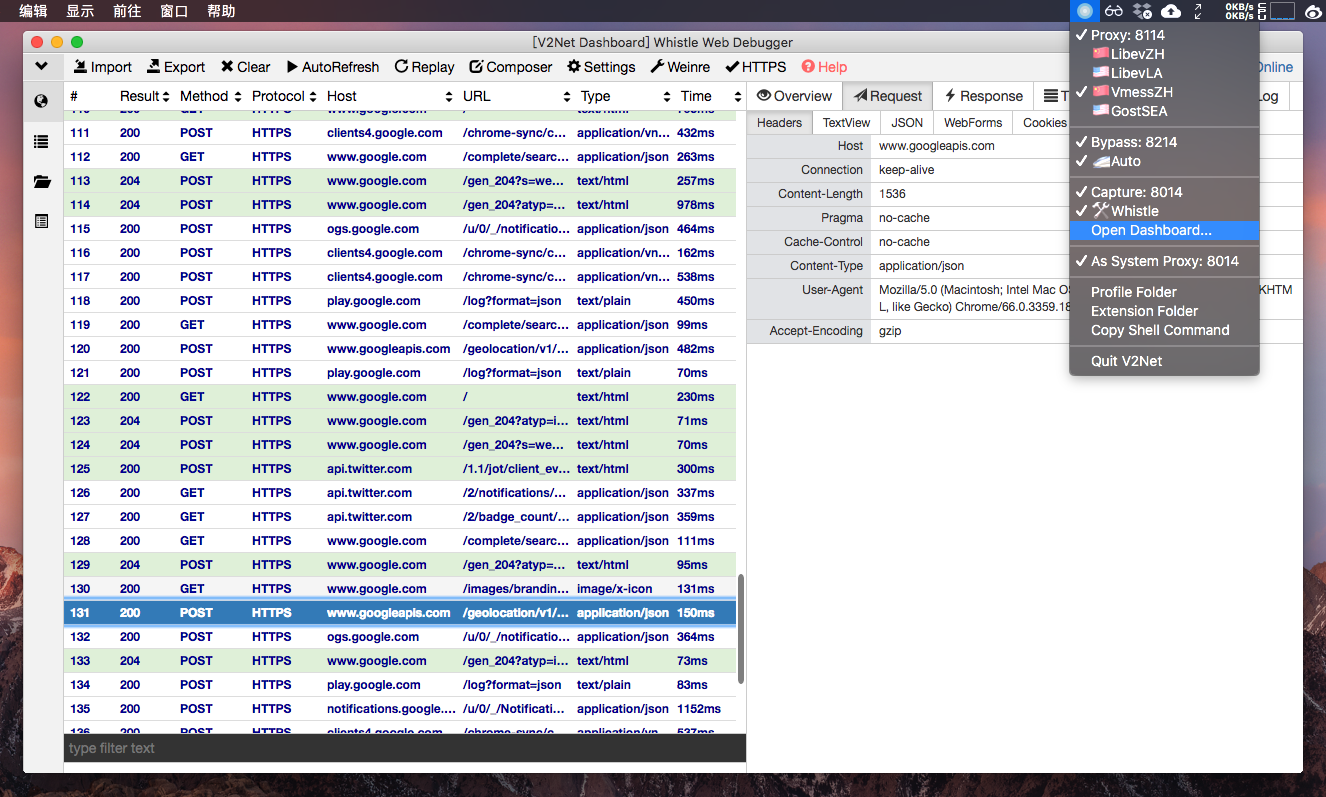
Snapshot

Prerequisites
(If only you want to use the integrated whistle extension,) Node.js is needed.
Install Node.js with homebrew:
brew install node
# or:
# brew install node@8
Or download installer from https://nodejs.org/en/
Installation
Download latest release:
https://github.com/deepjia/v2net/releases
Unpack and drag V2Net.app to Application folder.
Usage
Example of profile.ini
[General]
skip-proxy = 127.0.0.1, 192.168.0.0/16, 10.0.0.0/8, 172.16.0.0/12, 100.64.0.0/10, localhost, *.local, ::ffff:0:0:0:0/1, ::ffff:128:0:0:0/1
# proxy/bypass/capture: extensions selected last time
proxy = ✈️Beijing
bypass = ?Privoxy
capture =
# system: whether V2Net is set as system proxy last time
system = false
Port = 8014
InnerPortProxy = 8114
InnerPortBypass = 8214

[Proxy]
# The order of values is defined in "keys" field of extension.json in extension folders
# name = extension_name, *values
✈️Beijing = ss, server_ip, 12345, chacha20-ietf-poly1305, password, 60, true
??Shenzhen = vmess, example.org, 443, /ws, uuid
??Hangzhou = gost, ss, chacha20:password@server_ip, 12345
??Tokyo = gost, socks5, server_ip, 12345
??Denver = gost, http, server_ip, 12345

[Bypass]
# Same as proxy, privoxy preferred
?Privoxy = privoxy, , 127.0.0.1, , privoxy.txt
#?Gost = gost, , 127.0.0.1, , gost.txt

[Capture]
# Same as proxy
?️Whistle = whistle
Customization
-
Open
Extension Folder -
Enter/Create specific
Extension Directroy -
Modify/Create
extension.jsonbin: Main binary of extensions.
args: Arguments for binary to start with.
url: Dashboard url for capture extension.
exitargs: Arguments for binary to quit with.(If left blank, binary process will be stopped when stopping the extension)
keys: Keys to render by jinja2, whose values are in
profile.inihttp: Whether the extension serve as a http proxy.
socks5: Whether the extension serve as a socks5 proxy
render: Render the template files in
Extension Directroydefault: Default vaules to render.
{
  "bin": "./extension/myext/bin/mybinary",
  "args": "-p {{ ExtensionPort }} -c ./extension/myext/myconfig.ini",
  "url": "http://127.0.0.1:{{ ExtensionPort }}",
  "exitargs": "",
  "keys": ["ServerProtocol", "ServerAddress", "SeverPort", "ServerPassword"],
  "http": false,
  "socks5": true,
  "render": {"mytemplate.jinja": "myconfig.ini"},
  "default": {"ServerAddress":"example.com"}
}
jinja2 is used as render engine, which render {{ key }} as values from the
profile.inias well as from default values, which also supports logic causes like {{% if %}} {{% endif %}}.Specially,:
- {{ ExtensionPort }} will always be rendered as the proper value depending on your settings in
profile.ini - If an extension is running as a secondary proxy, {{ ServerPort }} and {{ ServerProtocol }} will be automatically rendered as
httporsocks5when left blank.
Build
brew install python git clone https://github.com/deepjia/v2net.git python3 -m venv venv source venv/bin/activate pip install -r requirements.txt python setup.py py2app - {{ ExtensionPort }} will always be rendered as the proper value depending on your settings in
Recommend
About Joyk
Aggregate valuable and interesting links.
Joyk means Joy of geeK