

Upgrading a create-react-app project to a SSR + code splitting setup
source link: https://medium.com/bucharestjs/upgrading-a-create-react-app-project-to-a-ssr-code-splitting-setup-9da57df2040a
Go to the source link to view the article. You can view the picture content, updated content and better typesetting reading experience. If the link is broken, please click the button below to view the snapshot at that time.
Upgrading a create-react-app project to a SSR + code splitting setup
UPDATE: This is part 1 of my CRA+SSR series:
- Upgrading a create-react-app project to SSR + code splitting
- Adding state management with Redux in a CRA + SSR project
UPDATE 2: I’ve created a GitHub repo for these 2 articles:
The problem with CRA
Since its inception, create-react-app is a great tool for rapidly prototyping React apps, demos and testing different features or techniques. That was, and still is, the main idea behind it. Its creators even encourage developers to look for alternatives if they want advanced features, like server-side rendering, usage of TypeScript or more customisation, or even eject and fiddle themselves with all the configurations.
However, many developers are afraid or skeptical to eject, and prefer (myself included) to stay locked in the CRA bubble, either for convenience, declutter of config files, or for always keeping the build tools up to date. That’s why many production apps still use the original CRA tools.
But while the default CRA setup can be OK for small projects, it’s not always enough for larger, more complex applications. Luckily, we can improve things, even without ejecting. Let’s try to do this step by step. This is what we’ll cover:
- Server-side rendering
- Code splitting with react-loadable
- Code splitting on the server
- Taking benefit of webpack’s chunkNames
First: Server-side rendering
Probably the most complex part of this upgrade is adding SSR. CRA by its own doesn’t offer support for this, and its devs don’t even plan to:
Ultimately server side rendering is very hard to add in a meaningful way without also taking opinionated decisions. We don’t intend to make such decisions at this time. — Dan Abramov
But having SSR is something every developer is craving for. So let’s begin!
For the purpose of this article, we’ll use express.js:
yarn add express
Create a /server folder next to our /src folder. CRA’s build tools will not parse and compile anything outside the src folder. This is fine, as no code from server will be used inside our client app.
Now we need an entry point for our server app. Create a file at /server/index.js:
So what’s with that serverRenderer thing? That’s an express middleware which will render our html. Our /server/middleware/renderer.js file looks like this:
There’s one final step here: Node doesn’t speak JSX, so we need to transpile our code with babel. For this, create a /server/bootstrap.js file that will tell Node how to interpret our code (we’ll actually use this as an entry point):
You will also need to install these additional packages: babel-preset-es2015, babel-preset-react-app, ignore-styles.
That’s it! Now run the server:
node server/bootstrap.js
You can extend your server app however you want, but the above is the minimum you’ll need for server-side rendering a React app with CRA.
If your project uses React Router, you will also need to capture all paths and apply the serverRenderer. To do this, just add another router rule in your server app:
// ...// anything else should act as our index page
// react-router will take care of everything
router.use('*', serverRenderer);app.use(router);
Next: Code splitting
Having just one huge js bundle with everything contained in your app still sucks! You have to download an entire file with all the parts of your app, even if your initial render is small and will only use a couple of components. A better approach is to only load what the user will need immediately, then lazy-load other parts of the app as they are required. So let’s split!
As described in the documentation, CRA offers support for code splitting, using dynamic imports. There’s also an extensive post on how to create async components in a CRA project. But more conveniently, we can use a higher order component that will simplify our work: react-loadable.
Let’s create /src/SomeComponent.js in our CRA app:
Now let’s make this component async by importing it with react-loadable in our main App.js:
I encourage you to read the react-loadable documentation, as it packs a lot of features, yet keeping the simplicity you see above.
That’s it! Now your app will load the SomeComponent module when your AsyncComponent will render. The block in the loading prop is what gets rendered while the required chunk is downloaded from the server and parsed.
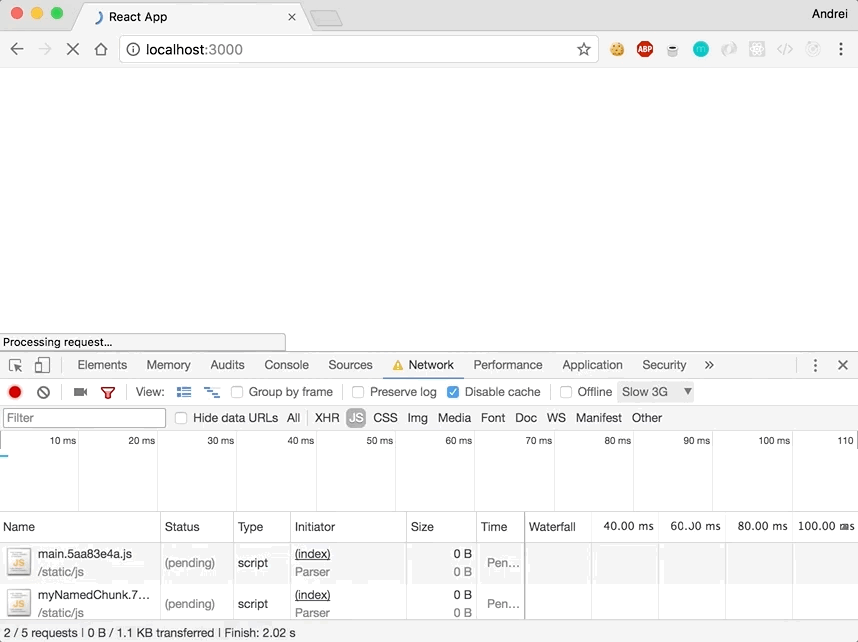
Notice that CRA created a new file called 0.[hash].chunk.js.
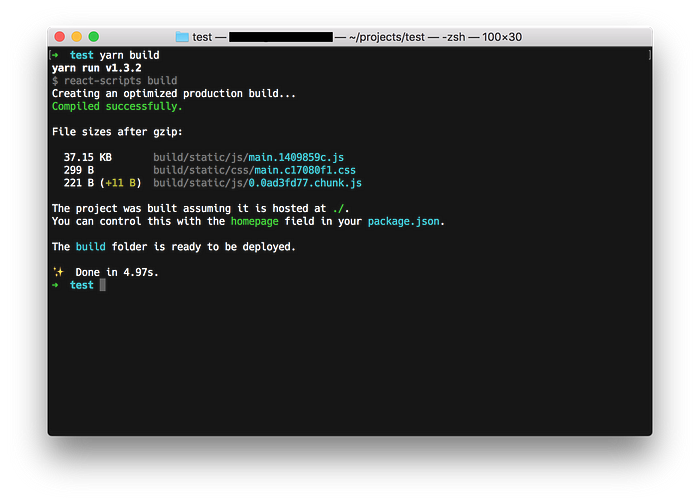
If you run the app now with yarn start, you’ll see just the main bundle being loaded. After the initial render, another request will retrieve our new chunk. A loading… message is displayed until the file is downloaded and parsed.
Code splitting on the server
To make this work with SSR, we’ll need to make some small adjustments. First, for Node to understand this dynamic import(), we’ll need some babel plugins. Add them to our bootstrap.js babel-register options:
Next, our server app will need to load all modules before rendering, so we don’t get that loading message rendered on the server. We need the actual component. For this, we’ll use a helper from react-loadable which preloads all async components. Update /server/index.js like this:
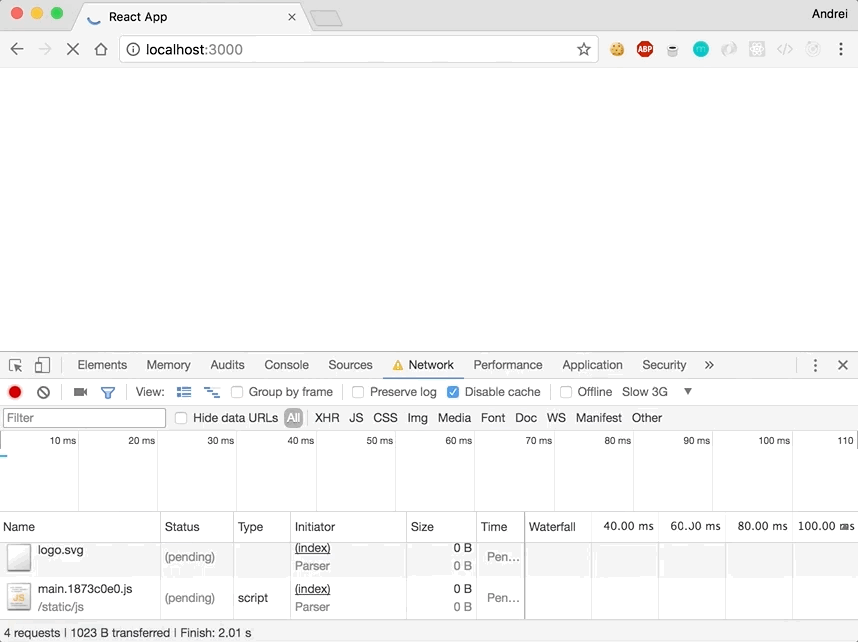
Also, on the client, let’s use hydrate instead of render:
Much better! Although, we still see the loading message. This is because the app is downloading only the main.js bundle. After the bundle is parsed, the app runs, but our other chunk is not downloaded. So at hydration, our code will request it and it will render the loading message until the download is finished. We don’t want that.
Instead, we want to identify, at server render, all chunks required, then send them next to the main bundle in the html, then we need to wait for all assets to download before hydrating. Let’s start by identifying the required chunks.
Taking benefit of webpack’s chunkNames
CRA’s chunks by default are ugly and unpredictable. We can improve this by naming our chunks using a relatively new feature of webpack: chunk names.
All we need is a comment inside the import():
The last line tells react-loadable that this component requires the chunk named myNamedChunk. Let’s build first:
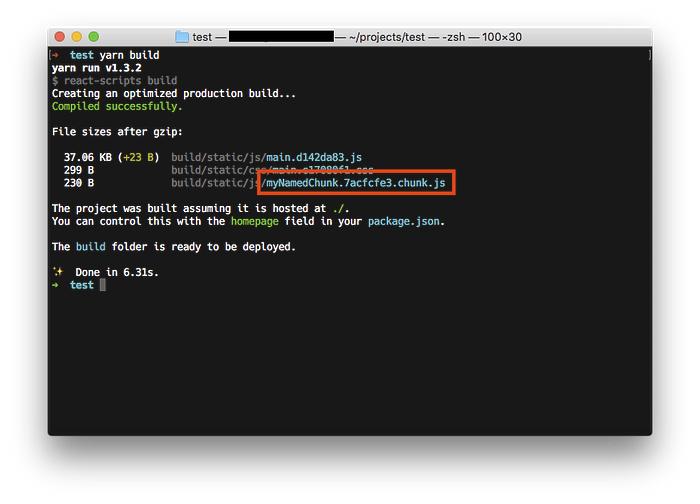
Better. Let’s see what’s in our /build/asset-manifest.json file:
Great! We see a nice, predictable name being mapped to the actual hashed filename. But how can we know which chunks we actually need to load? In a larger application, we surely don’t want all of them. Luckly (you guessed it) react-loadable comes once more to the rescue. Let’s update our renderer middleware:
Run the server and refresh the page and you’ll see in the console an array containing all the names of the chunks the server used to render the initial state of the app (except the main bundle). We just need to map this to the actual javascript files:
Now add them as script tags at the end of the body:
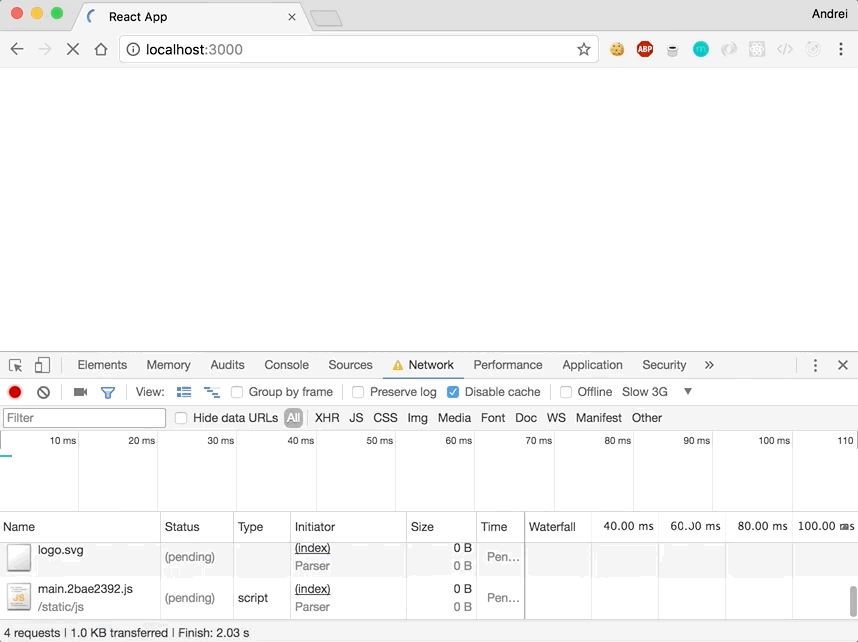
One final step, we need to wait for the document to load all assets before hydration. So we change the index.js on the client:
Let’s build one last time and run the server:
Notice the required chunk being loaded before the main bundle runs and requests it. So at hydration, we’re sure we have all necessary modules, thus getting rid of the ugly loading… message.
Summary
We’ve come a long way, but we managed to upgrade our simple CRA app to a full SSR + code splitting setup in just a few steps, without ejecting and without using other templates, boilerplates or frameworks.
I’ve used everything mentioned here on an awesome project I’m currently developing: Snipit.io, a collaborative tool for saving and organizing code snippets in the cloud. Besides what’s discussed in this article, Snipit also uses Redux, React Router and Styletron (for styled components). The server app uses a shared session with the backend app, so the server renderer knows if the user is logged in or not and renders components accordingly.
I’ll probably write another article on how everything works.
Finally, you can see a complete list with all the files we modified here from a blank CRA app at snipit.io/public/lists/1365. You can also bookmark this list for future reference if you create an account and log in. Do it, it’s free!
Recommend
About Joyk
Aggregate valuable and interesting links.
Joyk means Joy of geeK