

React Beautiful Conditional Rendering With <RenderWhen />
source link: https://blog.bitsrc.io/react-beautiful-conditional-rendering-with-renderwhen-d8e4d5d962a2
Go to the source link to view the article. You can view the picture content, updated content and better typesetting reading experience. If the link is broken, please click the button below to view the snapshot at that time.
React Beautiful Conditional Rendering With <RenderWhen />

Conditional rendering is one of the most commonly used in React. As the application grows and things get complex, conditional rendering statements may become less readable. In this article, we will discuss how to write beautiful conditionals in React with ease.
Common Conditional Rendering Techniques
These are a few techniques used while applying conditional rendering in React components:
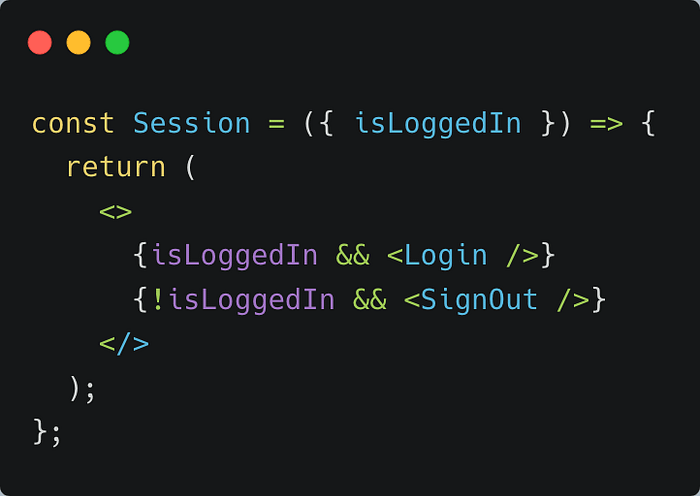
Using &&
It is one of the most commonly used techniques for conditional rendering. It is important to remember that this technique should be used very carefully as it can lead to unpredictable bugs.
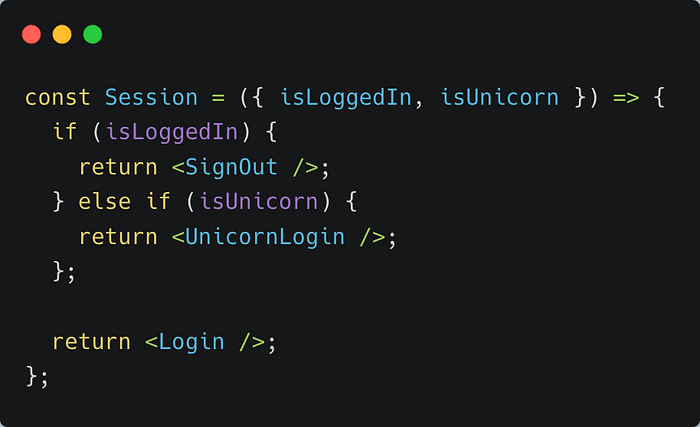
Using If/Else Statements
Another technique for conditional rendering in React is using if/else statements. It can result in complex component code when there are multiple conditions to check.
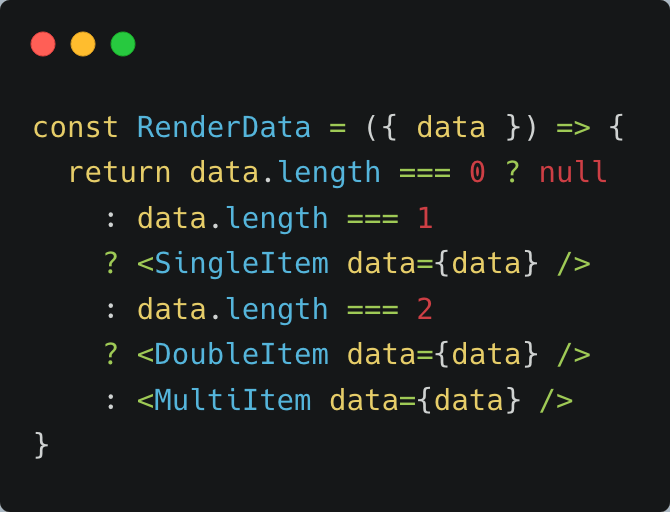
Using Ternary Operator
The ternary operator is a popular technique used for conditional rendering in React. The problem with using the ternary operator is that when you have multiple conditions to check, leading to the use of the nested ternary operator. It can make the code less readable and complex.
Writing Clean Conditionals
Introducing <ReactWhen />, a simple and tiny React component that allows you to write beautiful conditionals in React. It will enable you to write readable conditional rendering code in React quickly. Whether you need to test a single condition or a series of conditions, you can do that with <RenderWhen />.
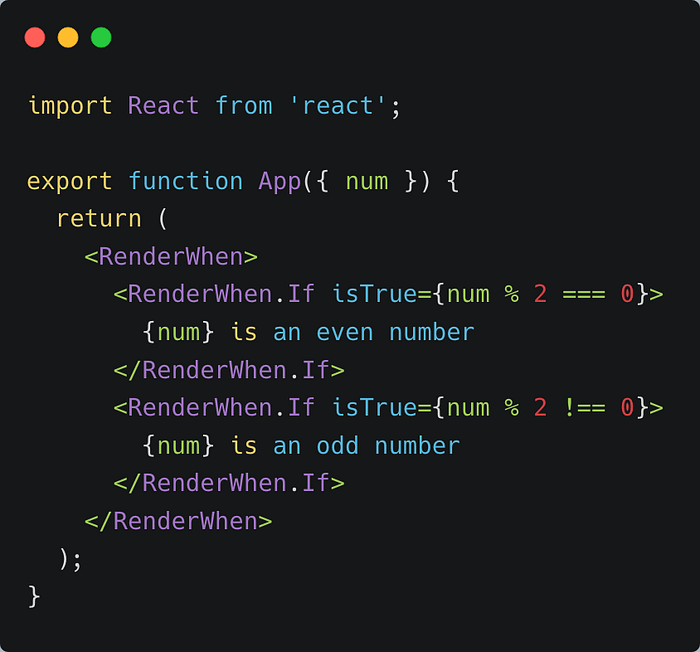
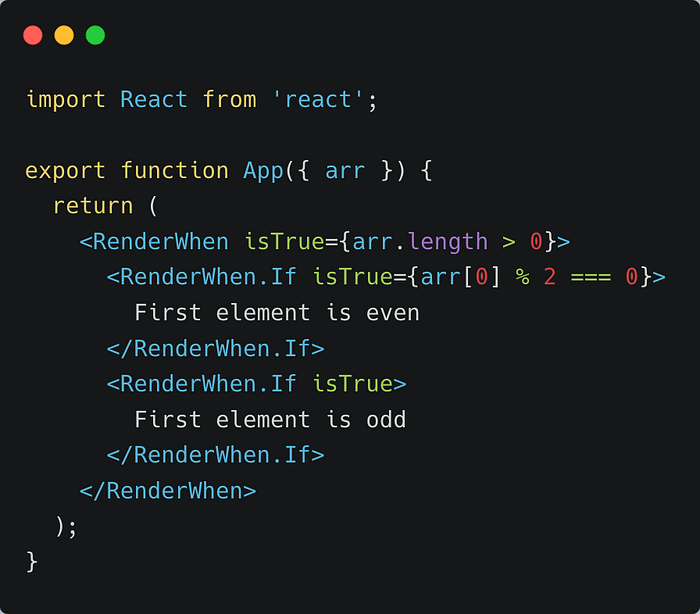
<RenderWhen /> component works similarly to if/else and switch/case statements. It allows you to check a series of conditions for conditional rendering in React.
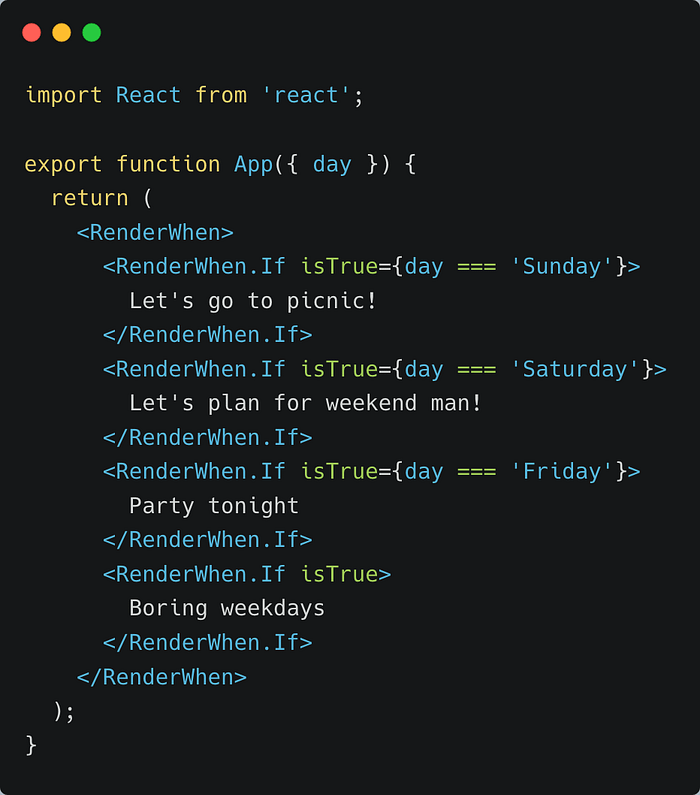
In the above example, the code displays a message based on the days of the week. The last conditional is always true, but it will only render when all the above conditions fail. It works precisely like the switch/case default statement.
<RenderWhen /> component accepts the isTrue prop, allowing you to implement nested conditionals. It means that all children conditionals will be checked only if condition passed in <RenderWhen /> evaluates to true.
Check out this tiny React component here on GitHub.
Build composable web applications
Don’t build web monoliths. Use Bit to create and compose decoupled software components — in your favorite frameworks like React or Node. Build scalable and modular applications with a powerful and enjoyable dev experience.
Bring your team to Bit Cloud to host and collaborate on components together, and speed up, scale, and standardize development as a team. Try composable frontends with a Design System or Micro Frontends, or explore the composable backend with serverside components.

Recommend
About Joyk
Aggregate valuable and interesting links.
Joyk means Joy of geeK