

Ikea Symfonisk Gen2 Amp Modification Guide - A much cheaper Sonos Amp
source link: https://www.thetylergibson.com/ikea-symfonisk-gen2-amp-modification-guide-a-much-cheaper-sonos-amp/
Go to the source link to view the article. You can view the picture content, updated content and better typesetting reading experience. If the link is broken, please click the button below to view the snapshot at that time.
Ikea Symfonisk Gen2 Amp Modification Guide - A much cheaper Sonos Amp
We're back with a new one - Sonos and Ikea have updated the Symfonisk for Gen2. On the outside, not much has changed. Same shell, same buttons, same speakers.
If you haven't seen the first article on why this thing is so cool, please head to that post right now. So what's in the Gen2?
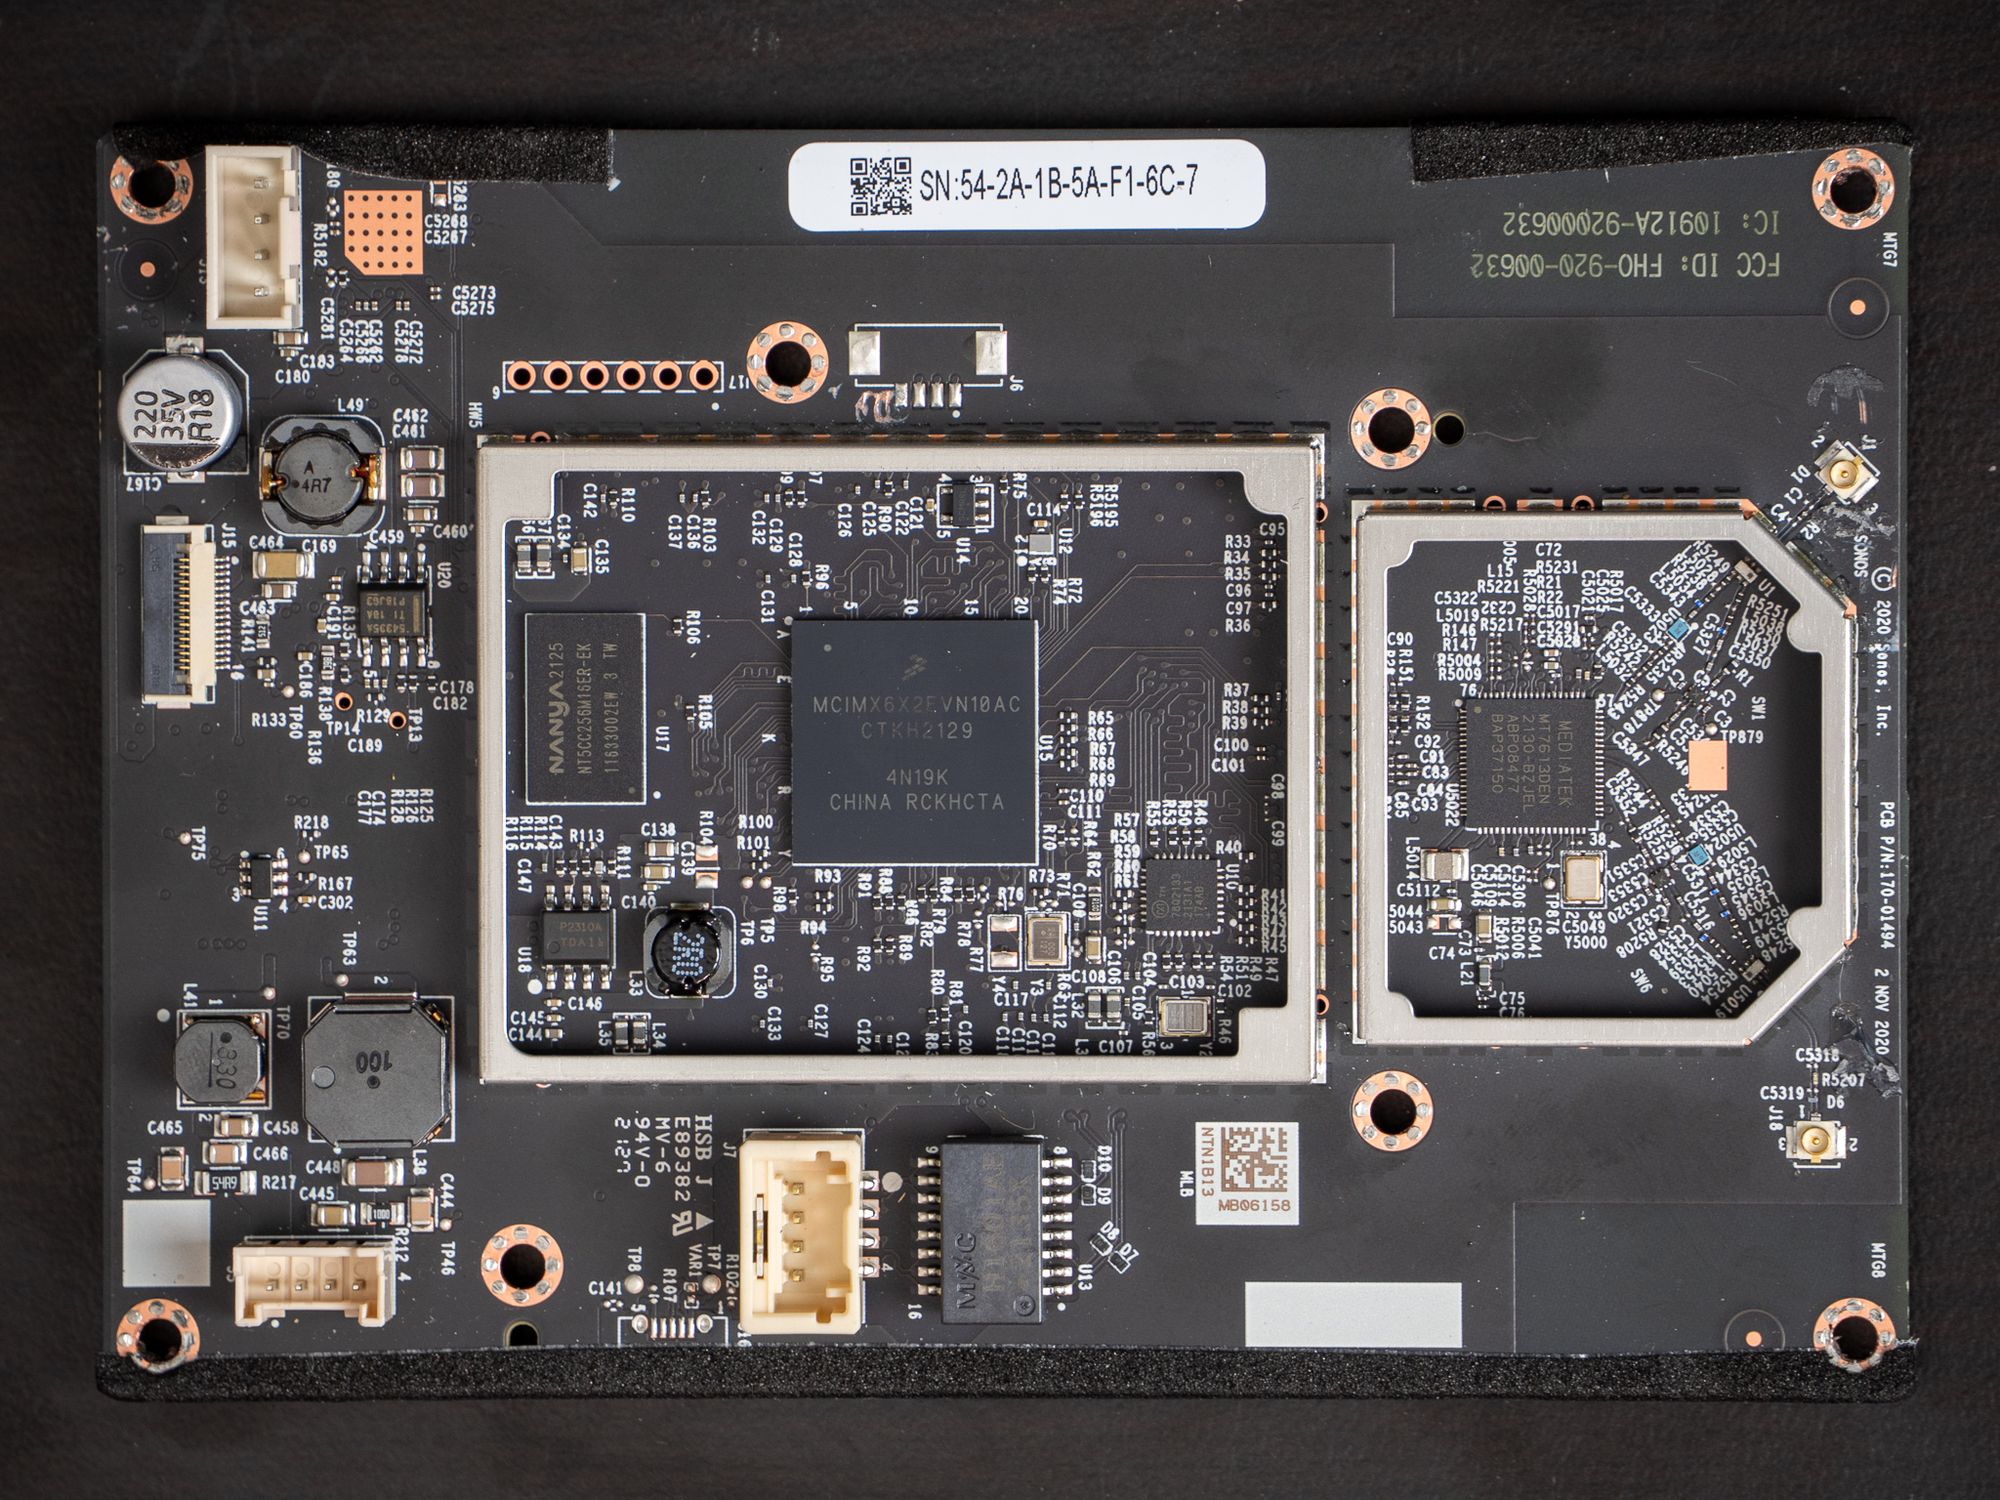
- Most important for this guide is that both the DAC, a TI PCM5102, and the amp, a TI TPA3116D2, are exactly the same.
- The NXP MCIMX6X2EVN10AC CPU is unchanged.
- The Maxim 78Q2133 is still around for ethernet with a slightly newer revision, but this time we get the ethernet port on a daughterboard.
There are some really noteworthy changes though:
- The memory has been doubled from the 256mb NANYA NT5CC128M16JR-EK to the 512mb NANYA NT5CC256M16ER-EK.
- The Atheros AR9582-AR1A PCIe daughterboard for wifi has been replaced with a Mediatek Mt7613DEN - a chip that, like the Atheros, doesn't have much public documentation. But it supports 802.11ac - a nice upgrade and much more compact.
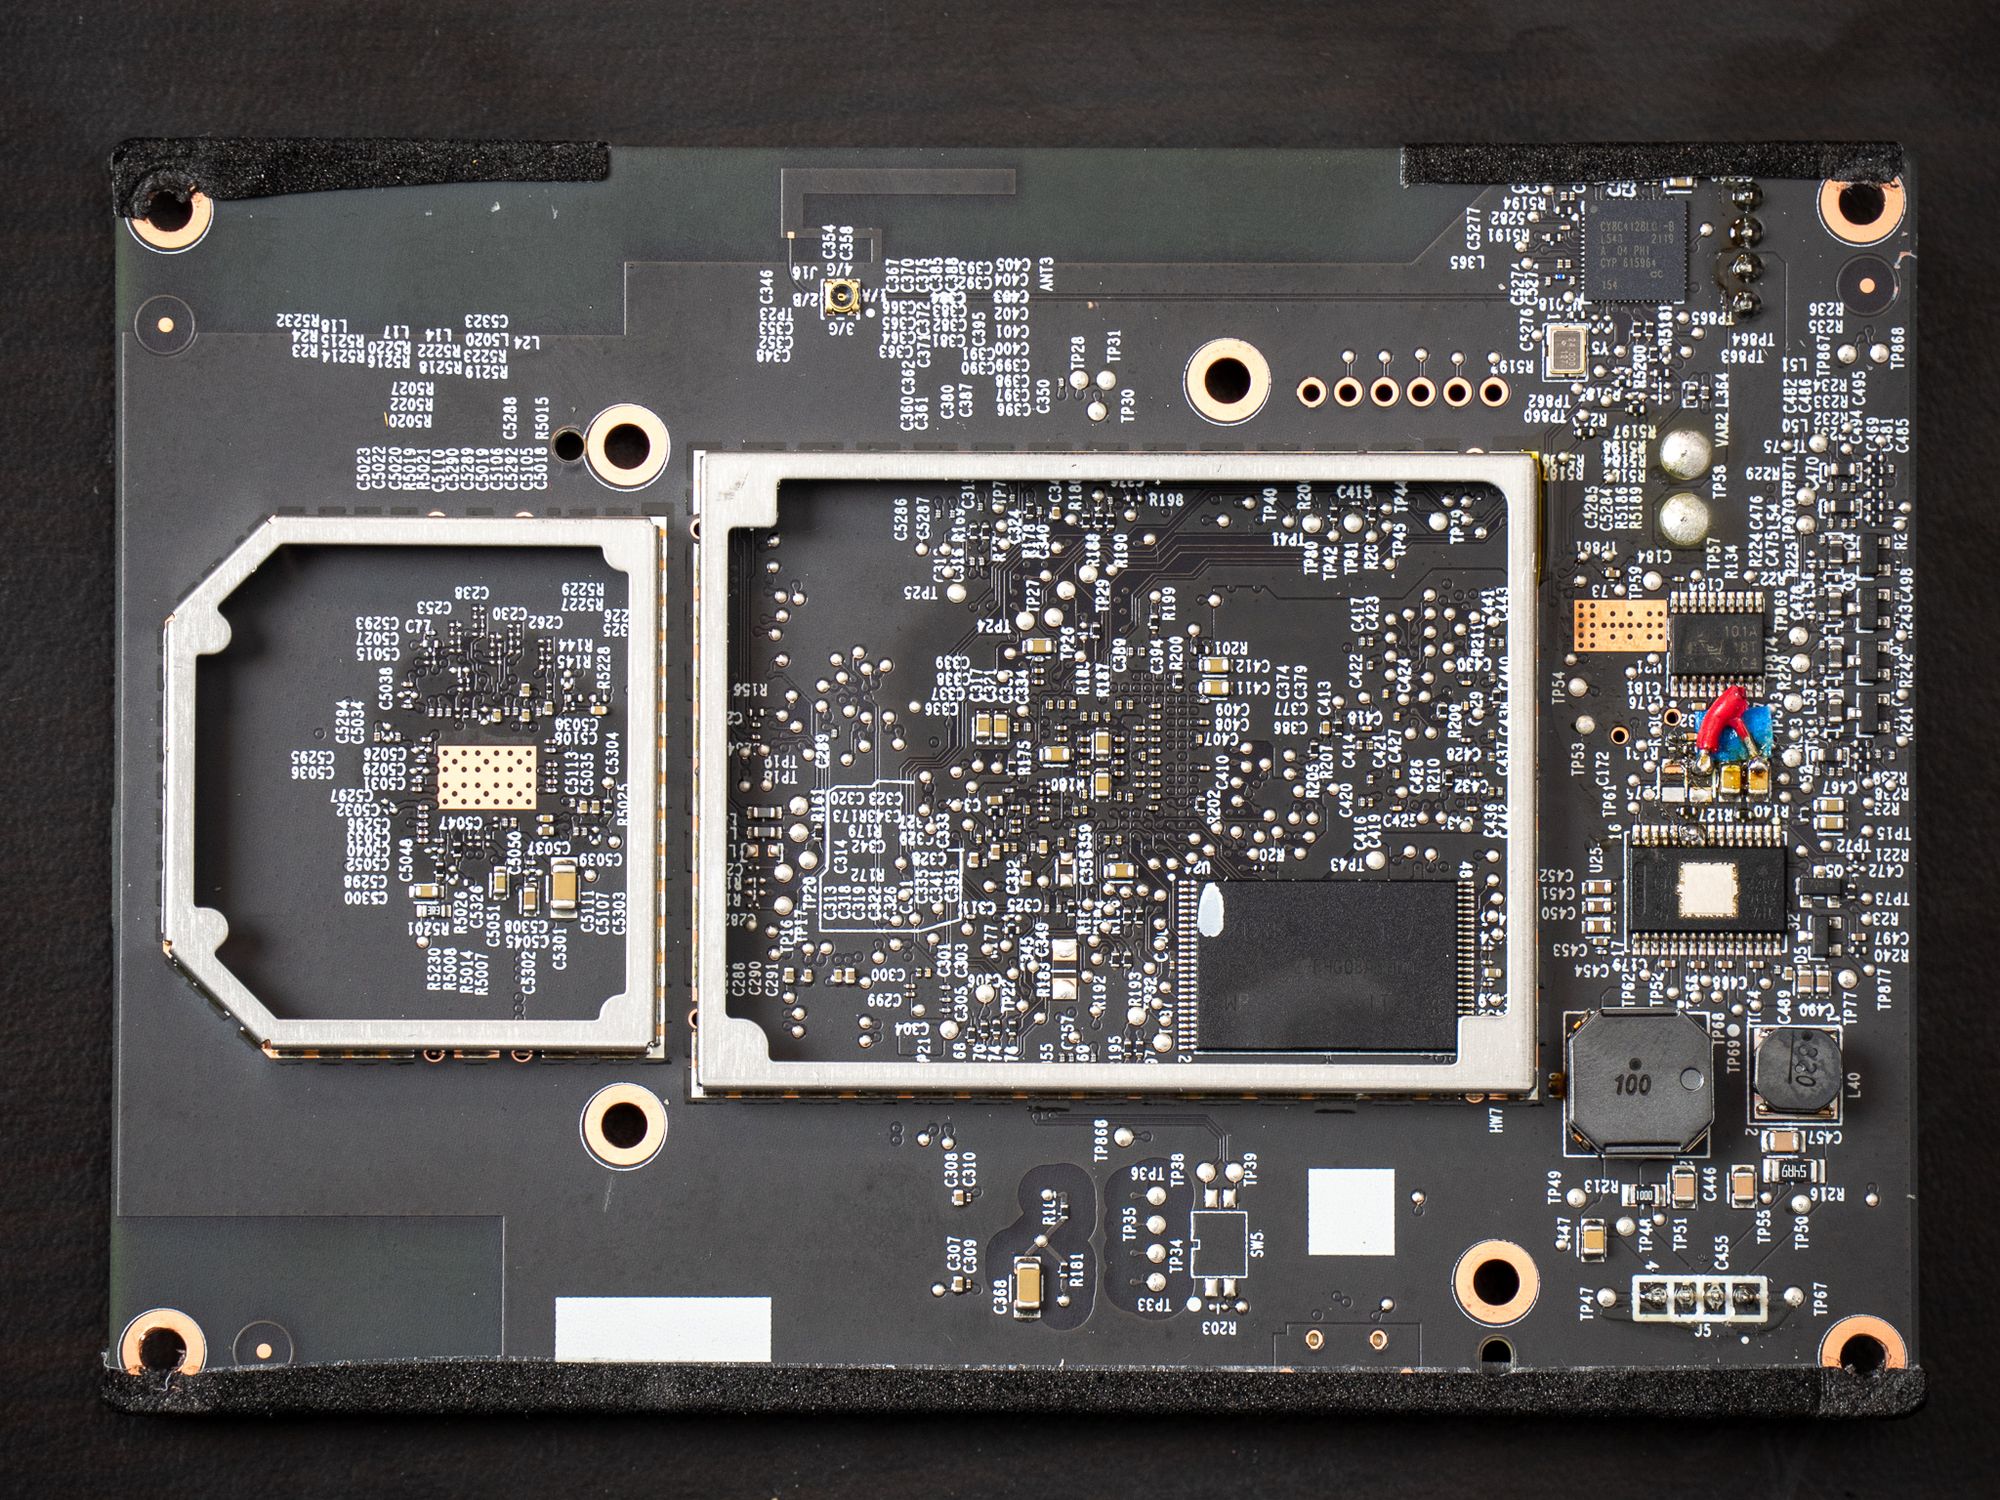
- New! - An Infineon CY8C4128LQI-BL543 chip and separate antenna for a powerful programmable Bluetooth and BLE ARM chip. What's strange is this isn't enabled as far as I can tell but all the hardware is present. Very strange to spend the money on the IC and leave it turned off.
- All of the power distribution has been offloaded to a daughterboard with only a clean 24vdc coming onto the main PCB.
Enough of the speeds and feeds, you're here to mod. Fortunately this time around is actually a little easier (if you have steady hands) than the Gen1.
What do you need?
Following this guide takes about an hour and a half start to finish, taking your time along the way. The last amp mod I did I timed at 43 minutes. So not a ton of time to invest.
If you're a DIYer already, there's also not much to spend. At an absolute minimum you need some binding posts, a Symfonisk Speaker and a ceiling speaker for each output location. So for a two speaker setup, minimum cost is $320. Thats 75% less expensive.
If you're totally new to DIY, and have to literally purchase every single tool, you're looking at about $600. Still a 52% savings.
And if you want to follow this guide and make your own enclosure, throwing in the cost of a decent 3D printer and filament, is still 29% less expensive at about $900.
Follow along with the video guide
A video guide for Gen2 will be coming very soon. In the mean time you can follow the Gen1 video guide here for the basics of disassembly
Modding the DAC (Digital to Analog Converter) and the Amp
The DAC, a TI PCM5102, is located on the bottom of the PCB. We can check the pinout to see the work we'll need to do. The amplifier on the Symfonisk speaker is the TI TPA3116D2, a two speaker amplifier allowing 30 watts per channel in stereo mode, or 100 watts in a bridged mono mode. If you want to see all the pinouts and details of the wiring scheme below, please see the Gen1 Article.


Just like on Gen1, we need a jumper across the Left and Right DAC outputs, to cut the traces of the Left +/- pins to the amp, and then to bridge the Left channel amp pins to ground.
Desolder the capacitors for Left +/- as shown. It's much easier to do this by adding some additional solder first, then wicking it all away. Apply light pressure with your soldering iron to one side to "lift" it out. I needed to set my Hakko station to 400C to get enough heat to pull these caps loose. DO NOT PRESS HARD or you will lift the pads below these caps, effectively destroying the board.
I recommend using Kapton tape both underneath the jumper wire, as well as to "mask" both sides of the amp when bridging pins 9/10/11 to avoid a solder blob disaster.
Double check you aren't bridging any pins - it is very easy to do if you aren't careful here. Take your time.
Bridging the speaker output wires
Now the hard part is done. The last step is handling the new output wiring.
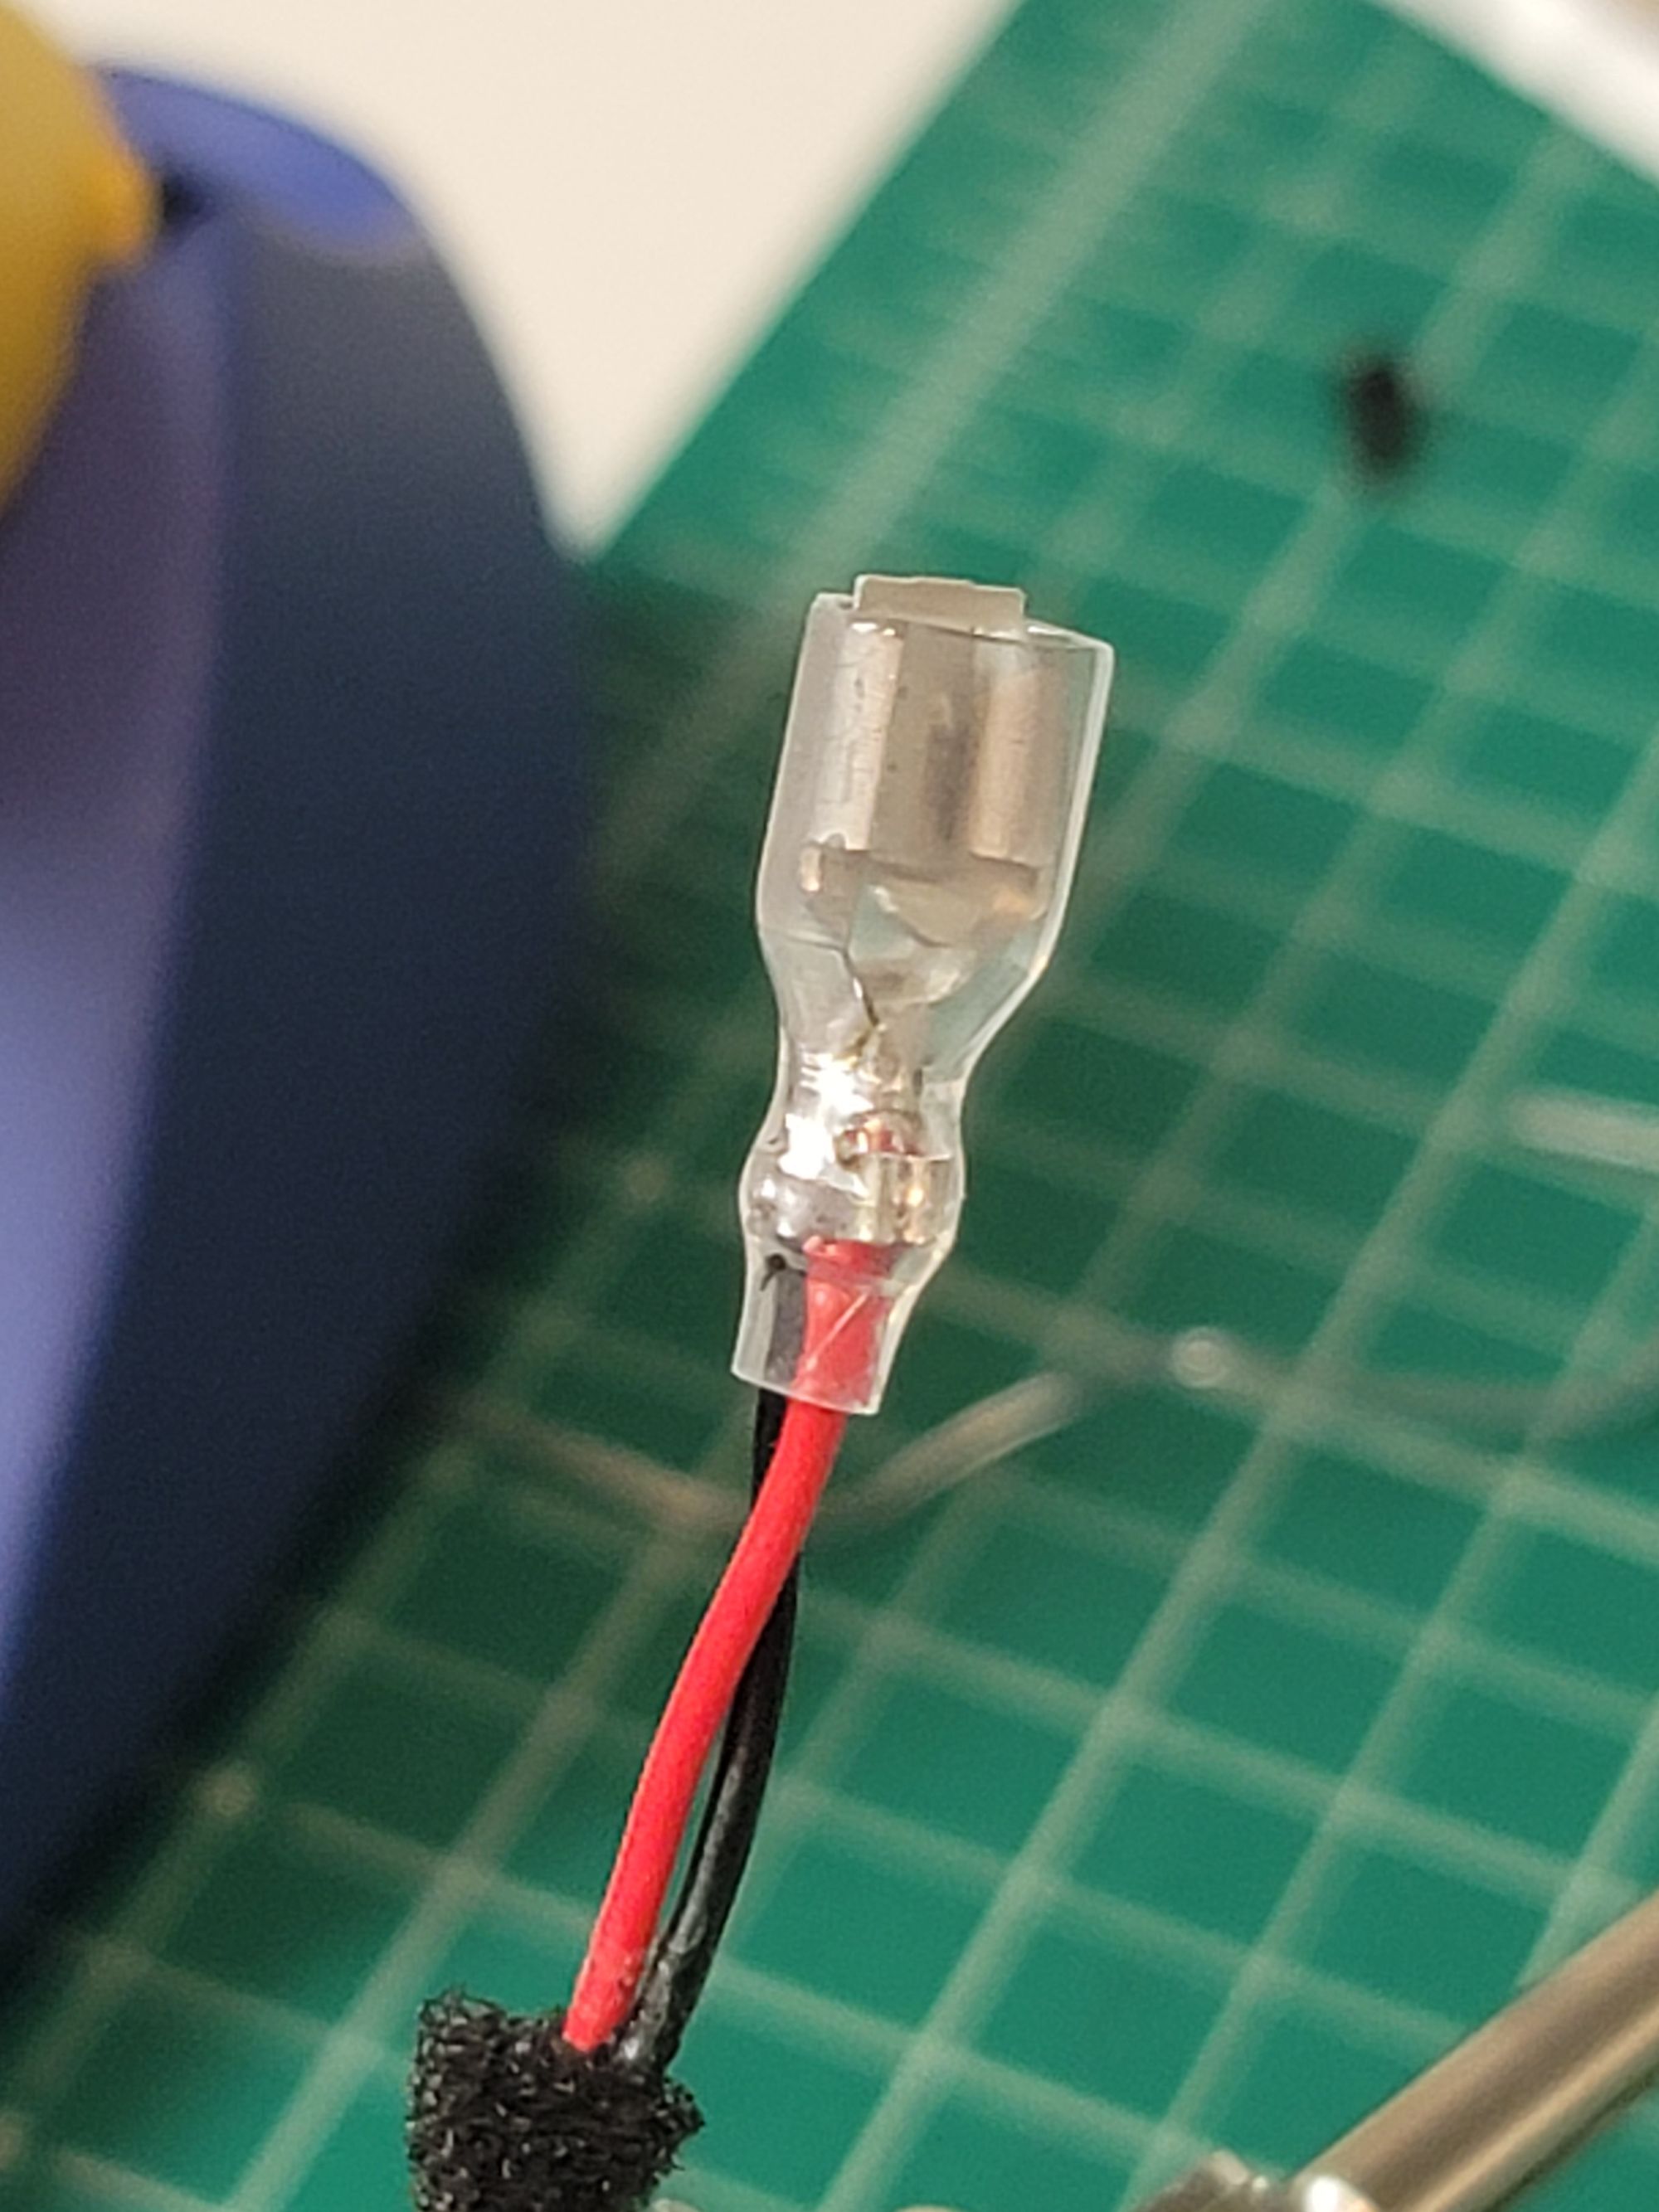
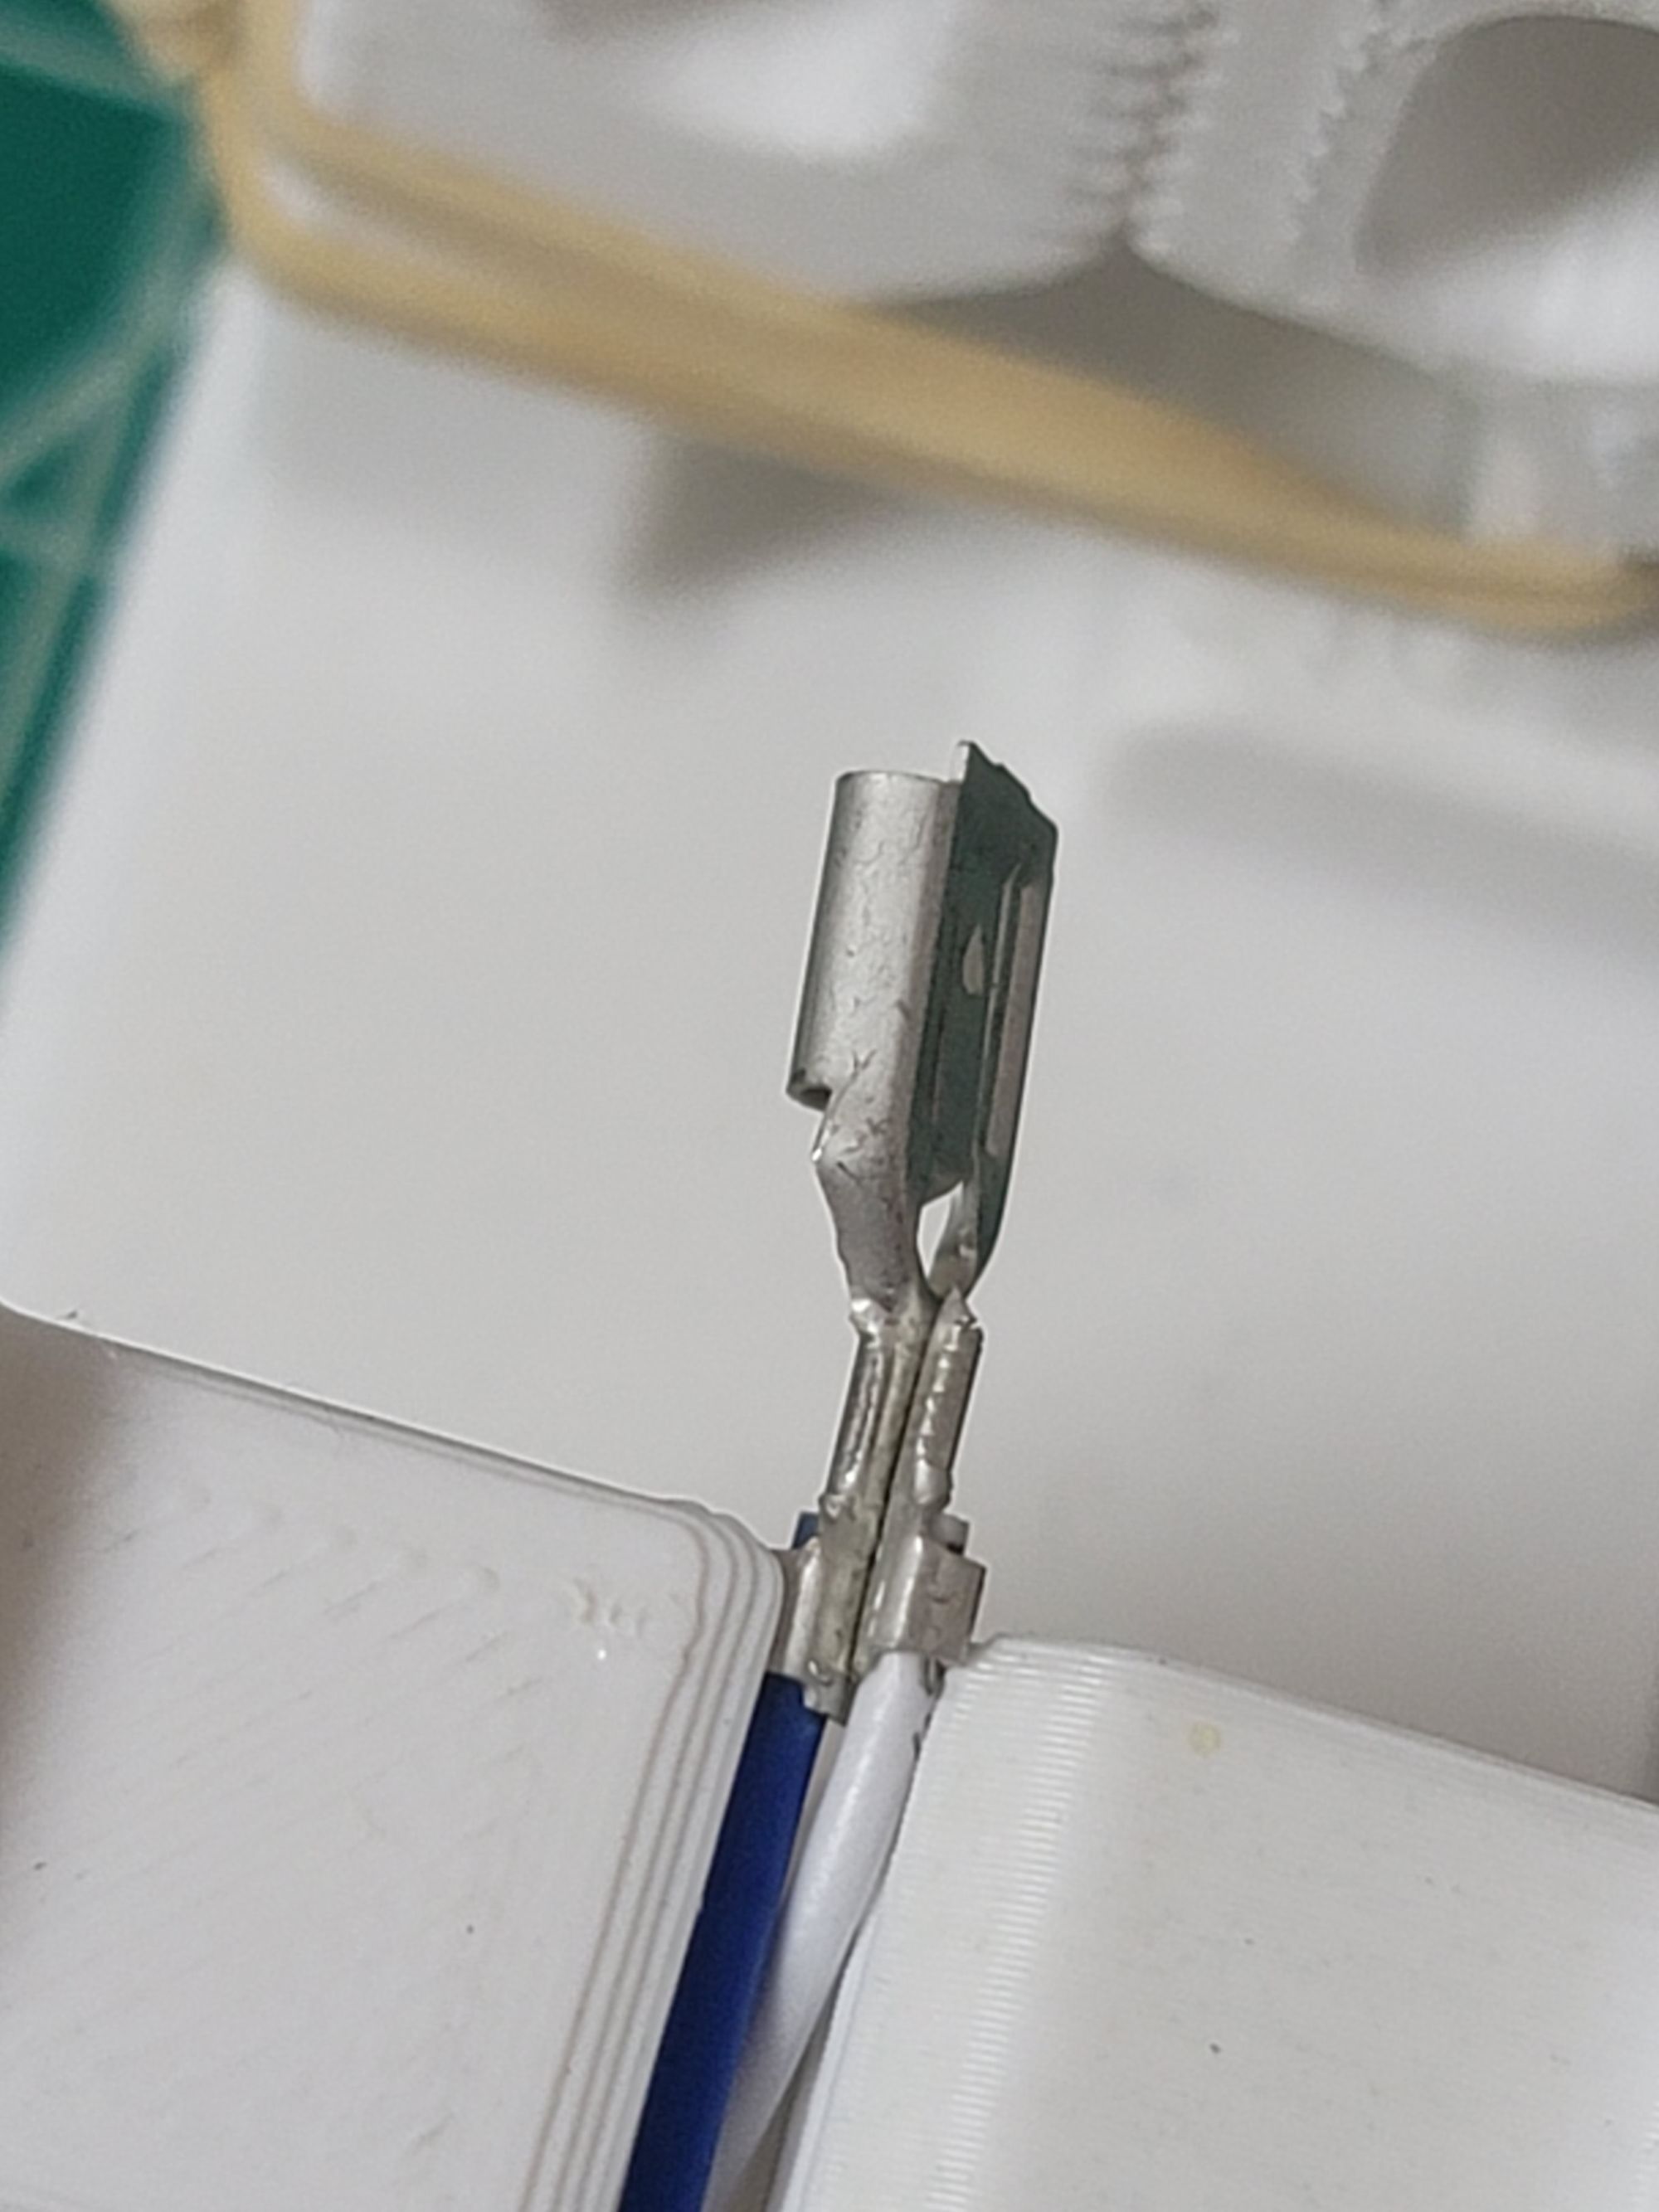
Fortunately this is pretty easy too. Most binding posts use the same terminal connector as the large connector on the Symfonisk. So clip off the end of the small one, solder the red/black and white/blue ends together, and Bob's your uncle.
Red/Black is your new positive wire, and Blue/White is your new negative wire. You could also directly wire new leads from the PCB, but there's really no purpose in doing so. The output pads are already sized for this gauge wire, you aren't going to get much out of using heavier gauge, or combining into a single wire at the PCB given the very short run length.
Hook them up to some binding posts and connect your speakers. Then turn everything on, grab an iPhone and run TruePlay tuning on the speaker.
Using a custom enclosure
Due to the completely new PCB layout, I've designed an updated custom enclosure for Gen 2. You can download the design from my page on cults3d.
Dimensionally it's very close to the same size, but the layout for Gen2 is far more compact. All cables exit the same downward facing direction and within the volume of the body, making cable routing and management in attics and ceilings much more manageable. (Yes I have fixed the hangers the right way round in the downloads).
If you don't have a 3d printer and would like to order this case directly, I am offering it directly through this site including the binding posts.
The BOM (Bill of Materials) for this project
Here's the list of everything you could possibly need to get this mod done. You probably have most of it already. The products below are either ones I personally own, or if I ever needed a replacement, what I would personally purchase.
Recommend
About Joyk
Aggregate valuable and interesting links.
Joyk means Joy of geeK