

Microapps architecture in Swift. SPM basics.
source link: http://swiftwithmajid.com/2022/01/12/microapps-architecture-in-swift-spm-basics/
Go to the source link to view the article. You can view the picture content, updated content and better typesetting reading experience. If the link is broken, please click the button below to view the snapshot at that time.
Microapps architecture in Swift. SPM basics.
12 Jan 2022This week I want to start a series of posts about the new approach I use to build scalable apps in Swift. Microapps architecture allows you to reduce the compile-time and enhances the separation of concerns in your codebase. Teams can produce a module per feature and run it as a separate app to improve the value delivery.
Swift Package Manager became the heart of this approach. It allows us to extract every feature into a separate Swift module and reduce the compile-time of your project. In this case, Xcode compiles only changed modules and doesn’t compile untouched modules.
First of all, let’s create a Swift Package that contains all our app’s modules. Swift packages are flexible enough and can include many modules that may depend on each other.
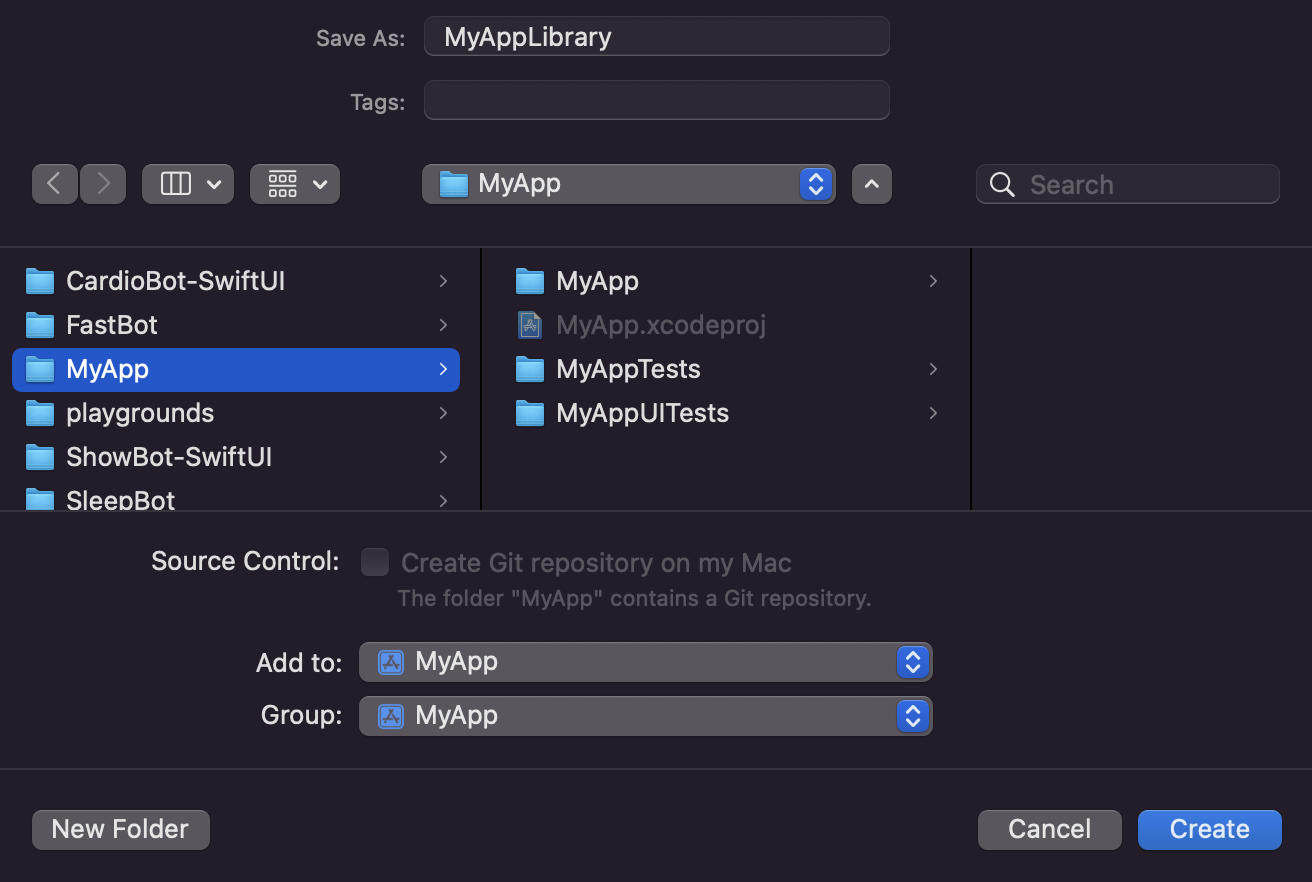
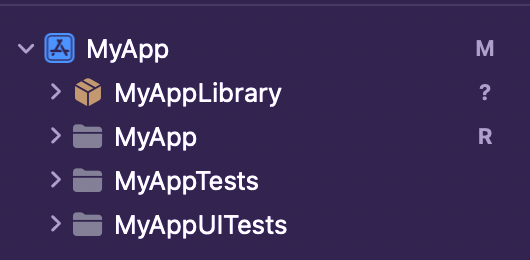
We have an already created empty Xcode project called MyApp. Go to the menu and choose File -> New -> Package to create a new Swift package. Let’s call our Swift package MyAppLibrary and put it in the root folder of our project. You also need to add it to your app project at the bottom of the dialog screen.
Now we have a Swift package containing all the modules that we want to share between multiple targets of our app. For example, watch app and widgets may need different modules to build their functionality. So we shouldn’t bundle the whole app codebase to create a simple widget.
Let’s remove the content of the Sources and Tests folders in our Swift package. These two folders are crucial for any Swift package. We must place all the source code and tests there. Swift package doesn’t use any project file. They are smart enough to understand your folder structure.
We should define our modules in the Package.swift file. This file contains all the information about the targets living in the package and the products we can import into other projects. Let’s take a detailed look at the package definition.
import PackageDescription

let package = Package(
    name: "MyAppLibrary",
    platforms: [.iOS(.v15)],
    products: [
        .library(name: "DesignSystem", targets: ["DesignSystem"])
    ],
    dependencies: [
        .package(url: "https://github.com/mecid/SwiftUICharts", from: "0.6.3")
    ],
    targets: [
        .target(
            name: "DesignSystem",
            dependencies: ["SwiftUICharts"]
        ),
        .testTarget(
            name: "DesignSystemTests",
            dependencies: ["DesignSystem"]),
    ]
)
- Name - the name of the package.
- Platforms - platforms supported by the package.
- Products - libraries and executables that another Swift project can import or run.
- Dependencies - the list of dependencies needed to build the current package.
- Targets - Swift modules that complier builds independently.
Now we can create our first module that contains the Design System of our app. This module includes button styles, empty views, and other design-related things that we want to use across different features of our app. To create a new module, we have to create a folder inside the Sources folder of our package. Let’s call this folder DesignSystem as we define it in Package.swift file.
import SwiftUI

public struct MainButtonStyle: PrimitiveButtonStyle {
    public func makeBody(configuration: Configuration) -> some View {
        Button(configuration)
            .controlSize(.large)
            .buttonStyle(.borderedProminent)
    }
}

extension PrimitiveButtonStyle where Self == MainButtonStyle {
    public static var main: Self { .init() }
}

struct ButtonStyles_Previews: PreviewProvider {
    static var previews: some View {
        Button("Action") {}
            .buttonStyle(.main)
    }
}
Here is the source code for the main button style that we will use across the app. Take a look at the public access modifier. Swift uses the internal access modifier by default making your code visible only inside the current module. We should explicitly mark the types and functions with the public access modifier to make them visible outside the current module. This way, we can improve the boundaries of our modules and control which types should be visible.
We also should create a DesignSystemTests folder in the Tests folder of the Swift package to place our tests there. Xcode automatically updates the scheme of our project, and you can run the tests by pressing CMD+U.
This week we learned about the basics of Swift Package Manager that we would use as the core tool while implementing Microapps architecture. I hope you enjoy the post. Feel free to follow me on Twitter and ask your questions related to this post. Thanks for reading, and see you next week!
References
Recommend
About Joyk
Aggregate valuable and interesting links.
Joyk means Joy of geeK