

Telerik UI for WinForms with Python for Desktop Applications
source link: https://www.telerik.com/blogs/telerik-ui-for-winforms-with-python-for-desktop-applications
Go to the source link to view the article. You can view the picture content, updated content and better typesetting reading experience. If the link is broken, please click the button below to view the snapshot at that time.

Whether you need a fancy GUI for your Python app, you have an existing Python desktop app which needs some additional functionality or you are mainly interested in a different theme that will freshen up your app, we are here for you. All this is possible with the help of Telerik UI For WinForms Controls.
You read that right! IronPython and the latest Visual Studio 2019 made all this possible! They enable Python desktop applications to work together with WinForms controls. And more importantly, work together with the Telerik UI For WinForms suite and all the goodies that come out of the bag.
Iron Python
IronPython is a powerful open-source variation of Python. It is an adaptation of the Python programming language that runs on top of Microsoft's .NET framework. IronPython can use the .NET Framework and Python libraries, and other .NET languages can use Python code just as easily.
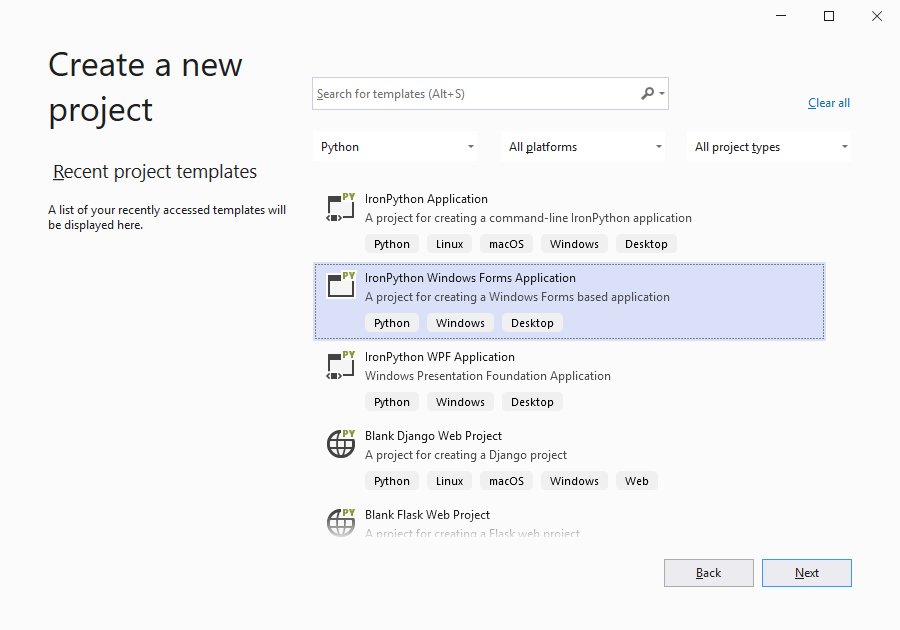
After you install the latest version of IronPython, you can open Visual Studio 2019 which comes with a built-in template project for “IronPython Windows Forms Application” and create your first app.
How to Integrate Telerik RadGridView in Your Application with a Modern Fluent Theme Applied
Now let’s make a huge step onto using Telerik controls. First, you need to install the Telerik UI for WinForms UI component suite—you can download it from here. Then add the required Telerik assemblies into your project folder for using the RadGridView, FluentTheme and RadChartView (spoiler alert—we will need it for later) controls for WinForms.
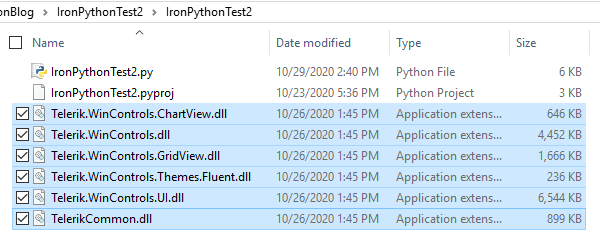
To reference the binaries in the app, import the clr library and then use the addReference methods. Here you can see how to add references and usings that we are going to need for our sample app.
import clr
import random
clr.AddReference('System.Drawing')
clr.AddReference('System.Windows.Forms')
clr.AddReference('Telerik.WinControls')
clr.AddReference('Telerik.WinControls.UI')
clr.AddReference('Telerik.WinControls.ChartView')
clr.AddReference('Telerik.WinControls.Themes.Fluent')
clr.AddReference('TelerikCommon')
clr.AddReference('Telerik.WinControls.GridView')

from System.Drawing import *
from System.Windows.Forms import *
from Telerik.WinControls import *
from Telerik.WinControls.UI import *
from Telerik.Charting import *
from Telerik.WinControls.Themes import *
Now let’s take a look how we can add a radGridView control, containing a bunch of different columns to our form.
#Define RadGridView
self.radGrid = RadGridView()
self.radGrid.BestFitColumns()
self.radGrid.ForeColor = Color.Black
self.radGrid.Dock = DockStyle.Fill

#Define Columns
self.decimalColumn = GridViewDecimalColumn()
self.textBoxColumn = GridViewTextBoxColumn()
self.colorColumn = GridViewColorColumn()
self.checkBoxColumn = GridViewCheckBoxColumn()
self.ratingColumn = GridViewRatingColumn()

self.decimalColumn.HeaderText = "DecimalColumn"
self.textBoxColumn.HeaderText = "Text"
self.colorColumn.HeaderText = "ColorColumn"
self.checkBoxColumn.HeaderText = "CheckBoxColumn"
self.ratingColumn.HeaderText = "RatingColumn"

self.radGrid.Columns.Add(self.decimalColumn)
self.radGrid.Columns.Add(self.textBoxColumn)
self.radGrid.Columns.Add(self.colorColumn)
self.radGrid.Columns.Add(self.checkBoxColumn)
self.radGrid.Columns.Add(self.ratingColumn)
self.Controls.Add(self.radGrid)

#Populate Rows
for index in range(10):
    self.radGrid.Rows.Add(index, "Sample Text " + str(index), Color.FromArgb(random.randint(1,255), random.randint(1,255), random.randint(1,255)), CheckState.Checked, random.randint(1,100))
The result of this exercise is a radGridView which has the following columns: GridViewDecimalColumn, GridViewTextBoxColumn, GridViewColorColumn, GridViewCheckBoxColumn, GridViewRatingColumn.

If you would like to apply a theme to your controls, as seen in the picture, it can be done as simple as that.
fluent = FluentTheme()
self.ThemeName = fluent.ThemeName
self.radGrid.ThemeName = fluent.ThemeName
Subscribing to Events and Implementing Your Business Logic
In case you wonder how subscribing to events works it is easier than you might think. Here is a sample of creating a RadButton control and subscribing to its Click event.
#Define RadButton1
self.myButton1 = RadButton()
self.myButton1.Text = "RadButton1"
self.myButton1.Click += self.OnButton1Click
self.Controls.Add(self.myButton1)
Then as you know you will have to define your OnButtonClick logic.
def OnButton1Click(self, sender, args):
    #TODO OnClick logic
So far so good. Now let’s look at a more complex event-related example using the radGridView from our previous example. We will implement some logic in the CellFormatting event in order to fill cells from GridViewRatingColumn with different colors. The value inside the Rating cells can be between 0 and 100. If the value is < 50 we will fill those cells in Red color, otherwise we will use Aqua color. We can achieve this result with the following code.
def OnRadGridCellFormatting(self, sender, args):
    if args is not None :
        if args.Column.HeaderText == "RatingColumn"    :
            if args.CellElement.RowInfo.Cells[4].Value is not None :
                if args.CellElement.Value > 50   :
                    args.CellElement.DrawFill = True
                    args.CellElement.ForeColor = Color.Blue
                    args.CellElement.NumberOfColors = 1
                    args.CellElement.BackColor = Color.Aqua
                else    :
                    args.CellElement.DrawFill = True
                    args.CellElement.ForeColor = Color.Yellow
                    args.CellElement.NumberOfColors = 1
                    args.CellElement.BackColor = Color.Red
        else    :
            args.CellElement.ResetValue(LightVisualElement.DrawFillProperty, ValueResetFlags.Local)
            args.CellElement.ResetValue(LightVisualElement.ForeColorProperty, ValueResetFlags.Local)
            args.CellElement.ResetValue(LightVisualElement.NumberOfColorsProperty, ValueResetFlags.Local)
            args.CellElement.ResetValue(LightVisualElement.BackColorProperty, ValueResetFlags.Local)
The end result of our CellFormatting effort looks like that.
A Little Bonus Setup Example with RadChartView
Using Telerik controls is as easy as you saw in the radGridView example. Let’s look at another example of setting up radChartView control with BarSeries.
#Define RadChartView
self.chartView = RadChartView()
self.chartView.Size = Size(290, 160)
self.chartView.Dock = DockStyle.Fill
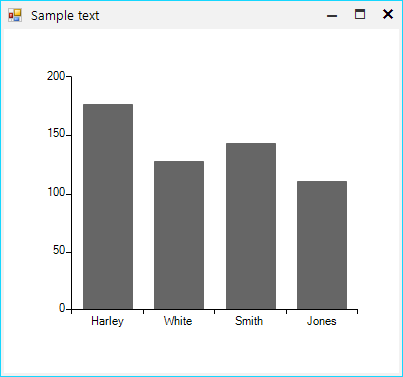
#Define BarSeries and CategoricDataPoints
self.barSeries = BarSeries("Performance", "RepresentativeName")
self.barSeries.Name = "Q1"
self.categoricDataPoint1 = CategoricalDataPoint(177, "Harley")
self.categoricDataPoint2 = CategoricalDataPoint(128, "White")
self.categoricDataPoint3 = CategoricalDataPoint(143, "Smith")
self.categoricDataPoint4 = CategoricalDataPoint(111, "Jones")
self.barSeries.DataPoints.Add(self.categoricDataPoint1)
self.barSeries.DataPoints.Add(self.categoricDataPoint2)
self.barSeries.DataPoints.Add(self.categoricDataPoint3)
self.barSeries.DataPoints.Add(self.categoricDataPoint4)
self.chartView.Series.Add(self.barSeries)
self.Controls.Add(self.chartView)
The result is as you might expect for a standard Telerik UI for WinForms application.
Summary
This was a short intro to combining Python desktop GUI and the Telerik UI for WinForms suite. Please don’t hesitate to share your experience with integrating Telerik UI for WinForms in your Python projects.
Feel more than welcome to drop us a line in the comments section bellow on how it went with our components or submit your feedback directly to our Feedback Portal. You can download the latest version of Telerik UI for WinForms from your account today, or if you're new to the suite, start a free 30 day trial today:
Recommend
About Joyk
Aggregate valuable and interesting links.
Joyk means Joy of geeK