

Hexo 进阶设置
source link: https://geekvic.top/post/a62b0c3d.html
Go to the source link to view the article. You can view the picture content, updated content and better typesetting reading experience. If the link is broken, please click the button below to view the snapshot at that time.
部署平台选型
GitHub 和 Gitee(码云)是国内外比较流行的代码托管平台,现都推出 GitHub/Gitee Pages 可以存放静态网页代码,因此可以用来搭建自己的博客。
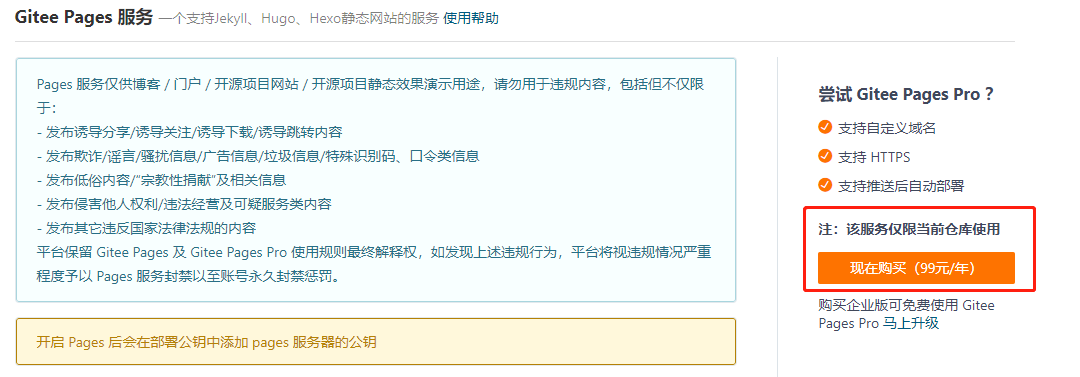
如上图所示,Gitee 是需要付费的,但是考虑到部署到 Github 上,在国内访问真的太慢,经常加载要十几秒,最终折中了选择,即两个平台同时部署,国外的用户可以访问 Github,国内的用户访问 Gitee,从而优化访问速度。
修改_config.yml
1
2
3
4
5
deploy:
  type: git
  repo:
    github: [email protected]:[username]/[username].github.io.git,master
    gitee: [email protected]:[username]/[username].git,master
其中,这里的 username 指的是你在这两个网站上的用户名,只有以这种命名形式的仓库,才能够来访问我们的博客。
- Github 的仓库名要命名为:{username}.github.io
- Gitee 的仓库名要命名为:{username}
比如说,我的 Github 和 Gitee 的 username 是 geekvic,那么在部署博客成功后,我就可以通过下边的 url 来访问我的 Hexo 博客:
Hexo 主题地址:https://hexo.io/themes/, 我们可以去挑选自己喜欢的主题,每个主题在 github 上面都开源了源码,下面主要以我选择的 theme-next 主题进行介绍。
找到 Hexo 文件的目录,如下图所示。

进入 theme 文件夹,执行命令
1
git clone https://github.com/theme-next/hexo-theme-next.git
下载完成后,则会在 themes 文件夹下出现一个新的名为 hexo-theme-next 的文件夹,这就是我们刚下载的主题,返回 hexo 站点的配置文件_config.yml,修改配置:
1
theme: hexo-theme-next
再执行下命令,就可以看到更改后的主题
1
2
3
hexo clean //清除一下缓存
hexo g  //生成静态页面
hexo s //开启本地服务器
Hexo 基础设置
配置网站基础信息
修改站点配置文件_config.yml 中,修改:
1
2
3
4
5
6
7
8
# Site
title:          # 网站标题
subtitle:       # 网站副标题
description:    # 描述,介绍网站的
keywords:       # 网站的关键字
author:         # 博主姓名
language: zh-CN # 语言:zh-CN 是简体中文
timezone:       # 时区
Next 主题进阶设置
默认的主题配置文件_config.yml 中,菜单只开启了首页和归档,我们根据需要,可以添加 about、tag、categories 等菜单
1
2
3
4
5
6
menu:
  home: / || fa fa-home
  about: /about/ || fa fa-user
  tags: /tags/ || fa fa-tags
  categories: /categories/ || fa fa-th
  archives: /archives/ || fa fa-archive
增加 about 页面
进入 Hexo 目录,执行 hexo new page “about”,会发现在 source 目录下多了个 about 目录,在里面的 index.md 写入内容
增加 tag 页面
1
2
3
4
5
6
7
hexo new page "tags"
vim source/tags/index.md
---
title: 标签
date: 2020-05-20 17:06:19
type: tags
---
增加 categories 页面
1
2
3
4
5
6
7
hexo new page "categories"
vim source/tags/index.md
---
title: 分类
date: 2020-05-20 17:06:19
type: "categories"
---
配置 hexo 中 next 主题样式选择
Next 一共提供了 4 种首页样式,按照自己喜好选择一个,我使用的是 Gemini
1
2
3
4
5
# Schemes
#scheme: Muse
#scheme: Mist
#scheme: Pisces
scheme: Gemini
配置 footer 信息
1
2
3
4
5
6
7
8
9
10
11
12
13
14
15
16
17
footer:
  since: 2020   # 建站开始时间
  icon:
    name: heart      # 设置 建站初始时间和至今时间中间的图标,默认是一个'小人像',更改user为heart可以变成一个心
    animated: true
    color: "#ff0000"  # 更改图标的颜色为红色
  #显示版权作者
  copyright: vic
  powered:
    enable: true        # 开启hexo驱动显示
    version: true       # 开启hexo版本号
  theme:
    enable: true       # 开启主题驱动
    version: true       # 开启主题版本号
  beian:
    enable: true                # 开启备案号显示
    icp: 苏ICP备...              # 备案号
配置头像信息
1
2
3
4
5
6
7
8
# Sidebar Avatar
avatar:
  # Replace the default image and set the url here.
  url: /images/jin.png
  # If true, the avatar will be dispalyed in circle.
  rounded: false
  # If true, the avatar will be rotated with the cursor.
  rotated: true
配置社交信息和友链
1
2
3
4
5
6
7
8
social:
  GitHub: https://github.com/yourname || github
  E-Mail: mailto:[email protected] || envelope
social_icons:
  enable: true         # 显示社交图标
  # 仅显示图标
  icons_only: true  # 只显示图标,不显示文字
  transition: true   # 动画效果
首页文章属性
1
2
3
4
5
6
7
post_meta:
  item_text: true    #  可以一行显示,文章的所有属性
  created_at: true    # 显示创建时间
  updated_at:
    enabled: true     # 显示修改的时间
    another_day: true  # 设true时,如果创建时间和修改时间一样则显示一个时间
  categories: true    # 显示分类信息
开启文章目录
1
2
3
4
5
6
toc: #侧栏中的目录
  enable: true #是否自动生成目录
  number: true #目录是否自动产生编号
  wrap: false  #标题过长是否换行
  expand_all: false
  max_depth: 6 #最大标题深度
Follow me on GitHub
1
2
3
4
github_banner:
  enable: true
  permalink: https://github.com/yourname
  title: Follow me on GitHub
字数统计、阅读时长
首先安装插件:
1
$ npm install hexo-symbols-count-time --save
主题配置文件修改如下:
1
2
3
4
5
6
symbols_count_time:
  separated_meta: true # 统计信息不换行显示
  item_text_post: true # 文章统计信息中是否显示“本文字数/阅读时长”等描述文字
  item_text_total: false # 底部footer站点统计信息中是否显示“本文字数/阅读时长”等描述文字
  awl: 4 # 平均字符长度
  wpm: 275 # 阅读速度, 一分钟阅读的字数
站点配置文件 新增如下:
1
2
3
4
5
6
7
8
# 新增文章字数统计
symbols_count_time:
  #文章内是否显示
  symbols: true # 文章字数
  time: true # 阅读时长
  # 网页底部是否显示
  total_symbols: false # 所有文章总字数
  total_time: false # 所有文章阅读中时长
显示当前浏览进度
右下角显示文章当前浏览进度,提供意见置顶功能,编辑主题配置文件,配置如下:
1
2
3
4
back2top:
  enable: true #是否提供一键置顶
  sidebar: false
  scrollpercent: true # 是否显示当前阅读进度
Next 主题支持页面滚动阅读进度指示器。 编辑主题配置文件,配置如下:
1
2
3
4
5
reading_progress:
  enable: true
  position: top
  color: "#37c6c0"
  height: 3px
设置代码高亮主题
Next 默认使用的是 白色的 normal 主题,可选的值有 normal,night, night blue, night bright, night eighties
1
2
3
4
5
6
codeblock:
  highlight_theme: normal
  copy_button:
    enable: true # 显示复制按钮
    show_result: true
    style: mac  #按钮样式: default | flat | mac
本地搜索插件
1
$ npm install hexo-generator-searchdb --save
修改站点配置文件,添加如下内容:
1
2
3
4
5
6
# 本地搜索
search:
  path: search.xml
  field: post
  format: html
  limit: 10000
- path:索引文件的路径,相对于站点根目录
- field:搜索范围,默认是 post,还可以选择 page、all,设置成 all 表示搜索所有页面
- limit:限制搜索的条目数
修改主题配置文件
1
2
3
4
5
6
7
8
# Local Search
# Dependencies: https://github.com/theme-next/hexo-generator-searchdb
local_search:
  enable: true
  trigger: auto
  top_n_per_article: 1 #每篇文章中显示的搜索数量
  unescape: false
  preload: false
数据分析与统计
Next 内置了 leancloud、firebase、busuanzi 三种访客统计插件,前两种需要到官网注册获取网站颁发的 appKey,相对麻烦。而不蒜子配置只需要将 false 改为 true 即可:
1
2
3
4
5
6
7
8
9
10
11
busuanzi_count:
  enable: true
  # 总访客数
  total_visitors: true
  total_visitors_icon: user
  # 总浏览量
  total_views: true
  total_views_icon: eye
  # 文章浏览量
  post_views: true
  post_views_icon: eye
Recommend
About Joyk
Aggregate valuable and interesting links.
Joyk means Joy of geeK